
Rolex Submariner style Clock Outer Ring and Assembly
Obliczymy ostateczną cenę na podstawie wybranego pliku. Sprawdzisz ją i zaakceptujesz przed płatnością.
Wstępna wycena dla PETG
10,09 € – 12,33 € netto (bez VAT)
Dla pliku: Print_wuhr-rim_0.2mm_PETG_MK3S_11h48m.gcode
To wstępna wycena jednego pliku. Dokładną cenę poznasz przed zamówieniem.
Plik i założenia wyceny
Plik użyty do wyceny
Średnia wycena orientacyjna: 11,21 € netto (środek widełek).
- Masa podana przez autora
- 137 g
- Czas druku podany przez autora
- 11,8 godz.
- Materiał u źródła
- PET
- Materiał wyceny
- PETG
- Drukarka wyceny
- Bambu Lab P1S - 0.4 nozzle
- Proces wyceny
- 0.20mm Standard
Orientacyjna wycena wyłącznie wybranego pliku, oparta na masie i czasie druku podanych przez autora. Warianty plików nie są sumowane. Ostateczna cena zostanie obliczona po analizie pliku.
Zapisane na tym urządzeniu.

Printable of outer Ring, with Building instruction for a complete Rolex Submariner style Clock
- Ocena
- 5 / 5
- Polubienia
- 55
- Pobrania
- 315
- Wydruki
- 3
- Wyświetlenia
- 2494
- Oceny
- 3
Aktualizacja u źródła:
Informacje o modelu
- Źródło
- Printables
- Kategoria
- Other Ideas
- Licencja
- Creative Commons — Attribution — Noncommercial — Share Alike
This is the outer ring for my Clock Face Rolex Submariner style. Assembled with the parts mentioned below and a Quartz Clock Movement Mechanism, you will have a wall-clock inspired by the Rolex Submariner as shown on the cover picture.
Overall dimensions:
- diameter 214mm
- Height 34mm
Print instructions:
This is a multi-color print, but the 3mf file is set up to print with a single extruder Printer. No MMU required.
The print includes enforced supports for the face-slot.
The parts are pretty large, so depending on your used material, you may consider to increase the bed temperature to 90° - 100°C to avoid warpage.
After starting the print, calibration, and purge, the printer will ask you to change filament. You just need to reinsert the filament for the first color (Letter-Ring) again. (This will be solved in the next version)
From now on, you will have to make 3 further filament changes.
Colors will be printed according following table:
 | 1st color: Material A (shown in white), Letter-Ring |
 | 2nd color (first color-change): Material B (shown in black), Letters and Marks |
 | 3rd color (second color-change): Material A (shown in white), Letter-Ring again up to 1.00mm |
 | 4rd color (third color-change): Material C (shown in blue), remaining Ring until the end. Caution: There will be no wiping for this color-change, so have an extra look if you are really extruding the right color already. |
 | End of Print |

Required Accessories:
Besides of this print, you will need:
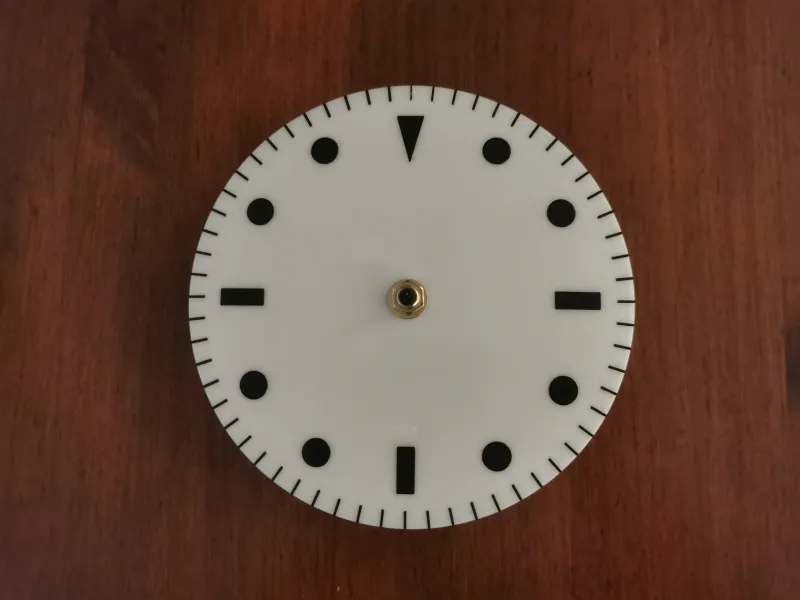

or suitable own designs or remixes.
If you plan to make a remix of the face, consider an outer diameter of 160mm, and a thickness of 2,8mm (including minute-marks if going to the outline).
Assembly Instruction:
Before you start the assembly make sure to remove the supports completely out of the slots for the face!
1. Step:
Take one of the halves of the Outer Ring, and align it with the face to have the 12 hour mark of the face to the 0 minutes mark of the Outer Ring (except you like it in another position).

2. Step:
Slide the face into the slot (marked in green) of the first half of the outer ring.

Notice: It is designed for a nice fit. But due to possible shrinkage of the material, it may need a little (!) bit of pressure to push it in completely.
3. Step
Add the second half in the same way

4. Step
Turn everything upside down an mount the two fixation blocks.


They are designed keep the parts together without getting loose on their own, so may need a little force to push them to the end. If the applied force seams to high, check the parts if there are any filament blobs or anything else which should be removed.
Step 5.
Mount the Clock Movement Mechanism and the hands according to the manual of the Movement Mechanism.
Make sure to push the hands as deep as possible. They should still be able to move, but deep enough to not collide with the next hand.

Please notice: There is no printable model for the seconds hand, so you have to take the seconds hand out of the set of the Clock Movement Mechanism, and cut it to an appropriate length.
Version: 1.3 - 25. Dec. 2022 / Slicer: PrusaSlicer Version 2.5.0