
Drag chain for bed of Sapphire Pro (SP3)
Obliczymy ostateczną cenę na podstawie wybranego pliku. Sprawdzisz ją i zaakceptujesz przed płatnością.
Zapisane na tym urządzeniu.
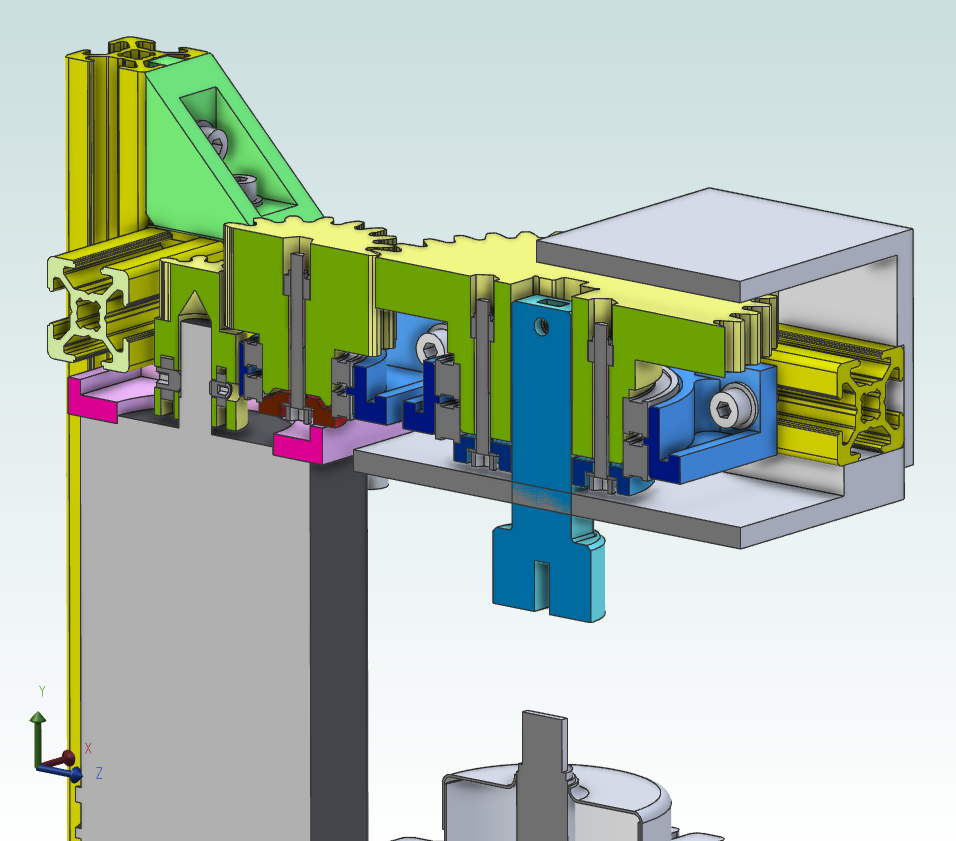
This clamp enables you to mount a drag chain to the bed of your Sapphire Pro (SP3).
- Ocena
- 0 / 5
- Polubienia
- 9
- Pobrania
- 30
- Wydruki
- 0
- Wyświetlenia
- 516
- Oceny
- 0
Aktualizacja u źródła:
Informacje o modelu
- Źródło
- Printables
- Kategoria
- Other Printer Parts & Upgrades
- Licencja
- Creative Commons — Attribution — Noncommercial — Share Alike
I designed this clamp because I wanted to fit a drag chain on the bed of Sapphire Pro. The clamp attaches to the outer tube of the smooth rod bearing. I designed this clamp to fit with the my drag chain, which you can find here:
https://www.printables.com/model/220142-open-drag-chain-optimized-for-printing
Source files in the Alibre Atom format is available but the website does not allow the upload. If you need it send me a message.
Print instructions:
- 0,3 mm layer height should be sufficient.
- No supports needed.
- PETG recommended (less brittle) but PLA should work, too.
- If printer is enclosed use heat resistant material like ABS or ASA.
Bill of material:
You need the following materials:
- 1x clamp (to print)
- 2x M5x35 cylindrical hex screw (ISO 4752)
- 2x M5 washer (ISO 7089)
- 2x M5 security nut (ISO 10512), but normal nuts should work, too.
- 5x M3x10 (ISO 4752)
- 5x M3 washer (ISO 7089)
- 1x M3 drop in nut for 20x20 profile
- 1x drag chain 19,5
- 18x normal chain link 19,5
- 1x “fixie” chain link 19,5
- 1x female end piece 19,5
- 1x male end piece 19,5
If you do not have M5 screws you can create inserts for M3 or M4 or I can create a variant for you.
Assembly / Installation:
- Print the clamp an chain parts.
- Insert the nuts in the clamp and mount it to the loosely to the bearing.
- Attach the chain to the clamp.
- Bring your bed to almost 0mm of z height.
- Adjust the height of the chain on the profile and the height of clamp on the bearing, in a way that the chain does not collide with the belt!
- Tighten the clamp an fix the chain on the profile.
- Bring the z axis in to the max position to identify where have to place the "fixie" link and fixate it.
Additional info to keep in mind:
- Please check the dimension of your bearings because I do not use the stock bearings anymore.
- Depending on your printers configuration, the cables to the heated bed might be to short. I can not tell for sure because my machine was already modded when I got it.
- Do not tighten the screws to much or you may squeeze the smooth rod bearing.
Optional size provided:
If you encounter space problems in the chain with the 19,5 version there is also a 22,5 version. But I recommend the 19,5 version because it fits exactly on the 20x20 aluminum extrusion. The difference is, that the 22,5 version is 3mm wider, resulting in a nicer look. But the 22,5 chain will fit on the 19,5 clamp as well.