
Dial Indicator Box, hinged
Obliczymy ostateczną cenę na podstawie wybranego pliku. Sprawdzisz ją i zaakceptujesz przed płatnością.
Zapisane na tym urządzeniu.

Multi-color print with Prusa MK3/S/+ single extruder printer easily possible.
- Ocena
- 5 / 5
- Polubienia
- 13
- Pobrania
- 81
- Wydruki
- 3
- Wyświetlenia
- 531
- Oceny
- 3
Aktualizacja u źródła:
Informacje o modelu
- Źródło
- Printables
- Kategoria
- Organizers
- Licencja
- Creative Commons — Attribution — Noncommercial
Object Description:
This Dial Indicator Box is easy to open and close. But the closing mechanism reliably keeps the box closed.
The box fits the following dial indicator, but should also fit other similar dial indicators: Steinle_Dial_Indicator
Space for one or two small dry bags is also provided.
The hinge-pins are designed to have a slight press-fit. This allows the lid to hold in any desired position.
For assembly, push the hinge-pins through the holes of the base and lid. Place the axial-lock on the open end of the hinge-pin and press it on until you hear a “click”.
Please note that the different colors of the lid are not visible in the preview of Printables!
Print settings for the lid (for single extruder printers only):
Even with a Prusa Mk3S/+ single extruder printer you can print the multicolor lid very easily if you follow the instructions below. Other printers may work similar. I would appreciate your comments.
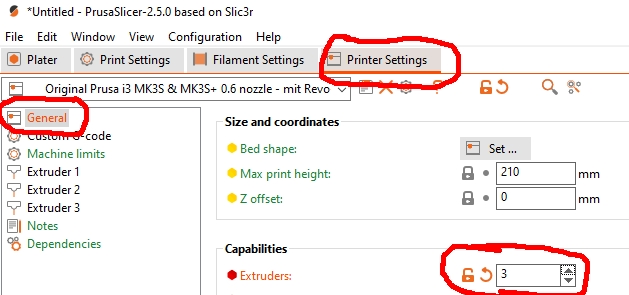
- Set the number of extruders to 2 (example picture shows 3)
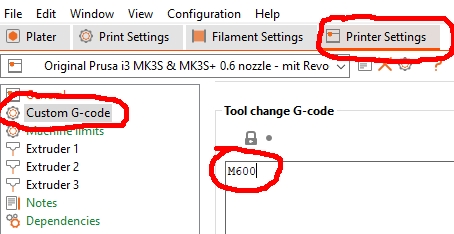
- Insert Tool change G-code “M600”
- Deselect wipe tower

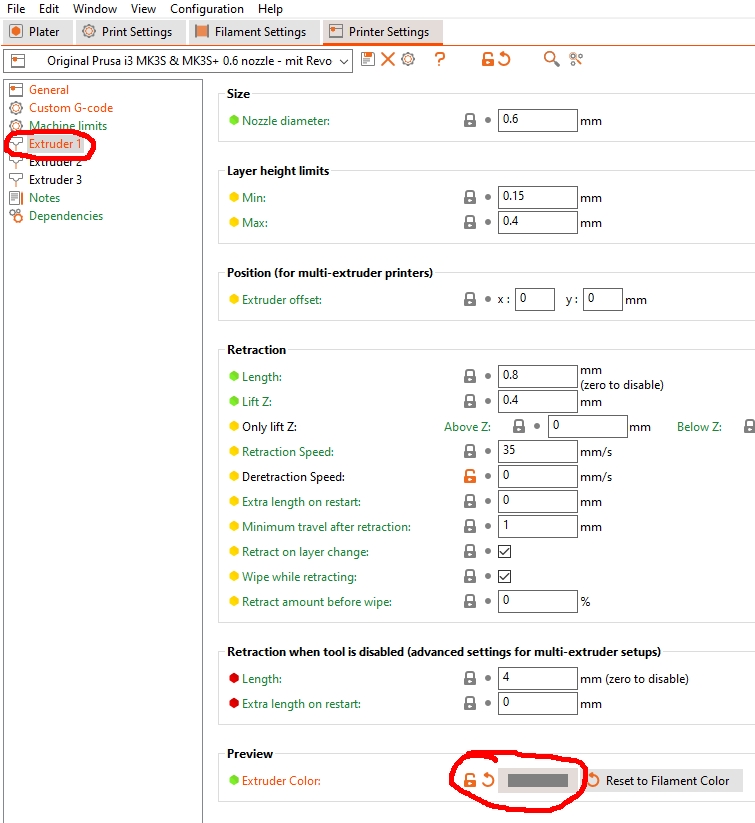
- Choose an individual color for each extruder
- Select extruder/color for each single part (example screenshot)

- Check the model if the colors are assigned correctly
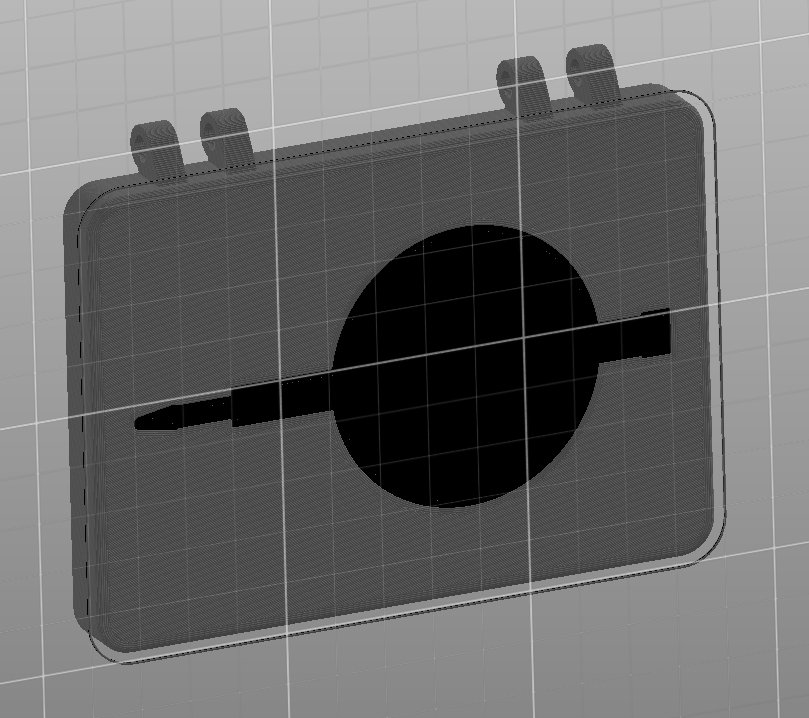
- Slice the model and note the order of the colors of the first two layers.
- During printing, the printer moves for each color change to the front and pulls out the current loaded filament. Please follow the instructions on the printer display. After the color change, the printer pushes out a low amount of the new filament. I recommend to just hold it with pliers until the nozzle is back over the model. Do not remove it earlier.
Print settings for the other parts:
Material: PETG, PLA, ABS/ASA
Nozzle: 0,4-0,6mm
Layer height: 0,2mm
Support: no