
Mobile Crane Business Card Display (Moving Parts!)
Obliczymy ostateczną cenę na podstawie wybranego pliku. Sprawdzisz ją i zaakceptujesz przed płatnością.
Zapisane na tym urządzeniu.
A mini mobile crane with multiple display options for business cards. Adjustable boom arm, rolling wheels, and more!
- Ocena
- 5 / 5
- Polubienia
- 101
- Pobrania
- 316
- Wydruki
- 2
- Wyświetlenia
- 2397
- Oceny
- 1
Aktualizacja u źródła:
Informacje o modelu
- Źródło
- Printables
- Kategoria
- Vehicles
- Licencja
- Creative Commons — Attribution — Noncommercial — NoDerivatives
Build up your business with a new business card display!
This is an adjustable model mobile crane business card holder. Clip cards to the lifting hook, rest them on the boom arm cab or outriggers, or store them in the rear storage slot.
Fits all standard business card sizes, max dimensions 100mm x 56mm (3.93" x 2.28") for the internal card storage.
Features include:
- Boom arm that extends and pivots
- Boom arm angle adjustable “hydraulics”
- Print-in-place rotating wheels
- Swinging lift hook card clip (removable, swappable)
- Adjustable and removable outrigger supports
- Additional card and part storage in rear
Printed with:
- Standard PLA (using an Ender 3 V2 Neo)
- 0.4 mm nozzle
- 0.2 mm layer height
- Supports and build plate adhesion as noted in instructions
Notes:
- Designed from scratch using Fusion 360
- Some parts are print-in-place, and almost no parts require supports
- Build plate squish (wider bottom edges) may need to be trimmed to fit some tolerances
- Small parts with 0.2 mm clearances (ex. boom arm pivot has a tight 0.2 mm clearance). An x-acto knife may be your best friend for some parts, additional notes in detailed instructions
- Components can be printed mirrored if you'd like the storage slots on the other side
- Additional notes from me at the bottom!
Print + Prep Instructions
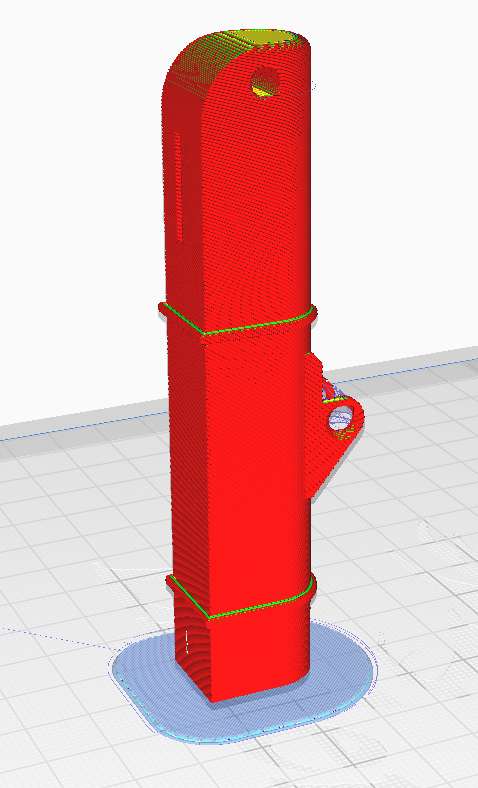
Boom Arm:
- Print QTY: 1
- Raft suggested for bed adhesion, print vertically in this orientation:
- Through-holes should be small enough in diameter that supports shouldn't be needed
- A sharp craft knife (or better yet a 4mm drill bit) can help smooth out any imperfections in the holes
- Use an x-acto blade to clear any first layer squish from the boom tip shown
- If the boom arm extension feels extremely tight, use an x-acto blade to trim this bump


Boom Arm Block:
- Print QTY: 1
- No raft or supports required (I print with a skirt anyways), print in this orientation:
- use an x-acto blade to clean up any first layer squish from the clips


Boom Arm Pins
- 8mm: Print QTY: 1
- 16mm: Print QTY: 2
- No supports required, print in this orientation:
- Ensure that your z-seam doesn't fall on the inner corners of the pin clip. The example shown below has the z-seam on the inside corner. This will lead to weak clips
- Trim any first layer squish with an x-acto blade


Boom Pin Clip
- Print QTY: 2
- No support, print in this orientation:

Boom "Hydraulics"
- Print QTY: 1 each
- Print vertically, raft may be necessary, in this orientation
- Trim any first layer squish with an x-acto blade
- Only trim as much as needed to get the threads rotating smoothly. Note that the thread direction is different on each side (left and right handed, mirrored)


Boom Tip
- Print QTY: 1
- Print flat on bed, no supports, in this orientation:

- Thin bridging filament is intentional to look like cables!
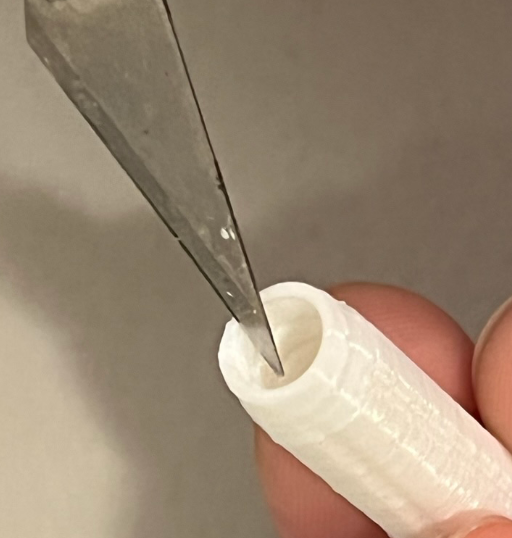
- Use an x-acto blade to trim away and free the pivot portion if it prints stuck
- Use a blade to open up the clip tip if it prints stuck together


Crane Body
- Print QTY: 1
- No supports, rafts, or brims required (this is the longest portion of the print, so if you don't trust your bed adhesion, add a raft if you really need it). Print in this orientation, with the storage slots facing up:
- The boom arm cab is print-in-place and should pivot smoothly
- Wheels/axles are print-in-place! Use both thumbs to roll and slowly loosen each axle in case of any binding:
- Trim away any first layer squish from the support bar holes on the front to ensure a good fit:

- This portion is ever so slightly chamfered to prevent this, but check just in case!


Crane Outrigger Bar
- Print QTY: 4
- Print with no supports, in this orientation
- Use an x-acto blade to trim any first layer squish or stringing that would affect thread/clip function:
- Like previous clips, ensure the z-seam does not fall on the inside edges of the clip. A z-seam like the one below would result in a weak clip


Crane Outrigger Foot:
- Print QTY: 4
- No supports, raft recommended (small contact area), print in this orientation:
- Loosen each foot by applying gentle pressure and pivoting as shown:
- Ensure each foot can thread nicely into a support bar:


Assembly Instructions
Step 1: Use one 16mm boom arm pin to join the boom arm to the boom arm block
Step 2: Assemble the “hydraulics” as shown, ensuring that the threads turn smoothly, and that the threads on each side are symmetrically aligned for the next step. Note that there are right and left-handed threads!
Step 3: Use one 16mm and one 8mm boom arm pin to fasten the “hydraulics” to the boom arm and boom arm block.
Step 4: Snap a boom pin clip on either side of the piston as shown (tweezers are a big help)
Step 5: Press the boom arm block firmly into the base cab as shown
Step 6: Insert the lift hook clip into the end of the boom arm as shown
Step 7: Thread outrigger feet into outrigger support bars
Step 8: Insert outrigger supports into crane base in locations shown
Assembly Complete!

Additional Notes:
This model took way many more hours of my time than I'd care to admit :)
There were A LOT of design iterations for each part, and I'm looking forward to maybe hearing some feedback!
Of course, iterations are expected for any sort of design work, so I'm happy to say I learned quite a bit about a few printing techniques I hadn't tried before.
Hope you all enjoy!
Progress Updates:
- Print instructions completed
- Assembly instruction videos completed
Work in Progress…
- Cap covers for rear storage
- Writeup of design iterations
- New part versions with wider clearances, easier printing, more print-in-place friendly