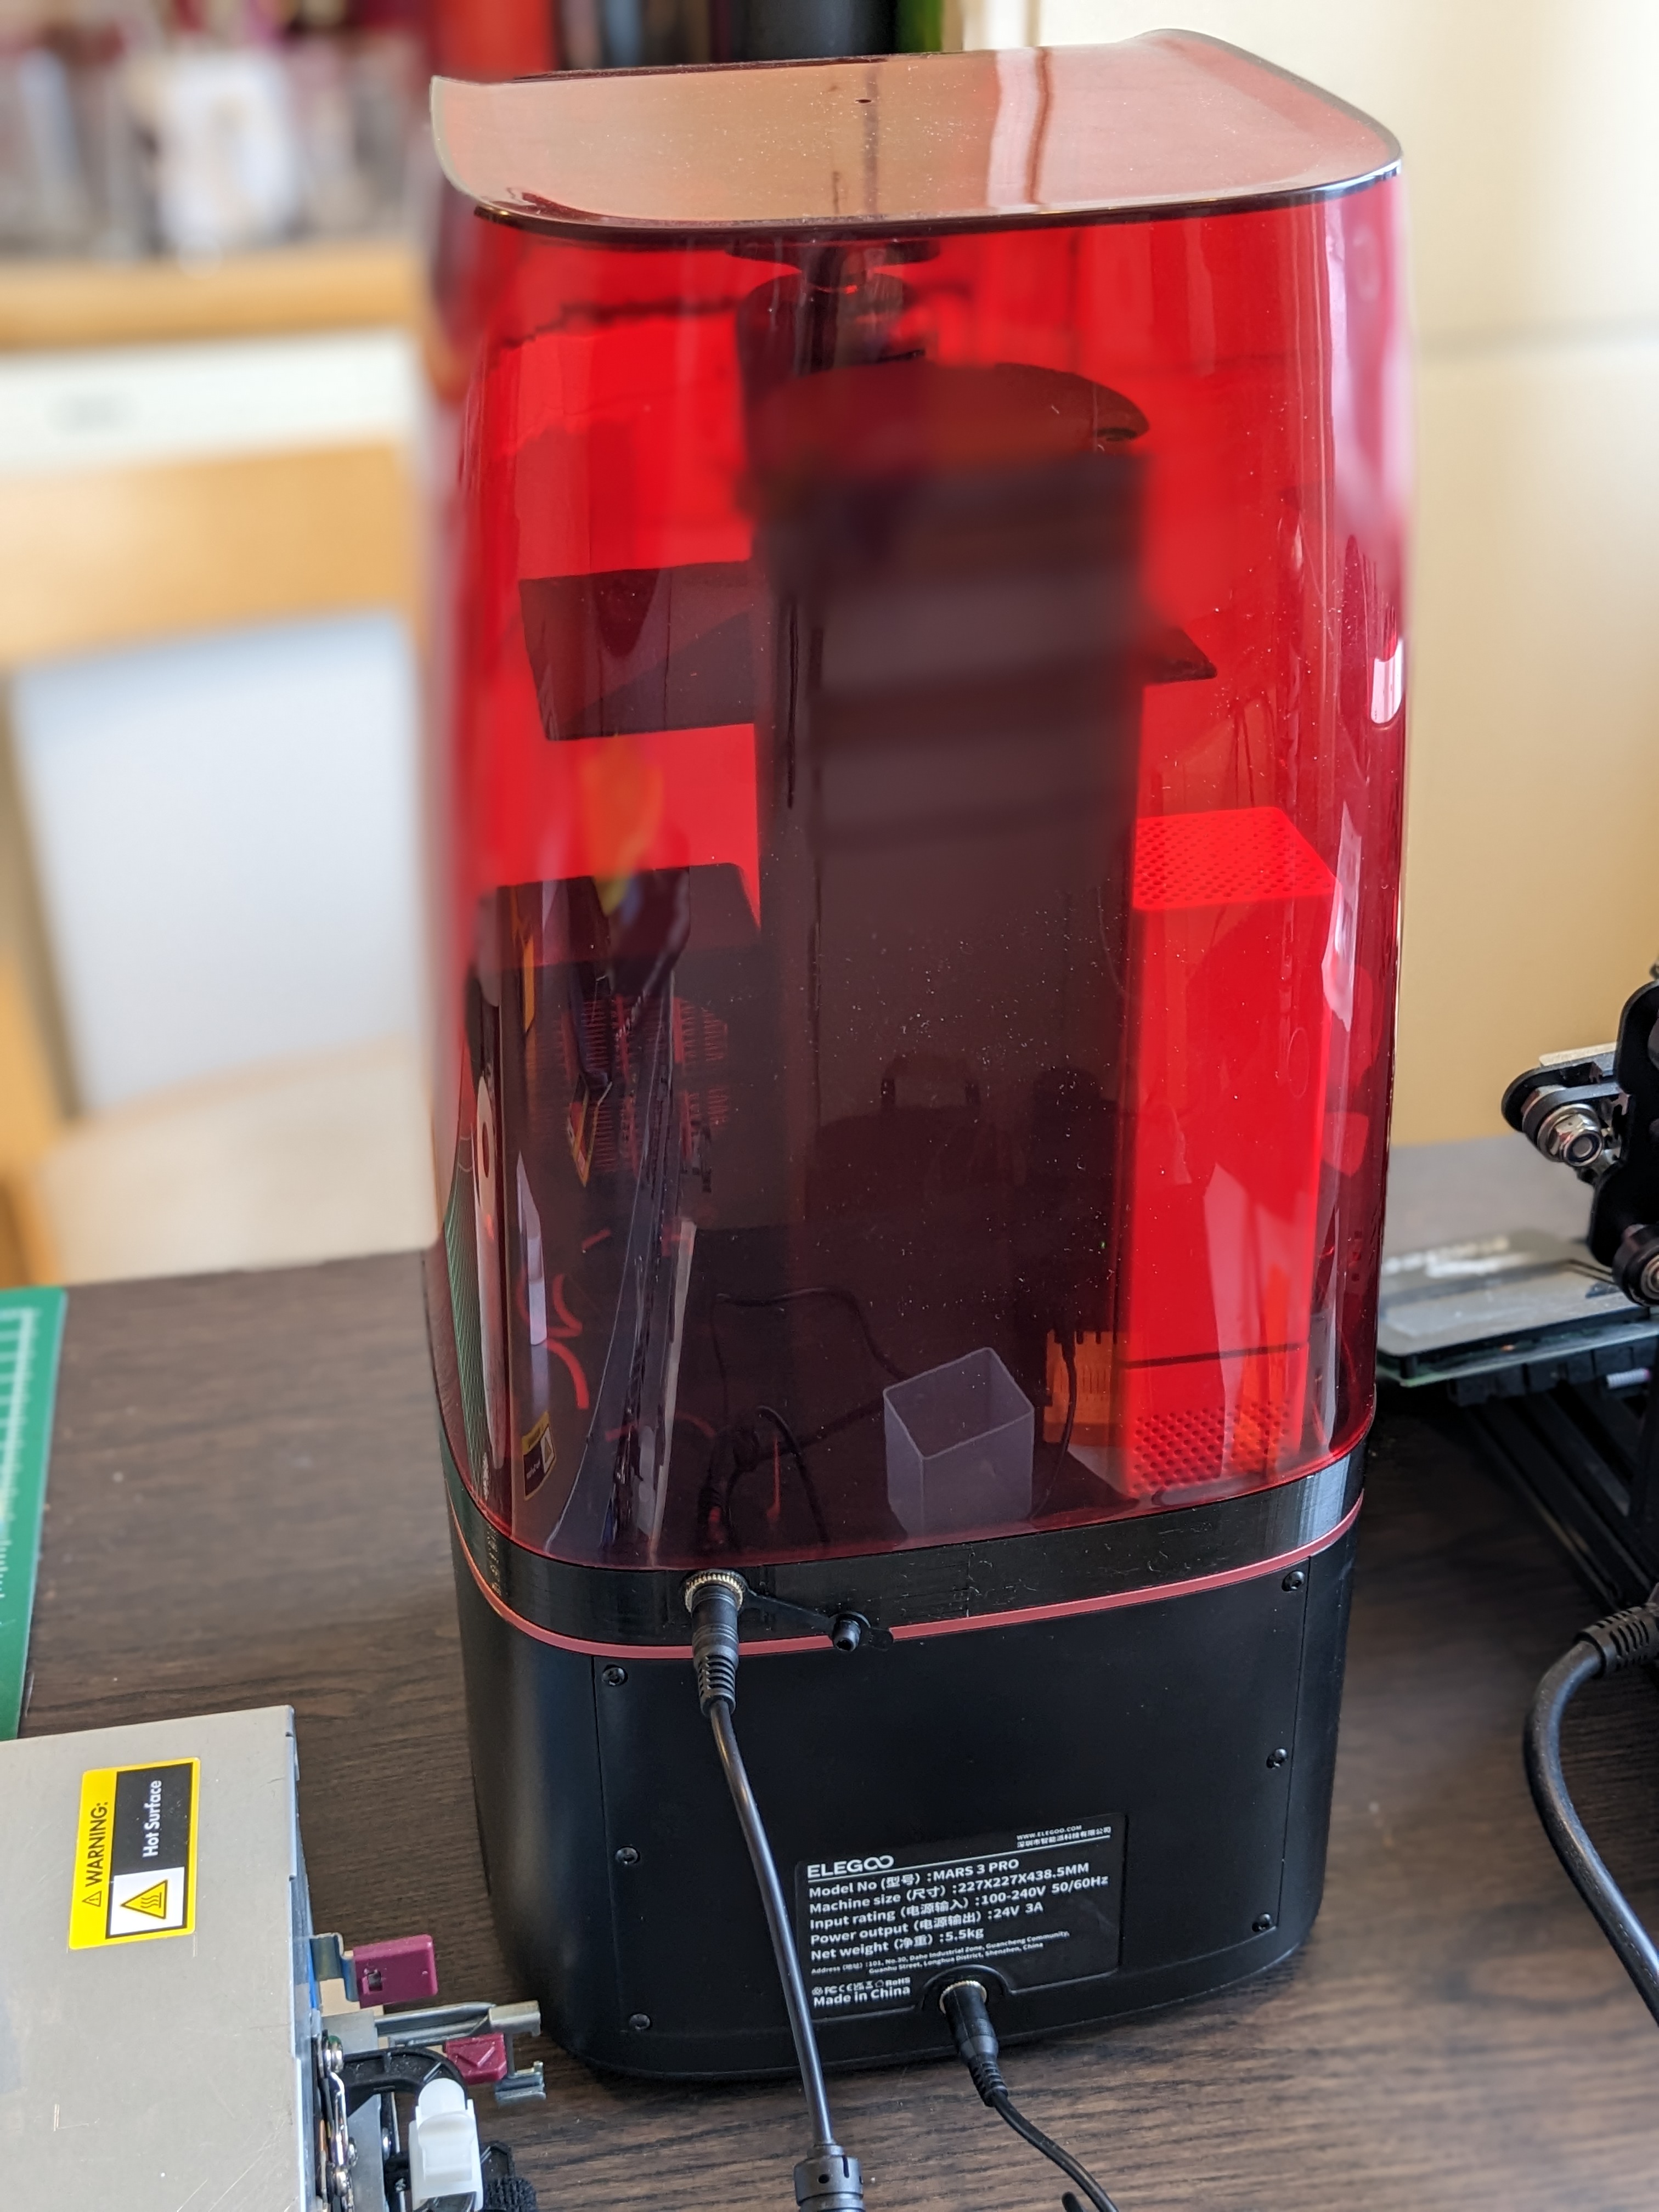
Mars 3 Pro heater adapter
Obliczymy ostateczną cenę na podstawie wybranego pliku. Sprawdzisz ją i zaakceptujesz przed płatnością.
Zapisane na tym urządzeniu.
Adapter for fitting a heater inside the very cramped Mars 3 Pro
- Ocena
- 0 / 5
- Polubienia
- 14
- Pobrania
- 98
- Wydruki
- 0
- Wyświetlenia
- 1663
- Oceny
- 0
Aktualizacja u źródła:
Informacje o modelu
- Źródło
- Printables
- Kategoria
- Other Printer Parts & Upgrades
- Licencja
- Creative Commons — Attribution
An adapter for fitting rsilvers FDM printed heater inside a Mars 3 Pro without any permanent modifications to the printer.
Because the Pro added the rounded Z-axis pillar there is not enough room between it and the (also awkwardly rounded) cover. It might be possible to redesign it into some angled monstrosity, but while considering that I decided not to cut a hole in the cover, so a base wall was needed for adding the hole anyway.
The adapter will put the heater above and slightly in over the resin vat, but not in the way of the build plate.
Read the printing tips now, or do it later after your first print fails.
Printed in eSUN Black PETG, 0.2mm layer height.
You will need for the adapter:
- 22 6mm neodymium magnets
- A wood or plastic tooth-pick
- A small amount of super glue
- Optionally: Super glue accelerator
Printing and fitting the base
It's a roughly 226x223mm print, which barely fits on a standard 235x235mm bed and could be hard to print.
Tip 1: Most build plates are not as well heated in the edges. Preheat the plate to the desired temperature for 10min before probing and starting the print.
Tip 2: On a standard Ender 3 you will have to place your bed clips very strategically and probably remove the keepout zones in your slicer that forbids you from printing in the area where the clips are.
At this size any shrinkage of the plastic will be noticeable.
The base wall is modelled exactly after Elegoos official dimensions for the Mars 3, but you will probably have to scale your print to fit perfectly. In my case a good fit was 100.27%. 0.27% extra sounds like nothing, but with the print this size it's almost a millimeter.
Use the included "testfit-wall" print to figure out the exact scaling you need.
When you have figured out the scaling print "Mars3Pro wall" with that scaling factor and supports for 90 degree angles. You absolutely need to use supports under the wall.
For a good fit you need to completely remove the thin layer of supports and clean all contact points with a knife or sanding. Unfortunately those very short supports are a pain in the ass
and will take 15-30min to remove, but don't try to do without them!
After cleaning up the print and supports, make sure the 12V socket can be pushed through the hole without too much resistance. You can't screw it in later because you will solder it on to stiff cables before mounting it.
Printing the heater shell
Print with supports. You will only get a very thin rectangle of support on the lip for the regulator display that ensures that it fits flush.
Do a test fit of both the regulator and the heater block before moving on to attaching magnets.
Fitting magnets
Fitting magnets on the base wall
Unfortunately the printer aluminium chassis is not magnetic, but we can make do by using the fact that the screws are. But it's not a very strong attraction, so care needs to be taken to get the magnets as close to the screws as possible.
- Tighten the screws lightly to make sure they are in their final position.
- Place one magnet on each screw, 6 in total. The orientation does not matter.
- Place the base wall on top of the magnets, making sure it's a snug fit.
- Using a non-magnetic tooth-pick, press down on the magnets through the holes above them so that they are pressed against the screw head.
- Drop one drop of super glue into each hole above the magnets. Make sure to not squeeze in and try to fill up the cavity, that risks squeezing glue past the magnet and gluing the wall to the printer.
- Place the hood on the base wall to weigh it in place while the glue dries.
Fitting magnets for attaching the heater
The amount of magnets on the wall and heater module (8 each) is overkill, so you could test with fewer if you are comfortable with it.
The important part is to mount the 8+8 magnets with reverse polarity, so use a pen to mark the polarity before starting to glue them in. If you make a polarity mistake the affected part will have to be reprinted and the magnets harvested with Acetone from the old print.
Building and installing the heater
Refer to the original articles and videos for the heater for actual instructions on the wiring. It's a very simple circuit, and will be manageable for anyone with a 3D printer, even if you have no prior soldering skills.
rsilvers heater shell is the one used (slightly remixed) with this adapter and that page has the parts list.
The original X3msnake Photonsters PTC Heater Unit was the start of it all and has links to video wiring tutorials.
When you have finished the build, you can optionally print out “plug separator”. It pressfits over the back of the plug and introduces an insolating tongue between the two points where the wires are soldered to prevent a short if they get crushed by something from above.
That said, here is a quick run-through of how I choose to do it. Not mentioned: Shrink tube is sprinkled liberally where it's deemed to improve cohesion or esthetics.
Grab napkin, write down wiring diagram so you know which cables to cut and connect.

Grab tools. At the minimum a soldering iron, a small Phillips screw driver and a good side cutter, but a wire stripper also helps a lot. If you don't have a wire stripper and do it the way I describe here then be very careful when stripping the midsections of a wire. If you cut strands you might have to replace it.

You don't need any extra cables, in fact you should end up with spares after trimming down the existing ones.

Begin with pushing in the heater module and regulator, cut down the negative lead to length, but leaving some margin. The cut-off will be used later.

Push out the regulator and fasten the now trimmed wire. Continue to take the heater block and regulators out when working on them and inserting them when fitting and marking throughout the whole build.

Mark where to strip a section of the positive fan cable and strip it.
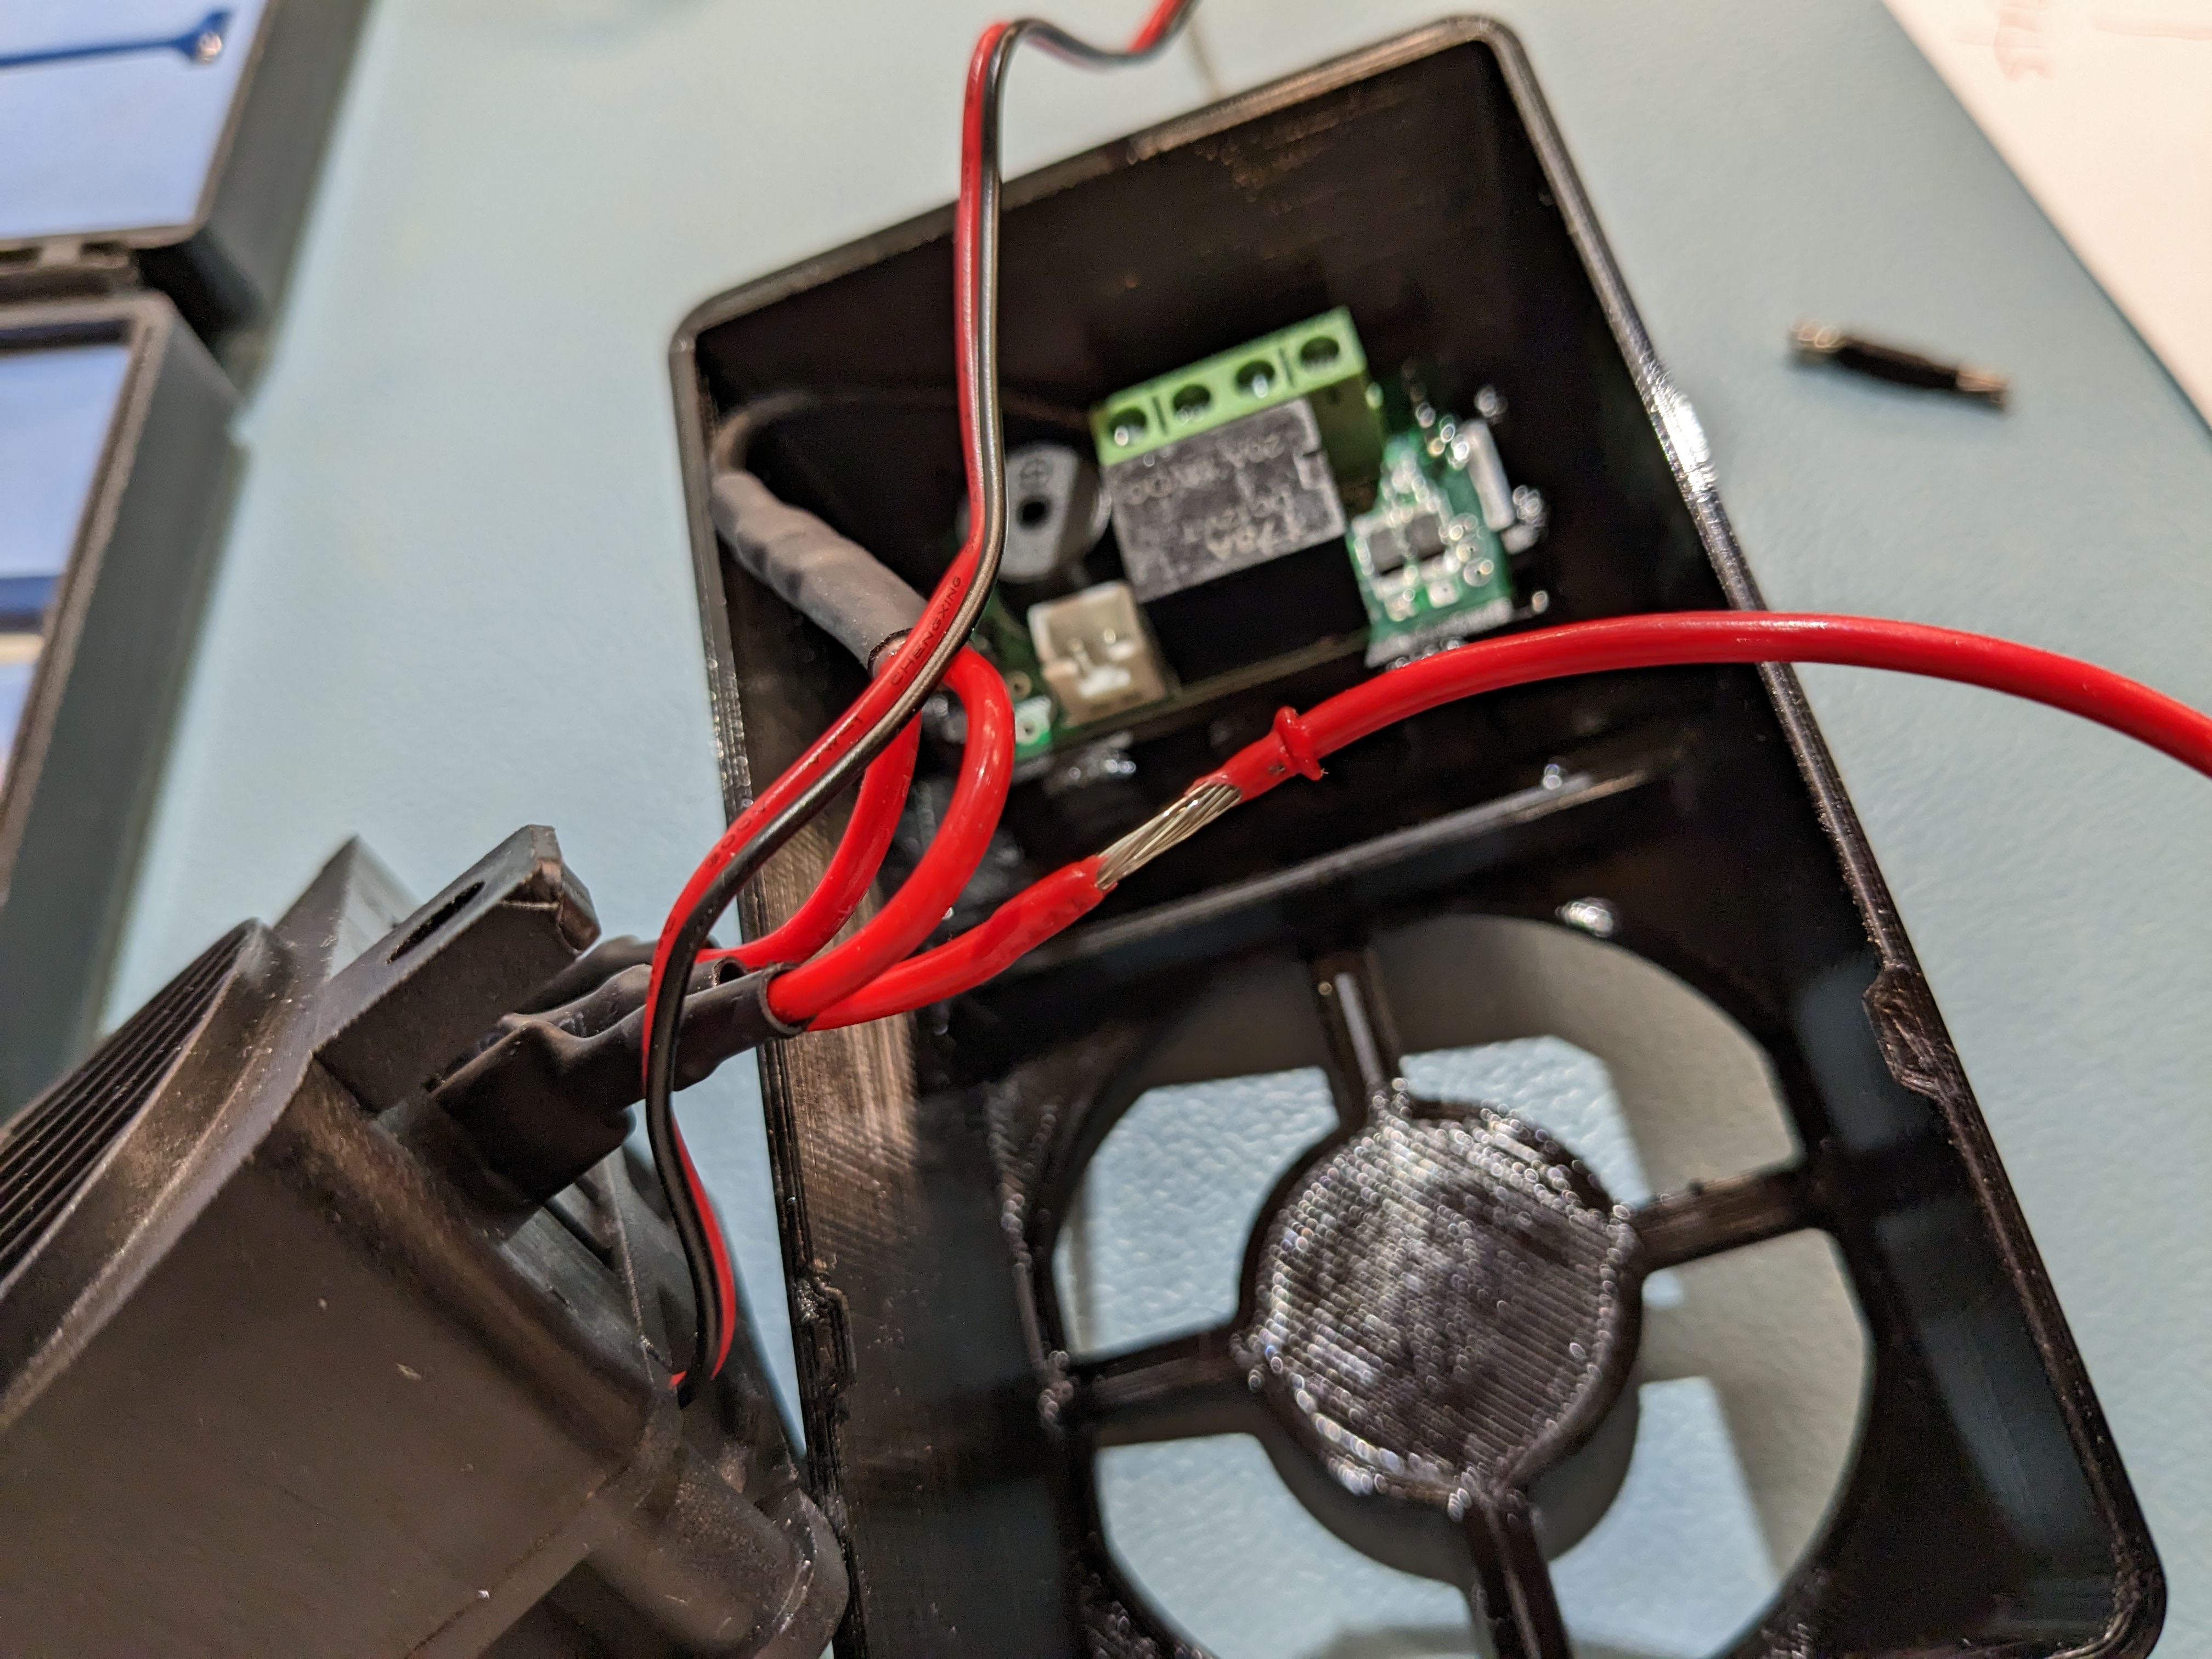
Cut both positive and negative fan wires so that they reach the
sockets with some margin.

Strip a section of the positive fan wire that matches up with where the heater wire is stripped, then wrap the the two stripped sections together and join them with solder.


Strip the end of the heater negative lead cut-off we got earlier, join it with the negative wire from the fan, crimp it and insert it into both of the middle screw terminals. If you don't have the tools to crimp them you can just use a short bit of left-over wire between then instead.


Attach the positive wire from the fan.

Place the fully assembled heater on the Mars 3 adapter, trim down the positive lead a bit, and put on plug fittings before sticking the wires out of the hole in the adapter.
Solder on the plug using plenty of solder to ensure good contact.


Press in the temperature sensor in it's holder and route it's cable in the dedicated pocket and connect it to the regulator. Coil up excess length around the wire pillar.


Press in the little extra wire coming from the plug over the wire pillar. This is snug enough that it will secure all wires in place.

Plug in and test your fully operational heater!