
Mad Scientist Control Panel
Obliczymy ostateczną cenę na podstawie wybranego pliku. Sprawdzisz ją i zaakceptujesz przed płatnością.
Zapisane na tym urządzeniu.

This mock mad science display features four real test tubes and animated lights that change color.
- Ocena
- 5 / 5
- Polubienia
- 48
- Pobrania
- 79
- Wydruki
- 1
- Wyświetlenia
- 1278
- Oceny
- 1
Aktualizacja u źródła:
Informacje o modelu
- Źródło
- Printables
- Kategoria
- Autumn & Halloween
- Licencja
- Creative Commons — Attribution — Noncommercial — Share Alike
This is a fun project for a mad scientist display or haunt. The meter, bargraph, and test tubes are all async animated by WLED. You can use the webapp to configure the animations, after which you can adjust the color pallet from the knob and change animation presets from the button.
If you fill the test tubes with colored liquid or hair gel, it looks really cool.
Part List
Multiple links are provided for sources, pick the one you like best. Be sure to print the test tube rack size that matches your test tube size. OpenSCAD file is provided, so you can adapt to your own parts too :)
- 4x Test Tubes w/ Cork Stopper
- 22*100mm Glass https://www.aliexpress.us/item/3256803855754241.html
- 25x120mm Glass https://amzn.to/3I0pucF
- 12x100mm Plastic https://www.aliexpress.us/item/3256803254620432.html
- 15x100mm Plastic https://amzn.to/3wXvD30
- 4x WS2812 LEDs
- Round 5V DC Analog Volt Meter
- Potentiometer 10k
- Dial Scale and Knob
- DS Mini (ESP8266)
- 12mm Metal Momentary Button
- Neopixel Strip
We are a participant in the Amazon Services LLC Associates Program, an affiliate advertising program designed to provide a means for us to earn fees by linking to Amazon.com and affiliated sites.
Printing
If you chose one of the Test Tube sizes I listed, you can print from the .3mf file. It is set for PLA on a satin sheet, and printed supports. Adjust as needed for your printer.
Print the bargraph cover using transparent filament.
If you want to make modifications, open the .scad file in OpenSCAD and change what you want. Here are the post processing steps in PrusaSlicer:
- Split to Objects
- Arrange [A]
- Place on Face [F] to flip all four parts.
- Paint on Supports [L] to add supports to the rings under the base.
- Select the base part, Add Part > Load > Select Speaker Grill and move/scale as needed.
The speaker part was made by mikecook1966
https://www.thingiverse.com/thing:3206579
Assembly
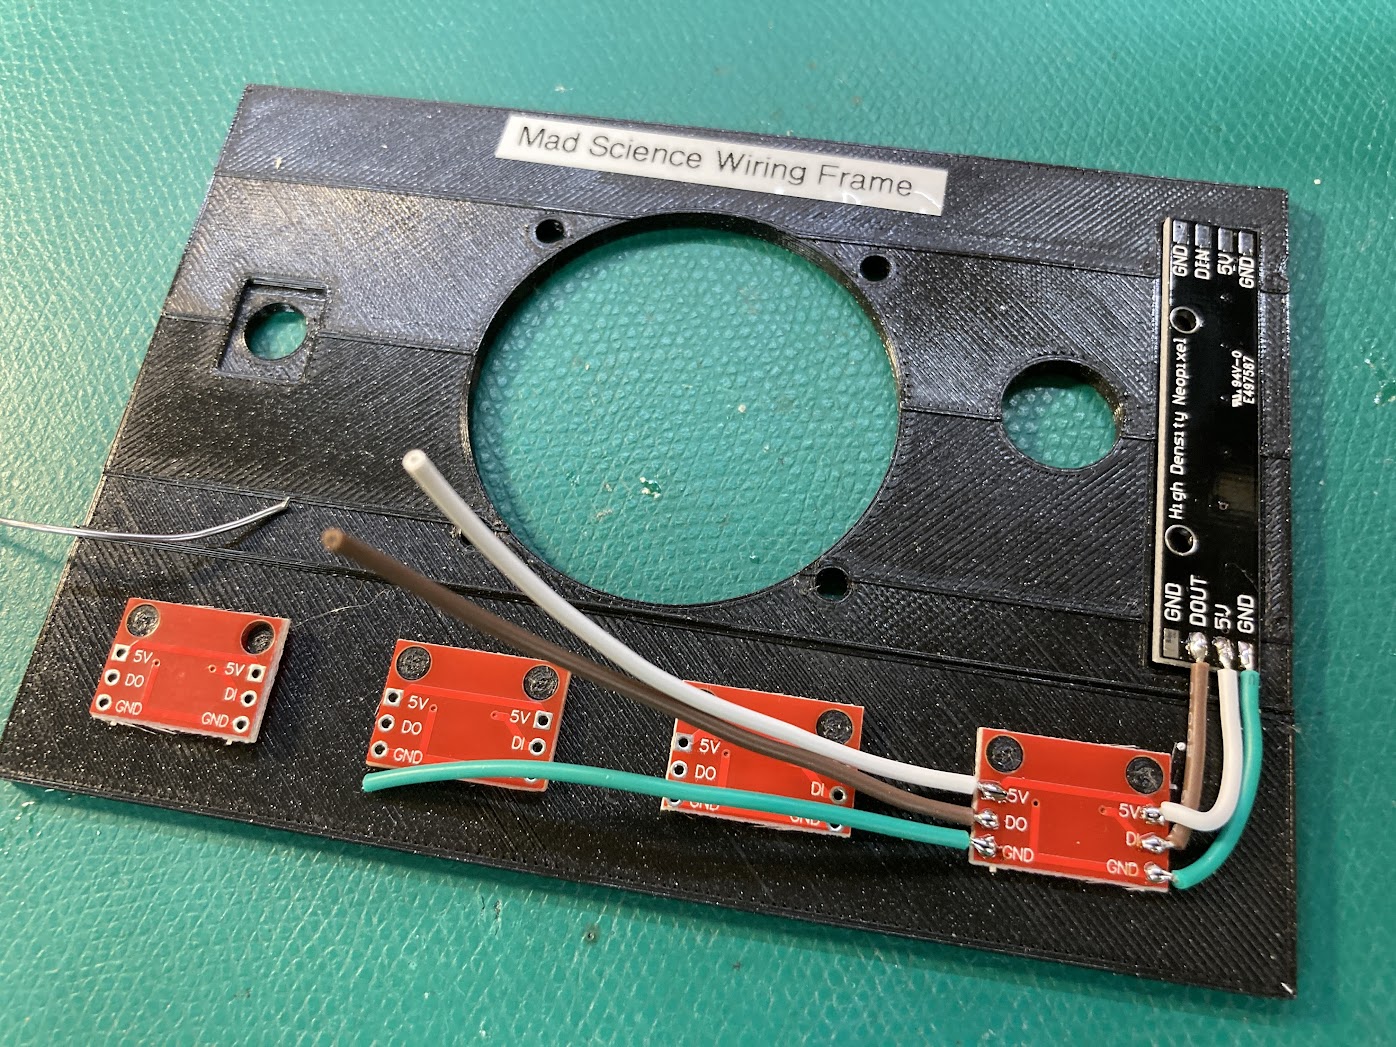
A wire guide is included. Snap the WS2812 breakouts and bargraph into place, then add the wires. Note the IN / OUT pin positions in the photo. When done snap the circuits out of the guide and install in the display base.
Wiring
- POT to A0 (ADC0) and 3.3V and GND
- Pixels to D4 (GPIO2) and 5V and GND
- Meter to D2 (GPIO4) and GND
- Button to D3 (GPIO0) and GND
Note: The pin set in the WLED settings UI for the Analog Button is ignored.
Configuration
Load firmware using this web tool https://install.wled.me/ You can save time by entering your wifi network details. The last prompt of the tool will send you to the WLED's IP address on your network. Bookmark this page!
Open WLED settings on the device's website, and configure as below.
Pro Tip: If you are using a PC, click PC Mode for a widescreen interface.
WLED > Settings > LED Preferences
- LED output 1: Length 12, GPIO 2
- LED output 2: Length 1, GPIO 4, PWM White
- Button 0: GPIO 0, Pushbutton
- Button 1: GPIO 1, Analog
- Apply preset 1 at boot.
WLED > Segments Tab
- Bargraph: Start 0, Stop 8 > Apply
- Test Tubes: Start 8, Stop 12 > Apply
- Meter: Start 12, Stop 13 > Apply
WLED > Settings > Time & Macros
- Button 0: Short=250 (Next), Long=249 (Off)
- Button 1: Short=0, Long=0, Double=247 (Color)
WLED > Settings > Security & Updates
Find where you can upload the presets.json (you may have to rename .txt to .json) This will populate a bunch of presets for you.
Basic Usage
- Power: Hold the button
- Quick Animation Change: Press the button
- Quick Color Change: Turn the knob.
There are 70 color pallets. Turn knob slowly and wait 3 seconds to see the color update.
Animation Programming
Use the WLED app to program your own animations.
There are three animatable areas: Test Tubes, Bargraph, and Meter. To change the animation of just one at a time, unselect the others on the Segments tab.
Save your preset when done.
More Info: https://kno.wled.ge/