
TiltBox
Obliczymy ostateczną cenę na podstawie wybranego pliku. Sprawdzisz ją i zaakceptujesz przed płatnością.
Zapisane na tym urządzeniu.
A compact, tilted layout for a DIY B0XX/Frame1 that can be printed on small print beds (largest part is 113.5x102x13mm)
- Ocena
- 5 / 5
- Polubienia
- 15
- Pobrania
- 108
- Wydruki
- 2
- Wyświetlenia
- 1173
- Oceny
- 1
Aktualizacja u źródła:
Informacje o modelu
- Źródło
- Printables
- Kategoria
- Video Games
- Licencja
- Creative Commons — Attribution — Noncommercial
1. Description
A compact, tilted layout for a DIY B0XX/Frame1/Rectangle controller that can be printed on small print beds (largest part is 113.5x102x13mm). Modules are bolted together and lids bolted down using threaded inserts. The button clusters are at a 10 degree inward tilt.
This is not a guide on how to make a DIY B0XX. Join Crane's Discord if you want to know more about these controllers and also take a look at HayBox which is what I'm running on my controller.
The Raspberry Pi Pico gets attached with 2 raspberry_pi_pico_stand.stl's and the usb-c breakout board is attached with threaded inserts. Both the HTangle's Model BirdD and the QuRB usb-c boards are supported. Key switches are pressed in to the 14x14mm cutouts which may need to be sanded for the switches to go in. Keyswitches are Gateron ks-27 low profile reds and keycaps are G20's from here.
2. Model File Choices
There are a few different options for this print. You need to decide on the following:
Simple Faceplates or Swappable Faceplates (described down below)
Fillet or No Fillet
Fillet is the rounded edges around the top faceplate
Model BirdD or QuRB usb-c breakout board
The Center Module stl will specify if it's for the BirdD or QuRB
The only difference is in the spacing for the mounting holes
Standard, HTanglCompact, or HTangl button layout
Standard layout has the extra row of buttons ABOVE home row
HTanglCompact layout has the extra row of buttons BELOW home row
HTangl is in between the above two options
The left hand side is unchanged for Standard and HTanglCompact BUT for HTangl, use the LH-HTangl file
HTangl stl files will have -HTANGL in the name
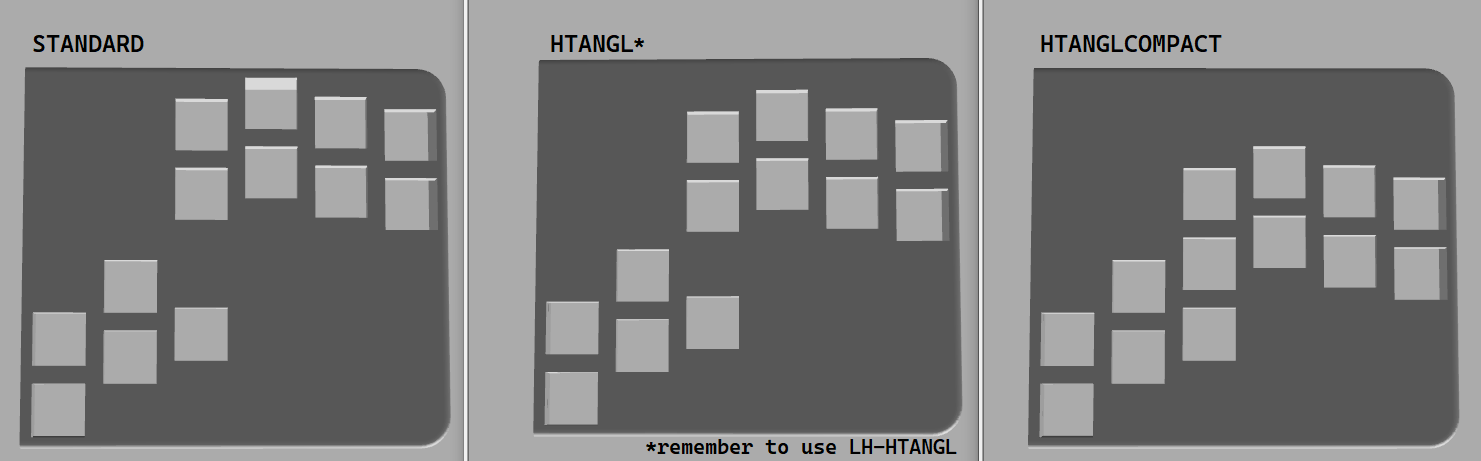
If you are unsure, I recommend Simple Faceplate (4mm thick plate), no fillet, and standard button layout. Use whichever usb-c board is available.
What to Download
One of the following folders:
Simple-Fillet-4mm
Simple-Fillet-2mm
Simple-4mm
Simple-2mm
SwappableFaceplates
As well as the Backplates folder and the RaspberryPiPicoStand (print 2 of these)
3. Simple Faceplates
Unlike the swappable faceplates, these are each 1 part and don't require threaded inserts to attach (the bottom lids will still need to be attached with threaded inserts).
There are 4 types of these modules:
Simple-2mm: No fillet around the edges, and 2mm thick keyswitch plate
Simple-4mm: No fillet around the edges, and 4mm thick keyswitch plate
Simple-Fillet-2mm: Fillet around the edges, and 2mm thick keyswitch plate
Simple-Fillet-4mm: Fillet around the edges, and 4mm thick keyswitch plate
Fillet vs No Fillet
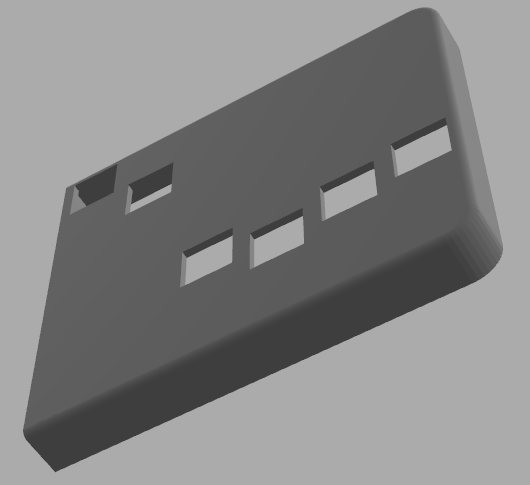
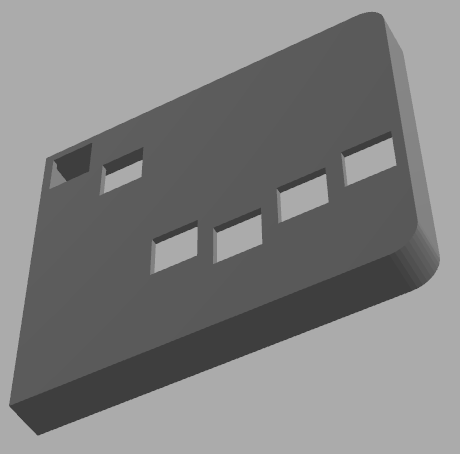
Fillets are rounded edges, and in this case I'm talking about the top most edge of the faceplate.
Fillet:
No Fillet:
4. Swappable Faceplates
These allow for intricate 3D printed patterns on the face of the controller. They are secured to the button modules using M2 threaded inserts and screws. Be careful not to pierce through the plate when adding the threaded inserts.
Included are faceplates with a hex(shine) pattern as well as blank ones. You can add your own pattern to the blank faceplates if you wish. I recommend a 0.25mm cut into the surface. I used a clear 3d epoxy to coat the faceplates and fill in the 0.25mm cut. This is optional.
5. Parts List
2 M3x20mm (usbc cable mount)
5 M3x12mm (backplates)
2 M3x10mm (pico stands)
6 M3x8mm (side walls)
2 M3x6mm (HTangle's Model BirdD)
8 M3 nuts (side wall screws and pico stands)
- What I used: amazon link
5 Threaded Inserts M3*4.6x5.7mm (for lids, amazon link)
15 M2x4mm (faceplates, amazon link)
15 Threaded Inserts M2*3.2x2mm (faceplates, amazon link)
4 Eyeglass Screws HD2.5 x SD1.4 x L6mm (for Pico + stand)
4 Eyeglass Bolts (for Pico + stand)
- What I used: amazon link
1 Raspberry Pi Pico
1 HTangle's Model BirdD or QuRB
1 USBC to USBC Mount: amazon link
The enclosure is made with this exact cable in mind. It won't work for other cables without modifications.

20 Switches (I'm trying out these: https://www.amazon.com/dp/B09WYJ8HSD?ref=ppx_yo2ov_dt_b_product_details&th=1 though I think most will work)
Wire (I used 26awg solidcore)
6. Possible Future Updates
More faceplate designs
DONE --A version without faceplates--
DONE --HTangl button layout--