
Sidewinder X2 5020 Fan Duct
Obliczymy ostateczną cenę na podstawie wybranego pliku. Sprawdzisz ją i zaakceptujesz przed płatnością.
Zapisane na tym urządzeniu.
Redesigned to support the 5020 fan size.
- Ocena
- 5 / 5
- Polubienia
- 25
- Pobrania
- 132
- Wydruki
- 1
- Wyświetlenia
- 1782
- Oceny
- 1
Aktualizacja u źródła:
Informacje o modelu
- Źródło
- Printables
- Kategoria
- Other Printer Parts & Upgrades
- Licencja
- Creative Commons — Attribution — Noncommercial — Share Alike
Upon the request of another user I have created another cooling duct for the X2. However, this one is designed to use a single 5020 fan. I have used this on multiple prints but have not tested it against the stock cooling solution or against any of my dual fan setups. I can state that it is much quieter than the dual fans while seemingly providing equivalent part cooling.
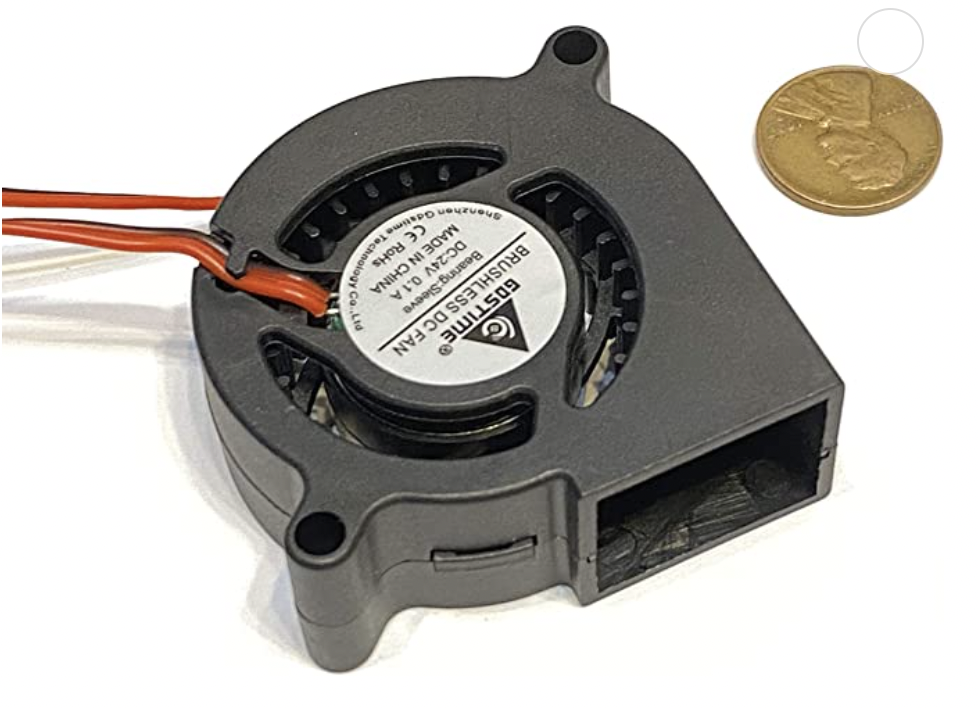
The 5020 fan this design was based on can be found here. Apparently, each manufacture can vary slightly in their mounting techniques. The one that I purchased and linked here only has two mounting holes.
 https://media.printables.com/media/prints/395102/rich_content/ade99af3-8249-4365-a87a-6eb7fc808d6a/image.png#%7B%22uuid%22%3A%226dac3aff-94ff-4d72-9d63-8beae7e2f0a2%22%2C%22w%22%3A531%2C%22h%22%3A528%7D" alt="A picture containing electronics
Description automatically generated">
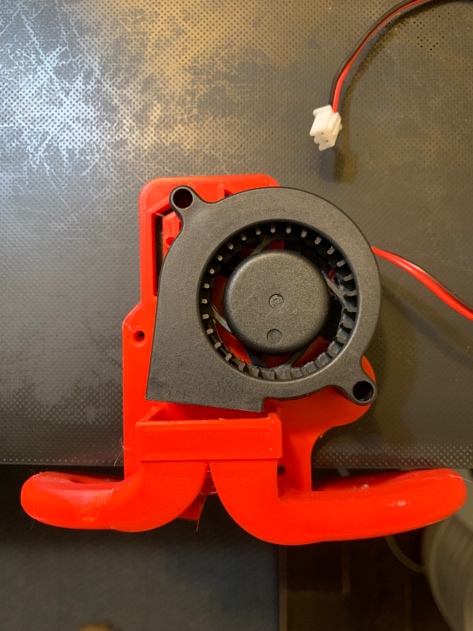
Installation is straight forward.
- I have found it works best to remove the beauty cover on the print head assembly so that you can more easily access the fan connector. Be advised, the connector may have to be re-pinned to properly orient the positive and negative terminals. For my printer, all I did was pull the connector base plate off and rotate 180º. Doing this forces the actual connector to be rotated as well to fit the base which correctly connects the positive lead.
- Mount the duct assembly and use two M2x11mm to secure it to the print head. The existing M2 bolts need to be either cut or replaced as they are too long and bind on the print head (hot end) fan.
- Once the duct is attached, install the fan. It works better to place the lower pin in first, then snap the upper pin in after the fan outlet is aligned to the input of the duct.
<img class="image_resized" style="width:50%;" src="https://media.printables.com/media/prints/395102/rich_content/a0f16b32-a898-496e-b22c-ce2e8b4510b0/image.jpeg#%7B%22uuid%22%3A%22639745aa-6ed8-49b1-8521-ec61ece7fb56%22%2C%22w%22%3A473%2C%22h%22%3A631%7D" alt="A picture containing indoor, tool
Description automatically generated">
Printing Tips
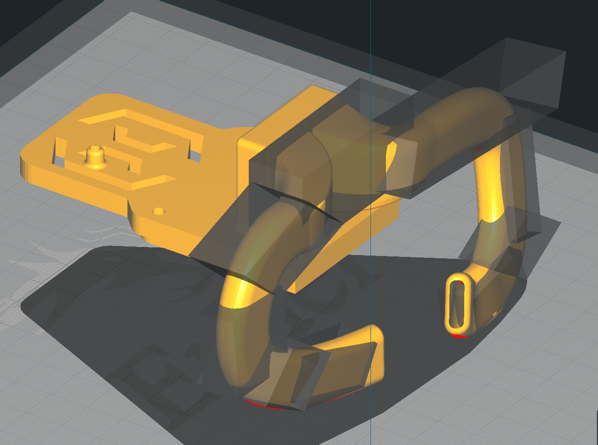
With the spring pin design using supports can adversely impact the functionality of the spring itself. Printing the duct in the vertical position will save time but there are unsupported parts in the coil of the spring which will result in print failure. I have found that printing the unit lying flat with the back facing the build plate works best. Make sure you use support blockers in your slicer to prevent the slicer from putting supports inside of the duct itself. I prevent the supports from being created on all but the fan input side and the very end of the exhaust side of each duct. This takes about 17 hours and unfortunately has significant waste due to the supports. If you choose to print the duct with the standard lower pin, vertical orientation will work just fine.
<img src="https://media.printables.com/media/prints/395102/rich_content/7af3eba7-1b0c-4311-a720-649e3b7d0be8/image.png#%7B%22uuid%22%3A%2246b4936c-c3b7-4425-a4d0-0ed5b7888392%22%2C%22w%22%3A598%2C%22h%22%3A445%7D" alt="A picture containing LEGO, toy
Description automatically generated">
Print settings:
- Material Temp: 200º
- Bed Temp: 67º
- Infill: 30% or more
- Speed: 50mm/s
- Supports: Yes
- Support Type: Normal (note that my version of Cura would not properly apply support blockers using tree supports).