
DC UPS (5V, 9V, 12V) based on LX-2BUPS module
Obliczymy ostateczną cenę na podstawie wybranego pliku. Sprawdzisz ją i zaakceptujesz przed płatnością.
Zapisane na tym urządzeniu.

DC UPS based on LX-2BUPS module (5V/9V/12V, with a USB Type-C power connector).
- Ocena
- 5 / 5
- Polubienia
- 96
- Pobrania
- 808
- Wydruki
- 5
- Wyświetlenia
- 6159
- Oceny
- 4
Aktualizacja u źródła:
Informacje o modelu
- Źródło
- Printables
- Kategoria
- Electronics
- Licencja
- Creative Commons — Attribution
DC UPS based on LX-2BUPS module (5V/9V/12V, with a USB Type-C power connector).
This is useful for powering internet switch/router during a power outage.
If you need 5V UPS with USB output, use this design instead.
Aug 2024 update:
I noticed that the UPS gets a bit warm when powering one of my switches, so I decided to add vents. To keep it from being boring, I added them as a polarized monochrome vyshyvanka. Just print ups-cable-top-vents-vyshyvanka.stl instead of ups-cable-top.stl.
May 15, 2025 update:
Added new STL files featuring ventilation holes inspired by traditional Ukrainian vyshyvanka patterns to celebrate Vyshyvanka Day. Just print any of ups-cable-top-vents-vyshyvanka*.stl instead of ups-cable-top.stl.
Print Settings
Printer:
RepRap Mendel
Rafts:
No
Supports:
No
Resolution:
0.3
Infill:
50%
Filament:
black
Notes:
Print it in transparent plastic if you want to watch the LEDs of the module.
Post-Printing
Step 1
Prepare all parts for assembly. There are several modification of the LX-2BUPS module. The modules can have a micro-USB or USB Type-C power input, and differ by 5V, 9V or 12V output. So make sure you are using the correct module (with a USB Type-C input socket, and producing the required UPS DC output).
Print ups-cable-bottom.stl, ups-cable-top.stl (or ups-cable-top-vents-vyshyvanka.stl if vents needed) and one of {ups5v-cable.stl, ups9v-cable.stl, ups12v-cable.stl} depending on UPS DC output voltage (or ups-cable.stl if you don't like to label the voltage).
In addition to the LX-2BUPS module and printed parts, you will need:
- 18650 battery, 2pcs;
- DC barrel jack plug;
- pair of wires;
- a pair of heat shrinks or kapton tape to insulate the wires in the DC plug;
- Screw 3.0x25, 4pcs.

Step 2
Solder a pair of wires to the DC power jack, use heat shrinks or kapton tape to insulate.
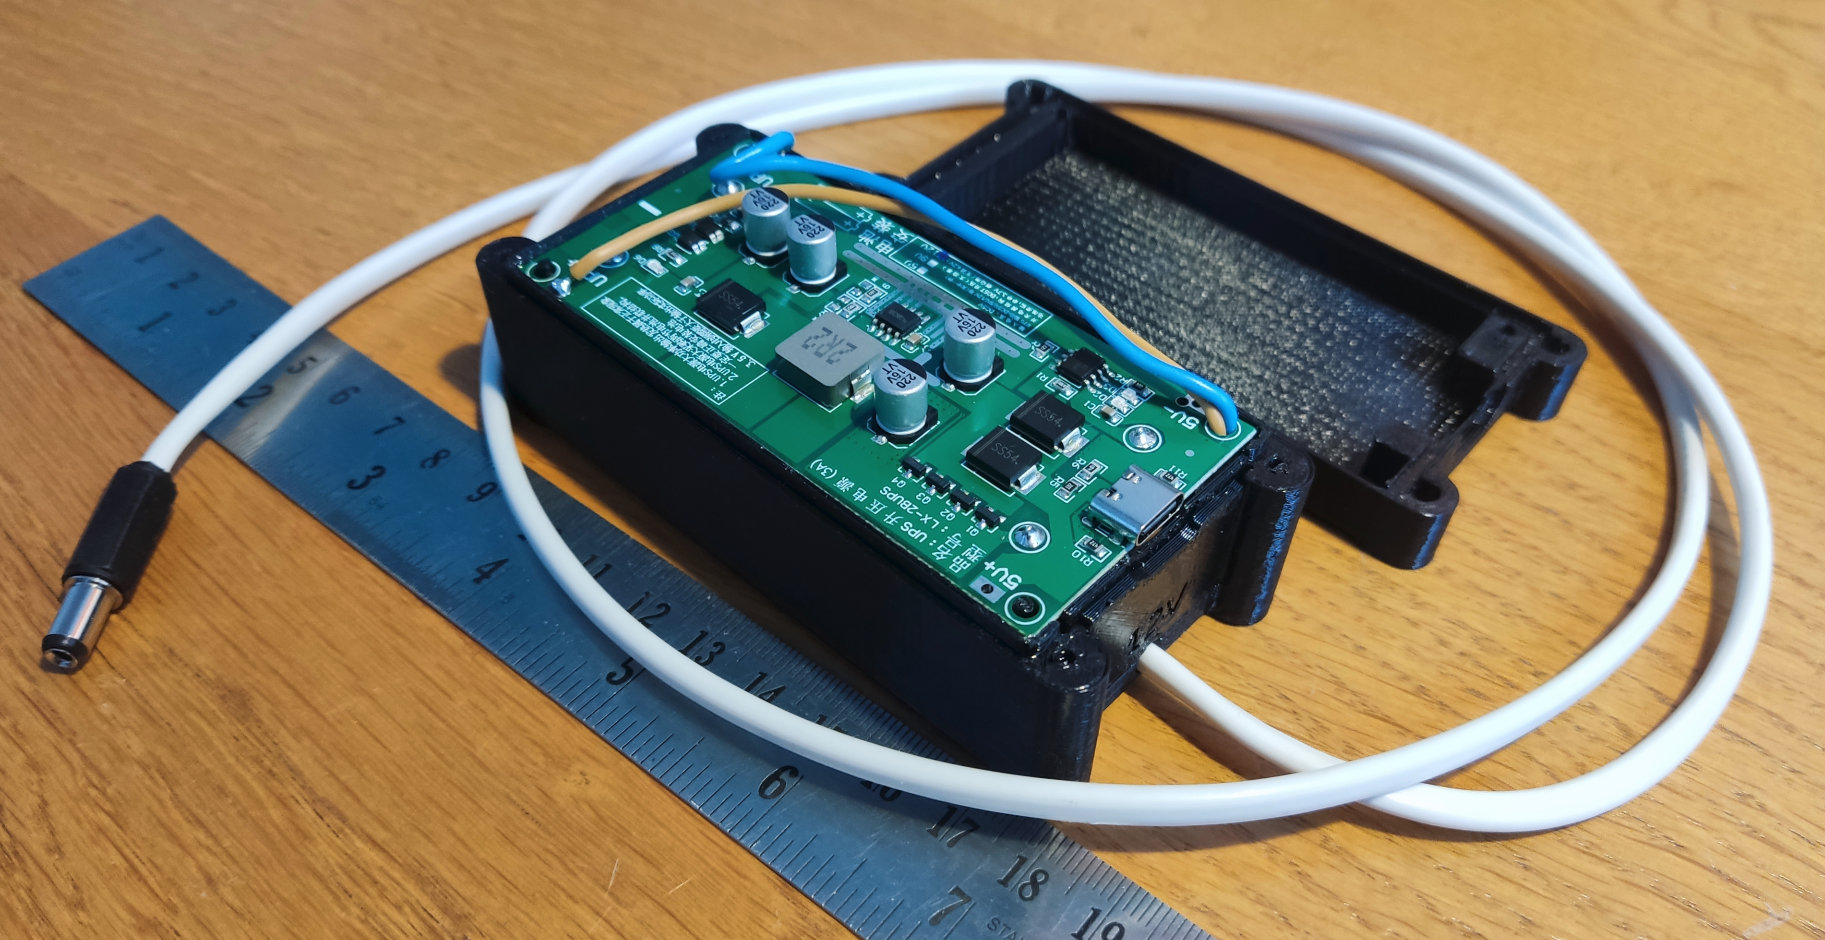
Pull the wires through the bottom left hole of the LX-2BUPS module and solder the wires to the corresponding USB+ and USB- pins.

Step 3
Insert the batteries into the UPS and assemble the bottom part of the device.

Step 4
Finish assembling the device by screwing the top part to the bottom part with four 3.0x25 screws.


Aug 2024 Update: top part with vents


Category: Electronics