
Filament dry box using DAISO plastic container
Obliczymy ostateczną cenę na podstawie wybranego pliku. Sprawdzisz ją i zaakceptujesz przed płatnością.
Zapisane na tym urządzeniu.

Parts to make a dry box that holds one filament spool.
- Ocena
- 0 / 5
- Polubienia
- 14
- Pobrania
- 51
- Wydruki
- 0
- Wyświetlenia
- 1608
- Oceny
- 0
Aktualizacja u źródła:
Informacje o modelu
- Źródło
- Printables
- Kategoria
- Accessories
- Licencja
- Creative Commons — Attribution
Update 3/2/2023.
Added "cylinder 2" to reduce the amount of support when printing.
印刷時のサポートの量を減らすために「cylinder 2」を追加しました。
---------------------------------------------------------------------------------------------------------------
Parts to make a dry box that holds one filament spool. No bearings, glue, or screws are used.
フィラメントスプールが一つ入るドライボックスを作るための部品です。ベアリング、接着剤、ネジは使いません。
Printed parts and purchased parts
印刷部品と購入部品
Print one of each of the following parts.
以下の部品をそれぞれ一つずつ印刷してください。
- cylinder
- cylinder holder
- meter holder
- silica gel box and lid, or bottom plate
If you use granular silica gel, please print silica gel box and put it in the box. If you use silica gel in bags, please print the bottom plate.
粒状のシリカゲルを使う場合はシリカゲルボックスを印刷して、そこに入れてください。袋入りのシリカゲルを使う場合はbottom plateを印刷してください。
In addition to the above, you will need to purchase the following parts
これ以外に以下の購入部品が必要です。
- Plastic container from DAISO (5.5 liter)
ダイソーのプラスチックコンテナ(5.5リットル) - Humidity sensor
湿度センサー - Pneumatic fittings
空気圧フィッティング - PTFE tube
PTFEチューブ
Printing
印刷について
The model is made and sliced considering the printing direction that the fillet can be printed cleanly. That is why a silica gel box consists of two parts. Please take this into consideration when slicing by yourself. If you use a silica gel box in one piece, use "silica gel box 1 piece.step".
フィレットがきれいに印刷できるような印刷方向を考慮してモデルを作成し、スライスしています。シリカゲルボックスが二つの部品で構成されているのはそのためです。自分でスライスする場合は、その点を考慮してください。一つの部品になっているシリカゲルボックスを使う場合は「silica gel box 1 piece.step」を使ってください。
I use version 2.5 of PrusaSlicer, so I use snag for cylinder support. You may want to use organic support when version 2.6 becomes available.
PrusaSlicerのバージョン2.5を使っているので、cylinderのサポートにはsnagを使っています。バージョン2.6が使えるようになったらオーガニックサポートにした方が良いかもしれません。
How to assemble
組み立て方
Step 1.
Drill a hole in the plastic container where you want to take the filament out and install the pneumatic fitting. I used the following parts for installation
プラスチックコンテナのフィラメントを取り出したい位置に穴を開けて、空気圧フィッティングを取り付ける。私は取り付けに以下の部品を使いました。


Step 2
Fit the humidity sensor into the hole in the “meter holder". If the size of the hole does not fit, change the values of the parameters meter_width and meter_height in Fusion360.
「meter holder」の穴に湿度センサーを嵌め込む。穴の大きさが合わない場合はFusion360でパラメータmeter_width, meter_heightの値を変更してください。
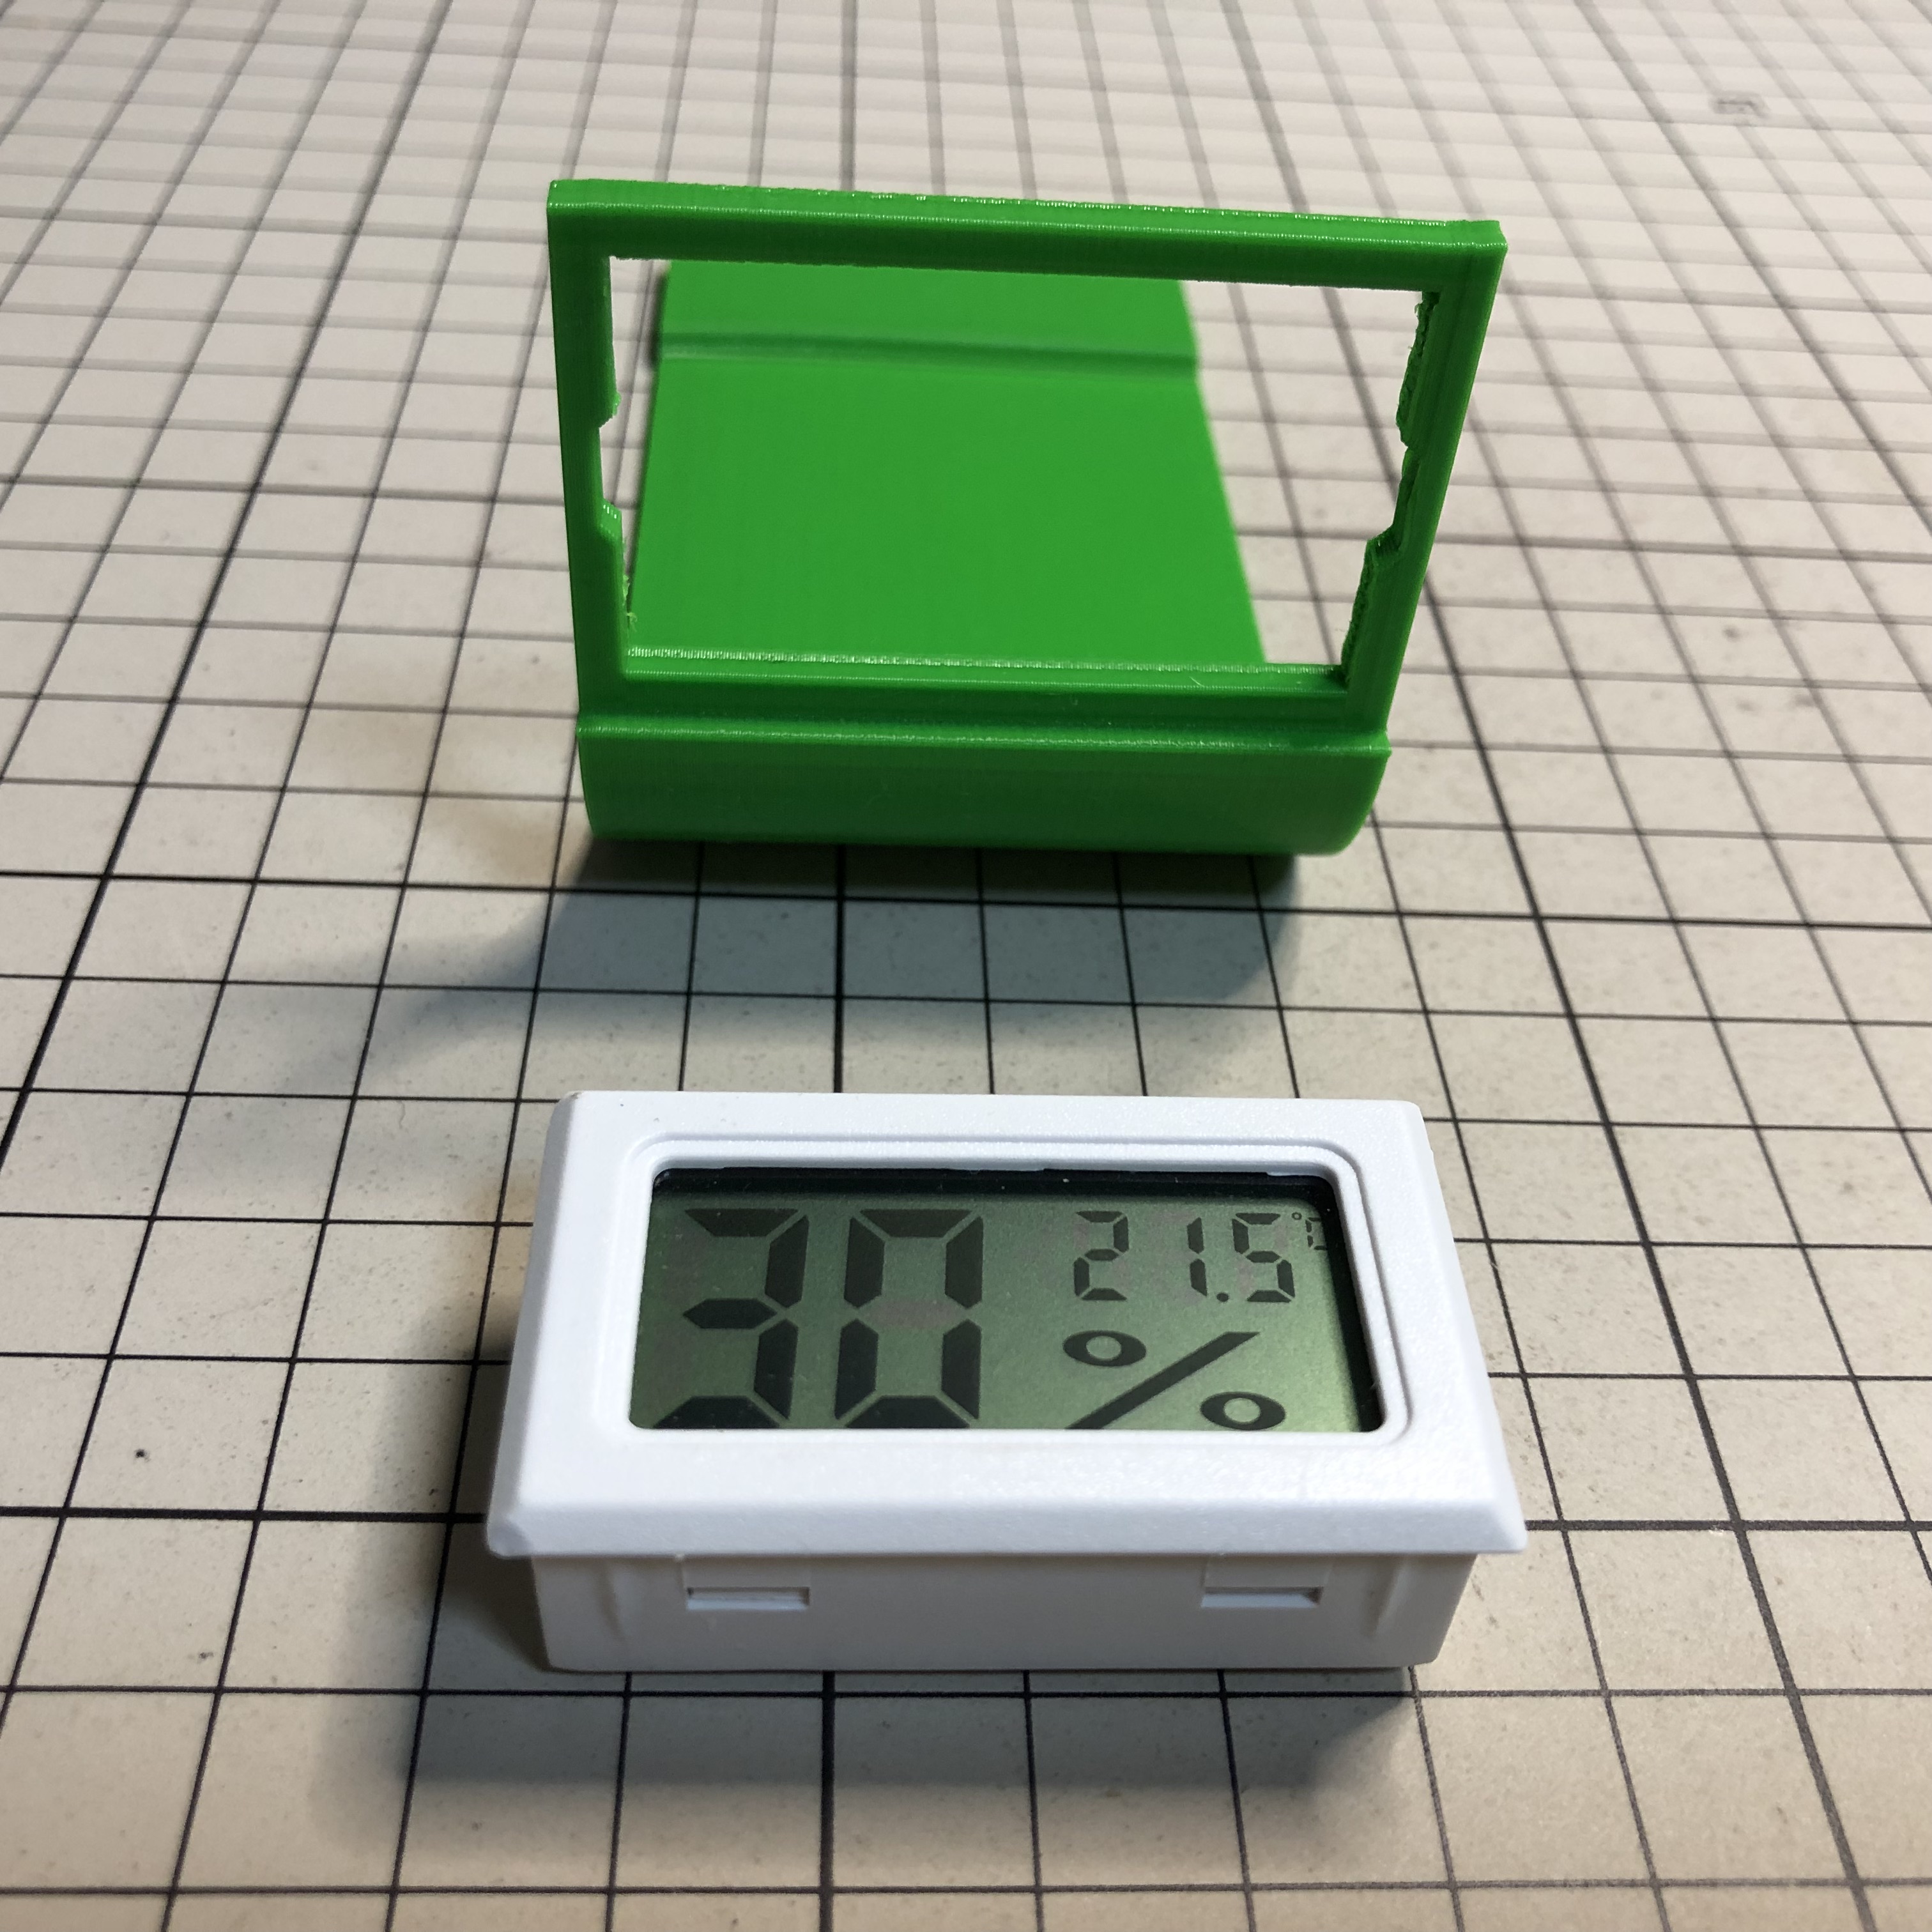

Step 3
Insert the “meter holder” into the hole of the “cylinder holder”.
「meter holder」を「cylinder holder」の穴に差し込む

Step 4
Insert the silica gel box with the lid attached or the bottom plate into the hole of the cylinder holder.
蓋を取り付けたシリカゲルボックス、あるいはbottom plateをcylinder holderの穴に差し込む


Step 5
Insert the “cylinder” into the hole of the spool and place it on top of the “cylinder holder”.
スプールの穴に「cylinder」を入れて「cylinder holder」の上に載せる。

Step 6
Put the assembly so far into the plastic container, pass the filament through the pneumatic fitting, and close the lid of the container. Finally, insert the PTFE tube into the pneumatic fitting to complete the process.
ここまでで組み立てたものをプラスチックコンテナに入れてフィラメントを空気圧フィッティングに通し、コンテナの蓋を閉める。最後にPTFEチューブを空気圧フィッティングに差し込んで完成です。


Tilting measures
傾き対策
Due to the shape of the plastic container, it will tilt when placed on a flat surface. Please print "container holder" and attach it to the bottom of the container.
プラスチックコンテナの形状ゆえに平らなところに置くと傾いてしまいます。そこで台座を用意しました。「container holder」を印刷して、底部に取り付けてください。


The "container holder" has a hole through which an 8mm square bar can be threaded, allowing it to be connected and secured. I installed these on the top of the printer enclosure.
「container holder」には8mm角の角棒を通すための穴が空いており、これを利用して連結と固定が可能です。私はプリンターの筐体上部にこれらを設置しました。

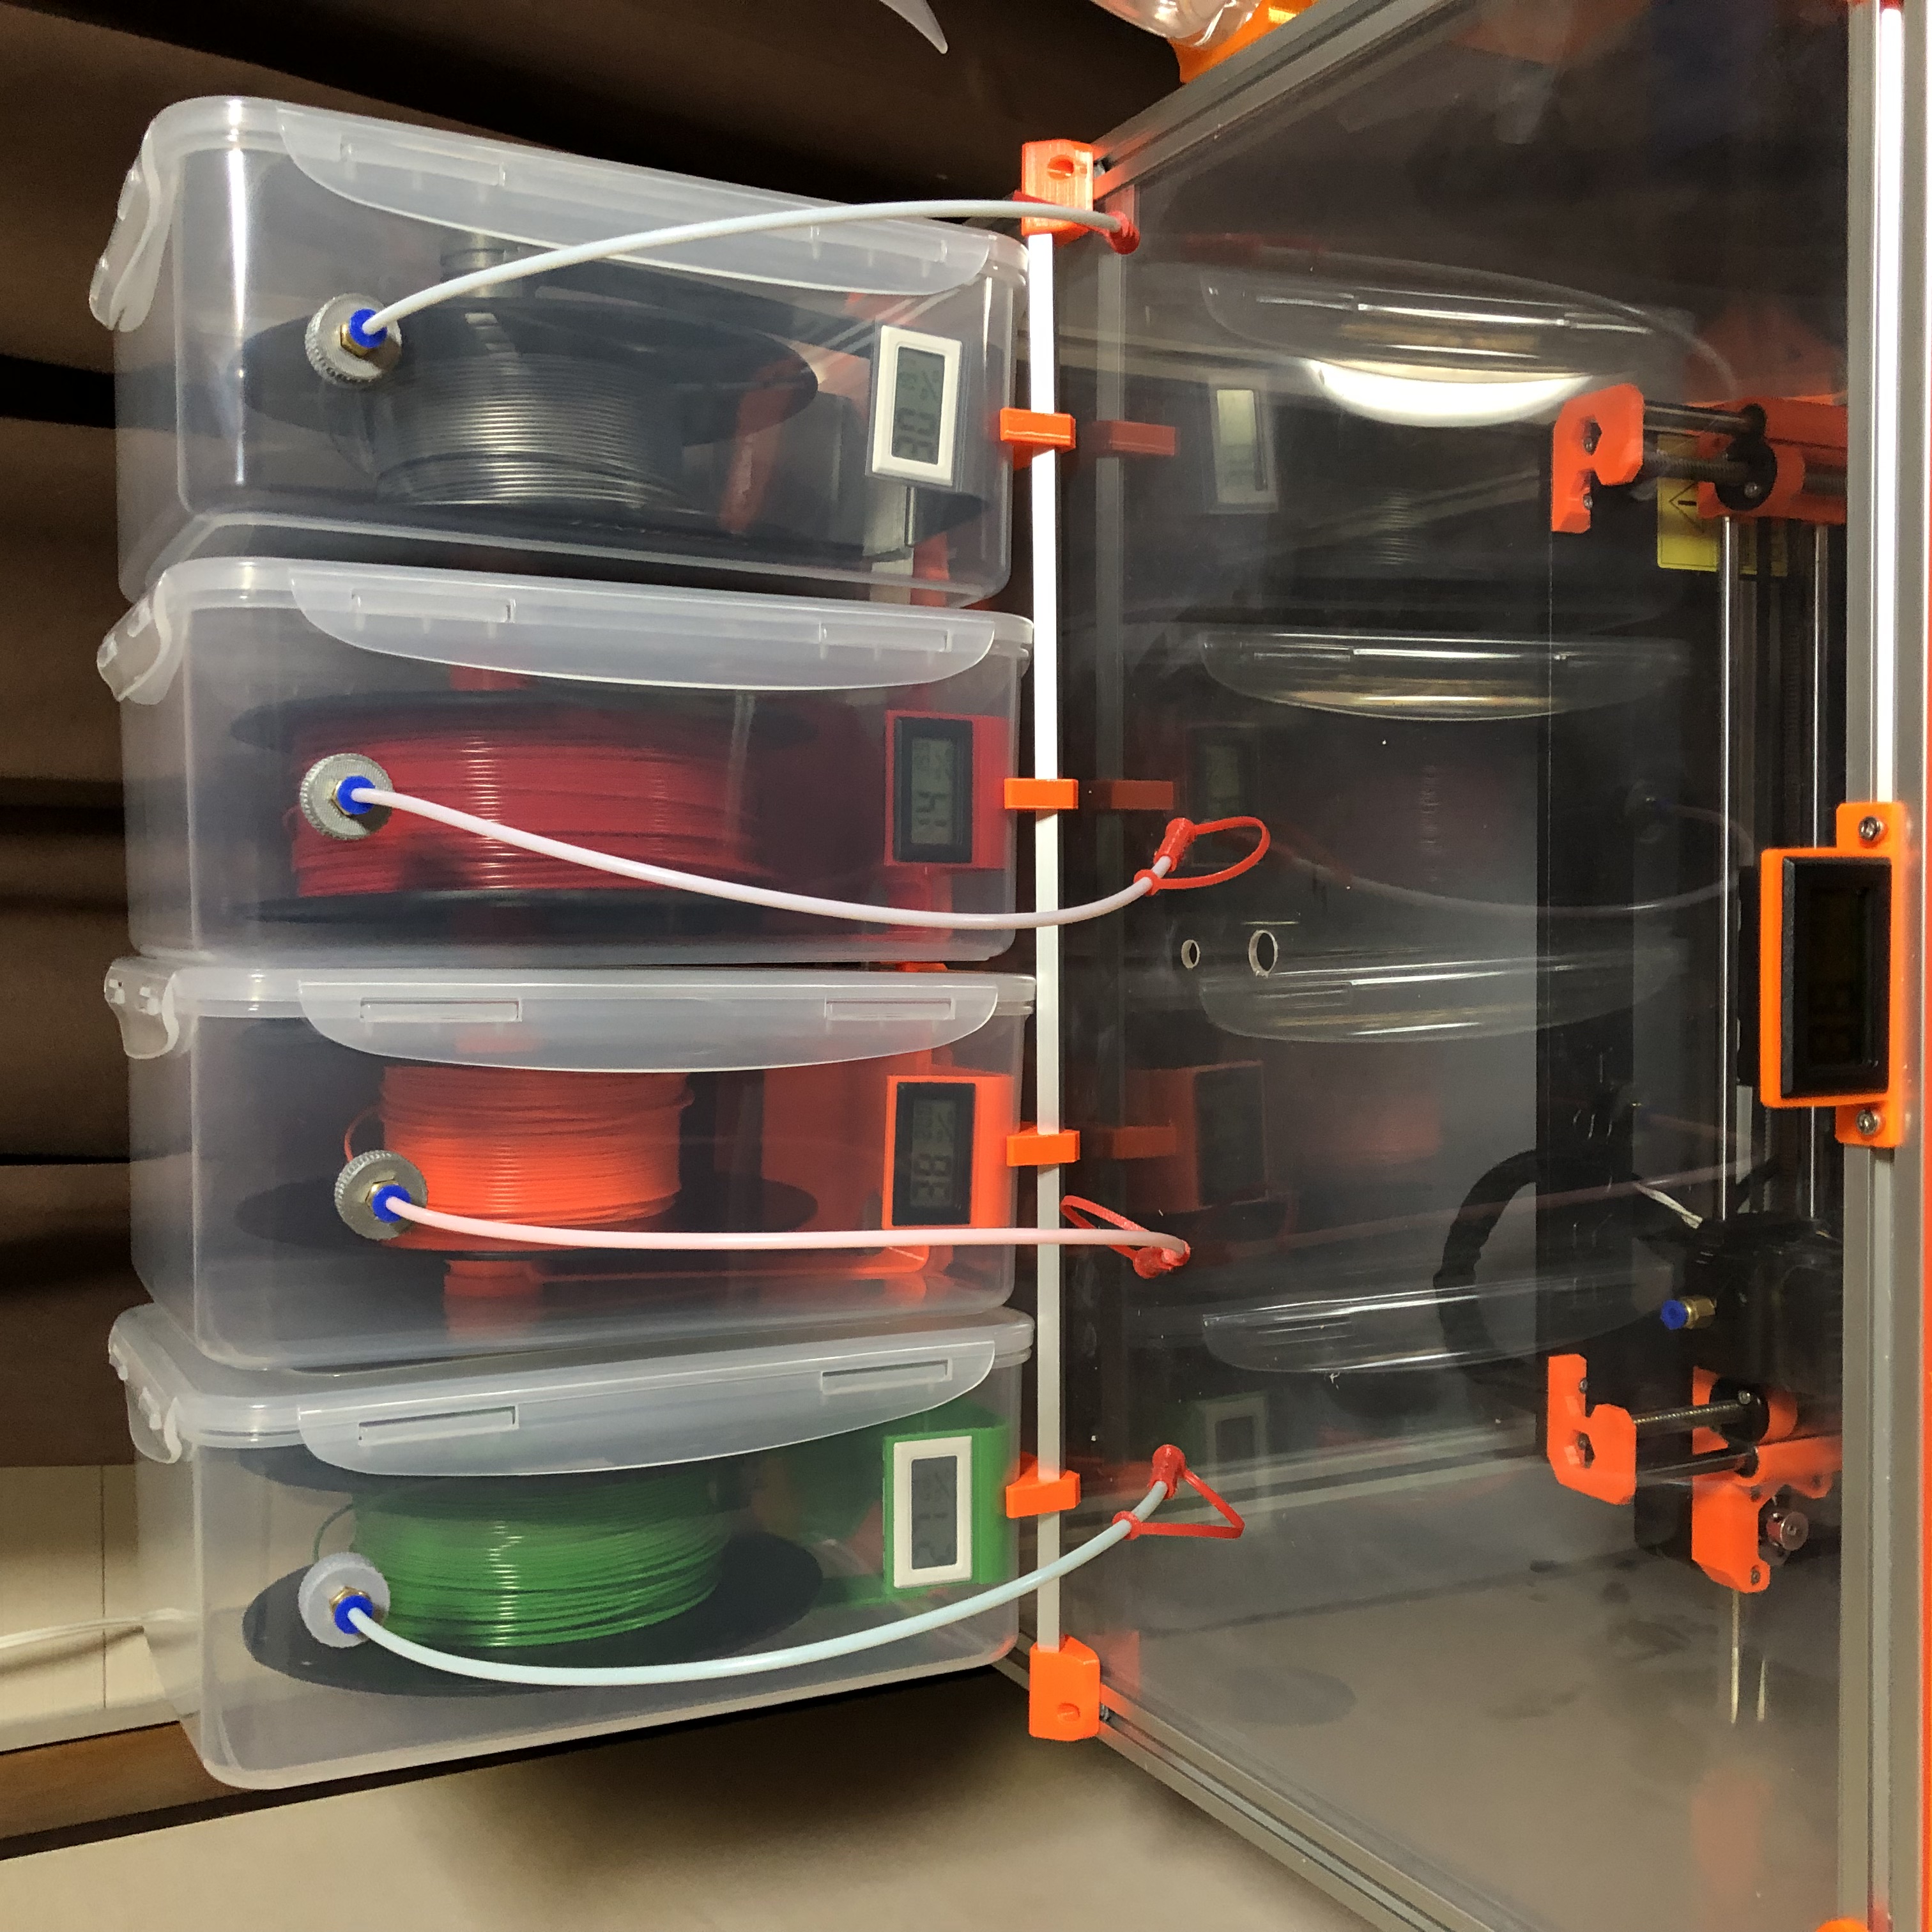
Two "back rod holders" are attached to the back of the enclosure and one "side rod holder" is attached to each side to secure it.
筐体の後ろ側に「back rod holder」を二つ、両脇に「side rod holder」をそれぞれ一つ取り付けて固定しています。


Parameters

A spool on the CAD is prepared for interference check.
CAD上のスプールは干渉チェック用に用意したものです。
