
Display Turntable
Obliczymy ostateczną cenę na podstawie wybranego pliku. Sprawdzisz ją i zaakceptujesz przed płatnością.
Orientacyjna cena wydruku pliku
0,17 € – 0,21 € netto (bez VAT)
Dla pliku: Display Turntable_pinion.gcode
To wstępna wycena jednego pliku. Dokładną cenę poznasz przed zamówieniem.
Plik i założenia wyceny
Plik użyty do wyceny
Średnia wycena orientacyjna: 0,19 € netto (środek widełek).
- Masa podana przez autora
- 1 g
- Czas druku podany przez autora
- 15,6 min
- Materiał u źródła
- PLA
- Materiał wyceny
- PLA
- Drukarka wyceny
- Bambu Lab P1S - 0.4 nozzle
- Proces wyceny
- 0.20mm Standard
Orientacyjna wycena wyłącznie wybranego pliku, oparta na masie i czasie druku podanych przez autora. Warianty plików nie są sumowane. Ostateczna cena zostanie obliczona po analizie pliku.
Zapisane na tym urządzeniu.

This "revolutionary" turntable is great for displaying 3D prints and it comes in at under $25!
- Ocena
- 0 / 5
- Polubienia
- 74
- Pobrania
- 273
- Wydruki
- 1
- Wyświetlenia
- 2705
- Oceny
- 0
Aktualizacja u źródła:
Informacje o modelu
- Źródło
- Printables
- Kategoria
- Photo & Video
- Licencja
- Creative Commons — Attribution — Noncommercial — Share Alike
Overview
This display turntable is really easy and cheap to print and assemble. It's great for displaying 3D prints!
All 3D printed parts were designed in OnShape and the rest of the BoM is as follows:
- Gardner Bender Rocker Switch GSW-41
- Geared DC Motor 130 3V-12V - for DIY Car and Robot Projects
- Note: remove the plastic strap holding the motor to the plastic housing - glue the motor to the housing instead
- 9 VDC battery
- 9 VDC battery clip connector (with wire leads)
- Zip-ties
- I used some spares from the Prusa kit
- Nice Ball Bearing SRM043205BF18
- I used McMaster Carr PN 6383K22
You'll also need a soldering iron and solder.
Printing
I printed everything in PLA on the Prusa i3 MK3. I've included the original STLs and g-code for all parts.
If you re-slice, I recommend just applying “support on build plate only” and orient the parts similar to the provided g-code. Note that the base will need to have supports disabled near the switch, as shown below.
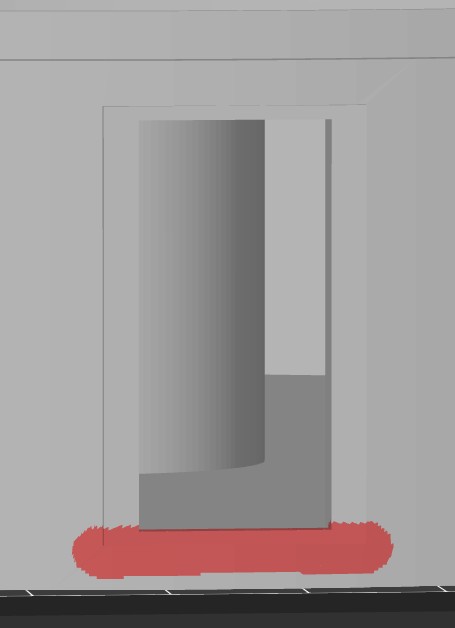
When assembling, I recommend filing or sanding down the tab on the battery cover (opposite the clip) a bit. I also sanded the post on the top a bit to help the gear mesh a little cleaner.
Please like it if you do and leave any comments! If you're really feeling generous please consider buying me a coffee so I can keep creating!
Check out my TikTok!
Check out my YouTube!
If you like what you see, please consider joining my Patreon.