Adjustable dual z belt tensioner
Obliczymy ostateczną cenę na podstawie wybranego pliku. Sprawdzisz ją i zaakceptujesz przed płatnością.
Zapisane na tym urządzeniu.

adjustable z belt tensioner for 640mm closed belt on Ender3
- Ocena
- 5 / 5
- Polubienia
- 35
- Pobrania
- 118
- Wydruki
- 1
- Wyświetlenia
- 1441
- Oceny
- 1
Aktualizacja u źródła:
Informacje o modelu
- Źródło
- Printables
- Kategoria
- Other Printer Parts & Upgrades
- Licencja
- Creative Commons — Attribution — Share Alike
Converted my Ender3 to the dual z axis with 2 stepper motor in parallel, problem - there is a chance that the 2 motos get out of sync.
To prevent this I bought a 640 closed timing belt but needed an adjustable belt tensioner.
Needed materials :
- 3x M5x23mm screw (or larger)
- 3x M5 nut (preferable self locking)
- 3x M3x20mm screw
- 3x M3 T-nut (printed my ones)
- 3x GT2 20 teeth 6mm with 5mm bore idler pulley
- 2x GT2 20 teeth 6mm with 8mm bore
- 1x M4x20mm hexagon screw
- 1x M4 nut
Knob:
For the knob you can use whatever M4 knob you like, haven't designed an own one.
E.g. https://www.printables.com/model/365850-bq-hephestos-2-m4-bed-level-knob
Printing advise :
Printing orientation for the tensioner is shown below, only brim needed :

Preparing:
The assembly orientation is reversible, you can assembly the tensioner on top or below the upper aluminium profile. If you mount it below (like I did) you will loose round about 20mm of printing height.
Before tightening the z belt you should align your x axis and make sure that the gantry is perfectly horizontal, used this Z block design :
https://www.printables.com/model/337231-dual-z-axis-alignment-block/comments/709902

Assembly tipps:
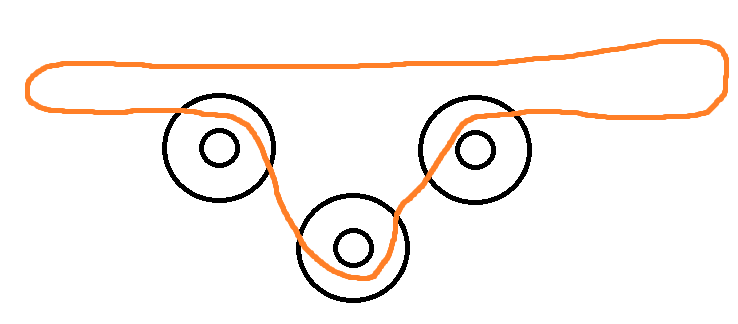
Below you can see the routing of the belt through the idler pulleys (sorry for bad painting skills). First insert the belt and the three pulleys into the tensioner, afterwards put the screws for fixing them in place. Do not forget to insert the haxagon screw to the pulley handler.
Next screw the assembly onto your frame and assemble the other two pulleys along with the belt to your z lead screws.
Fix everything in place and tension the belt, last step is to screw in the wormscrews at the pulleys on the lead screws.