
Infill-Based 7-inch / 45 RPM Adapters
Obliczymy ostateczną cenę na podstawie wybranego pliku. Sprawdzisz ją i zaakceptujesz przed płatnością.
Orientacyjna cena wydruku pliku
0,09 € – 0,12 € netto (bez VAT)
Dla pliku: 45RPM Adapter_infill_grid_0.25mm_PLA_MK3S_8m.gcode
To wstępna wycena jednego pliku. Dokładną cenę poznasz przed zamówieniem.
Plik i założenia wyceny
Plik użyty do wyceny
Średnia wycena orientacyjna: 0,11 € netto (środek widełek).
- Masa podana przez autora
- 1 g
- Czas druku podany przez autora
- 7,2 min
- Materiał u źródła
- PLA
- Materiał wyceny
- PLA
- Drukarka wyceny
- Bambu Lab P1S - 0.4 nozzle
- Proces wyceny
- 0.20mm Standard
Orientacyjna wycena wyłącznie wybranego pliku, oparta na masie i czasie druku podanych przez autora. Warianty plików nie są sumowane. Ostateczna cena zostanie obliczona po analizie pliku.
Zapisane na tym urządzeniu.

A few simple and attractive 7 inch vinyl record adapters made in-slicer with infill patterns.
- Ocena
- 0 / 5
- Polubienia
- 6
- Pobrania
- 37
- Wydruki
- 0
- Wyświetlenia
- 231
- Oceny
- 0
Aktualizacja u źródła:
Informacje o modelu
- Źródło
- Printables
- Kategoria
- Audio
- Licencja
- Creative Commons — Public Domain
Some quick and easy 7-inch record centre adapters, all done in-slicer. A workable concept.
These were made with the same principle used in an earlier project of mine for infill-divided battery holders - this time with the centred gap of the shape infill adjusted as precisely as reasonably possible to fit a turntable spindle.
If there's any run-out on these then I'm sure it's easily within tolerance of what any record player can handle.
Four infill variations:
- Honeycomb - Good strength, looks good, longest print time.
- Triangles - light and quick. Centre hole is the most flexible (may be a good or bad thing.)
- Stars - heaviest and strongest.
- Grid - lightest but a bit squashy.
Adjustments
I have tested and adjusted all of these examples on my own turntable and adjusted the infill as necessary to get a good fit, but in case you find the fit is a little off on your first try:
- For spindle: Try adjusting the flow rate for a thicker or thinner extrusion. 120% is a good start for tightening the fit. Note that this will also widen the outer diameter as well, so take note from point 2 below to estimate compensation.
- For record: Measure the record hole inner diameter and the print's outer diameter with calipers and enter half of the difference into “XY Size Compensation” to shrink or grow the outer diameter.

Alternatively, If the infill width or part geometry in the slicer is modified to adjust fit then you will have to check the gcode preview and take care to make sure the spindle hole is properly centred (to sub-millimetre precision) - move the chosen object's part called “infill adjuster” to change the infill position. Also make sure the part “Spindle guide” is raised slightly so it shows in the gcode. (lower this back before print.) Also make sure your view is straight over top so you are seeing the positioning between the infill pattern and spindle guide accurately.
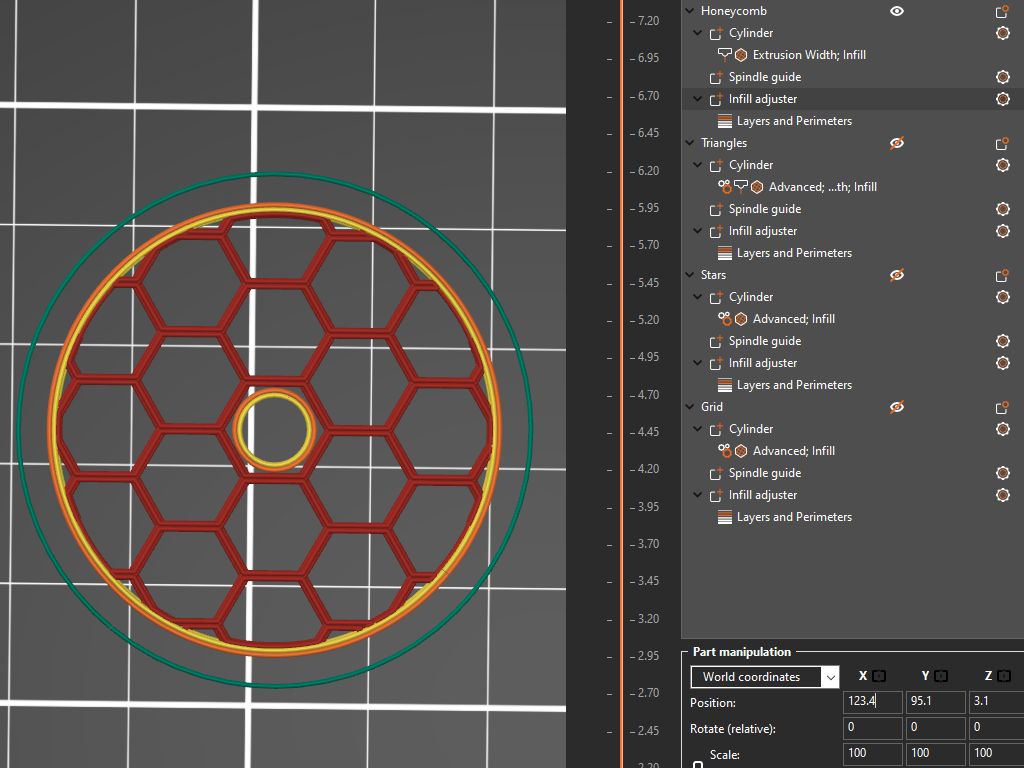
In short, this is fiddly! I think flow rate and XY size compensation are a lot less hassle.
But these are open to whatever modifications you might want to make, so go ahead and try something new. One such addition can be changing the spindle guide to a negative volume to create a round hole with perimeters and then using a different infill that would not be possible to create a reliable centre hole with before, such as gyroid.