
MMU Printing for Any Printer: Creating the Stone Award
Obliczymy ostateczną cenę na podstawie wybranego pliku. Sprawdzisz ją i zaakceptujesz przed płatnością.
Zapisane na tym urządzeniu.

How to Achieve Multi-Color Printing on a Single Layer with PrusaSlicer's Manual MMU
- Ocena
- 0 / 5
- Polubienia
- 24
- Pobrania
- 107
- Wydruki
- 0
- Wyświetlenia
- 1843
- Oceny
- 0
Aktualizacja u źródła:
Informacje o modelu
- Źródło
- Printables
- Kategoria
- Sculptures
- Licencja
- Creative Commons — Attribution
Print settings at the end of wall of text.
---
Have you ever wanted to print multiple colors on a print bed to a single layer, also known as MMU printing? Well, PrusaSlicer allows this via manual MMU. I will show you how to apply this method to any kind of logos or images using a single extruder printer and PrusaSlicer.
For this tutorial, I used an Ender 3 S1 to print this Stone award. In the end MMU is just as simple as doing normal color changes, but this technic only focuses on first two layers of printing.

Result: multi-colored model on the same bed layer using single extruder.
// Setting up multiple extruders (virtual extruders)
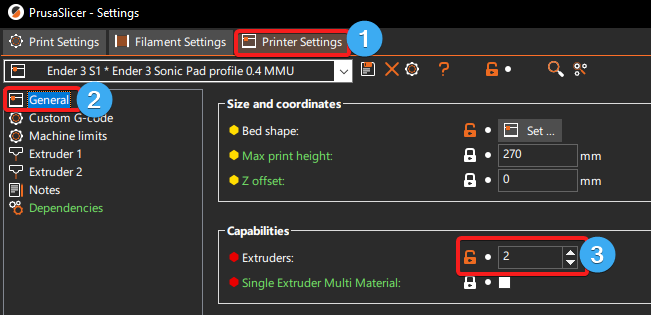
- Go to Printer settings tab
- Select General
- Add 1 more extruders for dual color printing, you can add more for more complicated colors
Next

- In printer settings
- Click Custom G-code
- add M600 to tool change G-code; M600 command is print pause
Next
- ensure that settings are exactly the same in Extruder 1 & Extruder 2 sections
Multicolor printing is now available!
-----
// Setting up model using .stl
If you want to add your own text using the new PS 2.6 text tool, follow these steps:
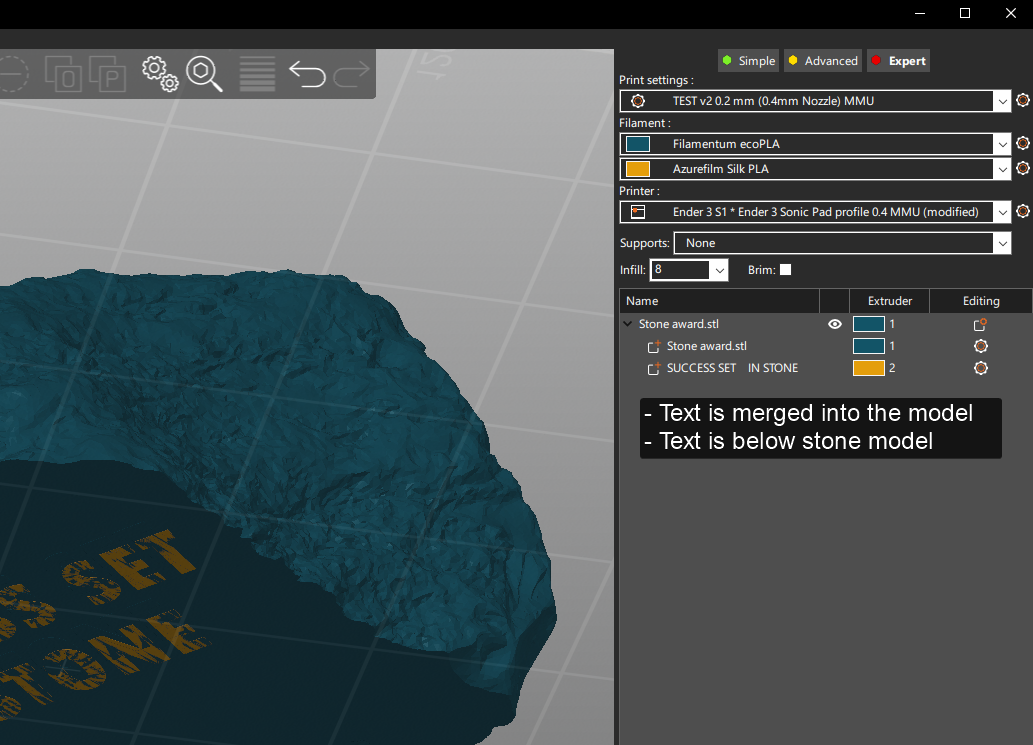
- Load the .stl file
- For your own text, right-click the model and add part → text
- Text must be below the model in parts section
- Select the extruder colors for the stone and text from a dropdown. The default is 1.
- Important: Set the text height to 0.4mm if you are using a 0.2mm layer height. This needs to be 2 layers high for simple color changes.
- Sometimes it's kind of hard to select the text when it's under the print bed. Click text layer then press shortcut T to open text menu.
- Don't forget to click the little icon to drop to the bed (if its available).

Font used: Tw Cen MT Font : Download Free for Desktop & Webfont
// Setting up model using .3mf
To set up the model using a .3mf file, follow these steps:
- Load the .3mf file
- Import this as a geometry only so it doesn't change your printer settings.
- Set filament 1 and 2 of your choosing.
- Slice.
// Fine-tuning text appearance for slicing

To get the most crisp text flat on the bed, we need to angle the model correctly. The text must be angled 45 degrees to get straight lines on the font. The Stone award model is already angled for this. Slice the file to check how it's going to print the text.
- In the Print settings, change the print bottom fill pattern to Monotonic.
// Filament choices and troubleshooting
- For some unknown reason, PrusaSlicer fails to print two different colors if they are not similar to each other.
- I wanted to print stone with normal PLA and text with Silk PLA and when printing, after the final color change from Silk to normal PLA - printing failed!
- After troubleshooting, it looks like this is related to filament temperature. The PLA was printed at 205°C and Silk at 225°C. Going from high temp to low temp failed my print.
This is easily avoidable. Everything printed fine when I just selected two normal PLAs. When swapping to Silk, I increased the temperature from 205°C to 225°C and back down to 205°C
// Printing with manual MMU
In essence, doing dual color text is two color swaps. No wipe towers required.
- After first purge line, printer pauses because there is “tool change”, just continue the print
- What happens is the printer does first color of Stone award → pauses → swap to different color → continues first & second layer of the text.
- In my case i have Klipper installed and can easily extrude second color before continuing the print, I'm not familiar how Prusa machines does extruding during pause.
- You can check what color comes next in PrusaSlicer, go down to first layer and use timeline to see whats the next color. Checking this is pretty important when doing more than 2 colors. Do this again for second layer.

// Tips to get clean prints
Level your bed!
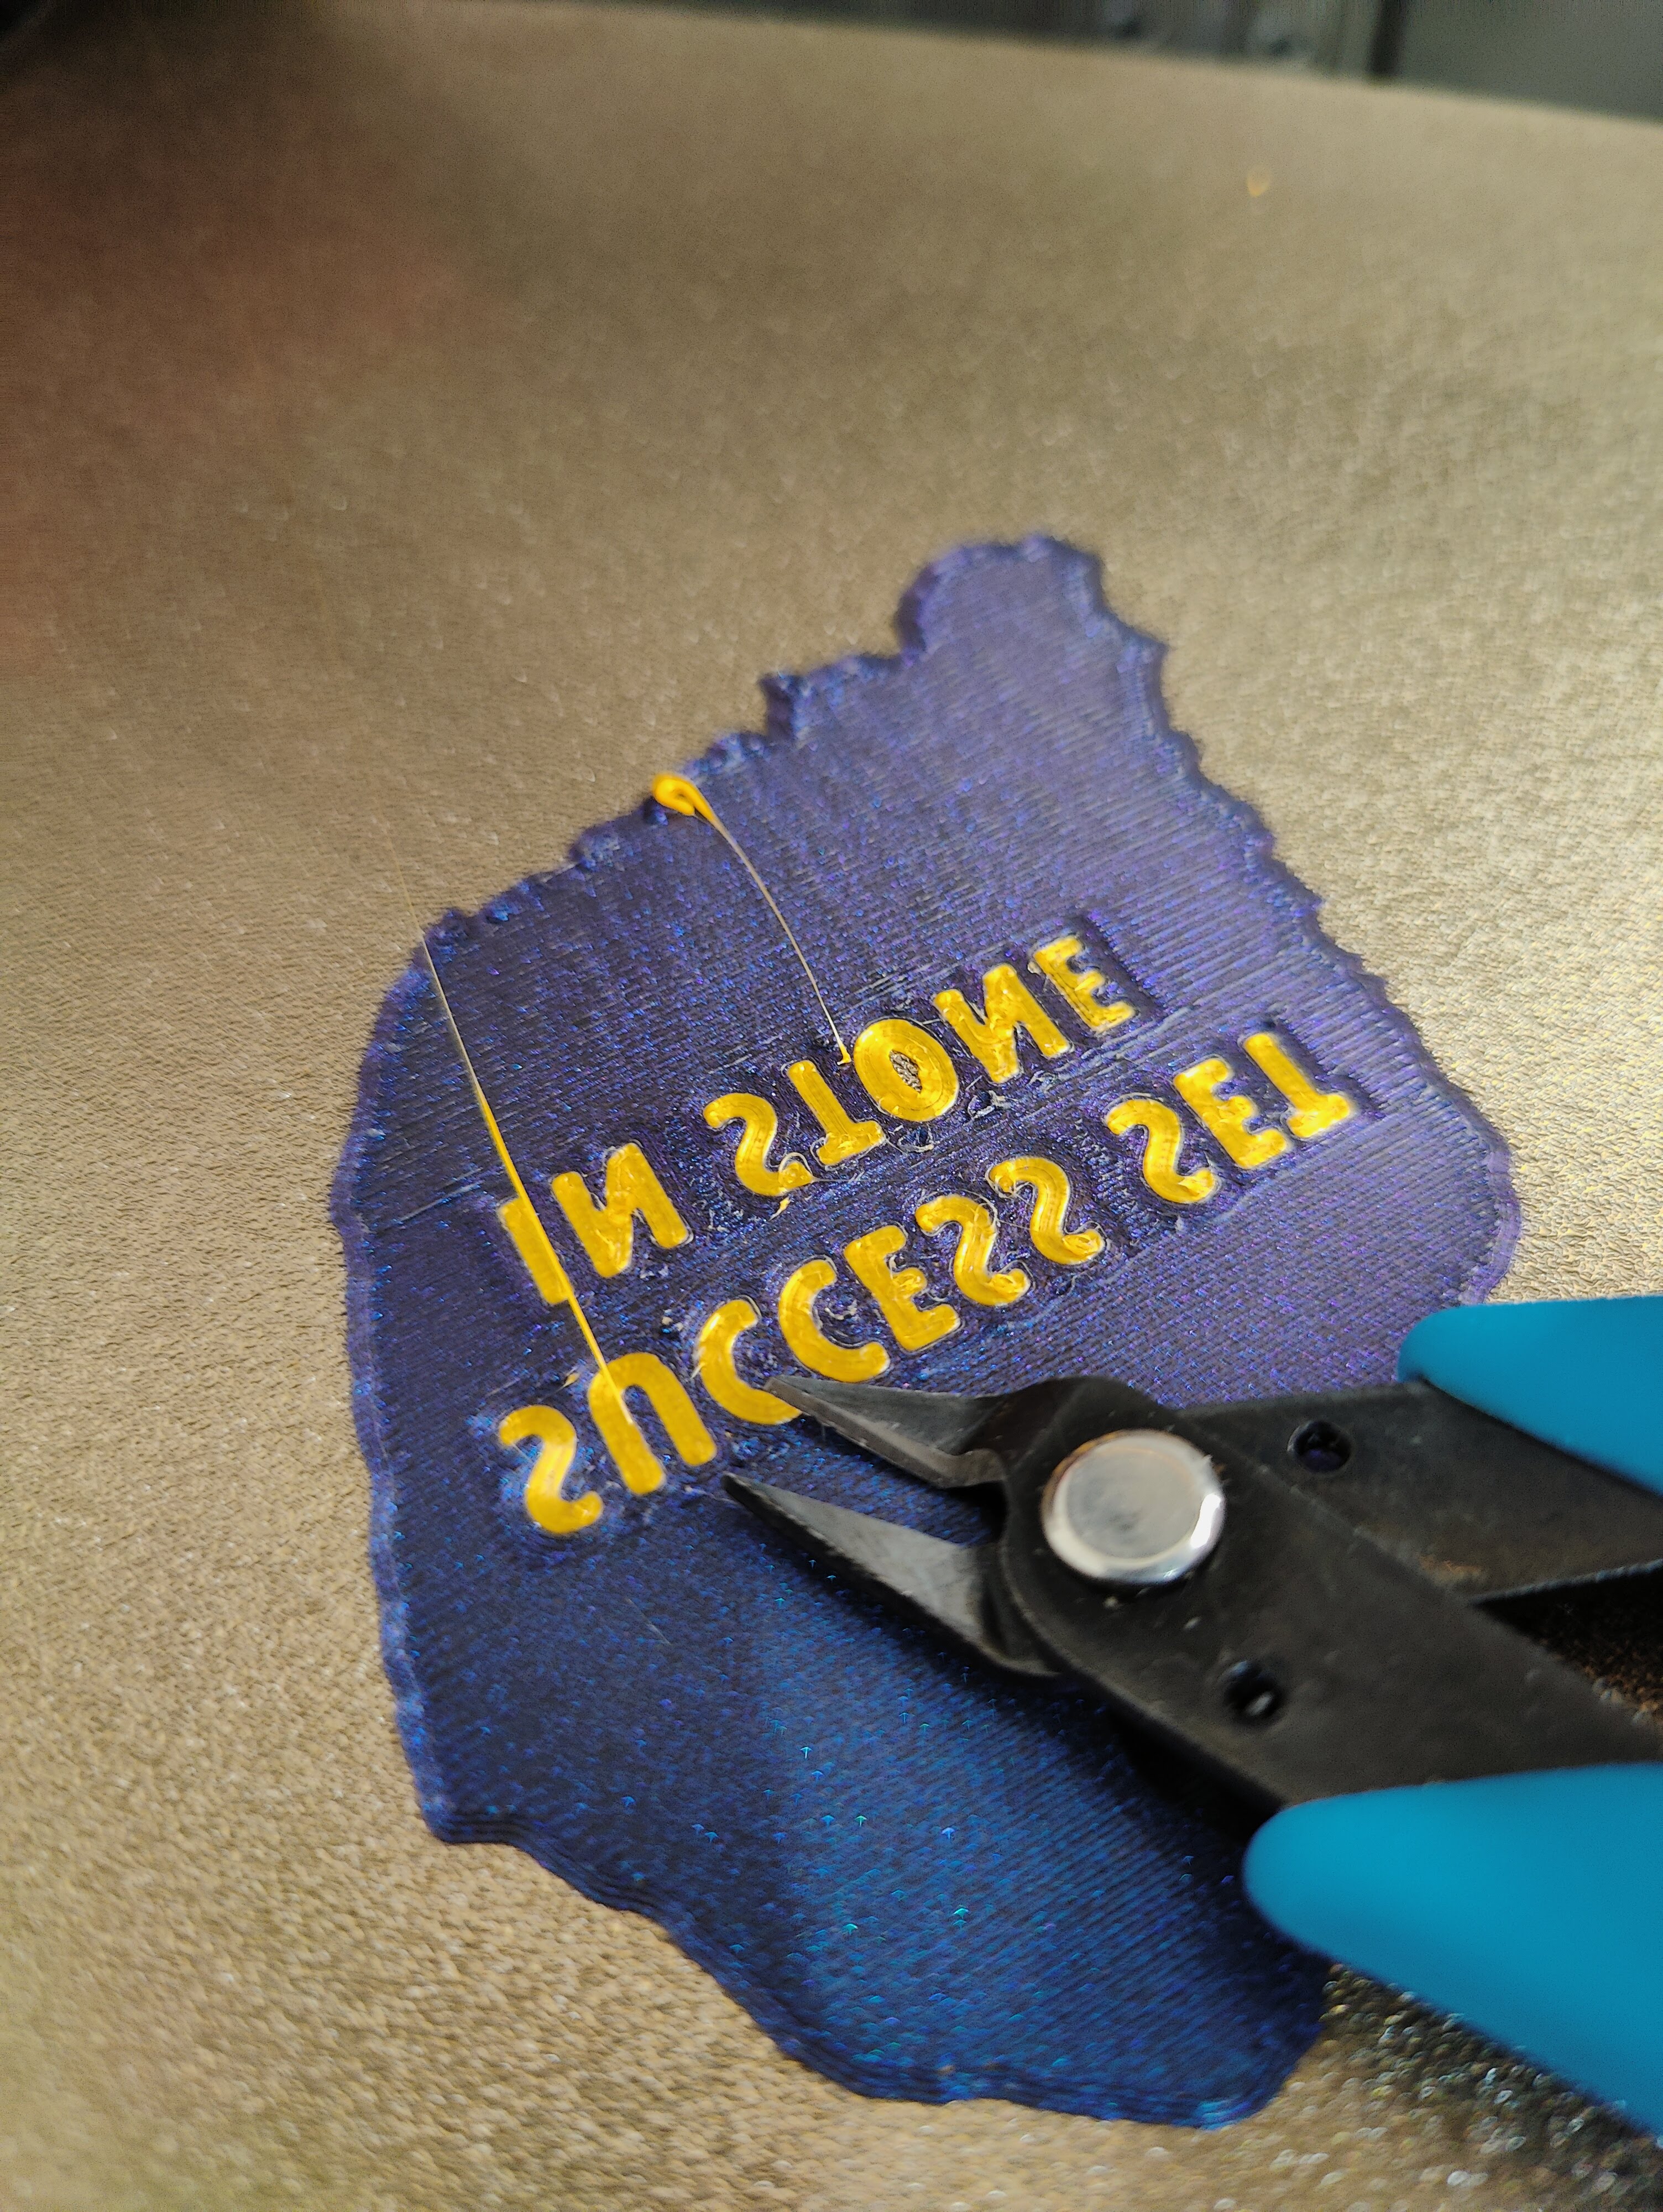
After first color, printer leaves string of filament, cut this with sidecutters

PrusaSlicer does small unretract when starting to print text, its small blob that goes somewhere. After text is printed, cut the filament string and remove blob
// Print settings
- 0.2mm layer high
- 3 walls
- Seam position: random - gives best result
- Check - avoid crossing curled overhangs
- Check - Dynamic overhang speed
- Supports: none
- There is pretty steep overhang, but mine did print well at 100% scale. Might require supports if you don't have custom cooling.
- 8% gyroid infill (if you want heavier then just increase this)
- Text 11mm high, 0.4mm depth. Font used
30g , 100mm tall
Filament used
- Stone - Fillamentum Wizard's Voodoo
- Text - AzureFilm Silk Flame Orange
Scales well and by doing so allows to add even more text.
Text quotes available in .3mf
Success set in stone
You are my rock
TLDR;
Virtual extruders, uses M600 pause as tool change and thus allowing doing multiple colors on a single layer.