
2013 Harold the Helicopter
Obliczymy ostateczną cenę na podstawie wybranego pliku. Sprawdzisz ją i zaakceptujesz przed płatnością.
Zapisane na tym urządzeniu.
This is the 2013 redesign of the Harold helicopter by Mattel.
- Ocena
- 5 / 5
- Polubienia
- 12
- Pobrania
- 113
- Wydruki
- 1
- Wyświetlenia
- 918
- Oceny
- 1
Aktualizacja u źródła:
Informacje o modelu
- Źródło
- Printables
- Kategoria
- Vehicles
- Licencja
- Creative Commons — Attribution — Noncommercial — Share Alike
Other helicopters in the series:
Thomas Wooden Railway Wiki lists this helicopter as a 2013 model. In one of the pictures below you will see a Mattel logo and the year 2012. I will go with the Wiki, perhaps the helicopter hit the stores in 2013. It features a more grown-up design, and I can see the beauty in it. Unfortunately, the helicopter is hard to repair at home due to the way it was put together (it was hot-pressed and glued), and the original plastic parts are thin and prone to breakage.
Making a new 2013 Harold Helicopter
The helicopter consists of four parts: Body, Tail, Skids, and Propeller. They attach using #6 pan head and flat head screws. Read the description for the suggested screw type and length. Stainless steel screws (18-8) are my favorite. You should have no problem sourcing these from a hardware store.
| File Name | Description |
| 2013 Body (Mod Fillet PinHoles12).stl | This is the recommended body. Print it on a side, and enable automatic supports. They will support the fillet around the body and two large pin holes for the tail. However, make sure to delete supports for the five smaller screw holes: one on top for the propeller, one for the tail, and three holes under the body for the skids and an optional magnet. |
| 2013 Body (+Tail) | If your child likes to hold the helicopter in the mouth by the tail, you might want this version of the body. It has an integrated tail without the fins. Print it on a side, and enable automatic supports to support the fillet around the body. Then, delete supports for all four screw holes: one on top and three on the bottom. |
| 2013 Tail (Mod Normal Deep Pins12 Solid Top Side Narrow).stl | This is the recommended tail. It is designed to be attached to the body with a 1" long #6 pan head screw. Print the tail on its “tail”, with pins pointing up. You can enable automatic supports, but the only thing that needs support is the deeply sunk hole for the head of the screw. |
| 2013 Plug (Short).stl | The tail above has a deeply sunk hole for the screw. If you do not like the look, you can plug this hole once the tail is attached to the body. Be aware, however, that taking the plug out will require drilling it out. The plug is small. I recommend printing x4 at once to avoid overheating and enabling a one layer brim, so not to knock the plugs off of the build plate. |
| 2013 Skids (Mod 2013 Normal Solid NoMag).stl | Recommended skids with solid runners. Print in a natural position with runners on the build plate. Enable automatic supports to support the platform. Attach to the helicopter body with two ½" long #6 flat head screws. |
| 2013 Prop (Mod XThin Sunk).stl | A extra thin version of the propeller. It is about the same thickness as the original 2013 model. Print with the flat side on the build plate. The screw hole is sunk, like the original, and requires supports. Attach to the body with ¾" or 1" long #6 pan head screw. |
| 2013 Prop (Mod Thin Sunk).stl | This propeller has about the same thickness as the 1993/1994 Harold. I like it better. Same printing/installation instructions as above. |
| 2013 Prop (Mod Thick Sunk).stl | A thicker version of the propeller. I think I like it too. Same printing/installation instructions as above. |
Repairing a wooden 2013 Harold Helicopter
The 2013 version of the helicopter is not the easiest to repair. The propeller and the skids are attached with ringed nails that are hot-pressed into a plastic stem.


To take this version of Harold apart, hold the propeller with pliers and cut the 2.5 mm metal nail with a mini hack saw or side cutters.
Now you can take out the skids and the entire construction becomes apparent.
I cleaned up the already broken tail with a utility knife. You can see that the two tail pins remained inside the body. This can be quite alright, depending on which new version of the tail you will put.
What one takes for a magnet, is actually a 19 mm long nail with a dome head. The real magnet is the ring under it.

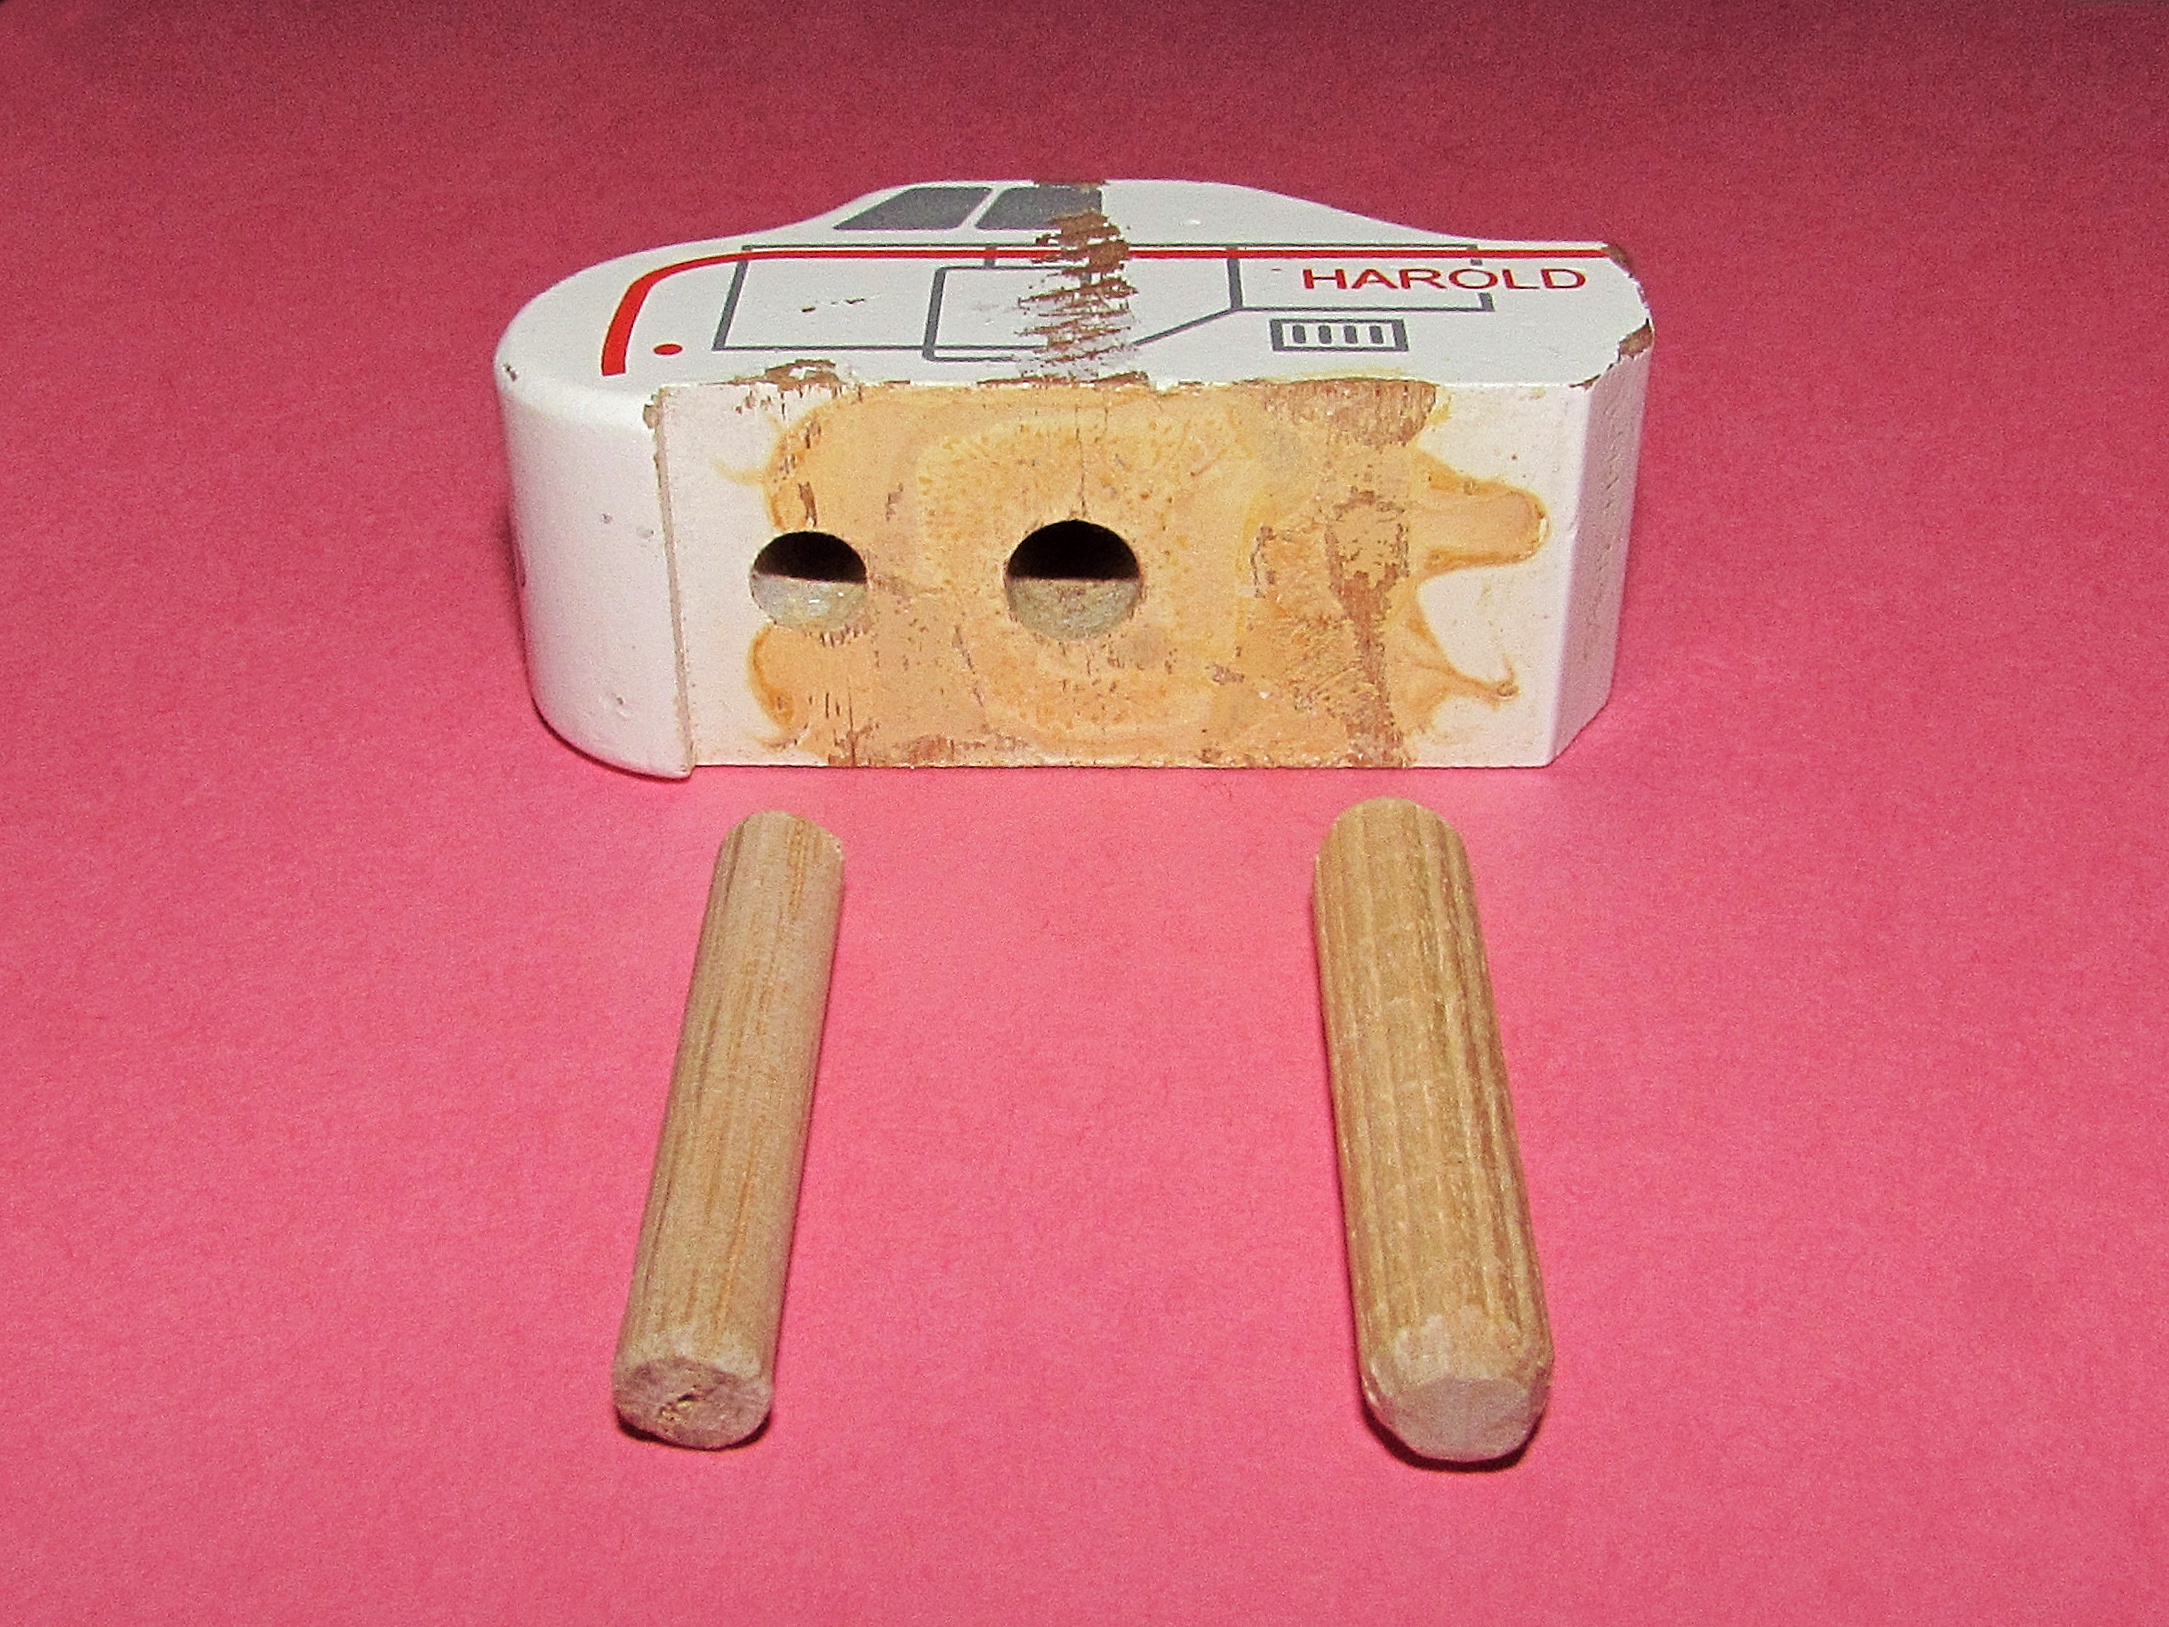

It would be hard to put back the helicopter the same way it was done at the factory. However, there are alternatives. My solution is to plug the holes in the body with wooden dowels. To be clear, there are two holes: one center hole, 7 mm in diameter that is drilled throughout the body. If you enlarge it with a 5/16" drill bit, you can glue a 5/16" dowel to plug it. The other is the front hole, it is blind and is 6 mm in diameter. If you enlarge it with a ¼" drill bit, it can be plugged with a ¼" wooden dowel.
Above you can see both holes plugged. I drilled a pilot hole in the center dowel before I glued it in. I used my Dowel Center Hole Jig to do that.
If you want to salvage the skids, do not plug the front hole, and only plug the center hole halfway from the top, so that the new 3D-printed propeller will have something to screw into. Cut the skid's center stem in the middle (this will preserve the magnet nail inside its bottom half) and put the skids back into the body of the helicopter. You can either glue them back or drill new holes and screw them into the body.
Or do like me and 3D-print the new skids. If you want to re-use the original magnet, make sure to print a special magnet-friendly version of the skids (the magnet has to be sunk 1 mm into the skid's platform). To liberate the magnet, you need to carefully cut along the skid's center stem with a Dremel or similar rotary tool, making sure to just cut the plastic and not the magnet nail inside it.
There are several options for the tail. I think I will recommend a version with a screw. This means that you cannot have tail pins 9 mm apart, like before: there will be no room for the screw in the middle. Either print a tail without the pins (it will rotate around the screw unless you glue it) or drill new pin holes 12 mm apart and use the same version of the tail I recommended for the new helicopter. If it sounds confusing, I suggest that you print different versions of the tail and see which one you like the best and how you will go about attaching it.
To help drill pilot holes in the tail use an appropriate template with the holes either 9 mm or 12 mm apart. Align the template with the helicopter's body tail section. Hold the template and the body with one hand, and use an awl or a 5/64" (2 mm) drill bit to make the pilot hole.
| File Name | Description |
| 2013 Tail (Mod Normal Deep NoPins Solid Top Sides Narrow).stl | The pin-less version of the tail. It is held by a 1" long #6 pan head screw. Print the tail on its “tail”, support the deeply sunk hole for the head of the screw. |
| 2013 Tail (Mod Normal None Pins9 Hollow Top Sides Narrow).stl | This is a version of the tale that resembles the original. It is hollow, has pins 9 mm apart, no screw hole. This tail can only be glued, like the original. Print the tail on its “tail” and enable supports. |
| 2013 Tail Template (Orig Pins9).stl | A template to help drilling pilot holes in the tail 9 mm apart. There is no center screw hole. |
| 2013 Tail Template (Mod Pins12).stl | A template to help drilling pilot holes in the tail 12 mm apart. There is also a center hole for the screw. |
| 2013 Skids (Mod 2013 Normal Magnet).stl | This version of the skids has 1 mm bottom dimple to install the original magnet. |
Original 2013 Helicopter Parts
Original parts may not be suitable for an FDM printer without soluble supports or may not work for other reasons. Here they are, however.
| File Name | Description |
| 2013 Body (Raw NoFillet).step | Raw wooden body, modelled in 3D. It has no fillets, no holes, and is in STEP file format for a CNC machine. |
| 2013 Body (Orig).stl | The original body with fillets and holes modelled in 3D. |
| 2013 Tail (Orig).stl | The original hollow tail. |
| 2013 Skids (Orig).stl | The original skids with a front searchlight. |
| 2013 Prop (Orig).stl | The original propeller, designed for a 2.5 mm diameter shaft. |