
ESP8266 D1 Mini case with perma-proto (small mint tin size)
Obliczymy ostateczną cenę na podstawie wybranego pliku. Sprawdzisz ją i zaakceptujesz przed płatnością.
Zapisane na tym urządzeniu.

Case for a small min tin size perma-proto board with pin headers for ESP8266 and 3 pin connector outlet.
- Ocena
- 0 / 5
- Polubienia
- 6
- Pobrania
- 61
- Wydruki
- 0
- Wyświetlenia
- 814
- Oceny
- 0
Aktualizacja u źródła:
Informacje o modelu
- Źródło
- Printables
- Kategoria
- Electronics
- Licencja
- Creative Commons — Attribution — Noncommercial — Share Alike
This is a small case for mounting an ESP8266 D1 Mini on a small Adafruit perma-proto small mint tin size board. The perma-proto is suitable smaller circuits. The case is high enough to fit the board with pin headers that typically come with the D1. A small hole allows for the onboard LED to be visible, e.g., for status indication. The base has grooves for two magnets (10mm x 6mm x 2mm) that are also easy to remove. Two M3 x 3mm threaded inserts go into the base to screw in M3 x 22mm screws through the lid, also holding the perma-proto and D1 board in place.
I use the case in particular to add a 3 pin angled pin header connector to connect an inductive sensor for reading a gas meter and a water meter. There is also a variant for a D1 Mini Pro with an external antenna in case wifi signal is a weaker.
I have also uploaded the FreeCAD model file to make it easy to remix, in particular, e.g., if you need it to host a different connector.
Assembly Instructions
1- Print parts and get pre-requisites
- Case print
- Lid print
- 2x threaded insert M3 x 3mm
- 2x M3 screw 22mm
- Optional: 2x magnet 10mm x 6mm x 2mm
- Adafruit Perma-proto Small Mint TinSize
- D1 Mini (ESP8266)

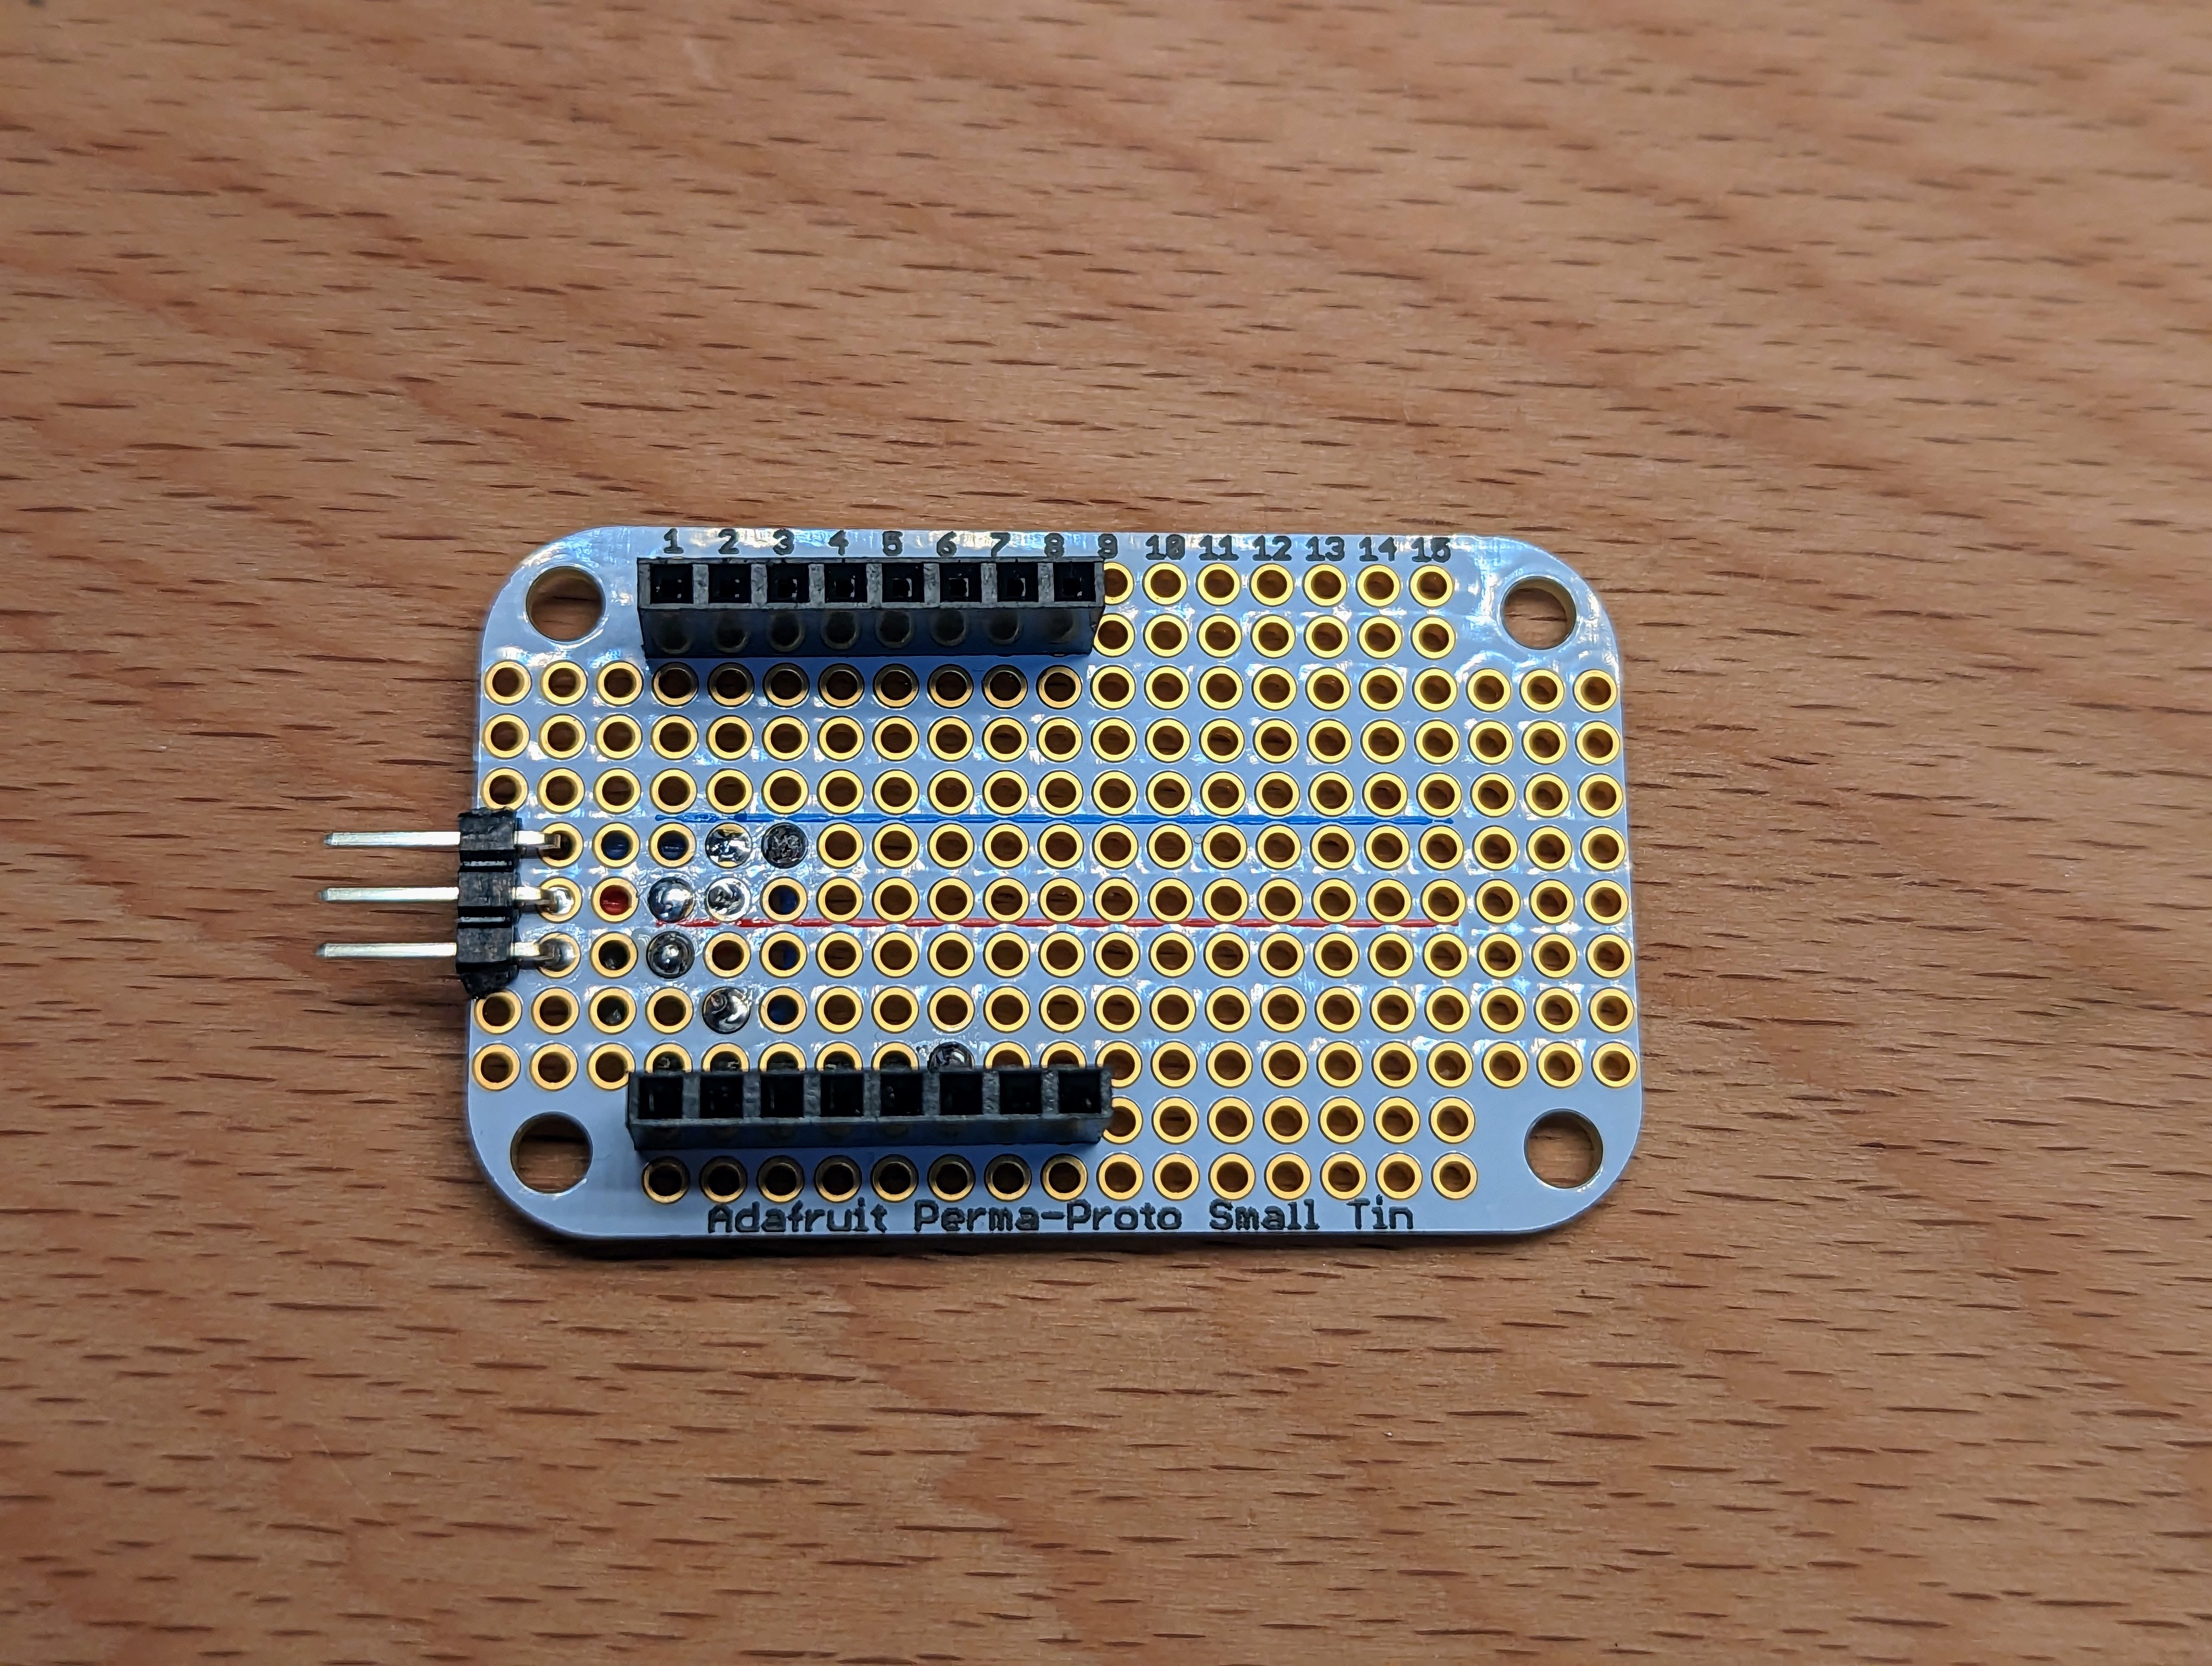
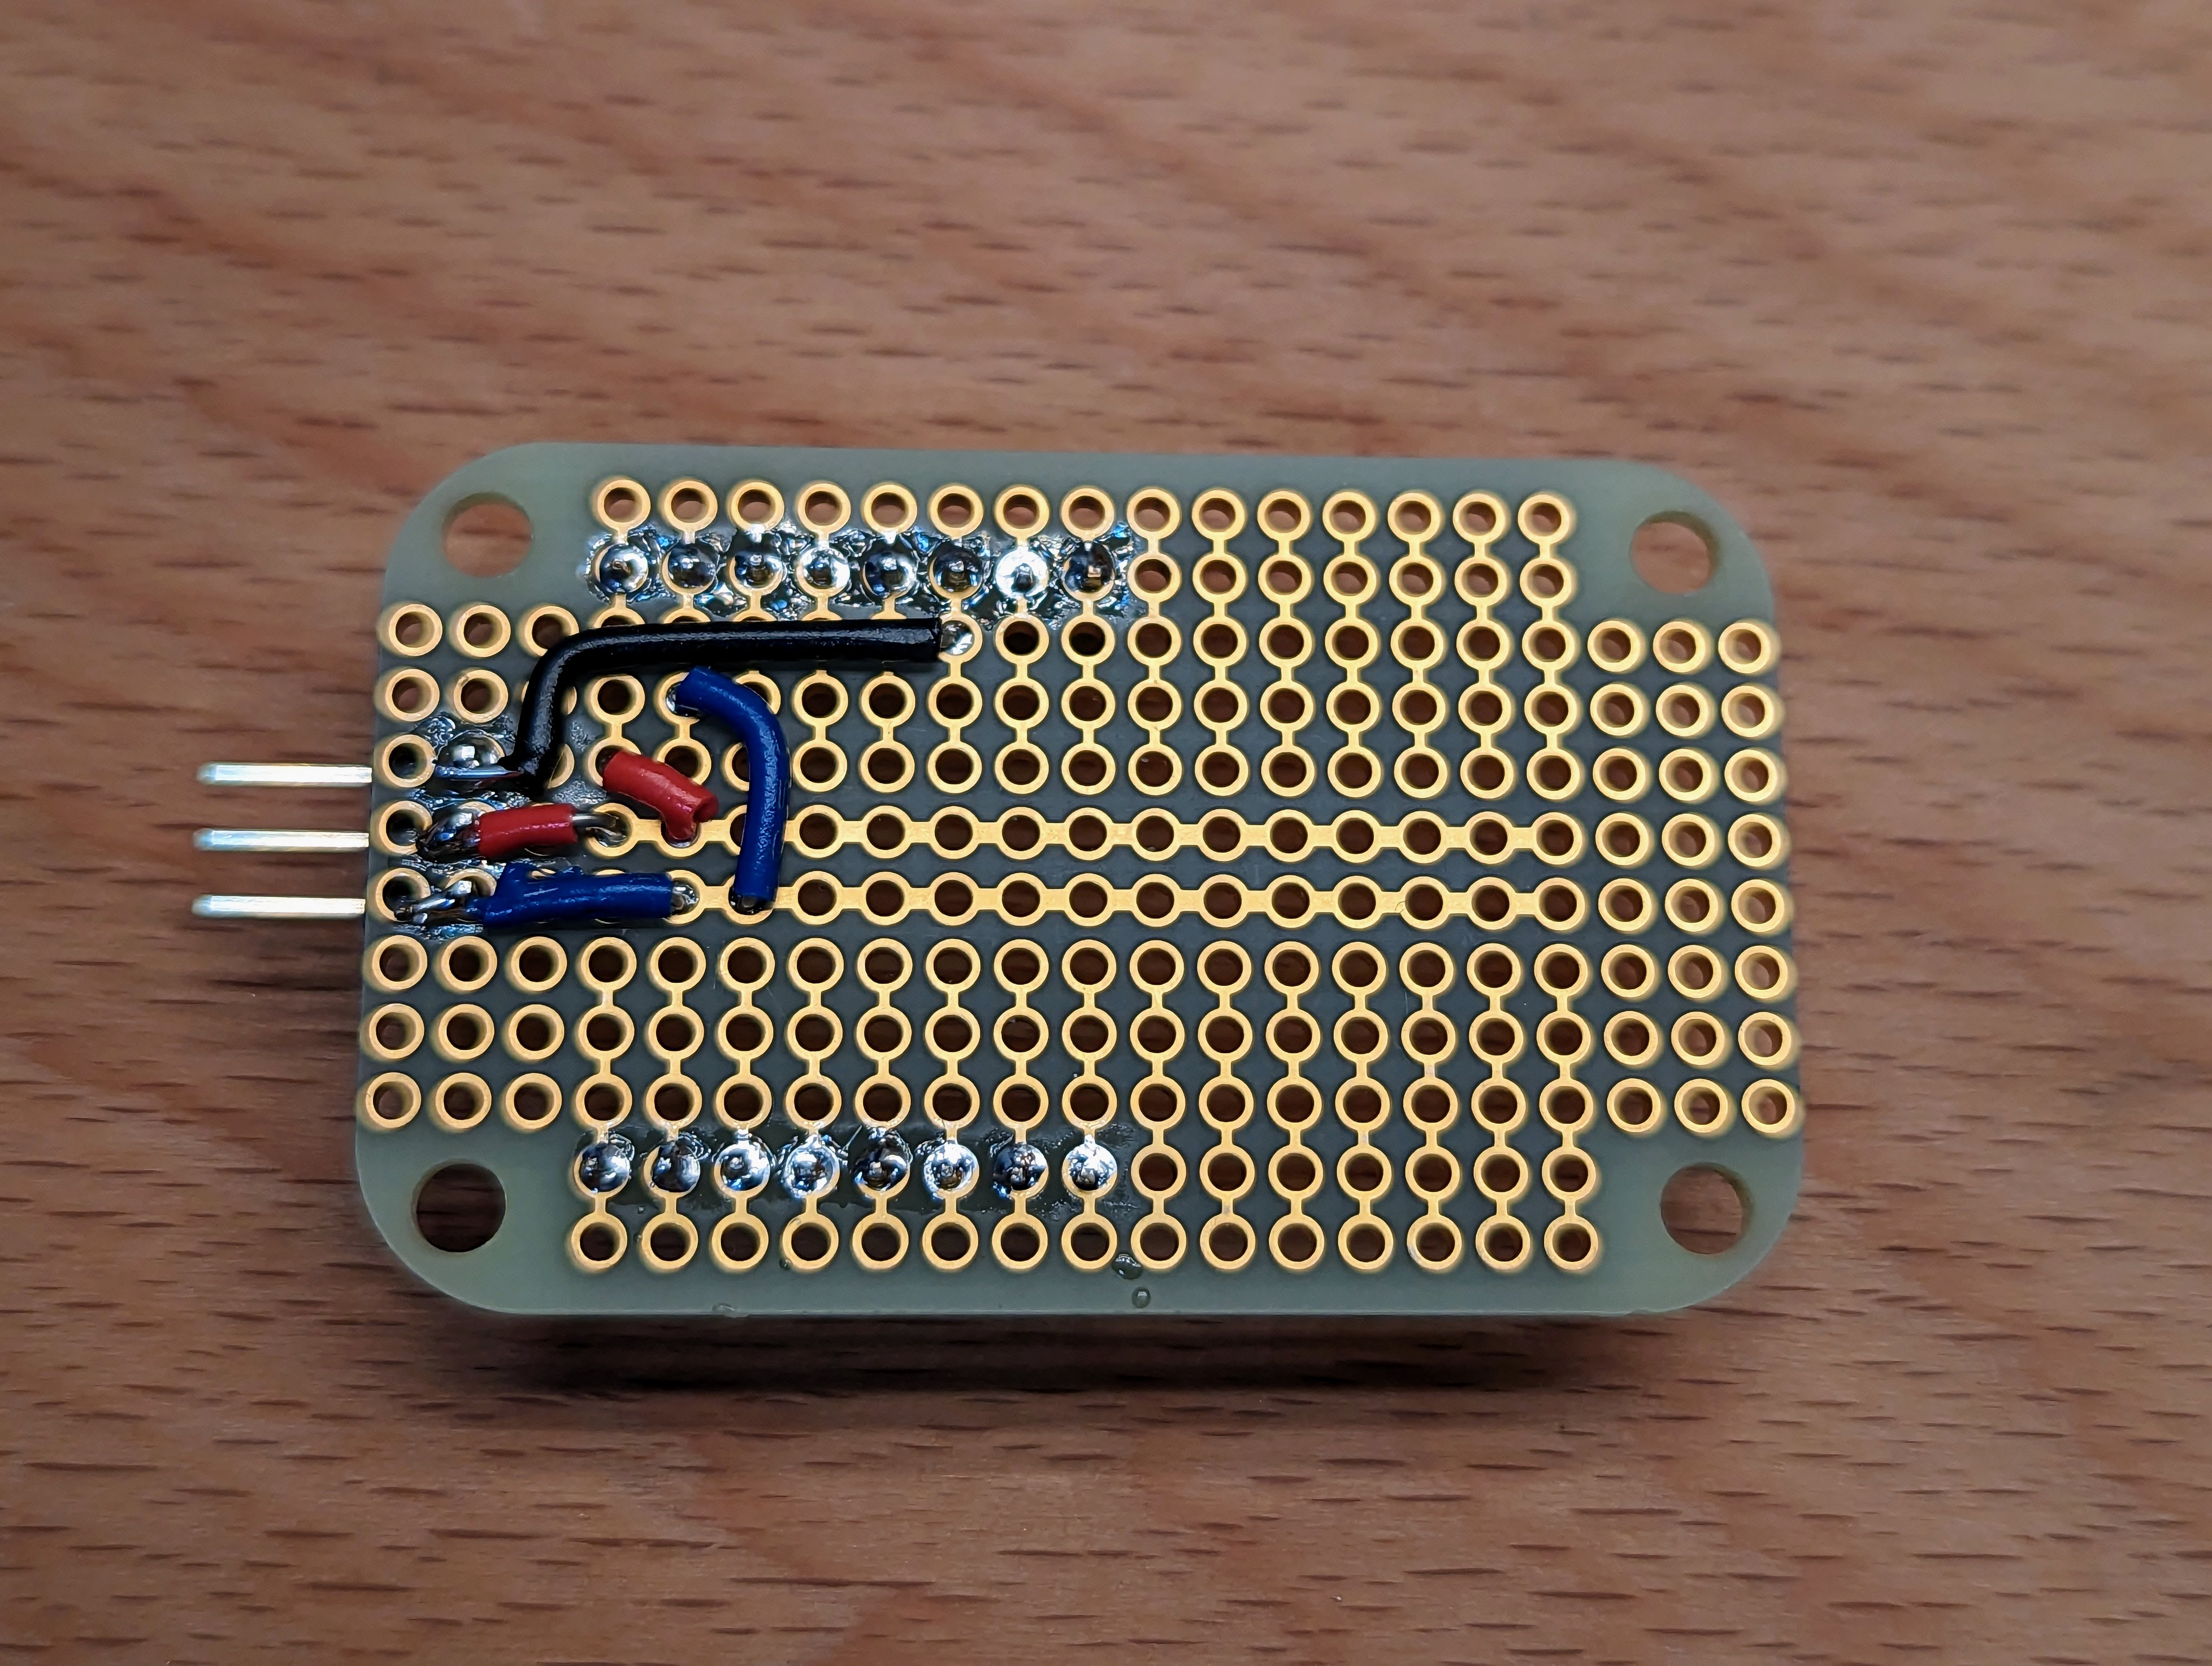
2- Solder board
Minimum is to solder the pin headers as shown. The connector is for three pins, connect to pins as needed obviously.
 |  |
3- Add threaded inserts and optionally magnets

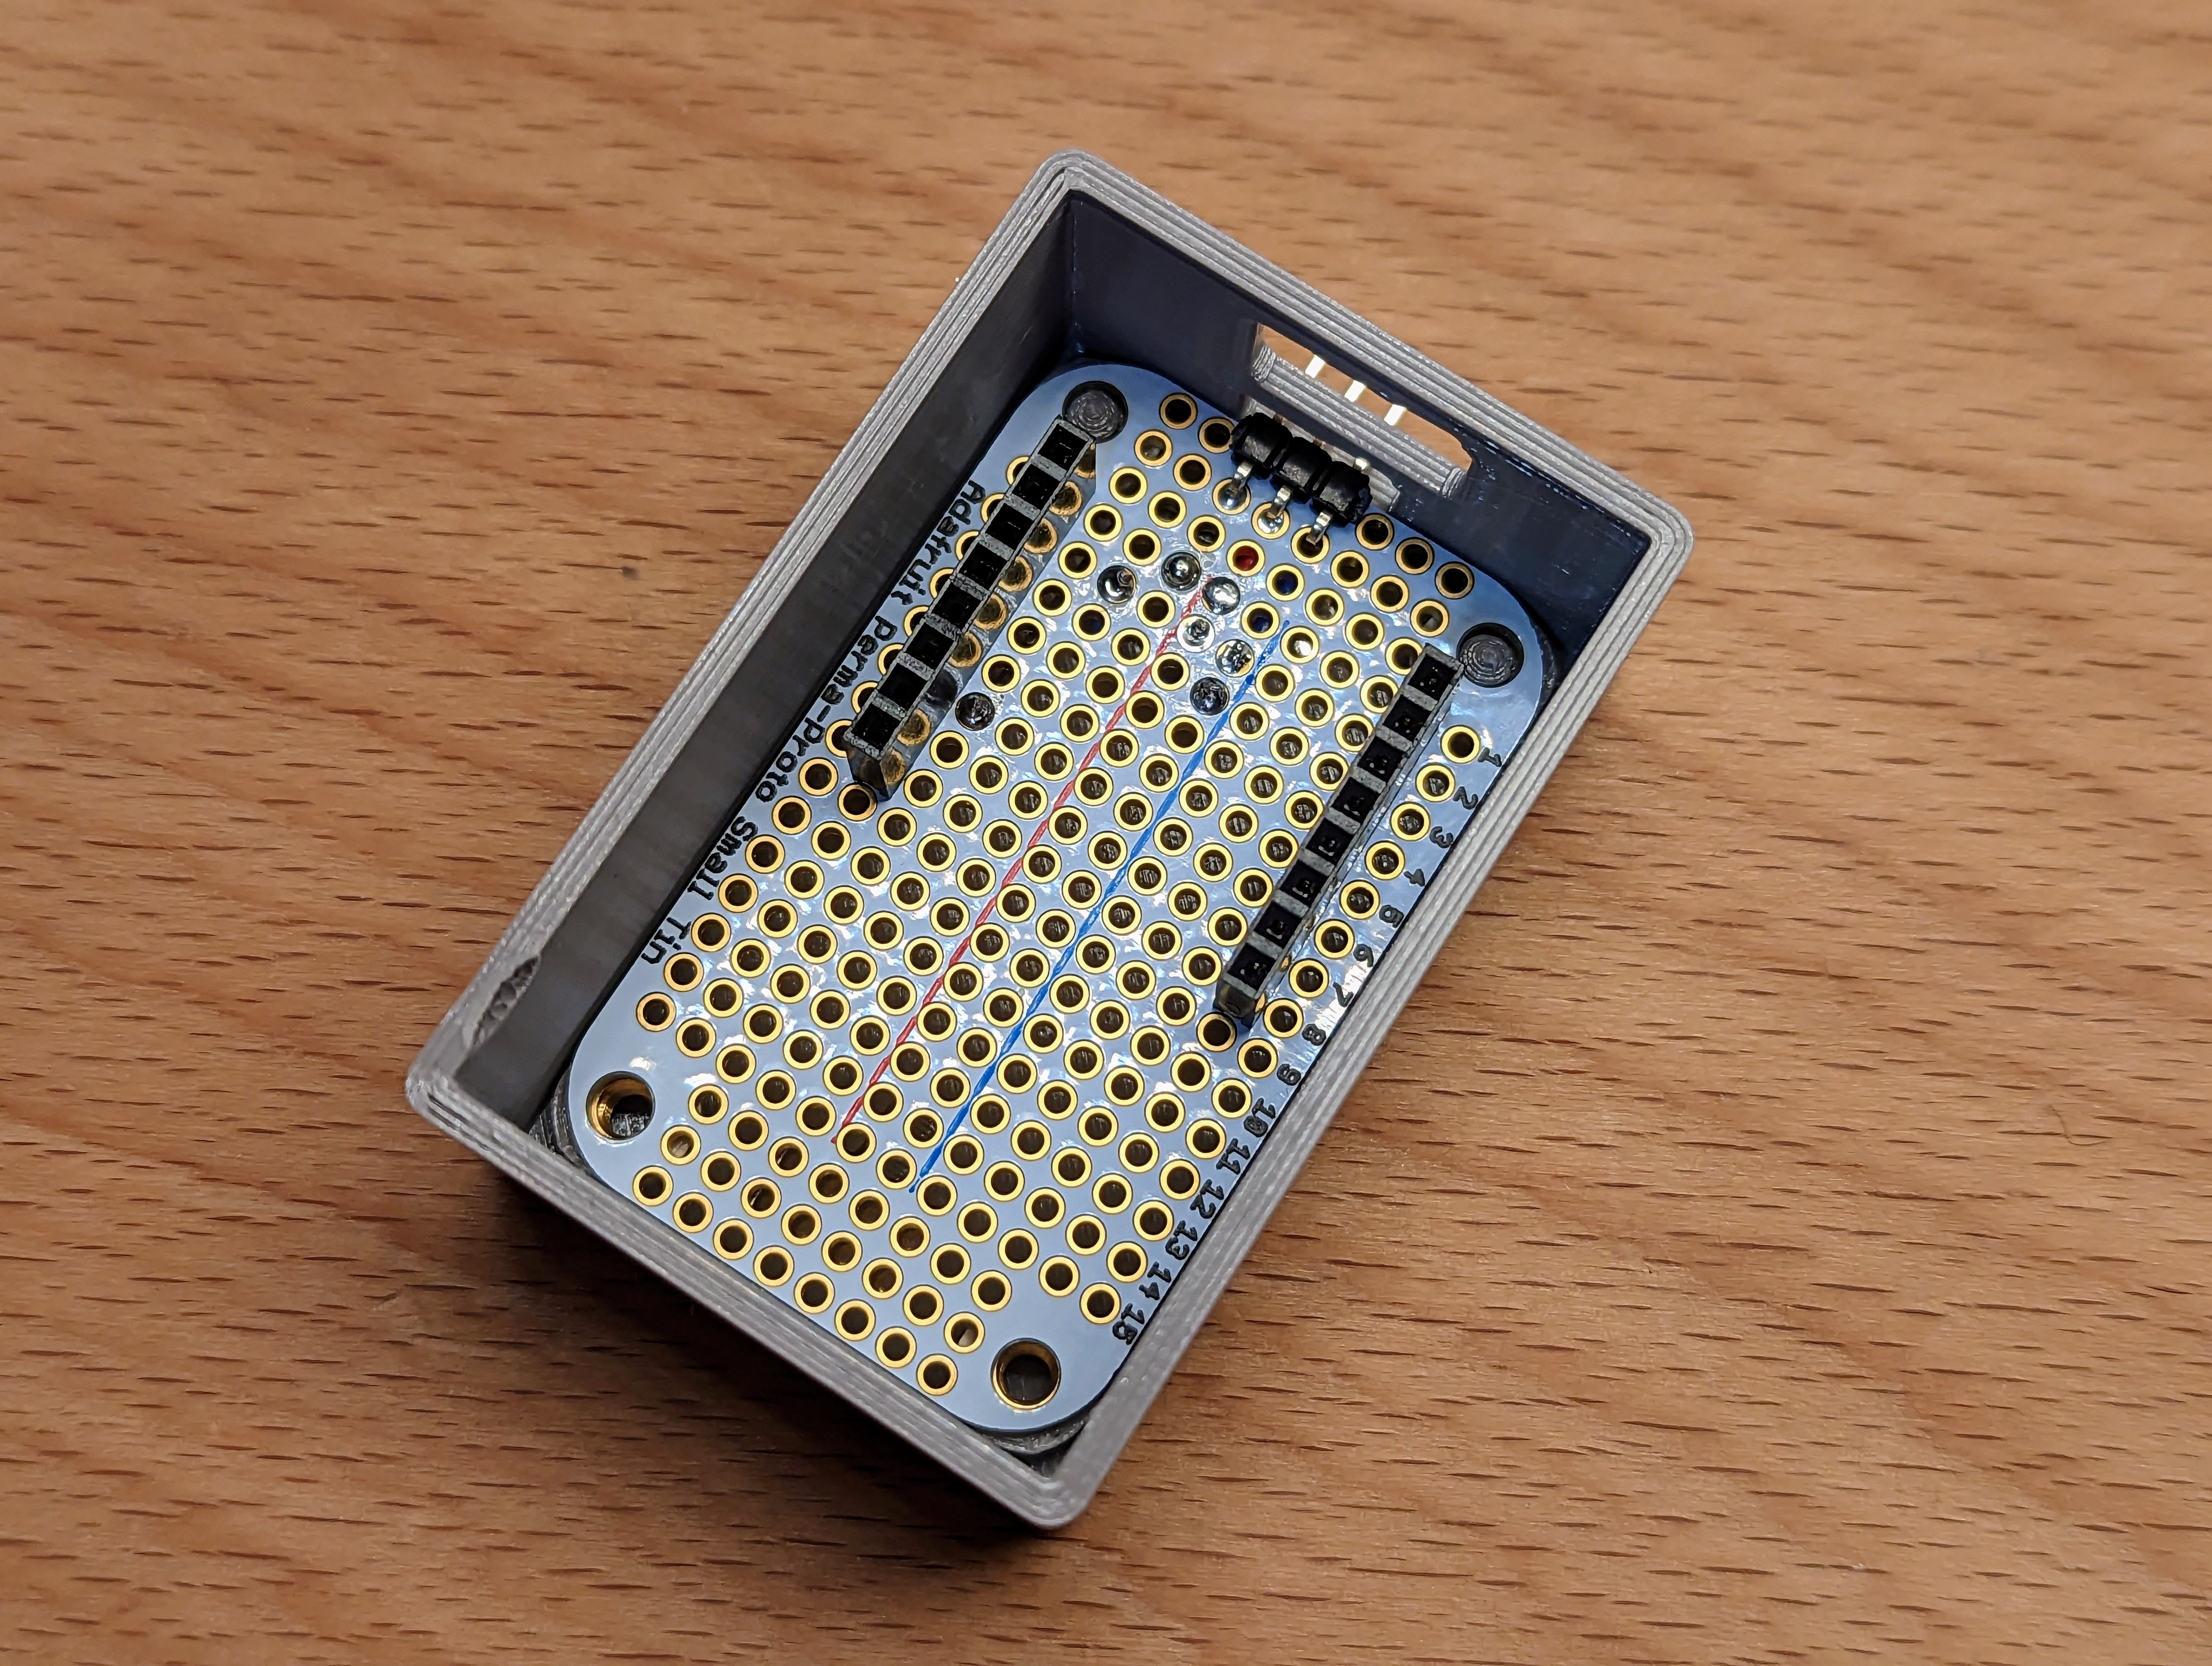
4- Place the perma-proto in the case (without D1 mini)
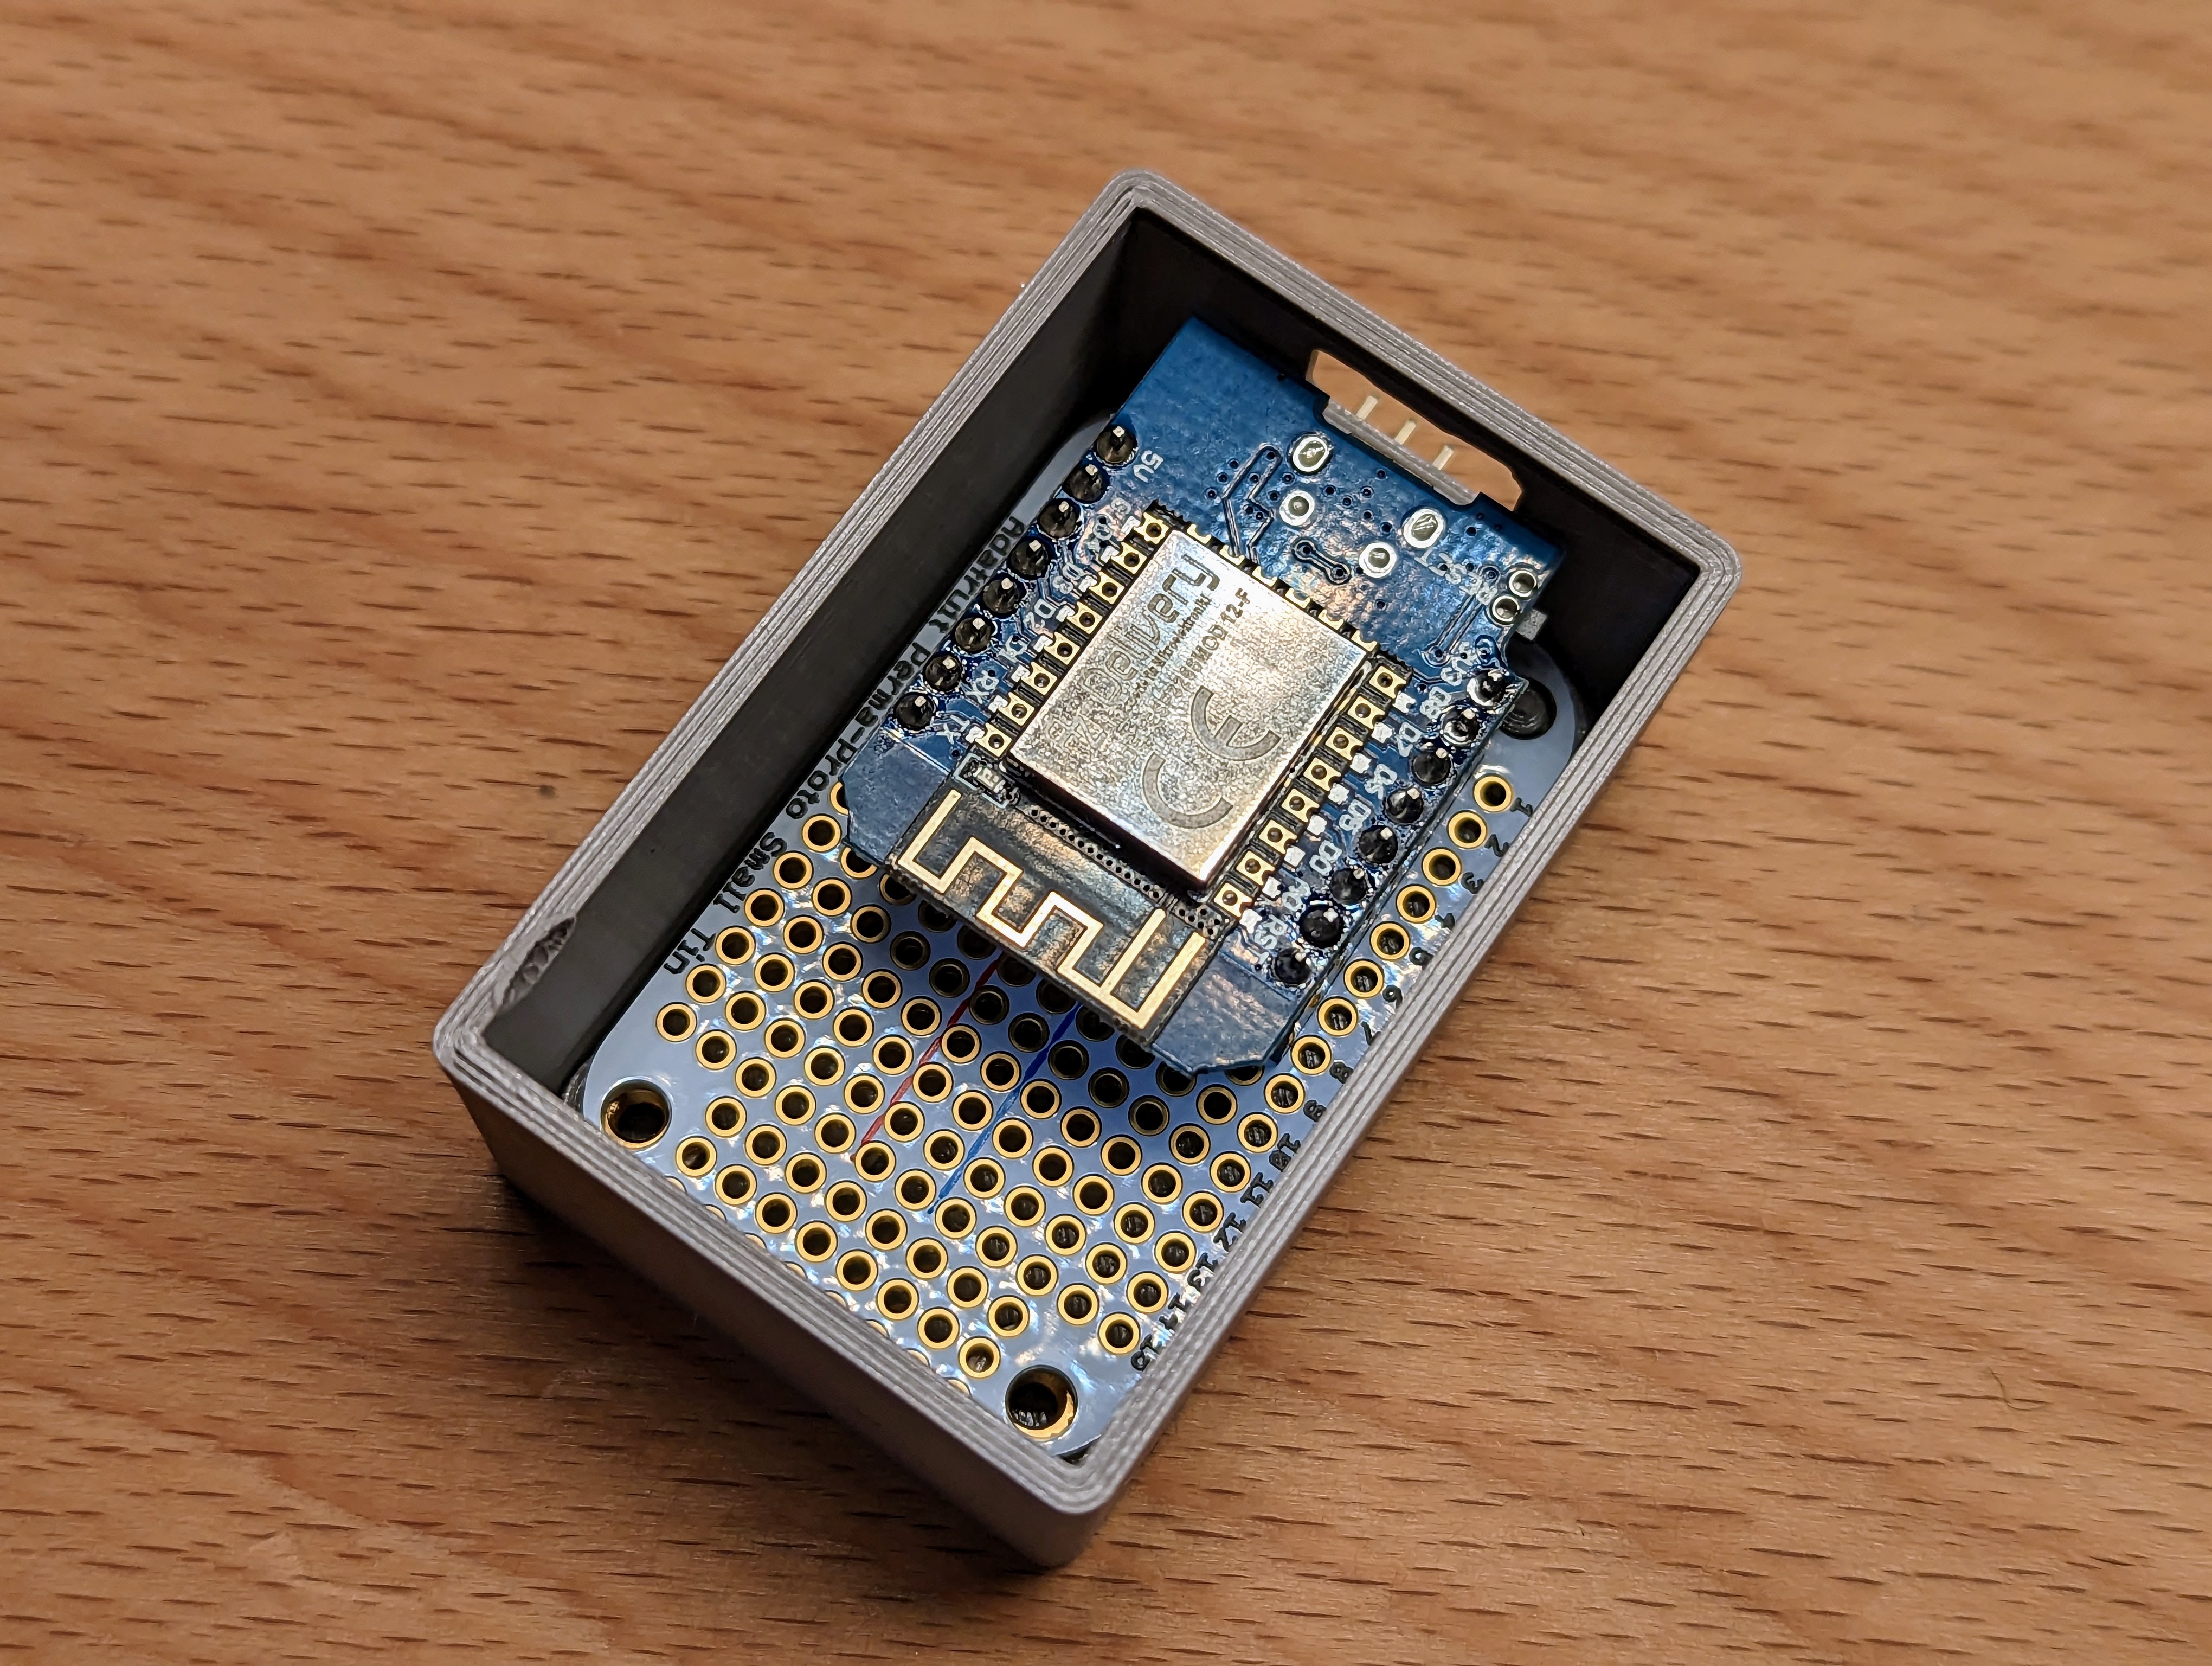
5- Add D1 mini
6- Screw on lid
Screw on with M3 x 22mm screws, make sure the perma-proto is aligned with properly.
7- Flash ESP8266 firmware
I'm using ESPHome for the firmware, but there are many options.
You can find an ESPHome config for the gas meter configuration with a D1 Mini.
Print Instructions
I have used PETG, but any other material should work just as well. You can print this without supports, but the lid's screw sinks will be slightly cleaner if you add supports there (use pain-on supports, the provided print file does that).
| Printer | MK3s+ |
| Filament | Prusament PETG Urban Grey |
| Infill | 15% |
| Supports | Optional on lid for cleaner screw sinks |