
Ratcheting Fan Pivot for Honeywell HT-900
Obliczymy ostateczną cenę na podstawie wybranego pliku. Sprawdzisz ją i zaakceptujesz przed płatnością.
Zapisane na tym urządzeniu.

Replacement pivot for Honeywell HT-900
- Ocena
- 0 / 5
- Polubienia
- 3
- Pobrania
- 23
- Wydruki
- 0
- Wyświetlenia
- 502
- Oceny
- 0
Aktualizacja u źródła:
Informacje o modelu
- Źródło
- Printables
- Kategoria
- Mechanical Parts
- Licencja
- Creative Commons — Attribution — Noncommercial — Share Alike
The pivot on my Honeywell desk fan recently gave out. I designed a new ball bearing system.
Disclaimers
I'll be the first to admit, this really isn't the best solution and it's probably more work then it's worth. Unless you love frustration, you should really just buy a new fan.
The install is a bit destructive to your fan. If your pivot is still working, I would not recommend this.
Perform at your own risk. Make sure you disconnect your fan from power while doing this and use appropriate safety gear. This obviously voids your warranty.
Tools and Parts Required
- X-Acto style utility knife
- ¾ Holesaw
- CA glue or similar plastic compatible glue.
- (Optional) Dremel with sanding drum attachment
- (Optional) #6-32 Tap
- Screwdriver
- #6-32 x 1-inch machine screw (full threaded) (BoltDepot #1545)
- 5.5mm ball bearings
- 5mm springs x 10mm (steel strings preferred)
Installation
(Some steps won't have pictures)
Assembling Ratcheting Mechanism
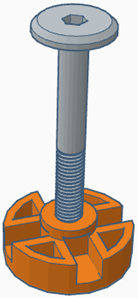 | Run the bolt through the ball bearing/spring carrier a couple times so threads form. This makes it a lot easier to assemble later down the line. This would also be a good time to do the same thing to the nut. |
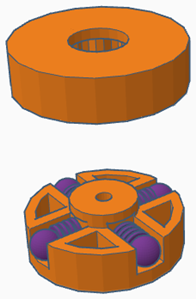 | Remove the bolt and load the carrier up with your springs and ball bearings. Compress the ball bearings down and slide the piece with the gear teeth over your carrier. Depending on your springs, this can be very difficult to do and you may need to repeat this multiple times. I'd recommend starting off with two balls/springs. You can lift the piece with the gear teeth at an angle and shove the last two springs/balls in. The springs may want to pop out. I'd recommend using tape to hold the assembly together. |
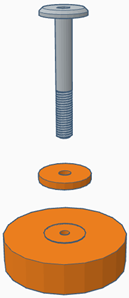 | Add the plastic washer to your screw and run it all the way through the top of the assembly. (The picture shows a half-threaded screw. Ignore that and use a full threaded screw) |
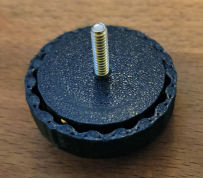 | Final product should look something like this. |
Preparing the Fan
| Disassemble the fan from the fan stand. | |
| Safely cut off all of the plastic walls from the old locking dent system. X-acto style knives work pretty well. A Dremel works great at smoothing out stubborn left overs. | |
| Using a holesaw, drill out the original pivot point. | |
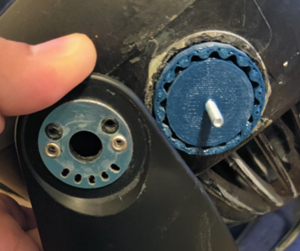 | Glue the ratcheting mechanism in place of the old pivot. Give this time to dry and cure before continuing. |
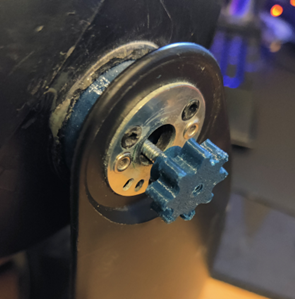 | Re-install the fan stand and use the nut to tighten it against the ratcheting mechanism. This causes a fraction fit between the ratcheting mechanism and the fan stand. You may need to remove the fan grill and hold the screw down using a screwdriver. |
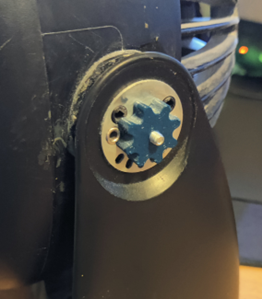 | Final product should look something like this. |