
Motor Drive 2 - Modular Design for Stand - Auto-Stop Function for Bambu Lab Filament Spool Switcher & Winder
Obliczymy ostateczną cenę na podstawie wybranego pliku. Sprawdzisz ją i zaakceptujesz przed płatnością.
Zapisane na tym urządzeniu.

Motor Drive 2 - Modular Design for Stand - Auto-Stop Function for Bambu Lab Filament Spool Switcher & Winder
- Ocena
- 4,975 / 5
- Polubienia
- 1434
- Pobrania
- 7159
- Wydruki
- 44
- Wyświetlenia
- 50 093
- Oceny
- 40
Aktualizacja u źródła:
Informacje o modelu
- Źródło
- Printables
- Kategoria
- Bambu Lab Parts & Upgrades
- Licencja
- Creative Commons — Attribution — Noncommercial — Share Alike




BEFORE STARTING THE IMPLEMENTATION OF THE PROJECT, READ CAREFULLY THE ENTIRE DESCRIPTION AND VIEW THE PHOTO GALLERY !!!
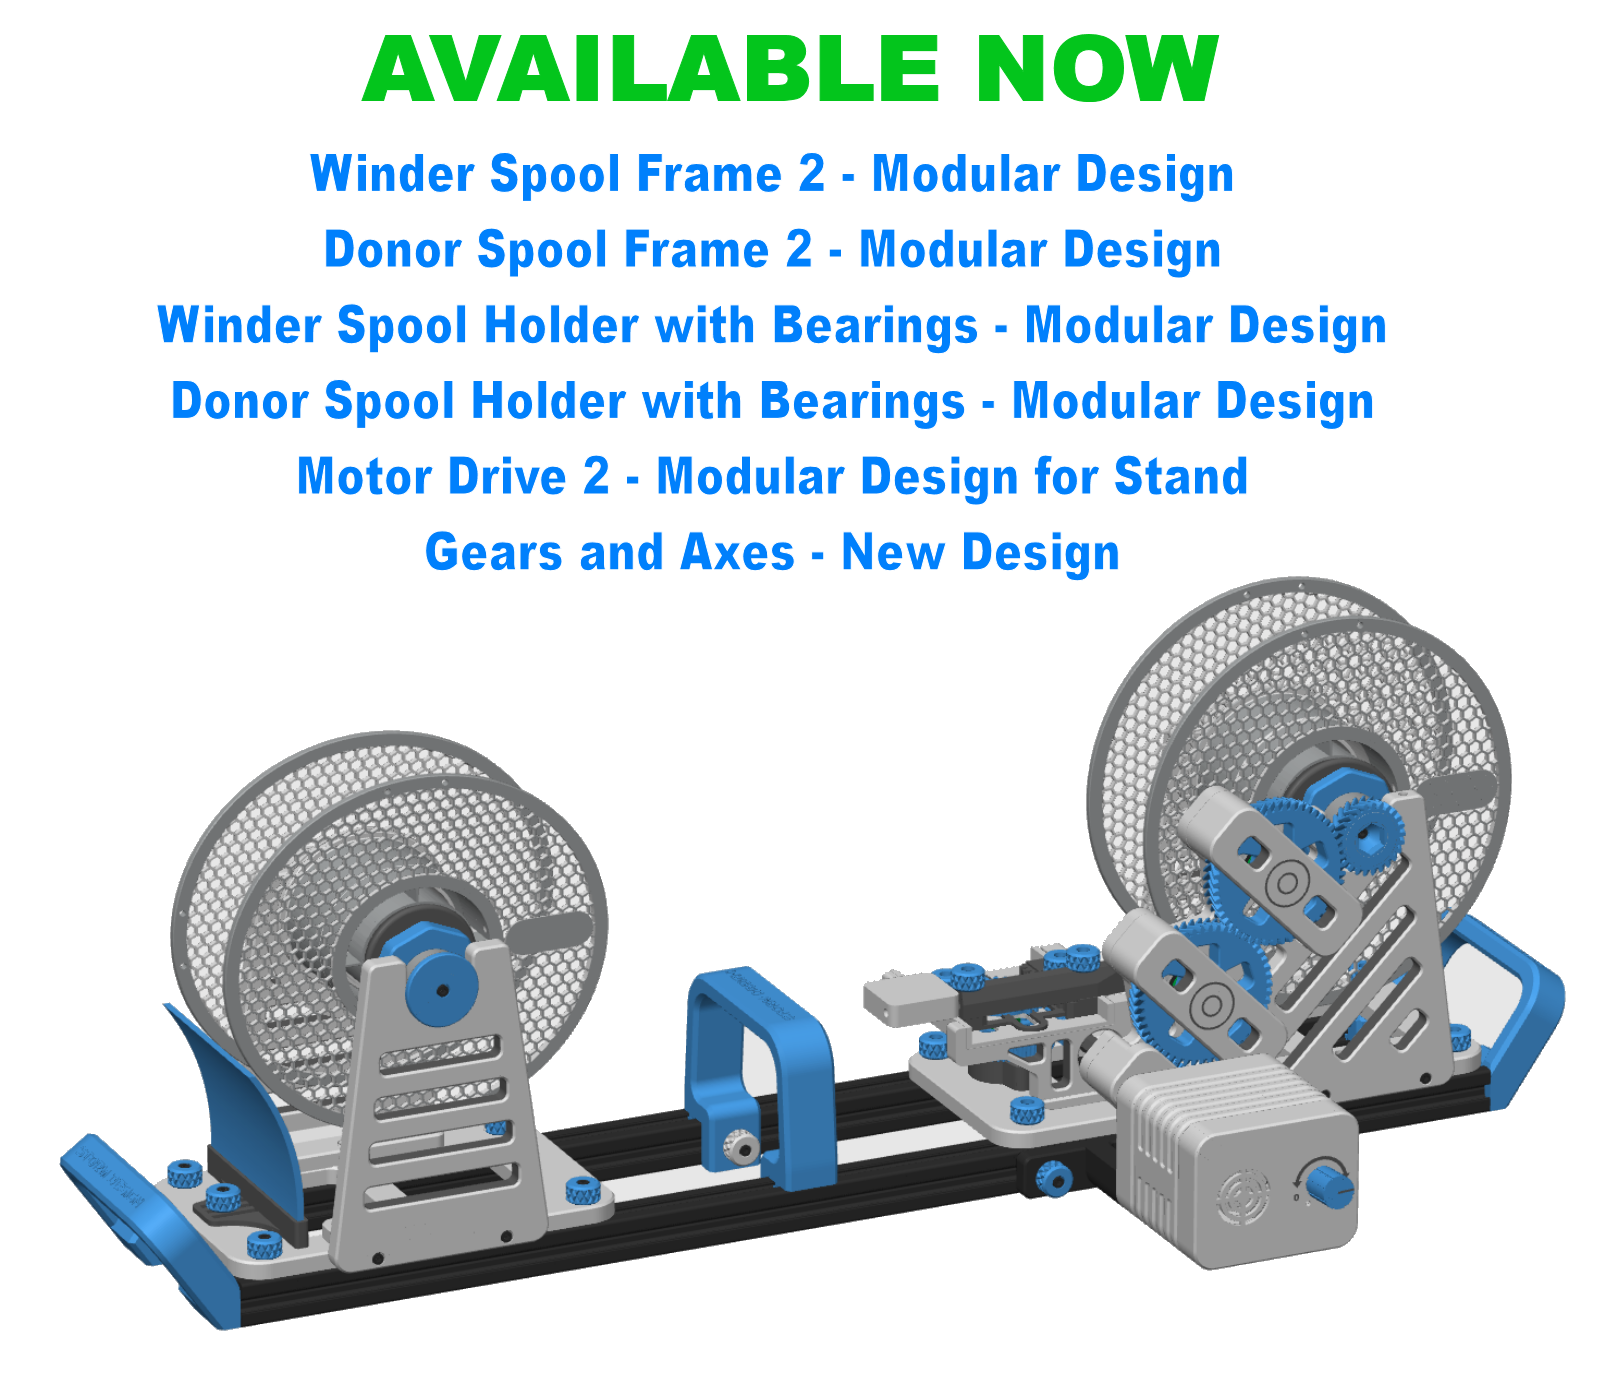
This is “Motor Drive for Stand - Auto-Stop Function” for an amazing project "Filament Spool Switcher & Winder" Design by @MiklosKiszely_486882 and “Winder Spool Frame 2 - Modular Design”
TO FULLY COMPLETE THE PROJECT, DOWNLOAD THE REMAINING ITEMS FROM THE LINK BELOW
https://www.printables.com/pl/@Damian27/collections/1304611
Hello Everyone
Since the beginning of the “Filament Spool Switcher & Winder” project, I have always used a cordless screwdriver. One day I had an idea to create an automatic filament winder using a motor. During the tests, I decided to add the automatic stop function after the filament winding was finished, so that the process would run fully automatically. I created the whole project over a month because I tested a total of 6 motors until I came to the best solution. I lost a lot of time, nerves and money :-). I had to make sure it worked every time. That's why I rewound 25 spools of filament for 2 days. Yes, 25 spools :-) and only for testing. By the time the project was published, I had rewound over 67 spools in total. I am a reliable person. I never post mechanical designs unless they are thoroughly tested. If you follow my recommendations below, you will be guaranteed trouble-free operation. However, if you do it your way, don't blame me that something doesn't work as it should. You make any modifications at your own risk.
Special Thanks to :
@Shoe for his contribution and help in this project
@Fisherman_639110 for the motor test from Amazon.de
When you complete the project, please share a photo and a comment. Thank you and have a nice day.
UPDATE 03.03.2024 :
- I added separate catalogs for Original Winder Spool Frame by Miklos Kiszely & Remix and Motor Drive 2 - Modular Design for Stand and Update from Winder Spool Frame 1 to Winder Spool Frame 2. Now you can download the selected version for a given project faster and easier - In the photo gallery there are instructions for Winder Spool Frame 2 - Modular Design and Update from Winder Spool Frame 1 to Winder Spool Frame 2 - The other things in the project remain unchanged
UPDATE 10.03.2024 :
- For the "Original Winder Spool Frame by Miklos Kiszely & Remix" version, I added two new versions of the file: Motor Housing V2.stl and Wires Holder V2. In the case of the Motor Housing V2.stl file, changes only in appearance
UPDATE 11.03.2024 :
- I have added a new version of "Motor Drive 2 - Modular Design for Stand" intended exclusively for the "Winder Spool Frame 2 - Modular Design" project
UPDATE 12.03.2024 :
- I have added a new version of the Knob M3 which now uses a Heat Threaded Insert instead of a nut
UPDATE 10.04.2024 :
- Minor visual changes for the files: Motor Drive 2 - Modular Design - Motor Housing.stl and Motor Drive 2 - Modular Design - Motor Plate.stl
UPDATE 02.05.2024 :
- I added a new version : Powered by Magnetic Power Bank. The assembly instructions and wiring diagram can be found in the photo gallery. The project is included in the catalog with the MPB designation "Motor Drive 2 - Modular Design for Winder Spool Frame 2 - MPB"

What do you need to do for the project to work properly? :
- Use my remix "Bambu Lab Filament Spool Winder - Upgraded" which provides support for the lower gear axis 50 - Applies only to the first version: "Original Winder Spool Frame by Miklos Kiszely & Remix". The new version of the "Winder Spool Frame 2 - Modular Design" project has a different structure - https://www.printables.com/pl/model/478890-bambu-lab-filament-spool-winder-upgraded
- Use my remix "Bambu Lab Filament Spool Winder - Upgraded All Gears and Axes" which includes new gears and hexagonal axles. Be sure to use Axis 32mm - with holes for Heat Threaded Insert M3 - Applies only to the first version: "Original Winder Spool Frame by Miklos Kiszely & Remix". The new version of the "Winder Spool Frame 2 - Modular Design" project has a different structure. - https://www.printables.com/pl/model/478967-bambu-lab-filament-spool-winder-upgraded-all-gears If you do not want to print all gears, use at least gears 50 bottom, top and Axis 32mm with holes for Heat Threaded Insert M3. Secure them with screws. Bearings without this can pop out of the winder frame.
- You need to buy a suitable motor with a minimum torque of 2.5 - 3Nm (25-30 Kg.cm). If you want to rewind spools of filament weighing 1 kg - it must have these parameters !!!. Note that even an ordinary cheap cordless screwdriver has a torque of 14Nm - 30Nm. If you buy a weaker motor, you will have a problem with rewinding a 1kg filament. In motors, the higher the rotational speed, the lower the torque. I tested the motor 150, 200, 330, 400, 550 revolutions. As for me, only 150 rpm is trouble-free. The 330, 400, 550 rpm motor couldn't handle a 1kg spool. If you find an motor with more than 150 revolutions that will have a minimum torque of 2.5-3Nm, you can safely buy it.
- Follow all other recommendations and use the components listed below.
IMPORTANT - READ :
- One of the most important things is the perfect fit of the gears in the “Filament Spool Winder”. There must be a slight gap of about 1mm between all gears. Thanks to this motor, it will be easier to rewind the filament. Each additional unnecessary friction on the toothed gears reduces the motor torque and thus the motor power decreases.
- Strengthen the Motor Gear 25 using Heat Threaded Insert M3 - 4pcs and Screws M3 16mm - 4pcs. View photo galleries - Applies only to the first version: "Original Winder Spool Frame by Miklos Kiszely & Remix". The new version of the "Winder Spool Frame 2 - Modular Design" project has a different structure
- I decided to use the module from the Creality filament sensor because only it has a bearing on the arm. Thanks to this, the filament moves smoothly. In addition, it is complete with wires. For this reason, I decided not to use a standard sensor. I suppose that the arm from the limit switch may heat up at such speeds due to the friction of the filament, which may cause distortion or melting of the filament. So I do not propose to replace my solution with a standard sensor. I realize that not everyone will like using the Creality Filament Sensor. That's why I made a second version for the limit switch. Everyone will have the choice of which version to use.
DO NOT CONNECT POWER TO THE SENSORS !!! ONLY NEUTRAL WIRES SHOULD BE CONNECTED TO THE SESNORS. WIRING DIAGRAM IN THE PHOTO GALLERY.
- The Filament Sensor can be mounted in two ways. See in the photo gallery.
Version 1 - Directly at the Filament Guide
Version 2 - On a long PTFE tube
If you notice that the tip of the filament loosens after the winding process is completed, use version 2. I use the version 1 and I had no problem with unwinding the filament from the spool. When choosing the version 2, the filament should stay in the PTFE tube. Then you will manually wind the end of the filament onto the spool.
- The filament sensor housing has a limiter for the PTFE tube. When assembling, insert the PTFE tube until resistance is felt.
- Do not be guided by the technical data of the motor where there is information that the motor with the shaft stopped consumes 5.5A. For all tests, I had the motor connected to my lab power supply. I stopped the shaft several times for 10-15 seconds and the draw was never more than 2.1A. With normal motor operation, it is much smaller. I tested it on the original Pololu and the replacement. Therefore, a 3A power supply is sufficient for the motor and the motor controller. This significantly reduces project costs.
- Using the Auto-Stop Function is not necessary.
- To install the new version of "Motor Drive 2 - Modular Design for Winder Spool Frame 2 - Powered by Magnetic Power Bank" it is required to have a hexagonal wrench with a ball end or a hexagonal wrench with a very short arm. The installation of the two screws for the "Power Bank Housing - Lower.stl" mounting is difficult.
What Should I Buy? :
PARTS COMMON TO ALL VERSION :
- Motor 12V 150rpm - Shaft Diameter 6mm - Minimum Torque 2.5 - 3 Nm (25-30 Kg.cm) !!! - 1pc (Pololu motor replacement model 4744 costs 20 euros - The original costs around 40 euros - The replacement has the same parameters and costs half the price ) - The Motor has a shifted shaft - See the Photo Gallery for a diagram
Pololu Motor Model 4744 :
Shop EU - https://botland.store/dc-motors-with-gearbox/17053-37dx54l-motor-with-701-gear-12v-150rpm-pololu-4744-5904422326746.html?SubmitCurrency=1&id_currency=4
Shop DE - https://www.exp-tech.de/motoren/dc-getriebemotoren/9795/70-1-metal-gearmotor-37dx54l-mm-helical-pinion
Shop US - https://www.pololu.com/product/4744
Shop PL - https://botland.com.pl/silniki-dc-standard-z-przekladnia/17053-silnik-37dx54l-z-przekladnia-701-12v-150rpm-pololu-4744-5904422326746.html
Replacement Motor :
Shop Amazon.de Model 70:1 12V - https://www.amazon.de/CQRobot-Geared-Down-6V-5W-75RPM-15-oz-12V-10W-150RPM-27/dp/B08ZK8NV4Q?th=1
Shop Amazon.co.uk Model 70:1 12V https://www.amazon.co.uk/CQRobot-Geared-Down-6V-5W-75RPM-15-oz-12V-10W-150RPM-27/dp/B08ZK8NV4Q/ref=sr_1_1?crid=2B9BMFLBH3E9U&
Shop Amazon.com USA Model 70:1 12V https://www.amazon.com/CQRobot-Geared-Down-6V-5W-75RPM-15-oz-12V-10W-150RPM-27/dp/B08ZK8NV4Q/
Shop PL - https://www.ebmia.pl/szukaj?controller=search&s=Pololu+4744
- Motor Controller - 1pc - China https://a.aliexpress.com/_EIe5Oy1 or Amazon.de https://www.amazon.de/dp/B096ZYZ7BW
- Power Supply 12V - Plug 5.5 / 2.1 or 2.5 - Minimum 3A - 1pc ( I use a Baseus Gan 65W charger + 12V power cable - https://a.aliexpress.com/_ExdpnXR - This is a more expensive solution. It is better to buy a 12V 3A power supply for about 5 euros )
- Power Socket 5.5 / 2.1 or 2.5 - Mounting Hole Diameter 8mm - 1pc (Buy the right size for your power supply) - https://a.aliexpress.com/_EybKzCh
- Version 1 - Filament Sensor - Creality (Version Ender 3 V2)- 1pc - currently not available for sale
Version 2 - Limit Switch - 3P with Wheel (View photo galleries) - 1pc -
https://a.aliexpress.com/_EuUUBxr
- T-nut M3 for Alu Profiles - 2pcs (for Knob M3 - Motor Drive mount to Stand) - https://a.aliexpress.com/_EJoHf4v
- Wago 221-612 - 1pc - You can use a different connector or solder the wires
- You will need a piece of Wires and PTFE tubing from Bambu Lab and Double-Sided Tape for the Wires Holder
PARTS DIFFERENT FOR EACH VERSION :
- For the project : "Original Winder Spool Frame by Miklos Kiszely & Remix" :
Screws M3 6mm - Round Head- 9pcs (6pcs for the motor mount and 3pcs for the Creality Filament Sensor or Limit Switchs) - http://a.aliexpress.com/_Ezs8MtJ
Screws M3 16mm - Cylindrical Head - 4pcs (For the Motor Gear 25) - https://a.aliexpress.com/_EIQRvnr
Screws M3 18-20mm - Cylindrical Head - 6pcs (2pcs for Knob M3 - Motor Drive mount to Stand and 4pcs for Motor Plate - Motor Housing) - https://a.aliexpress.com/_EIQRvnr
Heat Threaded Insert M3 3-4mm OD 4.5mm - 10pcs - (4pcs for Motor Housing and 4pcs for Motor Gear 25 and 2pcs for Knob M3 - Heat Threaded Insert) - https://a.aliexpress.com/_EwSyU8l
- For the project "Motor Drive 2 - Modular Design for Winder Spool Frame 2" :
Screws M3 6mm - Round Head- 3pcs (for the Creality Filament Sensor or Limit Switchs) - https://a.aliexpress.com/_Ezs8MtJ
Screws M3 12mm - Cylindrical Head - 14pcs (6pcs for the Motor mount and 4pcs for Motor Plate - Motor Housing and 4pcs for Motor Plate Holder - Motor Plate - https://a.aliexpress.com/_EIQRvnr
Screws M3 18mm - Cylindrical Head - 2pcs (for Knob M3 - Motor Drive mount to Stand) - https://a.aliexpress.com/_EIQRvnr
Heat Threaded Insert M3 3-4mm OD 4.5mm - 10pcs - (4pcs for Motor Housing and 4pcs for Motor Plate Holder and 2pcs for Knob M3 - Heat Threaded Insert) - https://a.aliexpress.com/_EwSyU8l
- For the project "Motor Drive 2 - Modular Design for Winder Spool Frame 2 - Powered by Magnetic Power Bank" :
Screws M3 6mm - Round Head- 3pcs (for the Creality Filament Sensor or Limit Switchs) - https://a.aliexpress.com/_Ezs8MtJ
Screws M3 6-8mm - Cylindrical Head - 2pcs (for Power Bank Housing) - https://a.aliexpress.com/_EIQRvnr
Screws M3 12mm - Cylindrical Head - 14pcs (6pcs for the Motor mount and 4pcs for Motor Plate - Motor Housing and 4pcs for Motor Plate Holder - Motor Plate - https://a.aliexpress.com/_EIQRvnr
Screws M3 18mm - Cylindrical Head - 2pcs (for Knob M3 - Motor Drive mount to Stand) - https://a.aliexpress.com/_EIQRvnr
Heat Threaded Insert M3 3-4mm OD 4.5mm - 12pcs - (4pcs for Motor Housing and 4pcs for Motor Plate Holder and 2pcs for Power Bank Housing and 2pcs for Knob M3 - Heat Threaded Insert) - https://a.aliexpress.com/_EwSyU8l
USAMS - Magnetic Power Bank USB-C - 1pc - https://a.aliexpress.com/_EvvXEs3
Trigger Module PD 12V USB-C - 1pc - https://a.aliexpress.com/_EGhlMx1
What Should I Print? :
For Original Winder Spool Frame by Miklos Kiszely & Remix :
- Motor Housing V1 or V2.stl - 1pc
- Motor Plate.stl - 1pc
- Filament Sensor Housing for Creality.stl - 1pc
- Filament Sensor Cover for Creality.stl - 1pc
- Filament Sensor Housing for Limit Switch.stl - 1pc
- Filament Sensor Cover for Limit Switch.stl - 1pc
- Gear 25 For Motor.stl - 1pc
- Knob M3 - Heat Threaded Insert.stl - 2pcs
- Wires Holder V2.stl - 2pcs
- Controller Knob.stl - 1pc (You don't need to print if you want to use the original one that was in the controller)
Motor Drive 2 - Modular Design For Winder Spool Frame 2 - Modular Design :
- Motor Drive 2 - Modular Design - Motor Housing.stl- 1pc
- Motor Drive 2 - Modular Design - Motor Plate.stl - 1pc
- Motor Drive 2 - Modular Design - Motor Plate Holder.stl - 1pc
- Motor Drive 2 - Modular Design - Axle and Motor Shaft Connector.stl - 1pc
- Motor Drive 2 - Modular Design - Filament Sensor Housing for Creality.stl - 1pc
- Motor Drive 2 - Modular Design - Filament Sensor Cover for Creality.stl - 1pc
- Motor Drive 2 - Modular Design - Filament Sensor Housing for Limit Switch.stl - 1pc
- Motor Drive 2 - Modular Design - Filament Sensor Cover for Limit Switch.stl - 1pc
- Motor Drive 2 - Modular Design - Knob M3 - Heat Threaded Insert.stl - 2pcs
- Motor Drive 2 - Modular Design - Wires Holder - 2pcs
- Motor Drive 2 - Modular Design - Controller Knob.stl - 1pc (You don't need to print if you want to use the original one that was in the controller)
Motor Drive 2 - Modular Design for Winder Spool Frame 2 - Powered by Magnetic Power Bank
- Motor Drive 2 - Modular Design - MPB - Motor Housing.stl- 1pc
- Motor Drive 2 - Modular Design - MPB - Motor Plate.stl - 1pc
- Motor Drive 2 - Modular Design - MPB - Motor Plate Holder.stl - 1pc
- Motor Drive 2 - Modular Design - MPB - Power Bank Housing - Lower.stl - 1pc
- Motor Drive 2 - Modular Design - MPB - Power Bank Housing - Upper.stl - 1pc
- Motor Drive 2 - Modular Design - MPB - Axle and Motor Shaft Connector.stl - 1pc
- Motor Drive 2 - Modular Design - MPB - Filament Sensor Housing for Creality.stl - 1pc
- Motor Drive 2 - Modular Design - MPB - Filament Sensor Cover for Creality.stl - 1pc
- Motor Drive 2 - Modular Design - MPB - Filament Sensor Housing for Limit Switch.stl - 1pc
- Motor Drive 2 - Modular Design - MPB - Filament Sensor Cover for Limit Switch.stl - 1pc
- Motor Drive 2 - Modular Design - MPB - Knob M3 - Heat Threaded Insert.stl - 2pcs
- Motor Drive 2 - Modular Design - MPB - Wires Holder - 2pcs
- Motor Drive 2 - Modular Design - MPB - Controller Knob.stl - 1pc (You don't need to print if you want to use the original one that was in the controller)
Update from Winder Spool Frame 1 to Winder Spool Frame 2 :
Version 1 :
- Motor Plate.stl - 1pc
- Motor Distance.stl - 1pc
- Gear 25.stl - 1pc
- Axle and Motor Shaft Connector.stl - 1pc
Version 2 :
- Motor Plate Distance.stl - 1pc
- Motor Distance.stl - 1pc
- Gear 25.stl - 1pc
- Axle and Motor Shaft Connector.stl - 1pc
How to print ? :
- Material : Motor Plate, Motor Gear 25 - ASA, ABS, PLA Plus, Other : Any
- Layer Height : 0.2mm
- Infill : Motor Plate - 40%, Motor Gear 25 - 100%, Other : Any
- Wall Loops : Motor Plate, Motor Gear 25 - 4, Other : Any
- Bottom Layers : Motor Plate, Motor Gear 25 - 4, Other : Any
- Top Layers : Motor Plate, Motor Gear 25 - 4, Other : Any
- Support : Only Motor Plate - Shown in photo gallery, Other : No
- Brim : No
- Brim Auto : No (Be sure to disable Brim Auto. When printing in color Motor Housing with Brim Auto on, it may cause a problem on the first layer)
I receive a lot of messages asking what to print for a complete project. It is complicated for many people. I had a problem with that myself. So I decided to prepare a short instruction.
If you take advantage of all my improvements :
All Projects :
https://www.printables.com/pl/@Damian27/collections/1304611
1. Bambu Lab - Winder Spool Frame 2 - Modular Design
https://www.printables.com/pl/model/769319-bambu-lab-winder-spool-frame-2-modular-design
2. Bambu Lab - Donor Spool Frame 2 - Modular Design
https://www.printables.com/pl/model/766774-bambu-lab-donor-spool-frame-2-modular-design-for-s
3. Bambu Lab - Upgraded All Gears and Axes
https://www.printables.com/pl/model/478967-bambu-lab-filament-spool-winder-upgraded-all-gears
4. Bambu Lab - Upgraded Filament Guide, Filament Guide Sled, Filament Guide Carriage and Knob
https://www.printables.com/pl/model/478923-bambu-lab-filament-spool-winder-upgraded-filament-
5. Bambu Lab - Winder Spool Holder with Bearings - Modular Design
https://www.printables.com/pl/model/740644-winder-spool-holder-with-bearings-for-bambu-lab-fi
6. Bambu Lab - Donor Spool Holder with Bearings - Modular Design
https://www.printables.com/pl/model/750033-donor-spool-holder-with-bearings-for-bambu-lab-fil
7. Universal Spool Centering Cone for Bambu Lab Filament Spool Switcher & Winder https://www.printables.com/pl/model/752030-universal-spool-centering-cone-for-bambu-lab-filam
8. Spool Brake for Bambu Lab Filament Spool Switcher & Winder
https://www.printables.com/pl/model/748642-spool-brake-for-bambu-lab-filament-spool-switcher-
9. Handle for Manual Rewind and Adapter for Electric Screwdriver
https://www.printables.com/pl/model/805532-handle-for-manual-rewind-and-hexagonal-adapter-for
10. Stand for Bambu Lab Filament Spool Switcher & Winder
https://www.printables.com/pl/model/479022-stand-for-bambu-lab-filament-spool-switcher-winder
11. Motor Drive 2 - Modular Design for Stand - Auto-Stop Function for Bambu Lab Filament Spool Switcher & Winder
https://www.printables.com/pl/model/485389-motor-drive-for-stand-auto-stop-function-for-bambu