
Cartoni Spreader Claw (Endpiece) Replacement
Obliczymy ostateczną cenę na podstawie wybranego pliku. Sprawdzisz ją i zaakceptujesz przed płatnością.
Zapisane na tym urządzeniu.
Replacement part for the claw/endpiece of a Cartoni Smart Lock mid-level tripod spreader.
- Ocena
- 0 / 5
- Polubienia
- 2
- Pobrania
- 28
- Wydruki
- 0
- Wyświetlenia
- 265
- Oceny
- 0
Aktualizacja u źródła:
Informacje o modelu
- Źródło
- Printables
- Kategoria
- Photo & Video
- Licencja
- Creative Commons — Public Domain
Replacement part (P50 SPREADER CLAW (P750)) for a Cartoni Smart Lock mid-level tripod spreader (S731/SL). Intended for when one of the “claw” bits on the original breaks, and you only need the main part replaced.
ADDITIONAL PARTS NEEDED:
- From the original:
- Spring
- Red latch
- C-shaped mounting plate
- New
- (6) M2.5×5 screws, to replace the plastic rivets
INSTRUCTIONS:
When slicing the model, it must be oriented on its side!
Supports will be required during printing, regardless. While the amount of support material is reduced by printing bottom side down, this results in the claws being structurally weak. I have included a picture of an actual from-the-field failure to prove it. Don't repeat my mistake!
Printing the part on its side ensures the best possible strength, putting the layers in parallel with the direction of force.
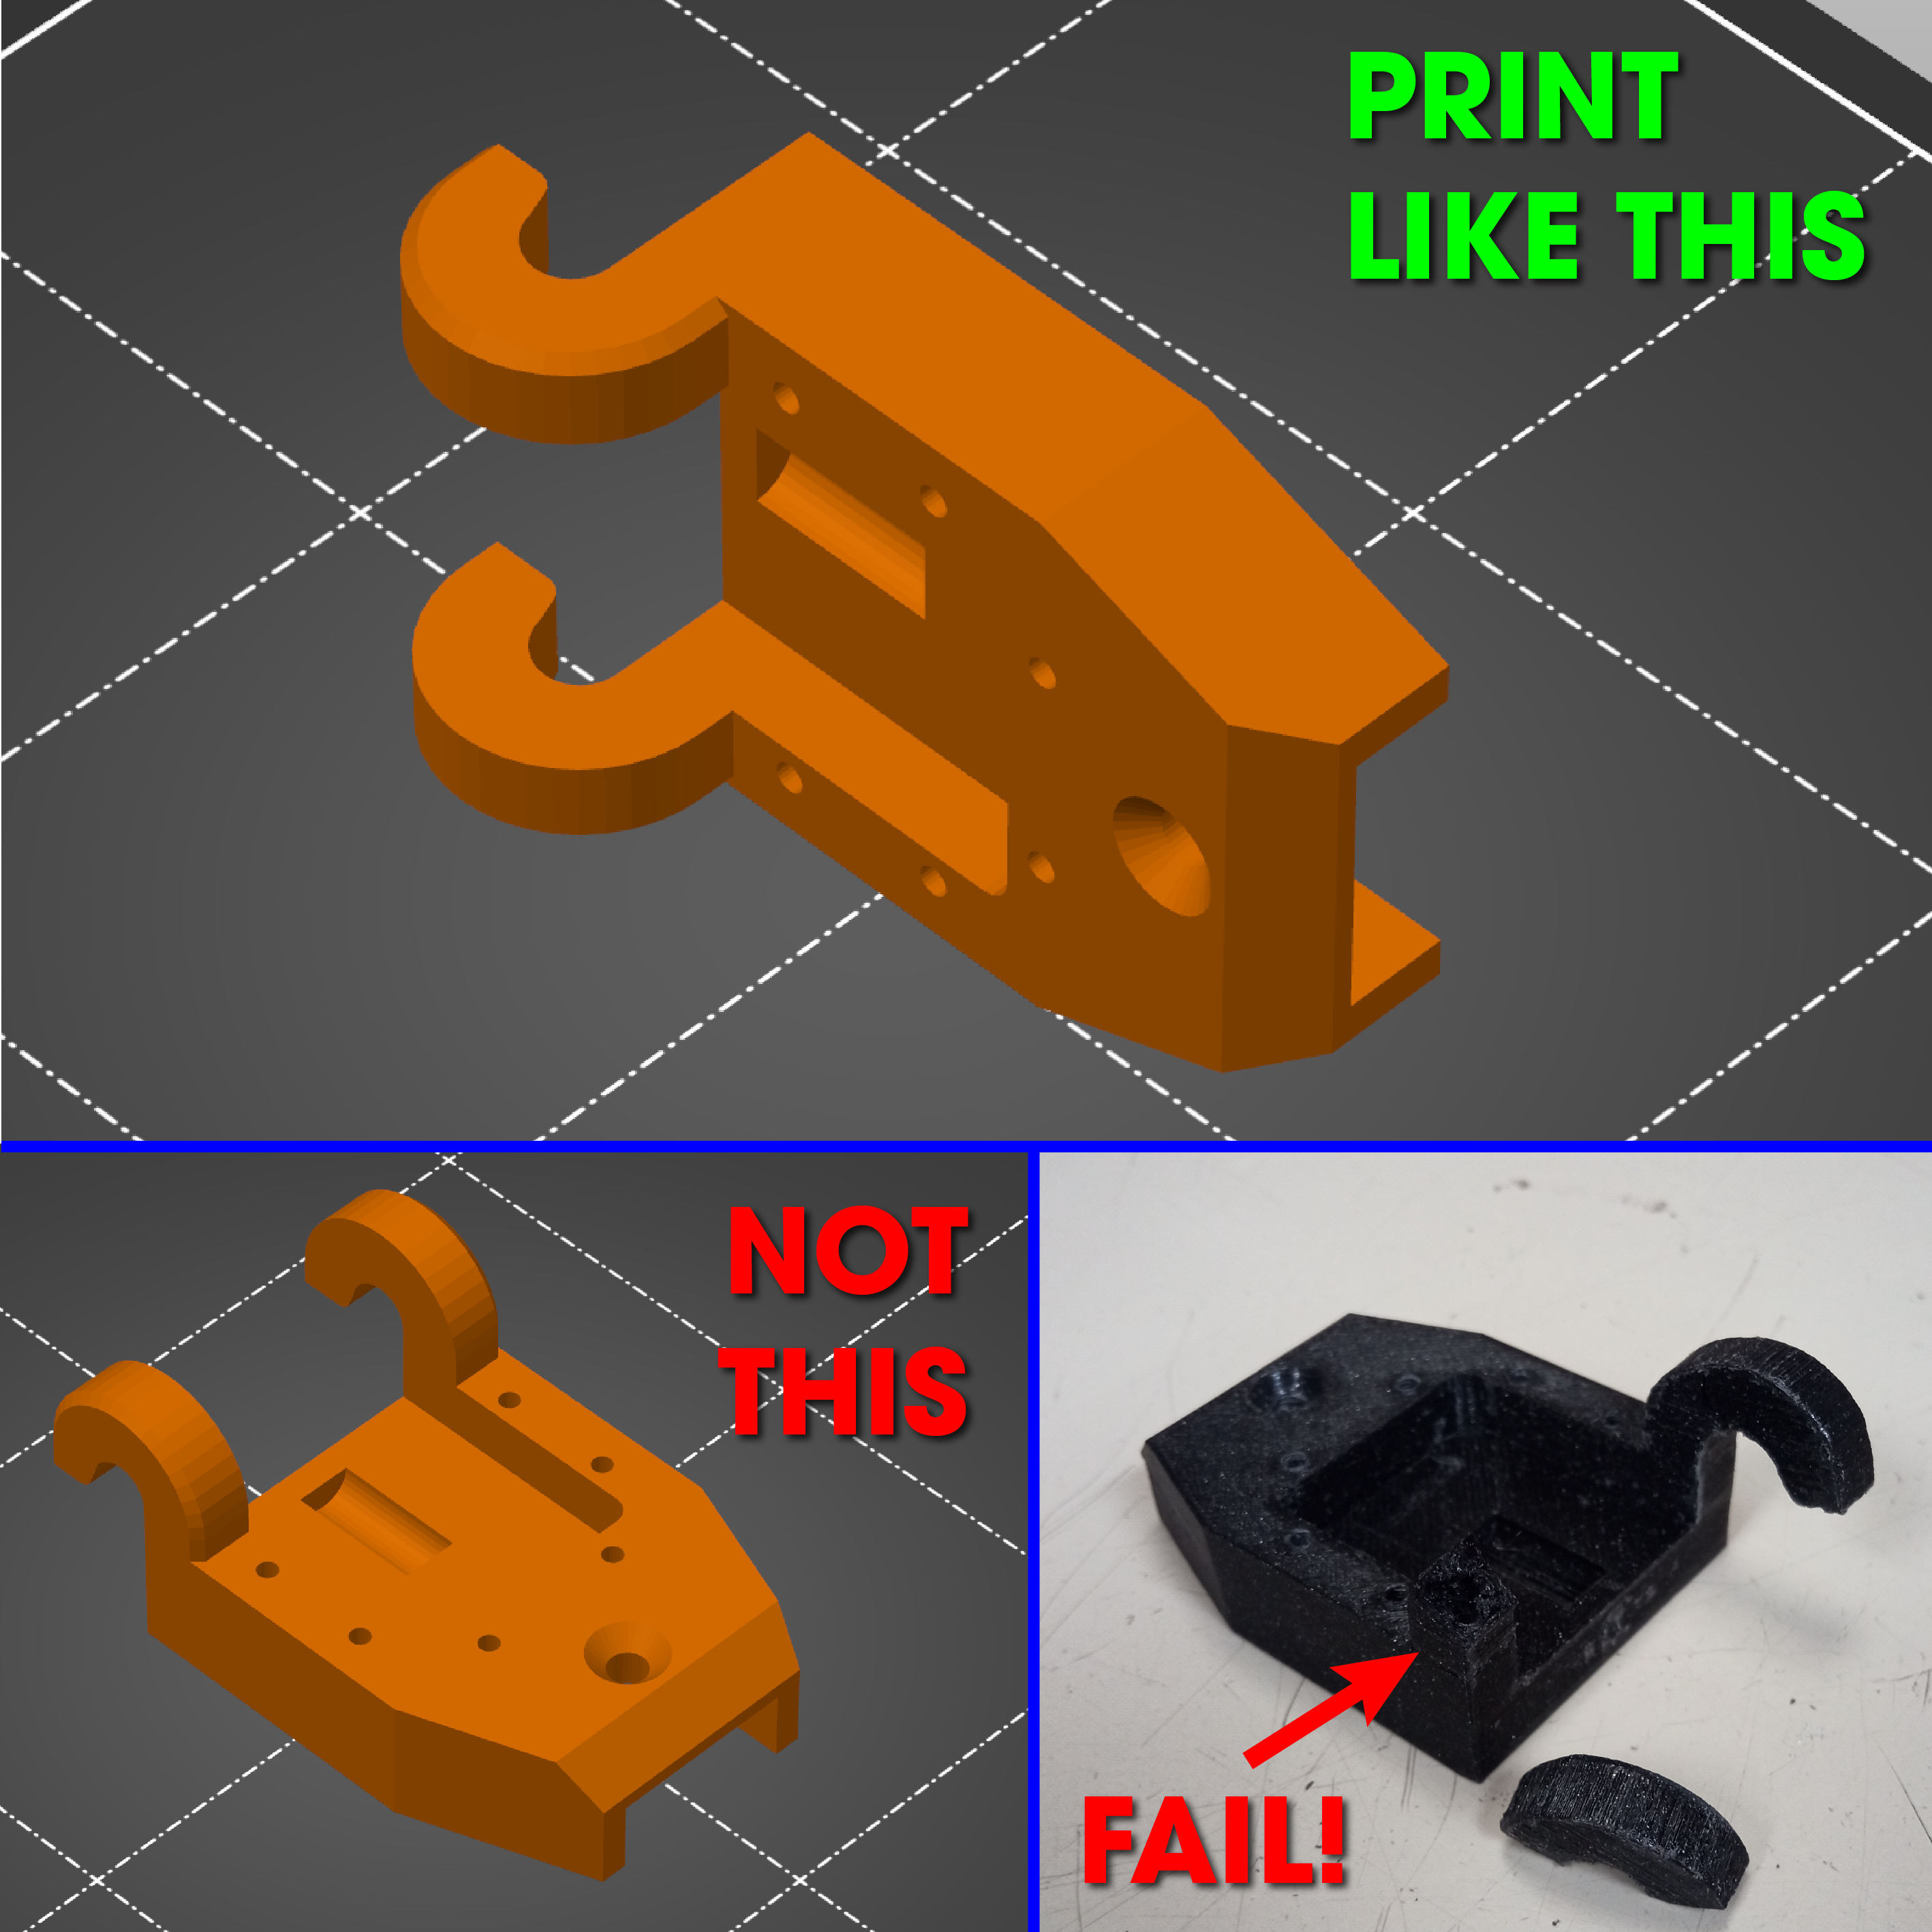
PRINT SETTINGS:
The recommended settings below are also mainly in the name of strength. You may even want to be more generous than this.
- Supports required: YES
- Material: The strongest you have. ABS would be ideal. Otherwise, go with the hardest, least giving PETG you've got. I used Prusament Galaxy Black PETG.
- Nozzle: 0.4mm
- Layer height: 0.12mm
- Perimeters: 3 (minimum)
- Infill: Adaptive Cubic @ 60-75% density
If you have the means, using a 0.6mm nozzle with a layer height of around 0.15mm would be stronger and take less time to print. I would still go with a minimum of 3 perimeters and 60% infill, though.
ASSEMBLY:
- Use a prying tool or flathead screwdriver to remove the c-shaped plastic mounting plate from the original part (this will destroy the plastic rivets). Set the mounting plate, red latch, and spring aside.
- Pre-thread the six small holes on the printed part using an M2.5 screw.
- Place the screw and red latch just as they were on the original. Secure with the mounting plate and six M2.5×5 screws, using the original rivet holes.
You may need to file the inside of the large screw hole to ensure the screw spins freely and lines up with the nut on the spreader.
Good luck!