
Auto Stamp 47x18mm
Obliczymy ostateczną cenę na podstawie wybranego pliku. Sprawdzisz ją i zaakceptujesz przed płatnością.
Zapisane na tym urządzeniu.

This is a remix of Devrosx's self inking stamp, I fixed up the model and added 2x m3x8mm screw for more reliable action
- Ocena
- 3,5 / 5
- Polubienia
- 24
- Pobrania
- 239
- Wydruki
- 1
- Wyświetlenia
- 1225
- Oceny
- 2
Aktualizacja u źródła:
Informacje o modelu
- Źródło
- Printables
- Kategoria
- Office
- Licencja
- Creative Commons — Attribution — Noncommercial — Share Alike
This is a remix of Devrosx's self inking stamp.
I fixed up the model, and added some design so we can use screw to secure the shell - stamp holder rotation. This makes the stamp rotation smoother and a lot more reliable.
====== Non printed Parts required ======
2x m3 8mm screw
1x comrpression spring with ½" OD, ≥ 1 ½" length and ≤ ½" solid height
1x trodat 4912 ink pad ( from amazon or aliexpress )
===== Printing =====
This should not need fancy filament. PLA / PETG work great already.
Print with tree support, the support removal for the body part might be a bit tricky and take some plier wiggle, watch out for the window around the ink pad insert area - that part of wall is thinner so be careful prying the support there.
====== Stamp pad ======
I only include one example - you will want to print this with TPU, also I found it is best to orient this with ink face at the bottom, as this give you the flatest surface for inking.
But to print it this way, you will need to use support, and TPU stick very well to itself, so the support removal can be challenging if your text is small or image is very detailed.
In some case, negative stamp might be a better choice, as you can simply have TPU bridge thorough the negative space.
Once the stamp pad is printed, simply use a double side tape to secure it on the pad holder.
====== Assembly ======
Drop the spring on the cross protrusion inside the shell part
put the body in - with the side cutout on the same side of the shell's side cutout, and line up the spring to the cross protrusion at the bottom of the body
Put the stamp pad holder in - flat side facing down into the body, get your screw driver ready
Slightly depress the body so it sink into the shell, and line up the shell's screw hole to the stamp holder's screw hole and fasten the screw. Repeat on the other side. ( note, during this phase keep the stamp pad holder flat side face down, and keep it near the bottom of the body chamber )
After both side's screw is secured, the assembly is completed. And you should be able to see the stamp mechanism working like this

Once the stamp pad holder is rotating smooth, you can then stick on the stamp pad, and put in the Trodat 4912 ink pad and test it out
====== sourcing spring ======
While I have not test it, this spring from Amazon has the right spec and should to fit the bill.
If you happen to have music wire , power drill and 3/8 dowel at hand, you can also try your hand at making your own spring: ( I uses .037" music wire for this, but I think anything between 0.03 ~ 0.05" should work )
Cut a slot at the end of 3/8" dowel like so
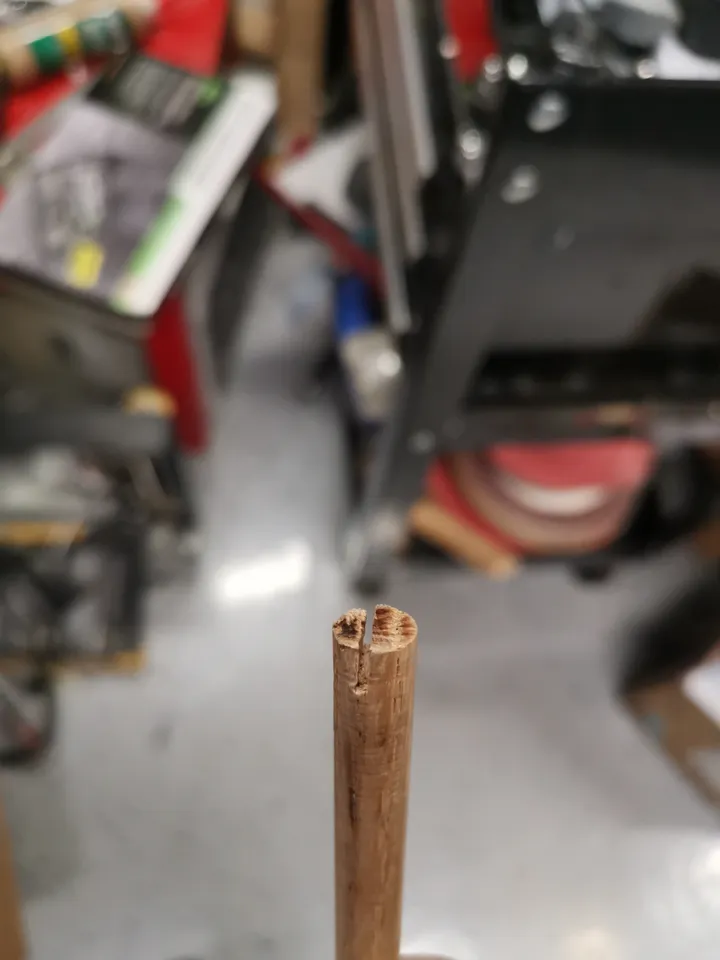
Put the dowel into a power drill, and insert one end of music wirez
Start the drill at about ⅓ to half speed, use your hand to guide the wire slowly downward. Don't go too fast else it might fly out on you.. but going too slow may make the loop inconsistent as well.

After you got a coil of music wire at least 15 loops long, stop the drill and release the music wire from the dowel. it should now have approximately 1/2~5/8 " OD
Use a wire snipper to cut off the straight part, then keep about 10 to 12 loop of the coil - too many loops might make the solid height too tall.
You want the final resting height of the spring to be a bit more than 1 ½" long - again use plier to adjust the coil so it would be about the right height.