
1 / 5
Raspberry Pi 4 Modular Clicker Articulated Arm Stand
Zamów wydruk tego modelu
Obliczymy ostateczną cenę na podstawie wybranego pliku. Sprawdzisz ją i zaakceptujesz przed płatnością.
Zapisane na tym urządzeniu.

Articulated Arm for Raspberry Pi Model 4 Modular design
- Ocena
- 5 / 5
- Polubienia
- 42
- Pobrania
- 108
- Wydruki
- 2
- Wyświetlenia
- 1114
- Oceny
- 1
Aktualizacja u źródła:
Informacje o modelu
- Źródło
- Printables
- Kategoria
- Accessories
- Licencja
- Creative Commons — Attribution — Noncommercial
SzczegółyPliki (19)Wydruki i komentarze (Wydruki: 2) (Komentarze: 5)Remiksy (0)Kolekcje (58)Powiązane
Mounting arm have stepped rotation, 40 points of rotation, can hold the weight of itself using Bedsprings
There are different bed spring strengths. choose the ones that won't break the print when twist and moved.
Update:
- Added a V slot 2020 adapter mount for the 2040 mount.
Notice:
- Screws must not exceed 8mm protruding from the Hinge Spacer to the Actuator.
- Different mounts will have different bolt length requirements
- Avoid stripping the plastic. To prevent over threading use a 3mm twist drill to re-bore all none threaded holes to prevent false threading. You should only feel the bite of the thread bearing holes in the Actuator. Use hand tools. do not use powered screwdrivers.
- To avoid total destruction of the prints Rotate the Pivots directly one joint at a time. instead of inverse kinematics.
- For extra strength use 8mm M3 screws instead of the 5mm M3 screws.
Contains:
- Wall Control Mount (BaseZ)
- 2040 V-slot rail Mount (BaseZ_2040)
- Arm Segment (2 hole configuration, A and B )
- Base Pivot Joints (BaseX,BaseY)
- Effector Pivot Joints (Hinge_Mount_A,Hinge_Mount_B)
- Fixed Rotation (Replaces Actuator to a fixed rotation)
Required:
- M3 screws (5mm or 8mm), (12mm) , (16mm)
- M2 screws (10mm)
- Bed Springs 8mm OD x 20mm Length https://www.amazon.ca/gp/product/B081DSZTV6
- Silicon Lubricant (for the Actuator)
Optional:
Printing instructions:
- Print at the slowest you can for stronger prints.
- 8 Perimeters,
- 25% infill Honeycomb
- 3 Top layers (more the better)
- 3 Bottom layers (more the better)
- The gears should always be horizontal to the bed. Never print it on its side.
- Use custom slicing options to make the top half of the Pi Mount print slower (20-30mms) to improve print strength (this part of the print breaks often)

Assembly:

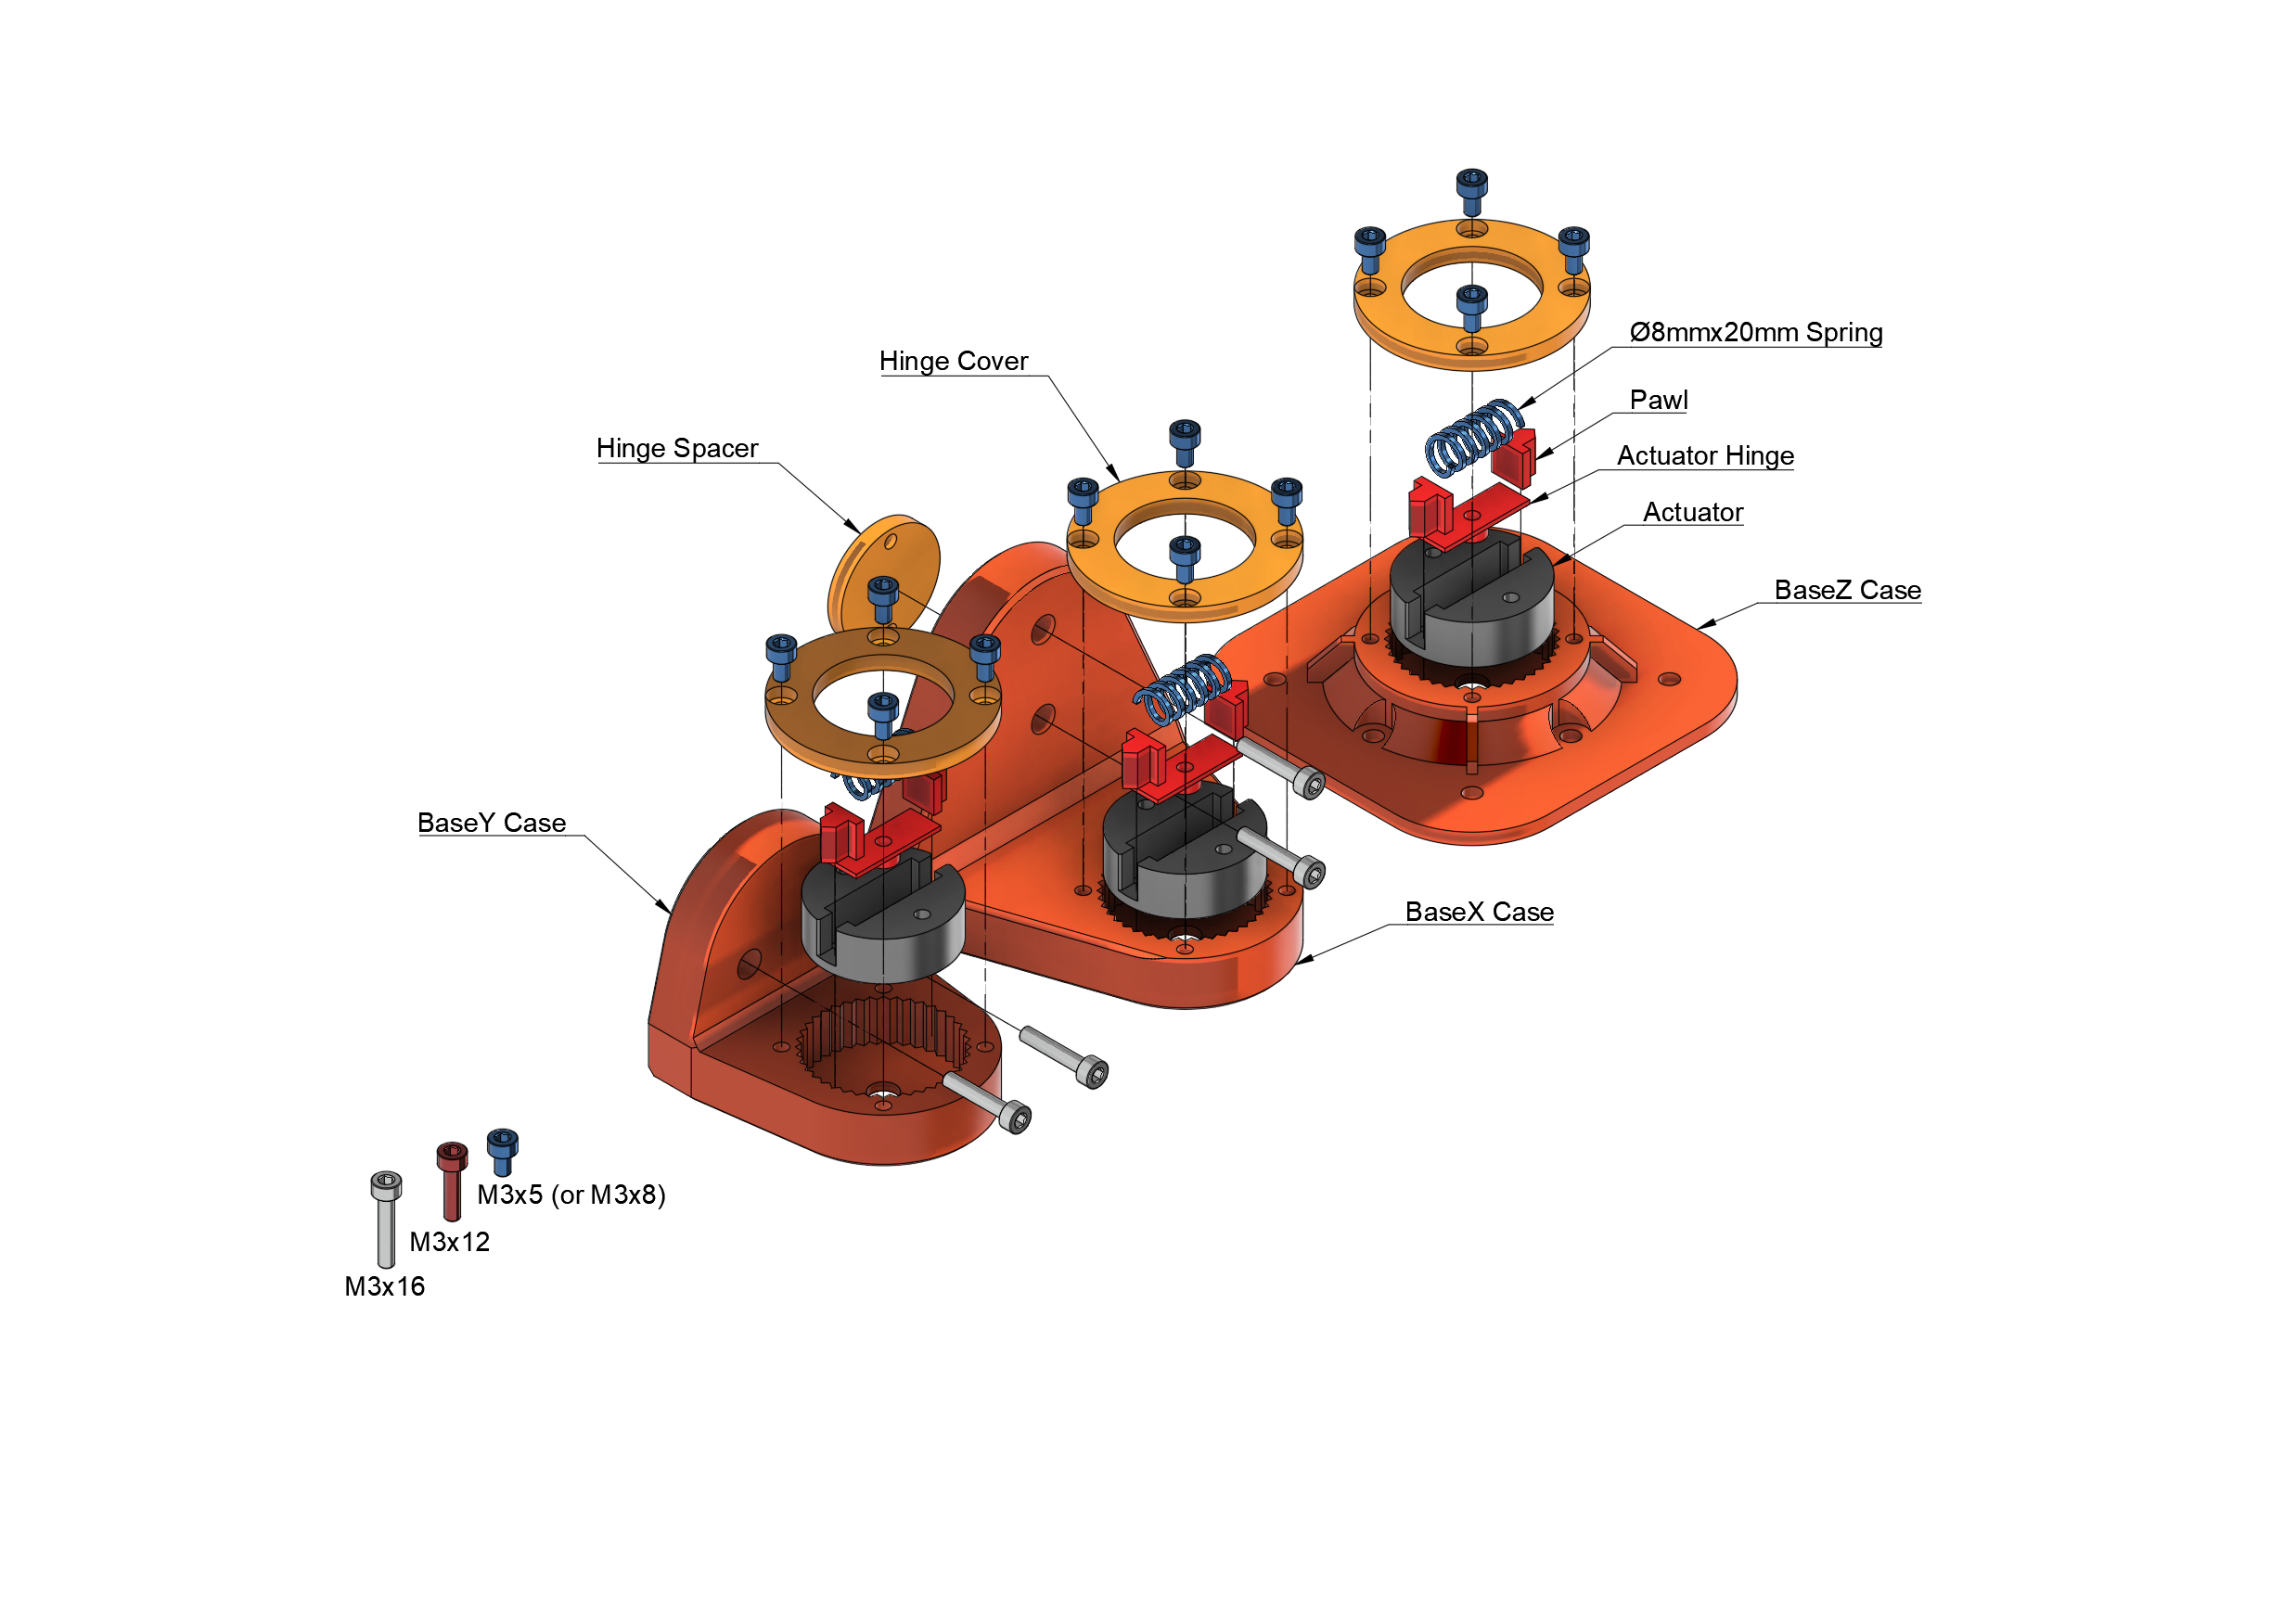
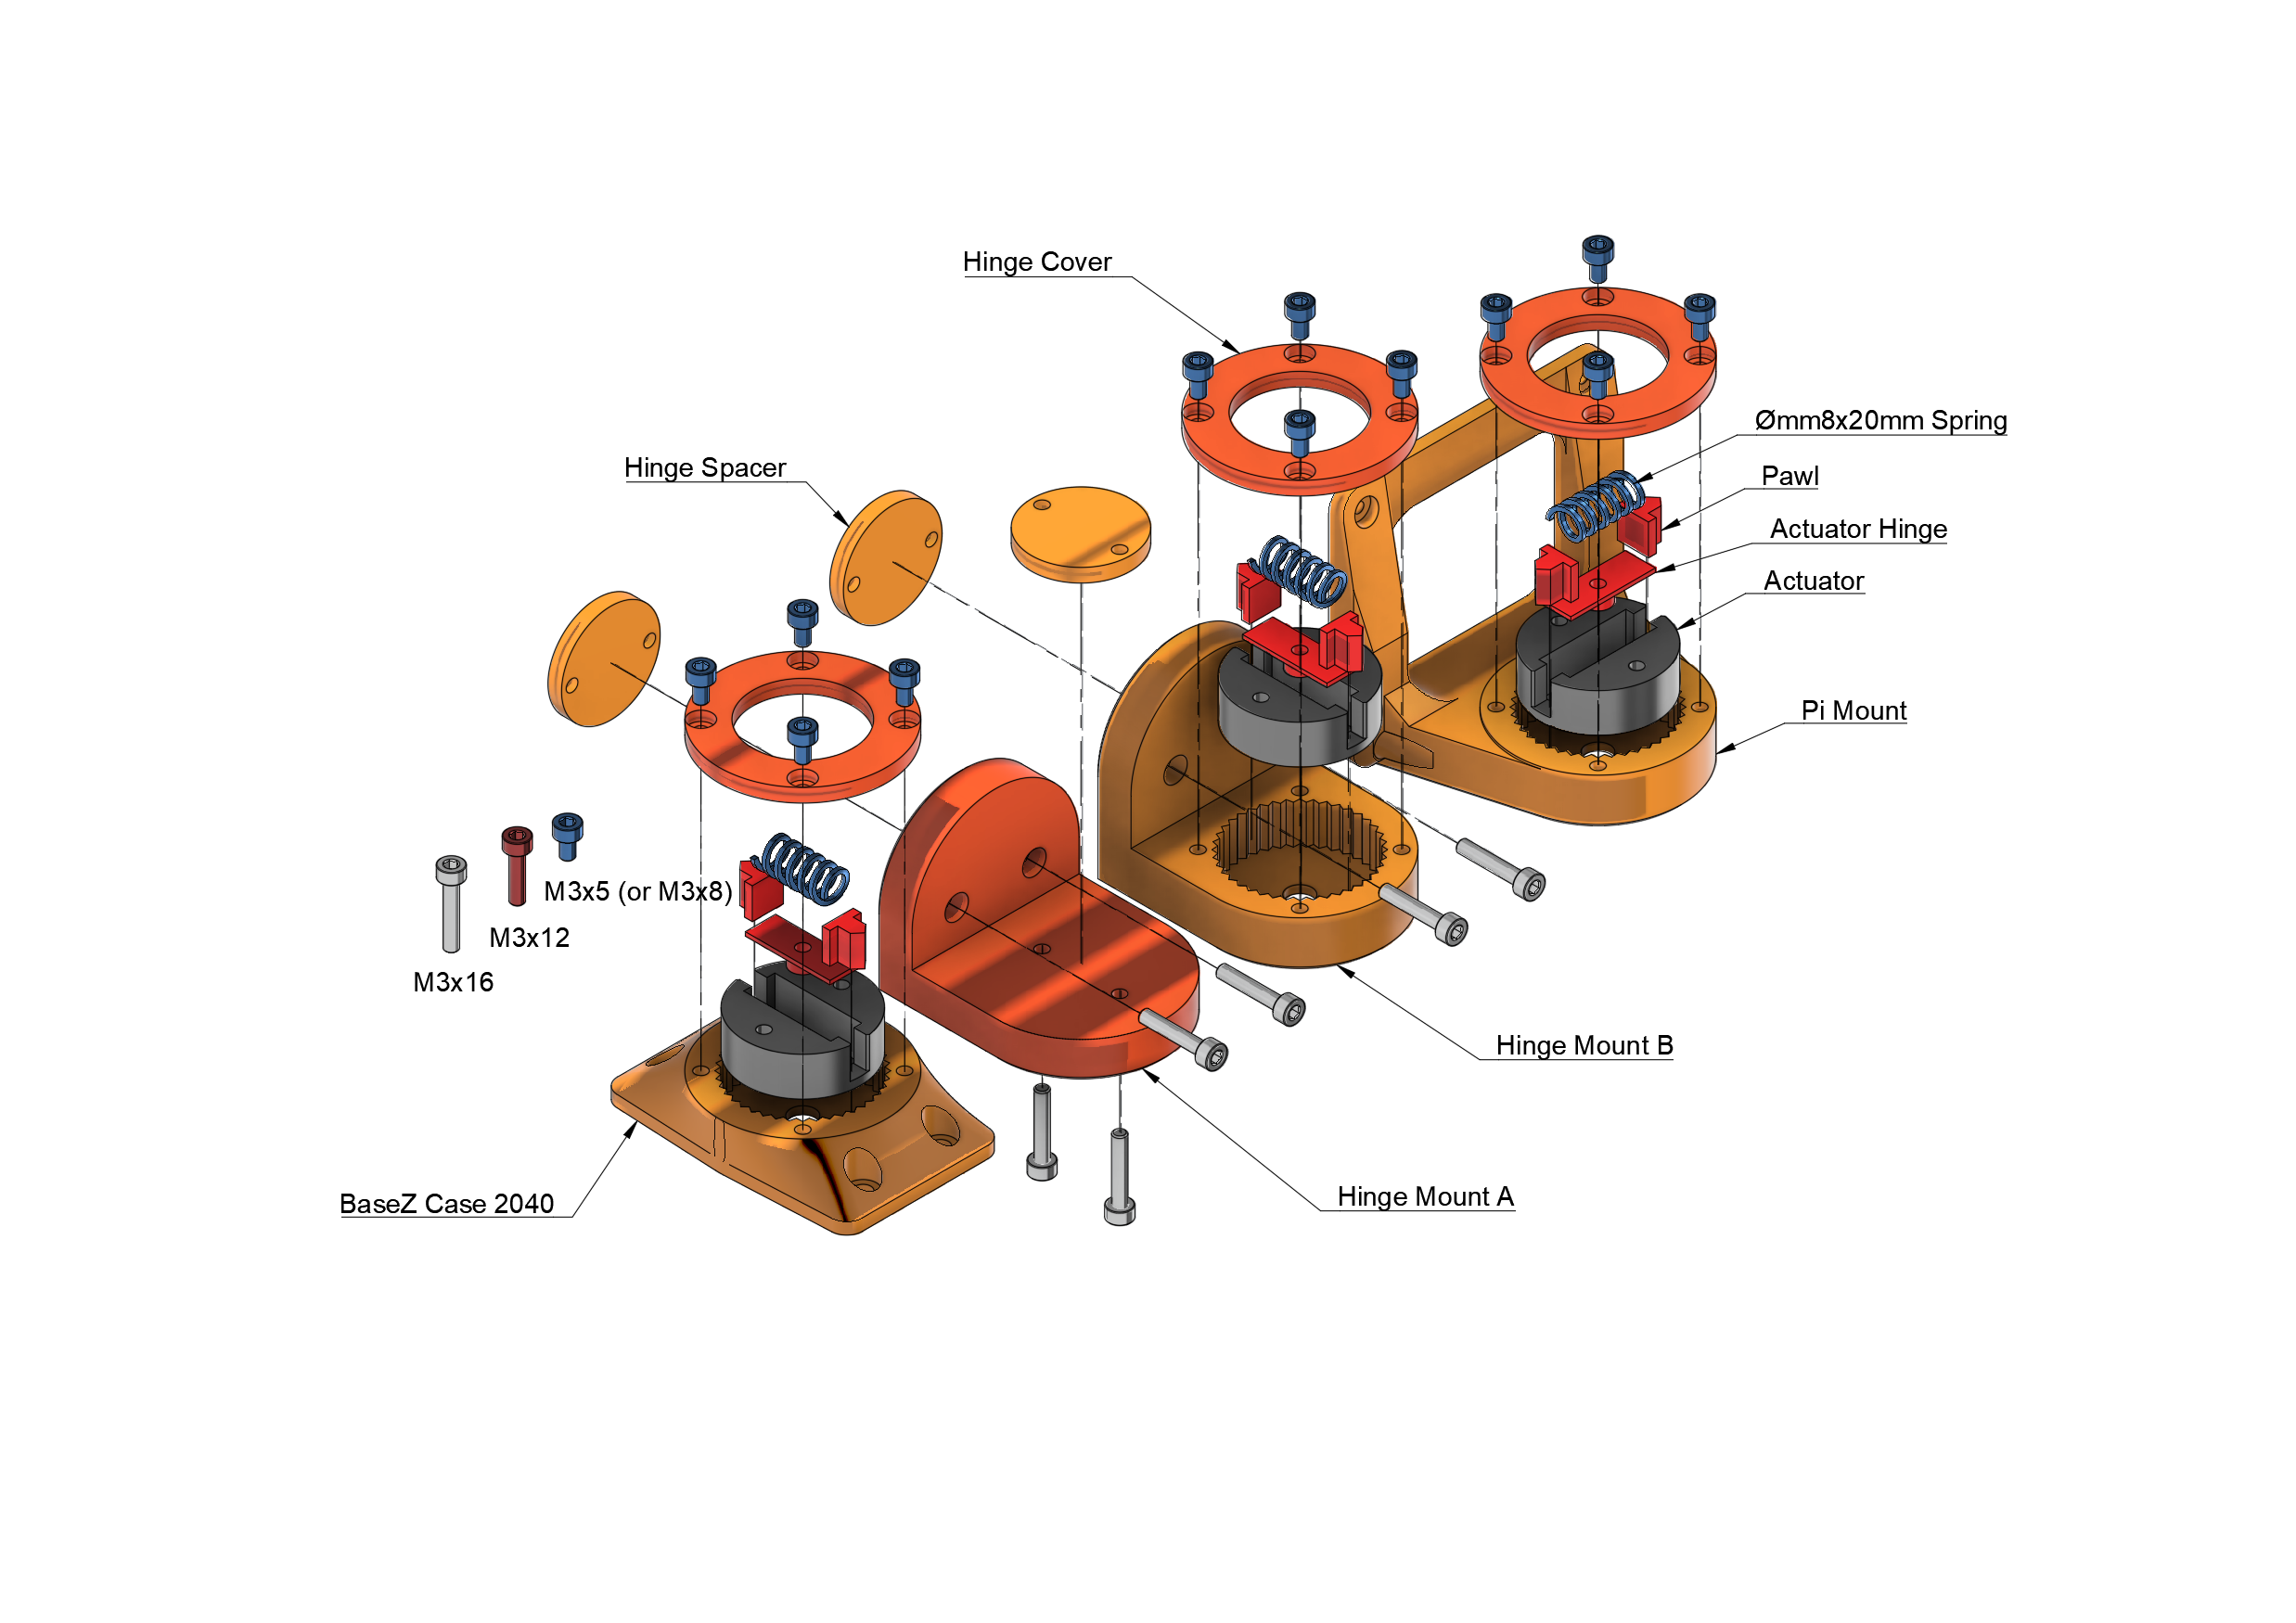
Printed with Bambu Labs X1 Carbon AMZN Generic ABS Grey