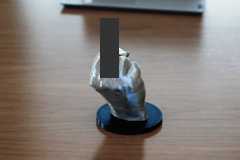
Helping Hand: Zeus' Nightlight
Obliczymy ostateczną cenę na podstawie wybranego pliku. Sprawdzisz ją i zaakceptujesz przed płatnością.
Zapisane na tym urządzeniu.

Zeus' hand with lightning as a night light
- Ocena
- 0 / 5
- Polubienia
- 24
- Pobrania
- 99
- Wydruki
- 0
- Wyświetlenia
- 547
- Oceny
- 0
Aktualizacja u źródła:
Informacje o modelu
- Źródło
- Printables
- Kategoria
- Sculptures
- Licencja
- Creative Commons — Attribution — Noncommercial — Share Alike
This decorative night light is an eye catcher on the shelf.
This model can also be assembled without the electronics and still looks nice. If you opt for the non-lightened model, I'd recommend to print a socket from my other "Hand with Attitude" models (see below).
Printing instructions
No support required at all.
The hand part can be printed with 5% infill and 3 perimeters.
The lightning part needs to be printed four (4) times, where two of the parts have to be mirrored (X or Y). I highly recommend to use translucent PLA, because these parts have to be glued together. I only had some translcent PETG left and had to use double sided adhesive tape to put the parts together.
Bill of Material and Assembly
If you decide to built the lightened model, you will need
- a 12V mains adapter
- an installable socket for the 12V adapter plug (8mm diameter hole)
- 10 x 3mm LEDs. Note, that only red or yellow LEDs will work, because the color defines the operating voltage
- a 47 Ohm resistor
- thin, isolated copper cable (normally used for electric magnets or transformators

For each branch of the lightning, you need to connect 5 LEDs in series. Solder the anode of one LED to the kathode of another with a 3cm copper cable.
Don't forget to scratch the isolation off the ends of the copper cable before soldering.
Solder a 20 cm copper cable to each of the unconnected anode and kathode.

Now, place the LED chain into the groove of one lightning part as shown in the picture. Glue the corresponding (mirrored) part on top.
Carefully thread the two wires into one of the holes on the side of the hand and guide them through to the hole at the hand's root.
Repeat this for the other lightning branch.

Solder two cables to the power socket. Solder the resistor between one of the power lines and the corresponding two lines from the LED branches. Just take care to connect the two anode wires with the positive, and the cathode with the negative power wire.
Use shrink tubes over the solder joints and resistor to avoid short circuits.
Except the lightning bolts, all printed parts are just pressed together for assembly. If they fit too loose, use some glue.
Please, check out, download, print and like also my other hand models: