
1 / 2
Pi Cam v1.3 Voron2.4 Chamber Mount
Zamów wydruk tego modelu
Obliczymy ostateczną cenę na podstawie wybranego pliku. Sprawdzisz ją i zaakceptujesz przed płatnością.
Zapisane na tym urządzeniu.

Mounting bracket for Pi Cam on the Gantry of Voron2.4.
- Ocena
- 0 / 5
- Polubienia
- 2
- Pobrania
- 23
- Wydruki
- 0
- Wyświetlenia
- 503
- Oceny
- 0
Aktualizacja u źródła:
Informacje o modelu
- Źródło
- Printables
- Kategoria
- Voron Parts & Upgrades
- Licencja
- Creative Commons — Attribution
Since I couldn't find anything for the Pi Cam mount inside the Voron, I made my own
Here are the BOMs:
- 6x M2x3.2 heated inserts
- 6x M2x8mm Socket Cap screws
- 4x M3x20 Socket cap screws (to replace the 4x M3x16 SC mounting the gantry to the carriage)
- Pi Cam v1.3
- Flex Cable. Measure the max diagonal length on your Voron. For my 350mm, I use a 1m cable as it can provide me the needed length + some slack
Instructions:
- Print with the orientation as shown
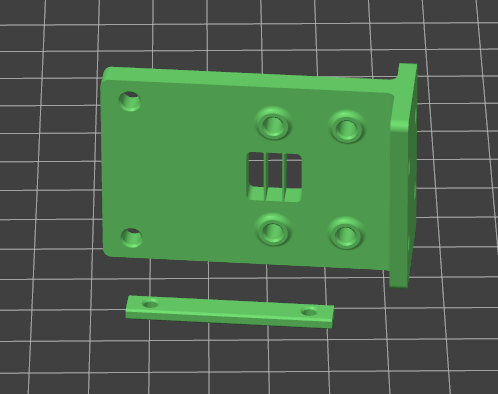
- No supports needed. There are 2 built-in support for the Pi Cam opening.
- Print with ABS or ASA. Follow Voron infill and wall standards
- Once done, remove the 4x M3 screws on either side of the gantry depending on your reference. The design is made so it can be mounted on either left or right side of the gantry
- Mount the Pi Cam bracket to the gantry
- Remove the panel on either side so you can mount the Pi Cam on it
- Secure the camera with 4x M2 screws.
- Insert the FFC on the Camera. Secure the cable with the Cable Clamp and 2x M2 screws
- Power on your Pi and check your camera. It should turn on after you power cycle. If not, check if you enable the camera interface via raspi-config
If you think the model is useful, please feel free to donate to support future development work