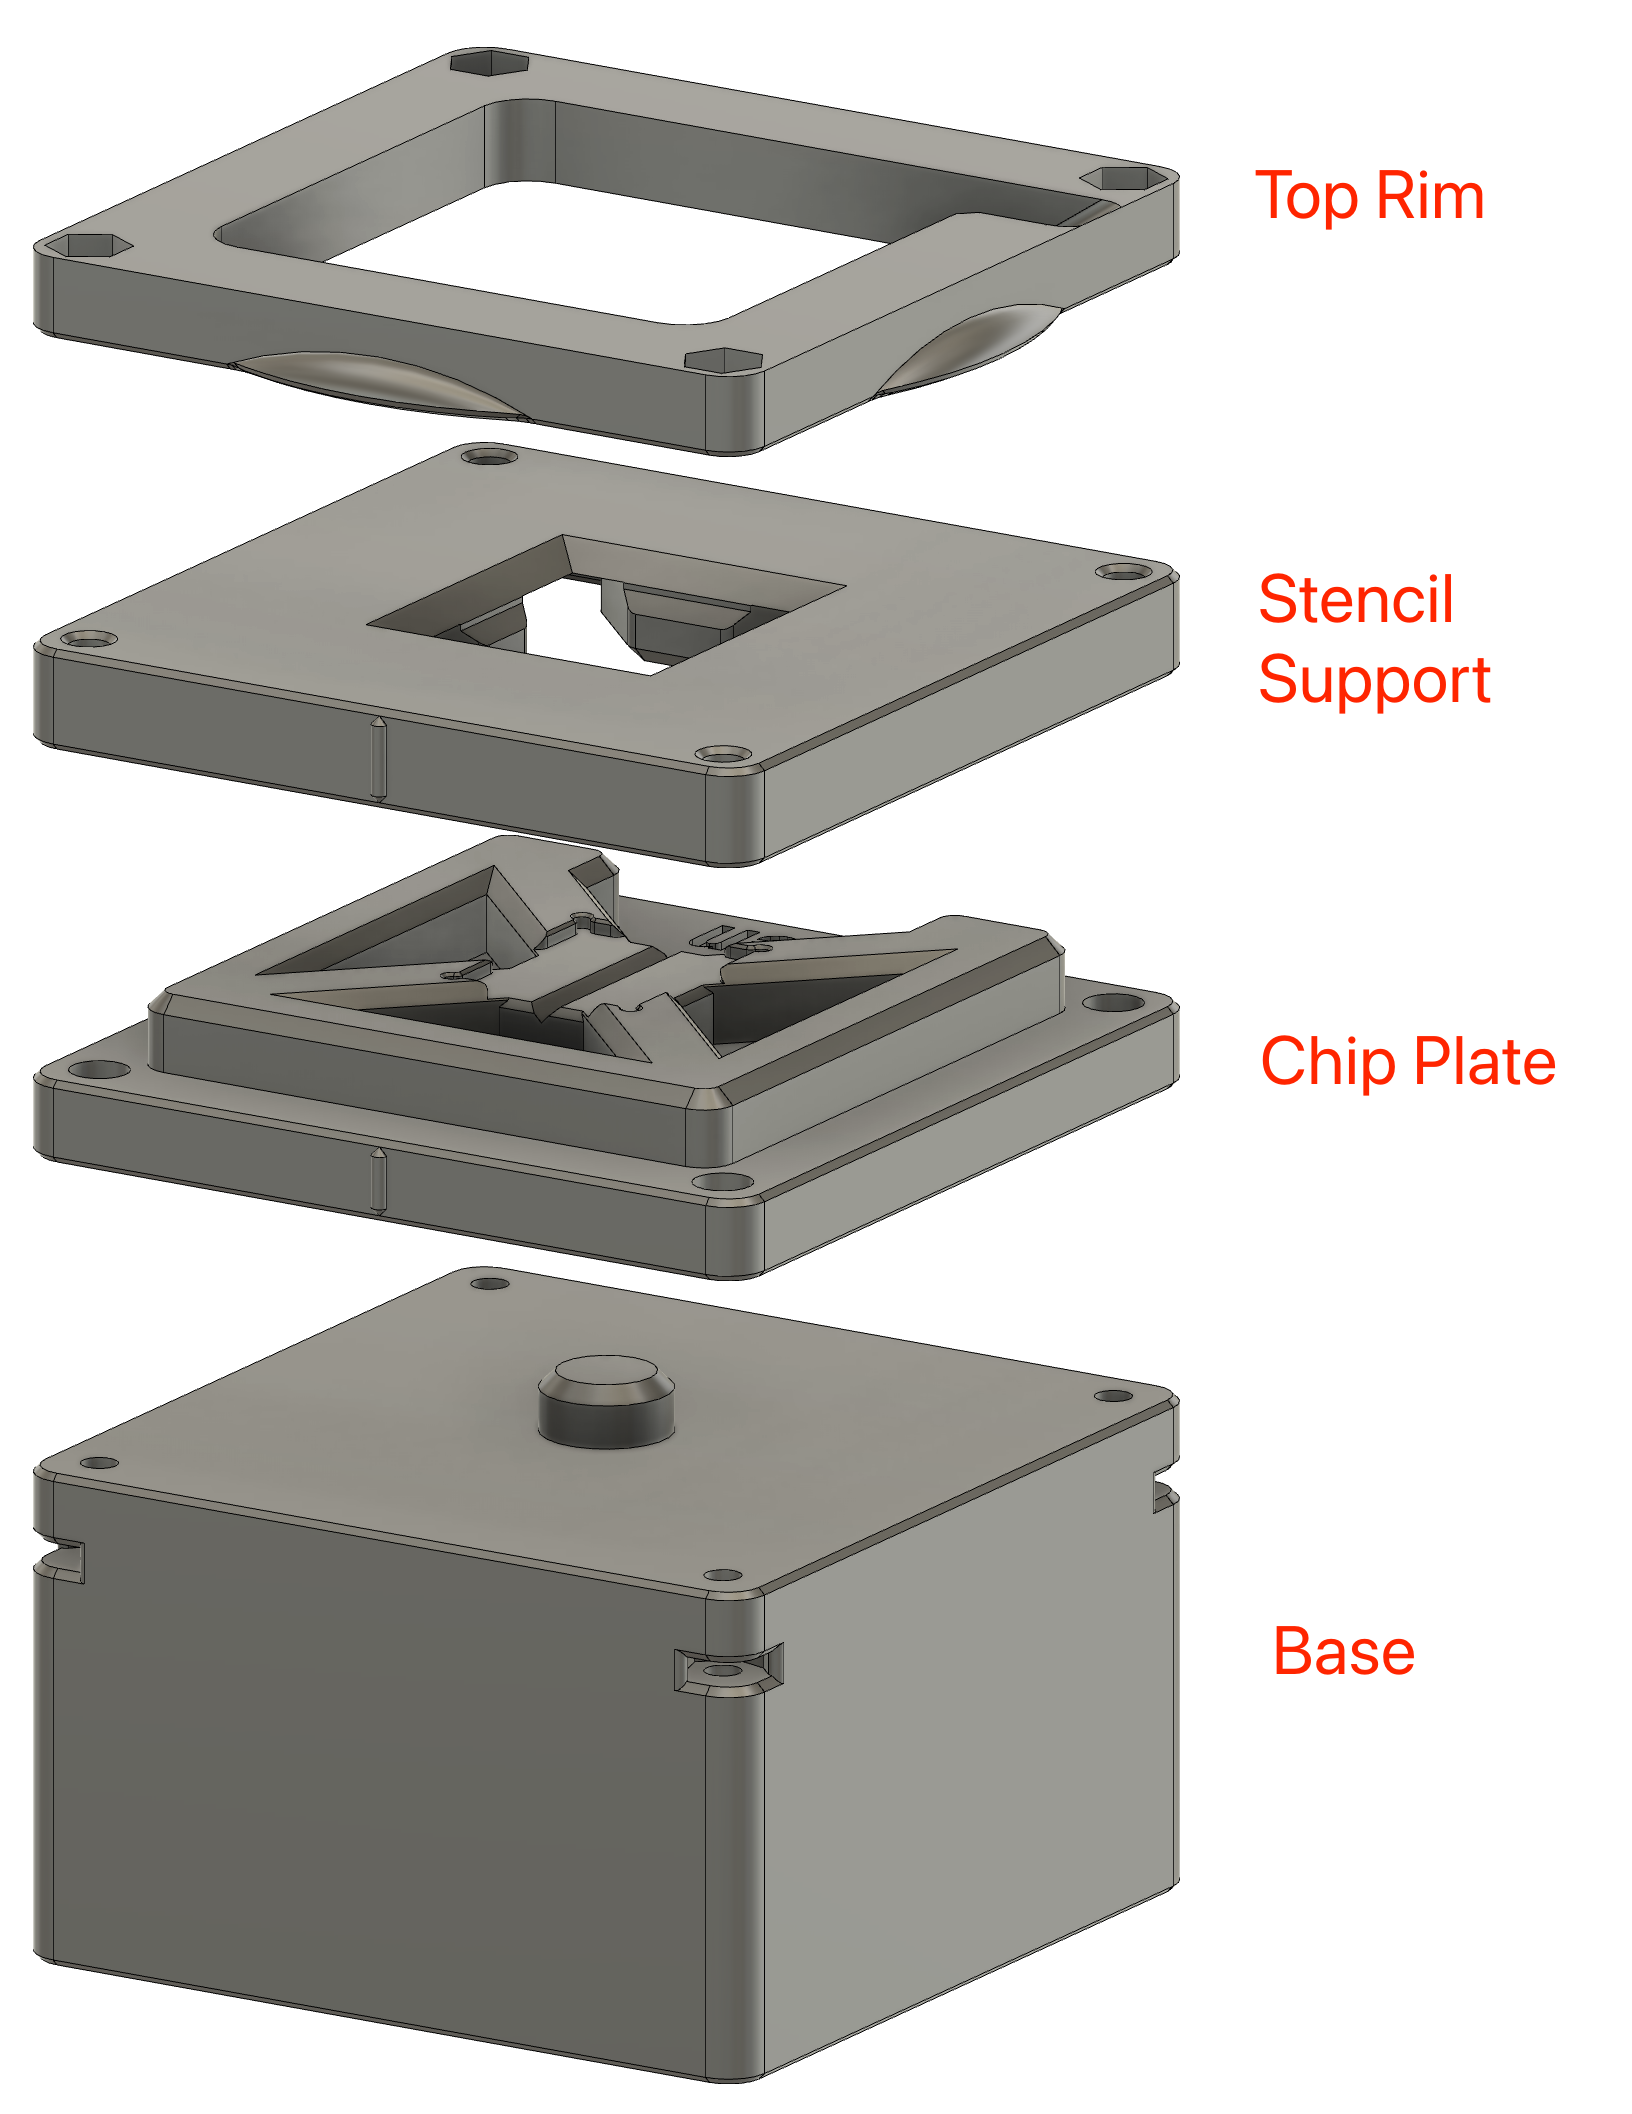
GDDR6X BGA Reballing Jig
Obliczymy ostateczną cenę na podstawie wybranego pliku. Sprawdzisz ją i zaakceptujesz przed płatnością.
Zapisane na tym urządzeniu.

A reballing jig for GDDR6X BGA chips.
- Ocena
- 0 / 5
- Polubienia
- 27
- Pobrania
- 201
- Wydruki
- 0
- Wyświetlenia
- 1859
- Oceny
- 0
Aktualizacja u źródła:
Informacje o modelu
- Źródło
- Printables
- Kategoria
- Computers
- Licencja
- Creative Commons — Attribution — Share Alike
A DIY BGA reballing jig for GDDR6X chips.
Stencil size: 0.7" x 0.62"/17.82mm x 15.84mm
----------------------------
Parts
Screws & nuts: [Link]
- [4x]M2x6mm
- [4x]M2x8mm
Magnet:
- 3mm tall, 8mm in diameter.
----------------------------
Print in original orientations, with support.
----------------------------
Tips
- Have a 1st layer squeeze so the plates are flat instead of having print lines.
- (Balls will get stuck in print lines)
- You need all 4 screws on all 4 corners, for both top and bottom assembly.
- Do not over tighten the screws. It will warp the plates
- Tape the coin hole so you don't spill them around.
----------------------------
Assembly
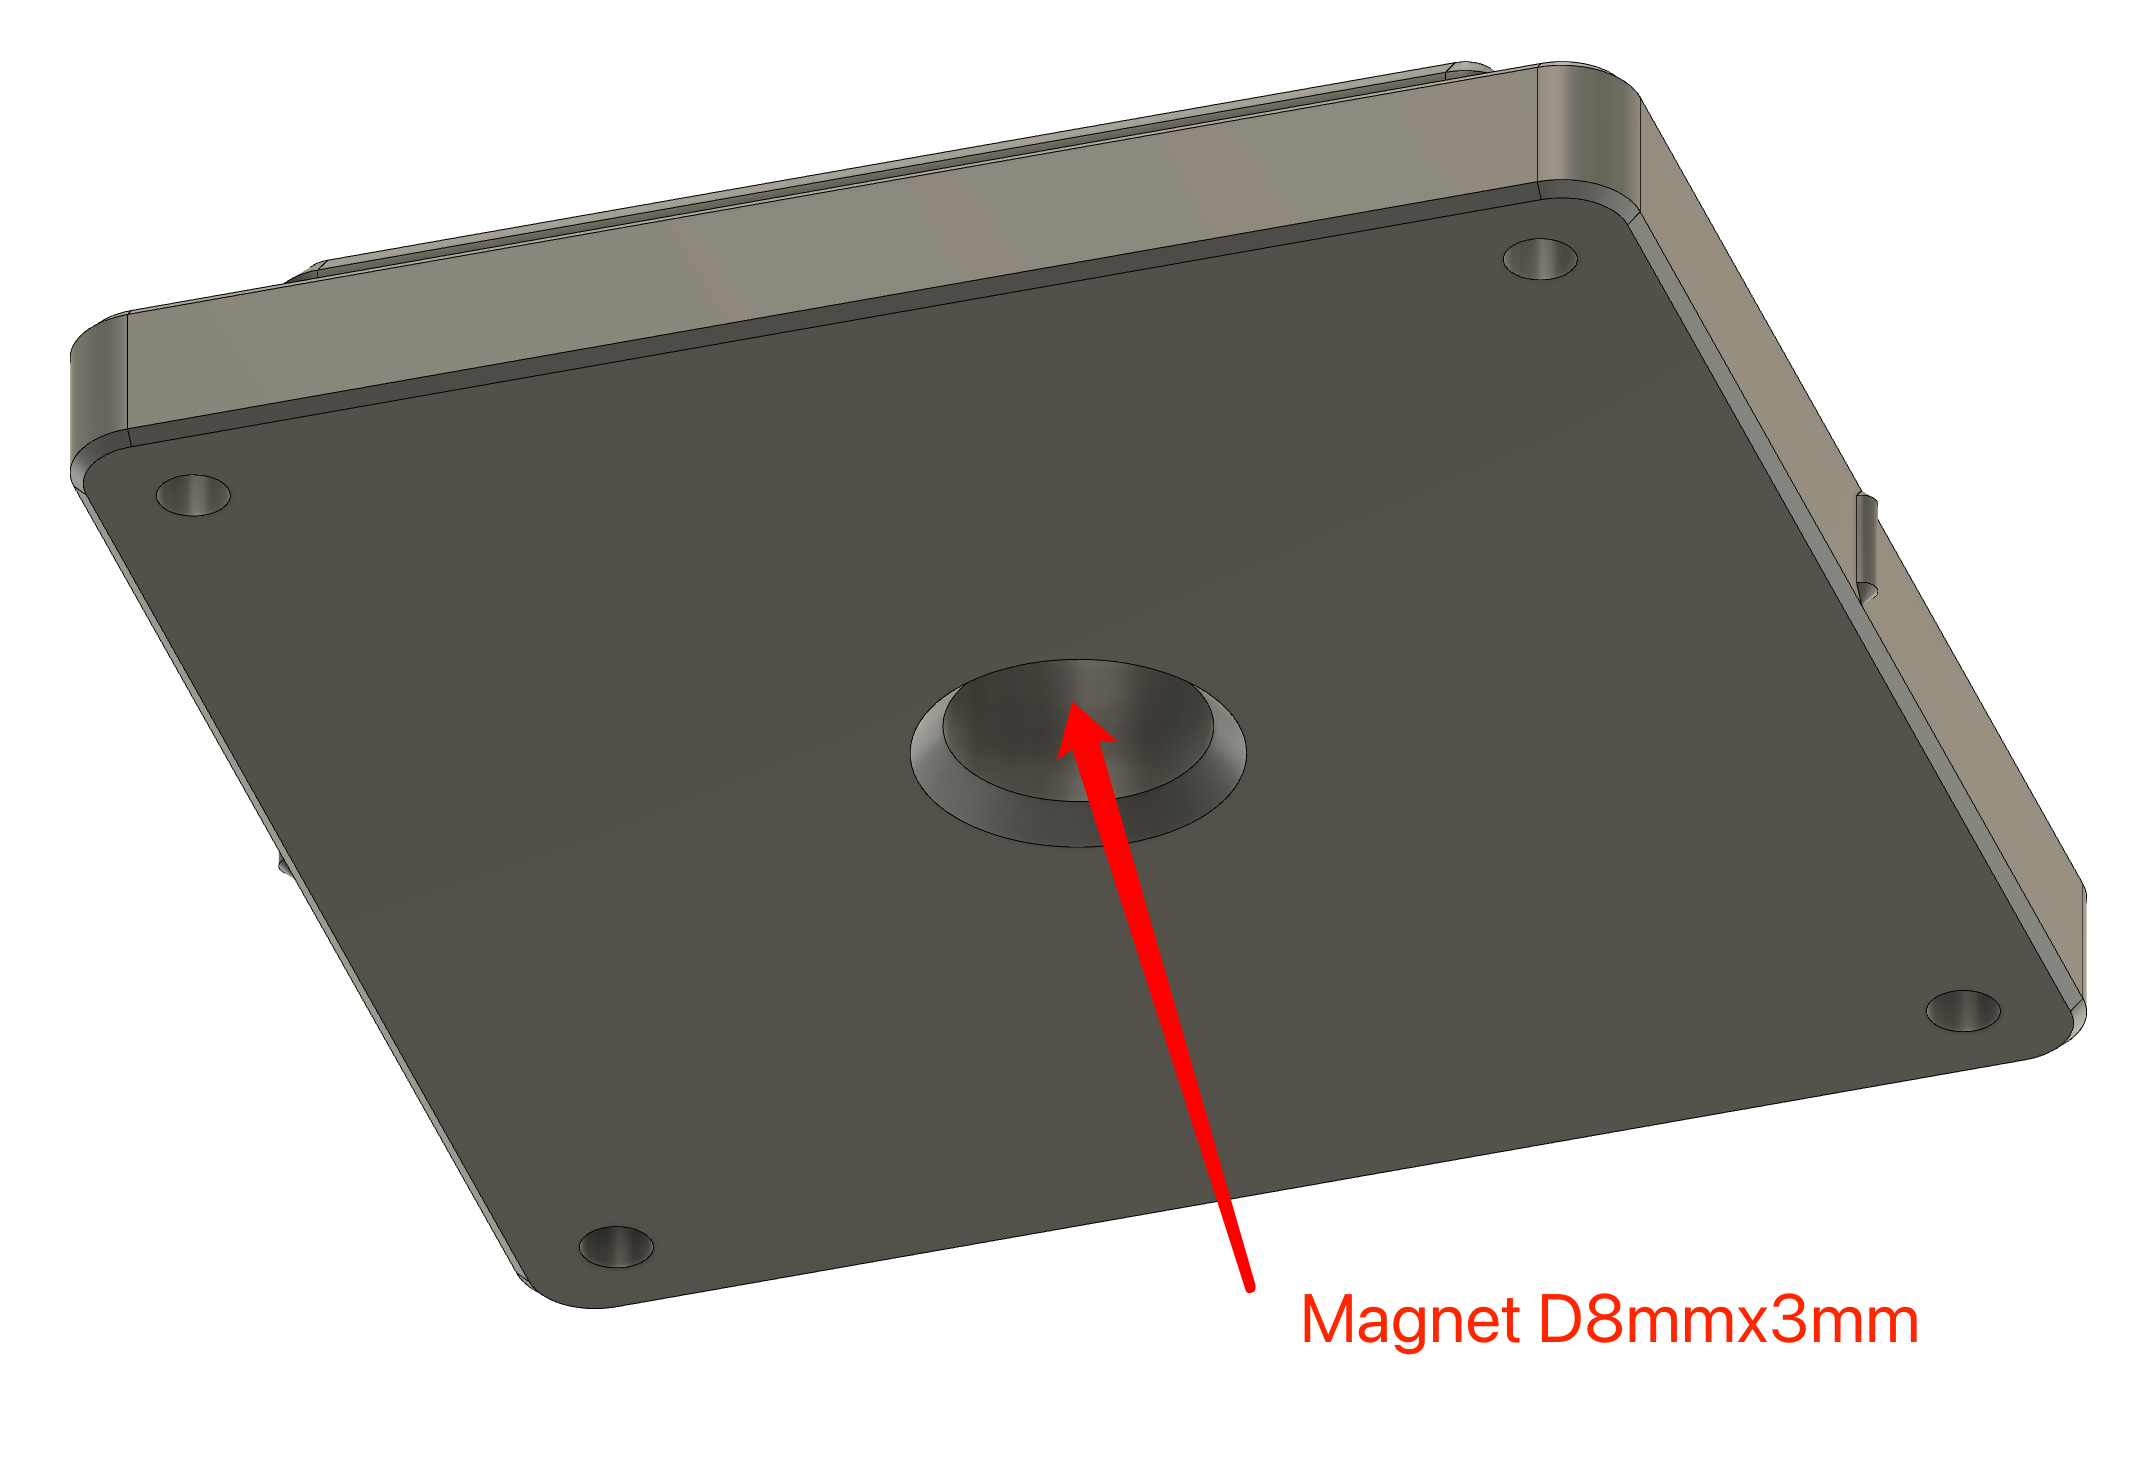
Clean out the support from the magnet hole on the bottom of the chip plate and insert a magnet no bigger than D8mm x 3mm.
Use [4x] M2x6mm screws to attach the top rim to the stencil support.
Use [4x] M2x8mm screws to attach the chip plate to the base AFTER inserting the magnet into the chip plate piece.
The base has an opening for a few coins to weigh the whole jig down for better stability.