Turtle beach headset parts replacement
Obliczymy ostateczną cenę na podstawie wybranego pliku. Sprawdzisz ją i zaakceptujesz przed płatnością.
Zapisane na tym urządzeniu.
this model allows you to replace both ear part and frame of headset which is known to be very fragile.
- Ocena
- 0 / 5
- Polubienia
- 14
- Pobrania
- 108
- Wydruki
- 0
- Wyświetlenia
- 1053
- Oceny
- 0
Aktualizacja u źródła:
Informacje o modelu
- Źródło
- Printables
- Kategoria
- Audio
- Licencja
- Creative Commons — Public Domain
This model is a buffed up version of original Turtle beach px22headset frame. As i already broke 3 of previous versions of the headsets and i know about people close to me that broke theirs i decided to make more durable piece myself. These parts can outlive the original ones several times over.
Replacement part works with models:
x12,x32, px22
Printing
Parts need to be supported, either organic or old style supports work.
printed in 0.2mm layer height, 0.15mm would be even better
Tested in PLA, PETG, ABS - all of these materials seems to work well enough
Assembly
Disassemble the old ones( which are partially disassembled since they broke, right?)
Save 4 screws holding each ear piece(total 8 screws)
You gonna have to cut the cable or desolder it from one ear piece to be able to extract it from old frame.
Now you can go 2 ways:
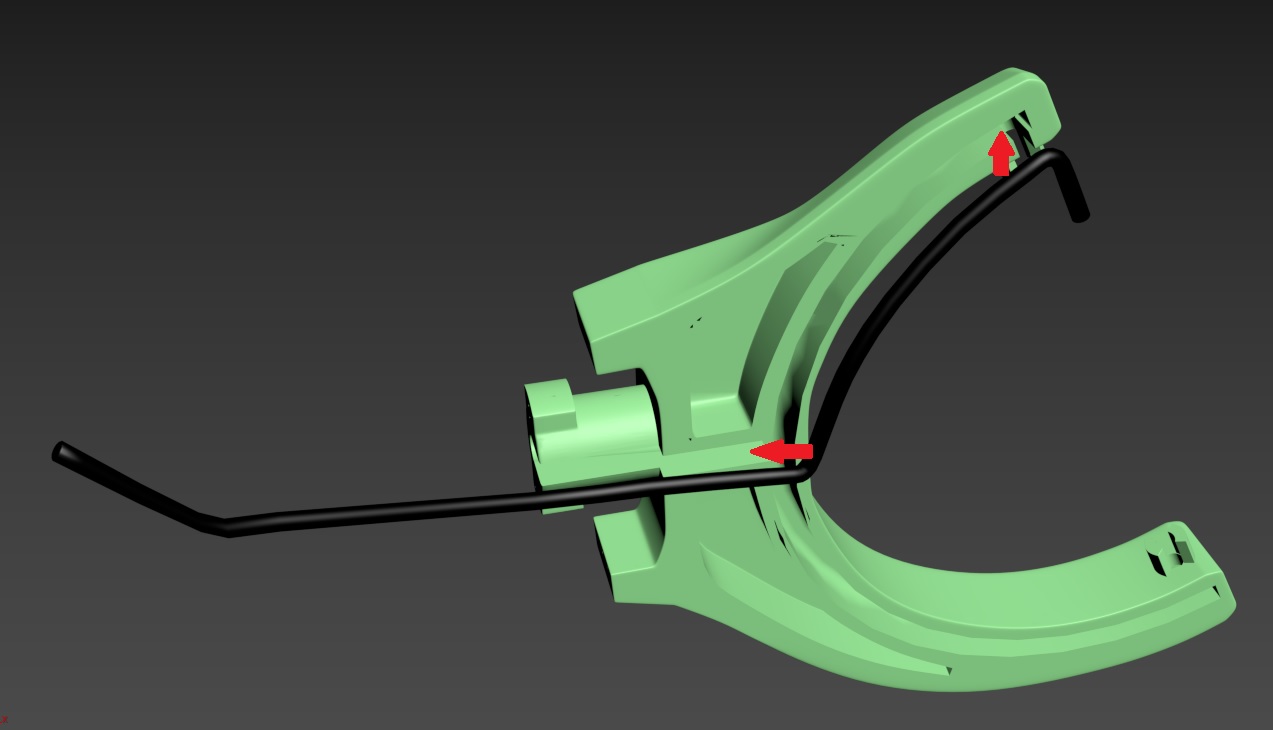
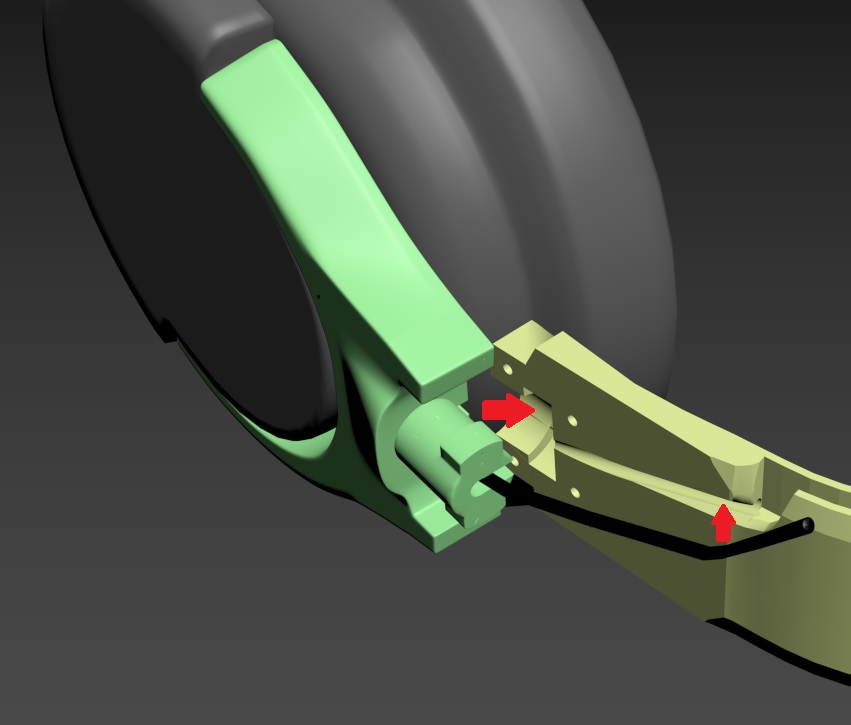
(A) IF you believe in this part strength you can attach ear piece (you will know how to,because it is exactly the opposite of the disassemble steps*) you can navigate the cable through the frame channel(pictures of proper placement included), pull the old foam piece on the frame part, attach the other ear piece. This way you will have to desolder the cable IF the part breaks.
(B) Pull the foam piece on the frame, and attach both ear pieces, solder wire. The wire will be dangling a bit(not too much because it is partly inserted in channel), but in case of an accident you can reprint broken part and assemble without ever needing soldering iron again.
* in case you dont know how to disassemble the ear piece, just remove the screws, pull apart the ear piece from the frame, gently pull aside the plastic U part attached to ear piece so you dont damage the cable- thats it, here you will attach the new printed U part again gently stretching it until you are able to insert both sides.
Pictures