
Drill guide for Makita BP453
Obliczymy ostateczną cenę na podstawie wybranego pliku. Sprawdzisz ją i zaakceptujesz przed płatnością.
Zapisane na tym urządzeniu.

Guide to drill holes exactly perpendicular to a surface
- Ocena
- 4 / 5
- Polubienia
- 119
- Pobrania
- 254
- Wydruki
- 1
- Wyświetlenia
- 2906
- Oceny
- 1
Aktualizacja u źródła:
Informacje o modelu
- Źródło
- Printables
- Kategoria
- Tools
- Licencja
- Creative Commons — Attribution — Noncommercial — Share Alike
As it is sometimes not so easy to drill holes exactly perpendicular to a plane with a cordless drill, I have developed a drill guide for my Makita BP453. With comparable guides, I didn't like the fact that the counterforce of the spring usually depends on the length of the drill bit. With my approach, the preload can be adjusted using the brackets.
You can choose between 2 different base plate variants. Depending on whether you want to drill holes on a larger flat surface or on the face of a 19mm panel.
UPDATE 15.11.2023:
I added a STEP File of the fixture part so you can adjust it to other cordless drills.
In addition to the 3D-printed parts, the following components are required:
4 pcs. Igus plain bearing 8mm - DryLin® R - RJ4JP 01-08
2 pcs. Linear shaft 8mm, 300mm
1 pc. Linear shaft 6mm, 200mm
4 pcs. M5 hexagon socket screws, 14mm
2 pcs. springs
Print settings:
Print the following quantities:
1 pcs. Makita_fixture_A
2 pcs. Makita_fixture_B
1 pcs. Makita_guide_base_A
1 pcs. Makita_guide_base_B
2 pcs. Makita_bracket
1 pcs. Makita_Screw_1
1 pcs. Makita_Screw_2
If you choose the correct orientation you need supports only for Makita_fixture_A and Makita_guide_Base_B.
I printed the tool from PETG with 0,2mm resolution and 100% infill.
Post-printing:
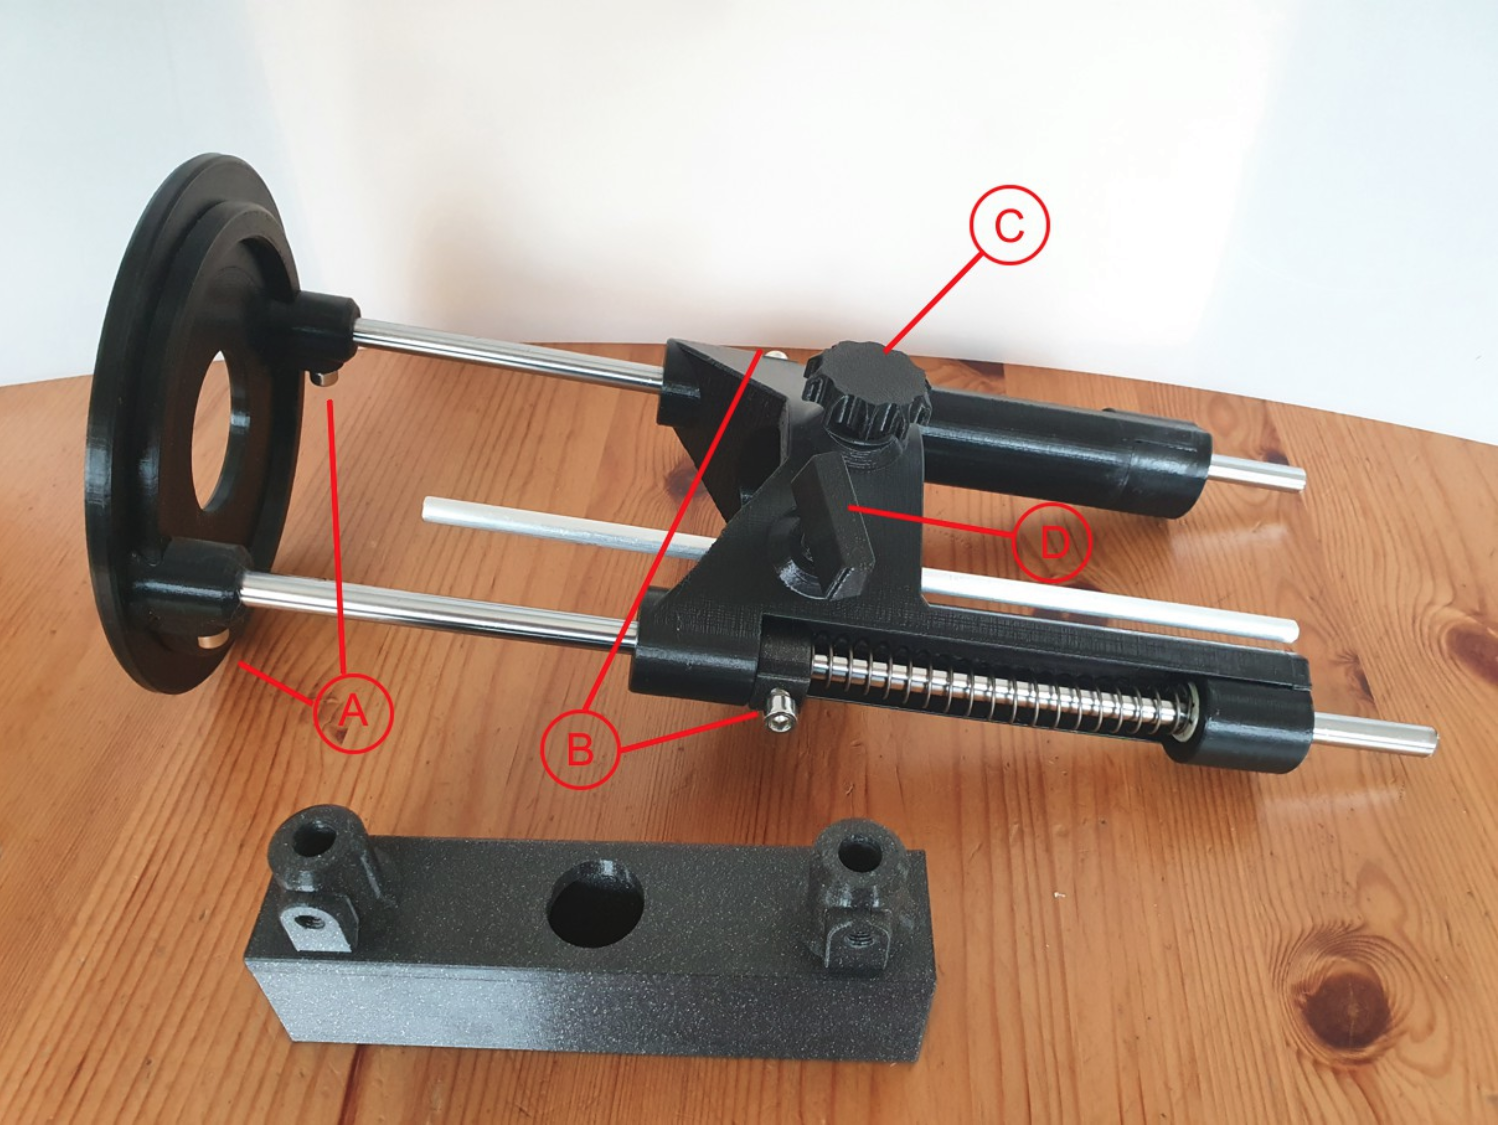
After printing, the two Makita_fixture_B parts are glued to the Makita_fixture_A part with e.g. 2-component epoxy resin adhesive.
Then the 4 bearings are inserted. The shaft is pushed into Makita_guide_Base_A (or B) and fixed with a screw (A in the picture above).
Shafts, springs, brackets and Makita_fixture_A are assembled and fixed with screws B. These screws are used to adapt the distance to the surface e.g. if you use a longer drill.
Makita_Screw_1 (C in the picture above) is used to fix the cordless drill.
Makita_Screw_2 (D in the picture) is used to fex the distance rod.
The linear shafts and also the threads of the mounting screws are thight at the beginning and need some force.