
Waveguided Bookshelf Speakers using SB15 woofer and SB26 tweeter
Obliczymy ostateczną cenę na podstawie wybranego pliku. Sprawdzisz ją i zaakceptujesz przed płatnością.
Zapisane na tym urządzeniu.

These speakers are designed using the alum SB Acoustics SB15 and SB26 drivers, with an integrated augerpro waveguide
- Ocena
- 0 / 5
- Polubienia
- 50
- Pobrania
- 258
- Wydruki
- 0
- Wyświetlenia
- 4298
- Oceny
- 0
Aktualizacja u źródła:
Informacje o modelu
- Źródło
- Printables
- Kategoria
- Audio
- Licencja
- Creative Commons — Attribution — Noncommercial
Greetings,
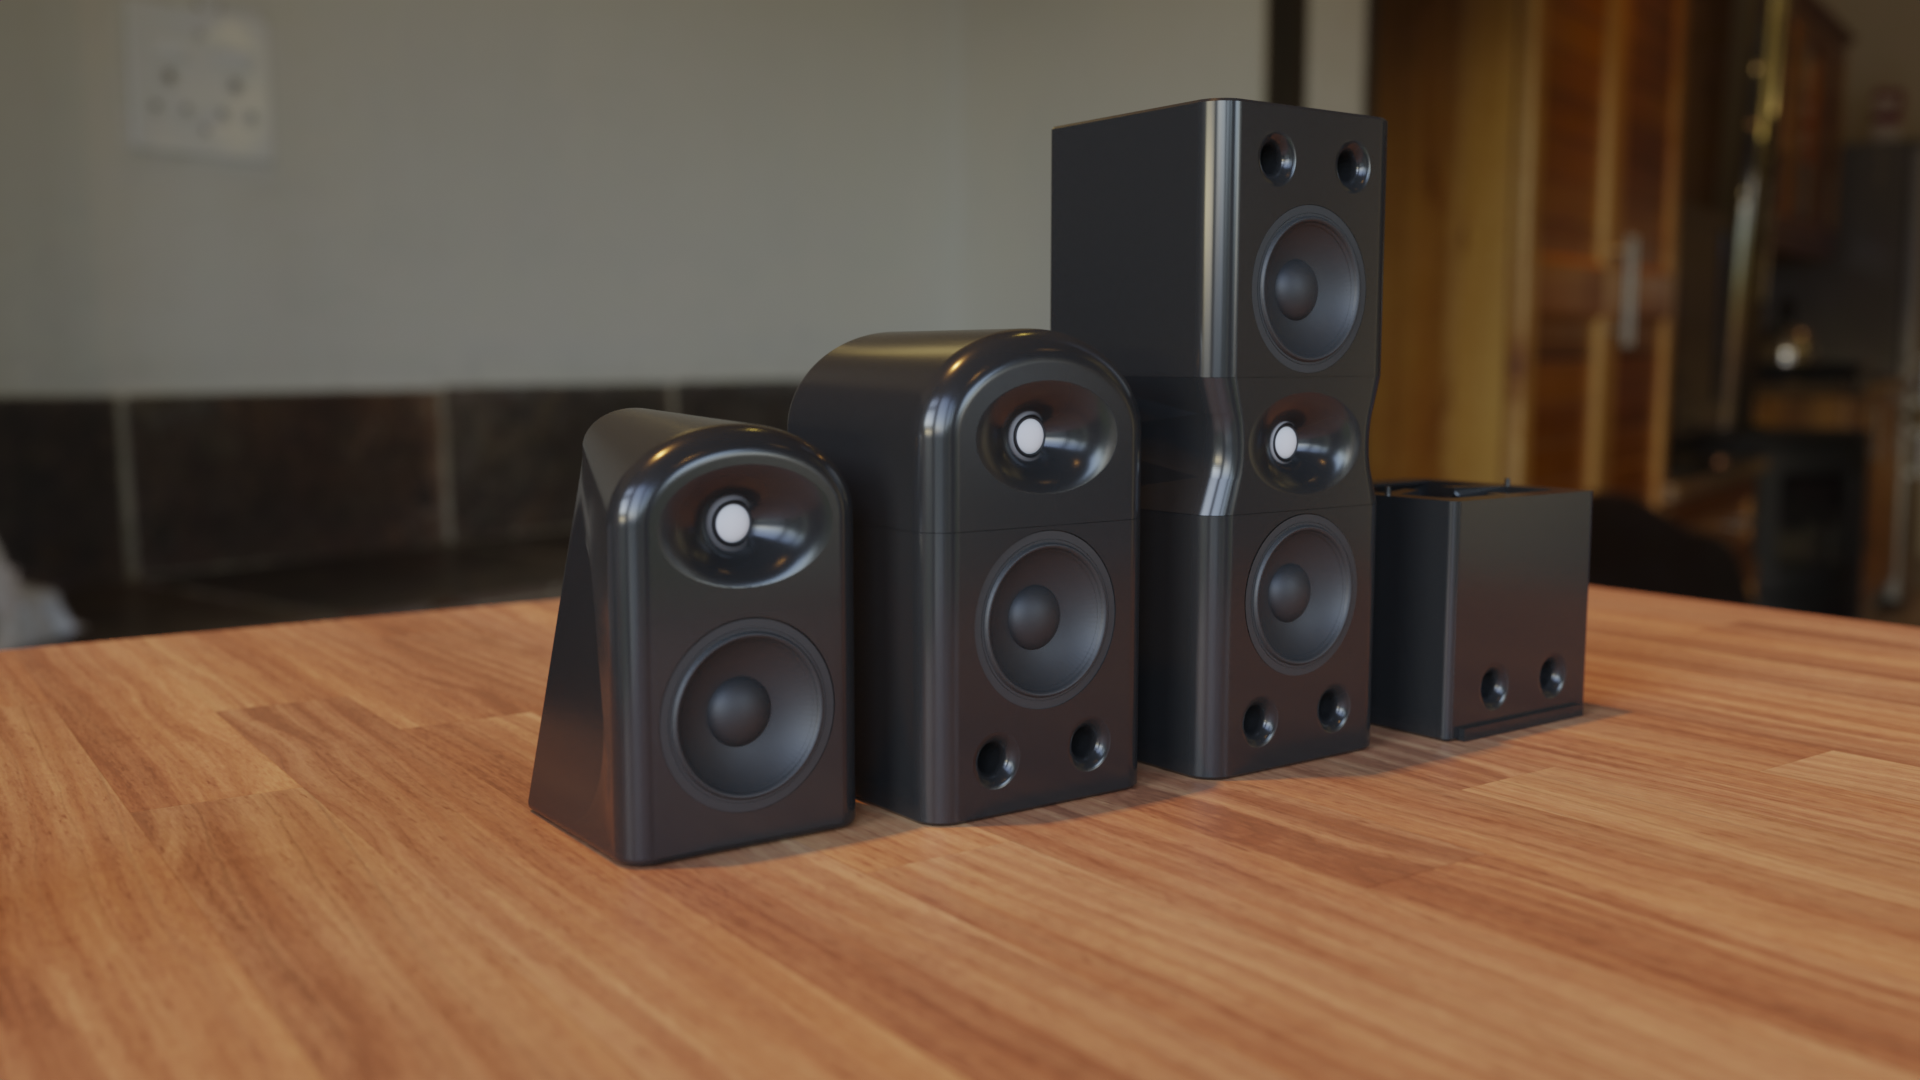
A few months ago I began designing, building, and testing 3d printed speakers using the SB Acoustics SB15 and SB26 aluminum drivers. The tweeter on all three designs use the Somossonus (AKA Augerpro) waveguides, but with some structural modifications.
These speakers can all be printed without supports, with the exception of the center unit on the MTM model. All models do benefit from tree supports, so I highly recommend they be used on the woofer overhang and the tweeter cabinet ceiling overhang.
I have poured a few years worth of personal research and experience into these speakers, pulling from my own background as an electrical engineer, as well as from online sources on multiple websites. That being said, I still consider myself an amateur, as my measuring techniques are far from perfect. Speaking of measurements, here are a few featuring my latest crossovers:


Depicted above are my latest measurements of the desktop speaker with 2300hz xover with a CTC spacing of ~6". Ideally, the crossover would be around 2600hz for the most optimal directivity at this CTC spacing. I tried making it at 2600hz, but it ended up dropping the sensitivity by 2db, was not as linear, and had lower suppression of the woofer breakup. It does, however, have a much smoother directivity index. Here are the measurements for the 2600xover, so try both if you wish:


With a little EQ, the response can be made very flat:

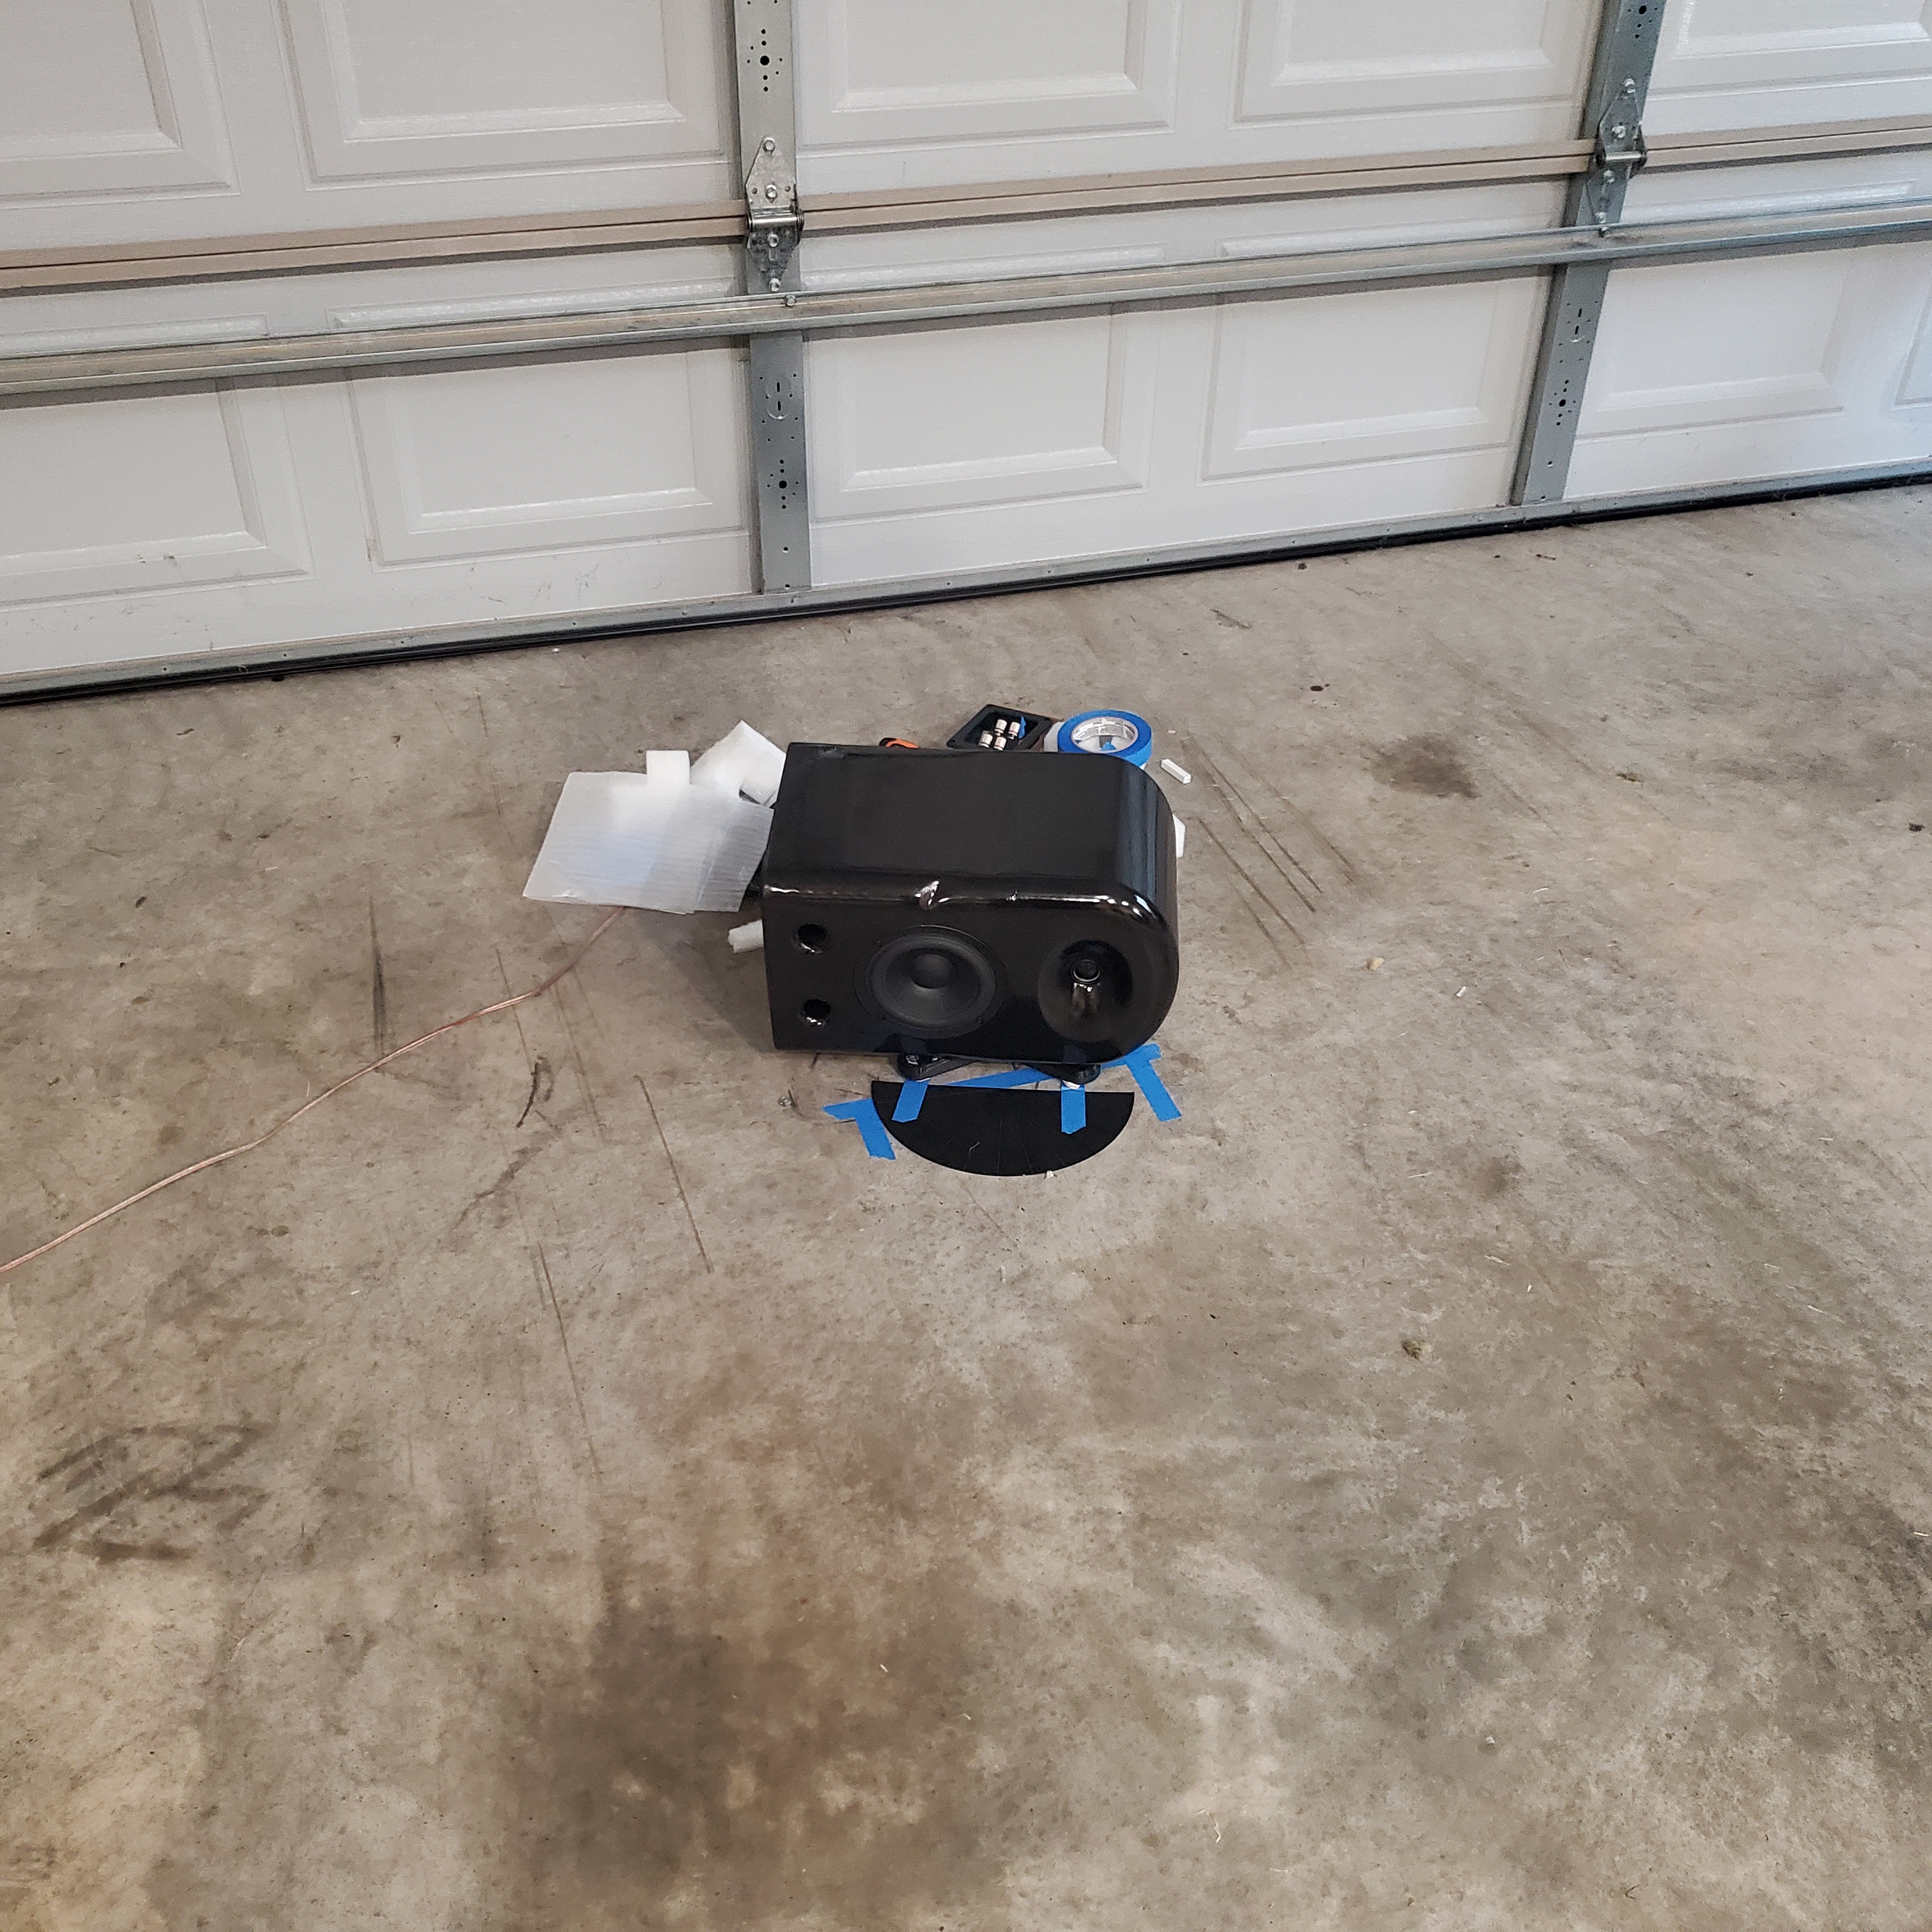
These measurements were taken using quasi-anechoic measurements from the ground plane. Essentially, that means is I placed the mic capsule as close to the concrete floor of my garage as I could, placed the speaker about two meters away, and used REW and a loopbacked Motu M2 to take ~10ms gated measurements of the speakers. I placed the speaker on a small stand that angled it down, so that the speaker reference point would be aligned towards the mic. In order to reduce back wall bass reflections, I opened the door to my garage.

I also fastened an angle measurement template, and marked a few reference points on the floor so I could consistently measure the speaker at different angles.
Below is my current crossover design, which works on both desktop and bookshelf designs(replace the 150uh inductor with a 130uh inductor for the bookshelf for most optimal performance. Not super important though!):


Above: 2300hz xover, optimized for higher sensitivity, flatness, and woofer breakup suppression.
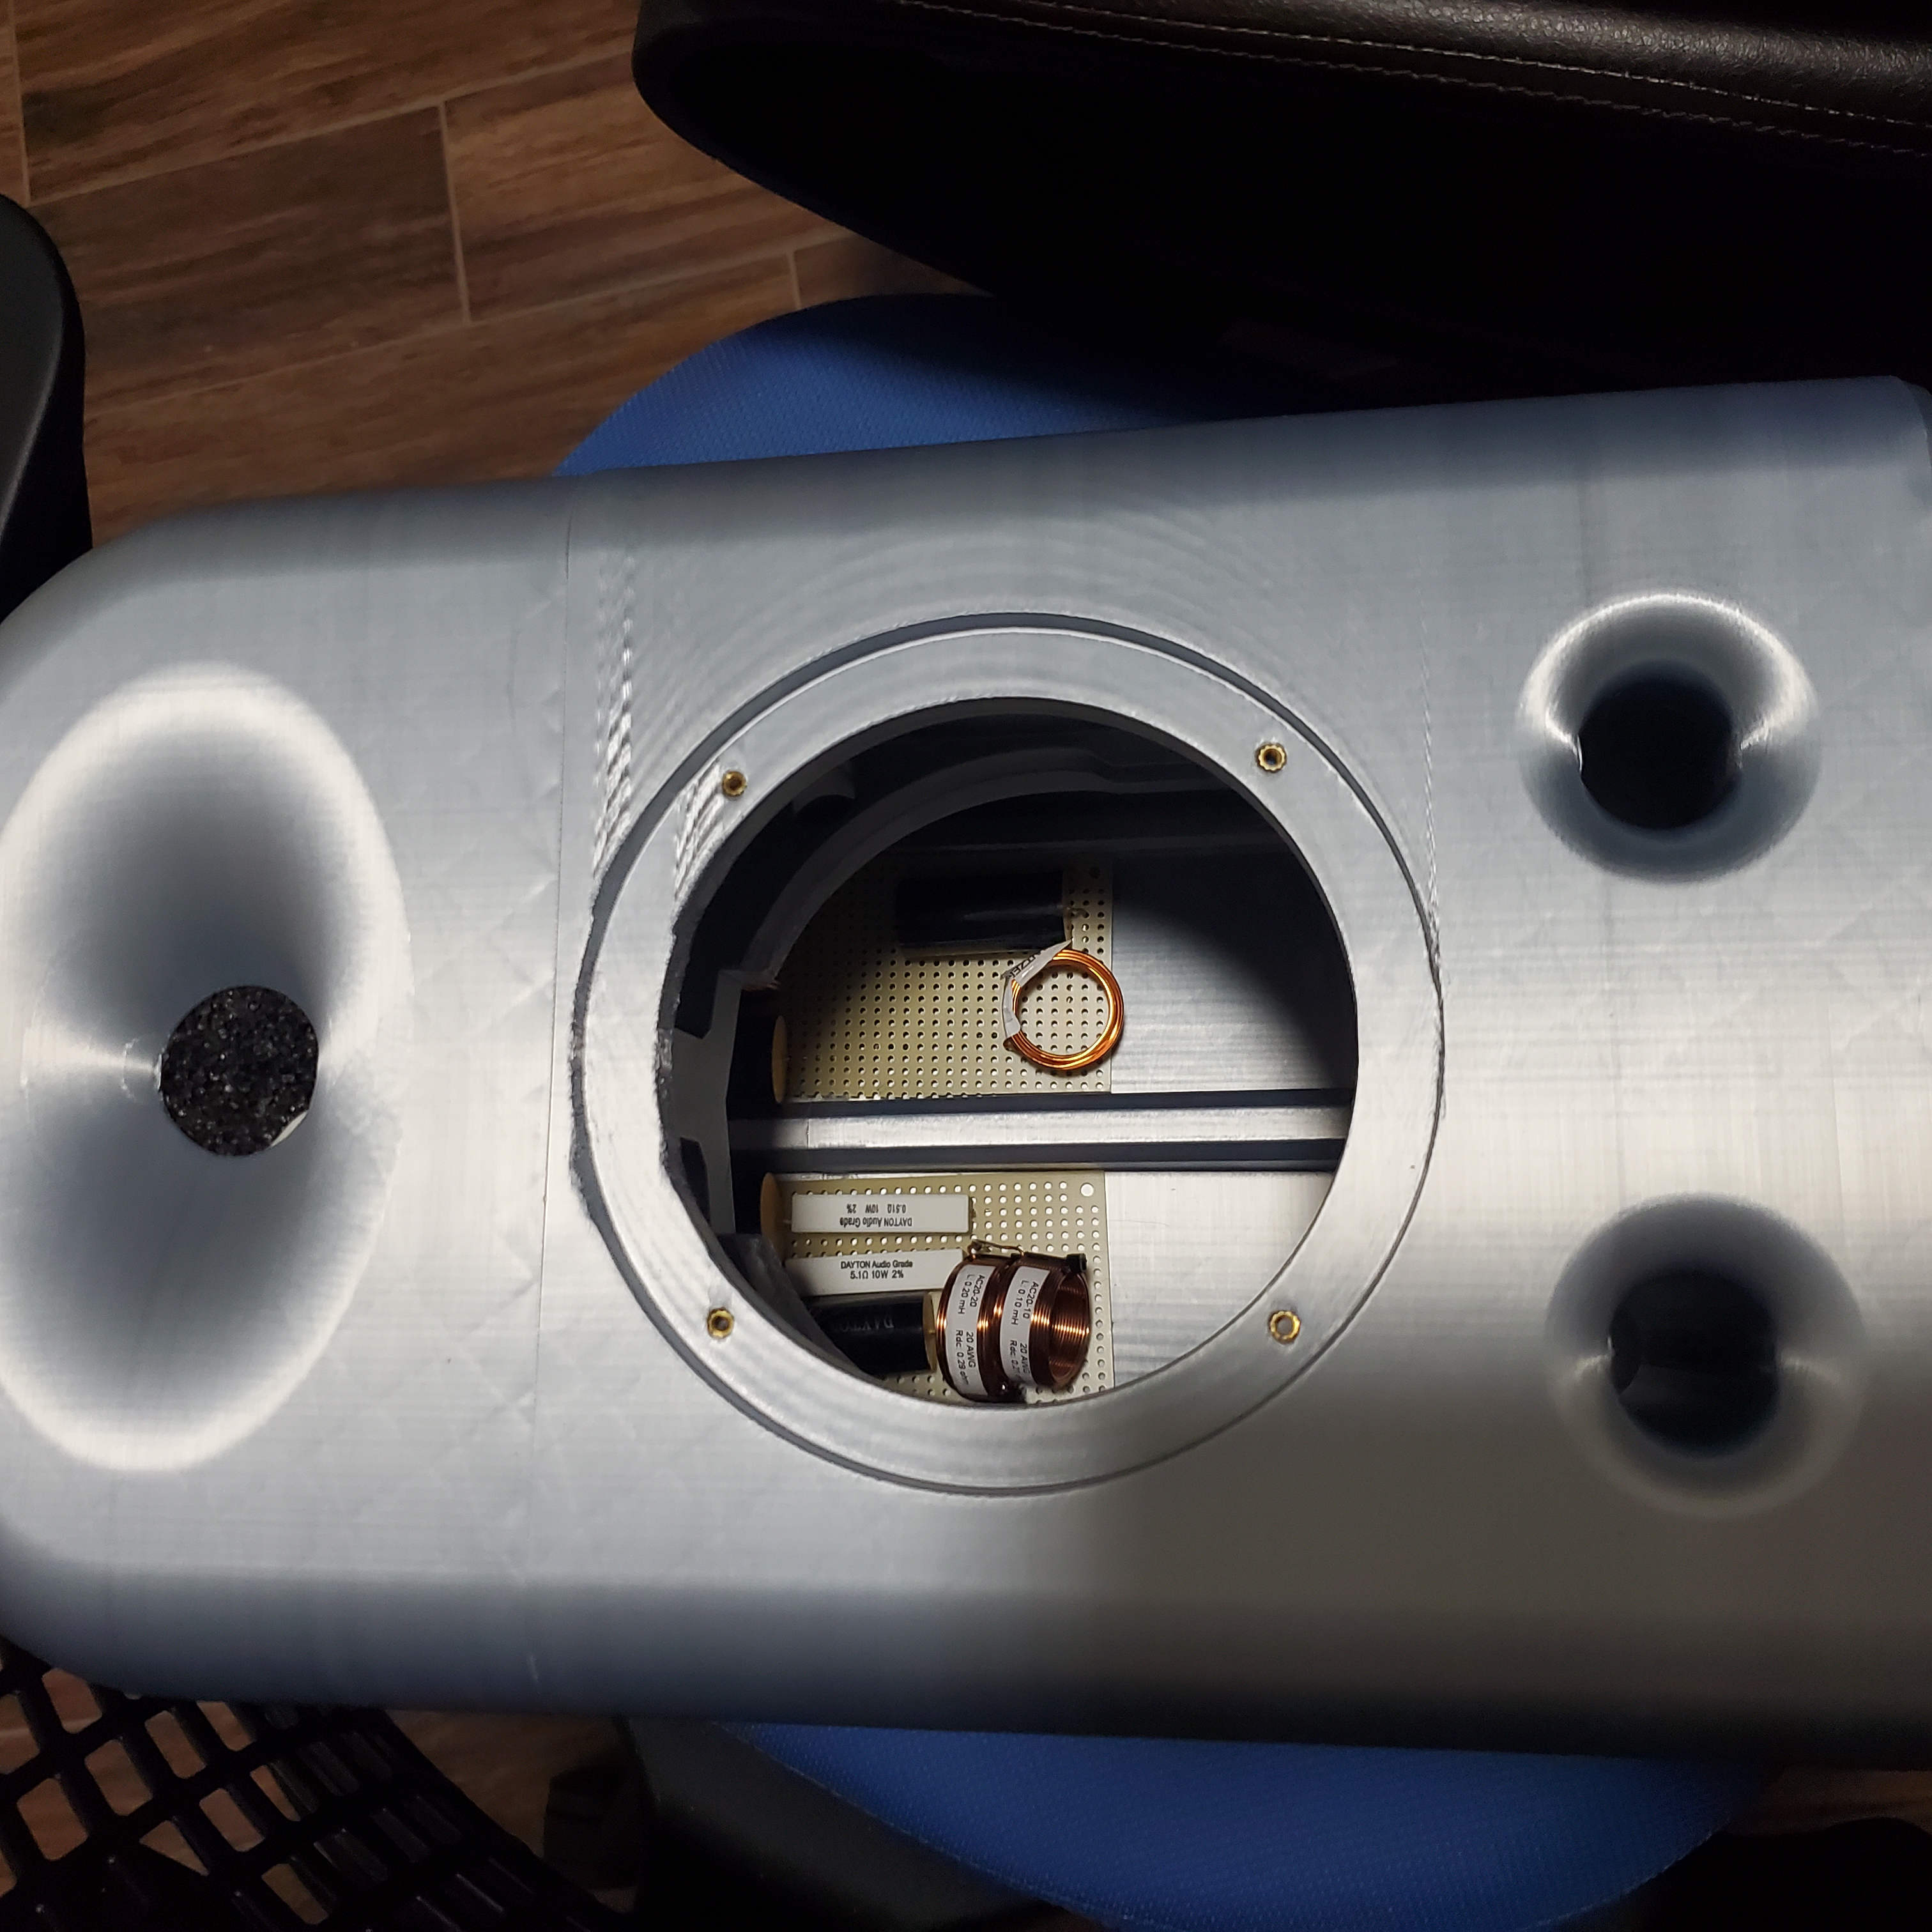

Above are pictures of the finished crossover. It's important to isolate the notch filter from the other instructors; having an improperly oriented and placed woofer notch filter will make it's inclusion useless.
Below: 2600hz xover, optimized for even directivity, yet lower sensitivity, further deviation from neutrality, and higher woofer breakup.


Keep in mind that these woofers are made of aluminum, and therefor have a nasty high frequency breakup mode. This mode needs to be dealt with, which is why I put the series notch filter in the woofer xover. If you have had bad experiences with aluminum drivers in the past, you can always substitute this driver with the poly or paper version; it will fit in just fine. The xover will not be optimized for it, however.
The impedance has a pretty low dip in the upper treble, which could cause higher distortion with certain amps. In the future I may optimize the xover with a parallel notch filter rather than a series; however, every attempt I have made with simulations so far have not been to my liking.
As my ability to measure these speakers improves, I suspect I will update the xover design in time. Even so, this xover design sounds very good in my opinion, and should be satisfactory to most listeners. I will continue to work on the passive crossover design, so follow my submissions on reddit and DIYaudio.com for updates!
Build and Design:
For these speakers, I have three main design, and all three can be fully 3d printed, or can be 3d printed with 7% gyroid infill and then filled with sand / epoxy / plaster. I personally recommend a long cure time(like, 72 hour+ cure time to reduce heat) resin, as it has given great results for me.
If you do not wish to fill the speaker, then I would recommend at least a 33% cubic infill with 4 walls. Dry filament is a must, or the material will warp causing the mating surfaces to not mate.
First in the lineup is a small desktop speaker, which has a port plug that can house a ~6" port, or be plugged. This speaker is great for integrating into a 3-way stand speaker with sealed design, since it is the most well-braced and designed speaker of the bunch. I came up with this design as a way to simultaneously reduce internal reflections and increase rigidity by having uneven walls, and a tapered shape. The round top and corners of the speaker increased the evenness of the tweeters directivity, and reduce baffle step resonances, theoretically.
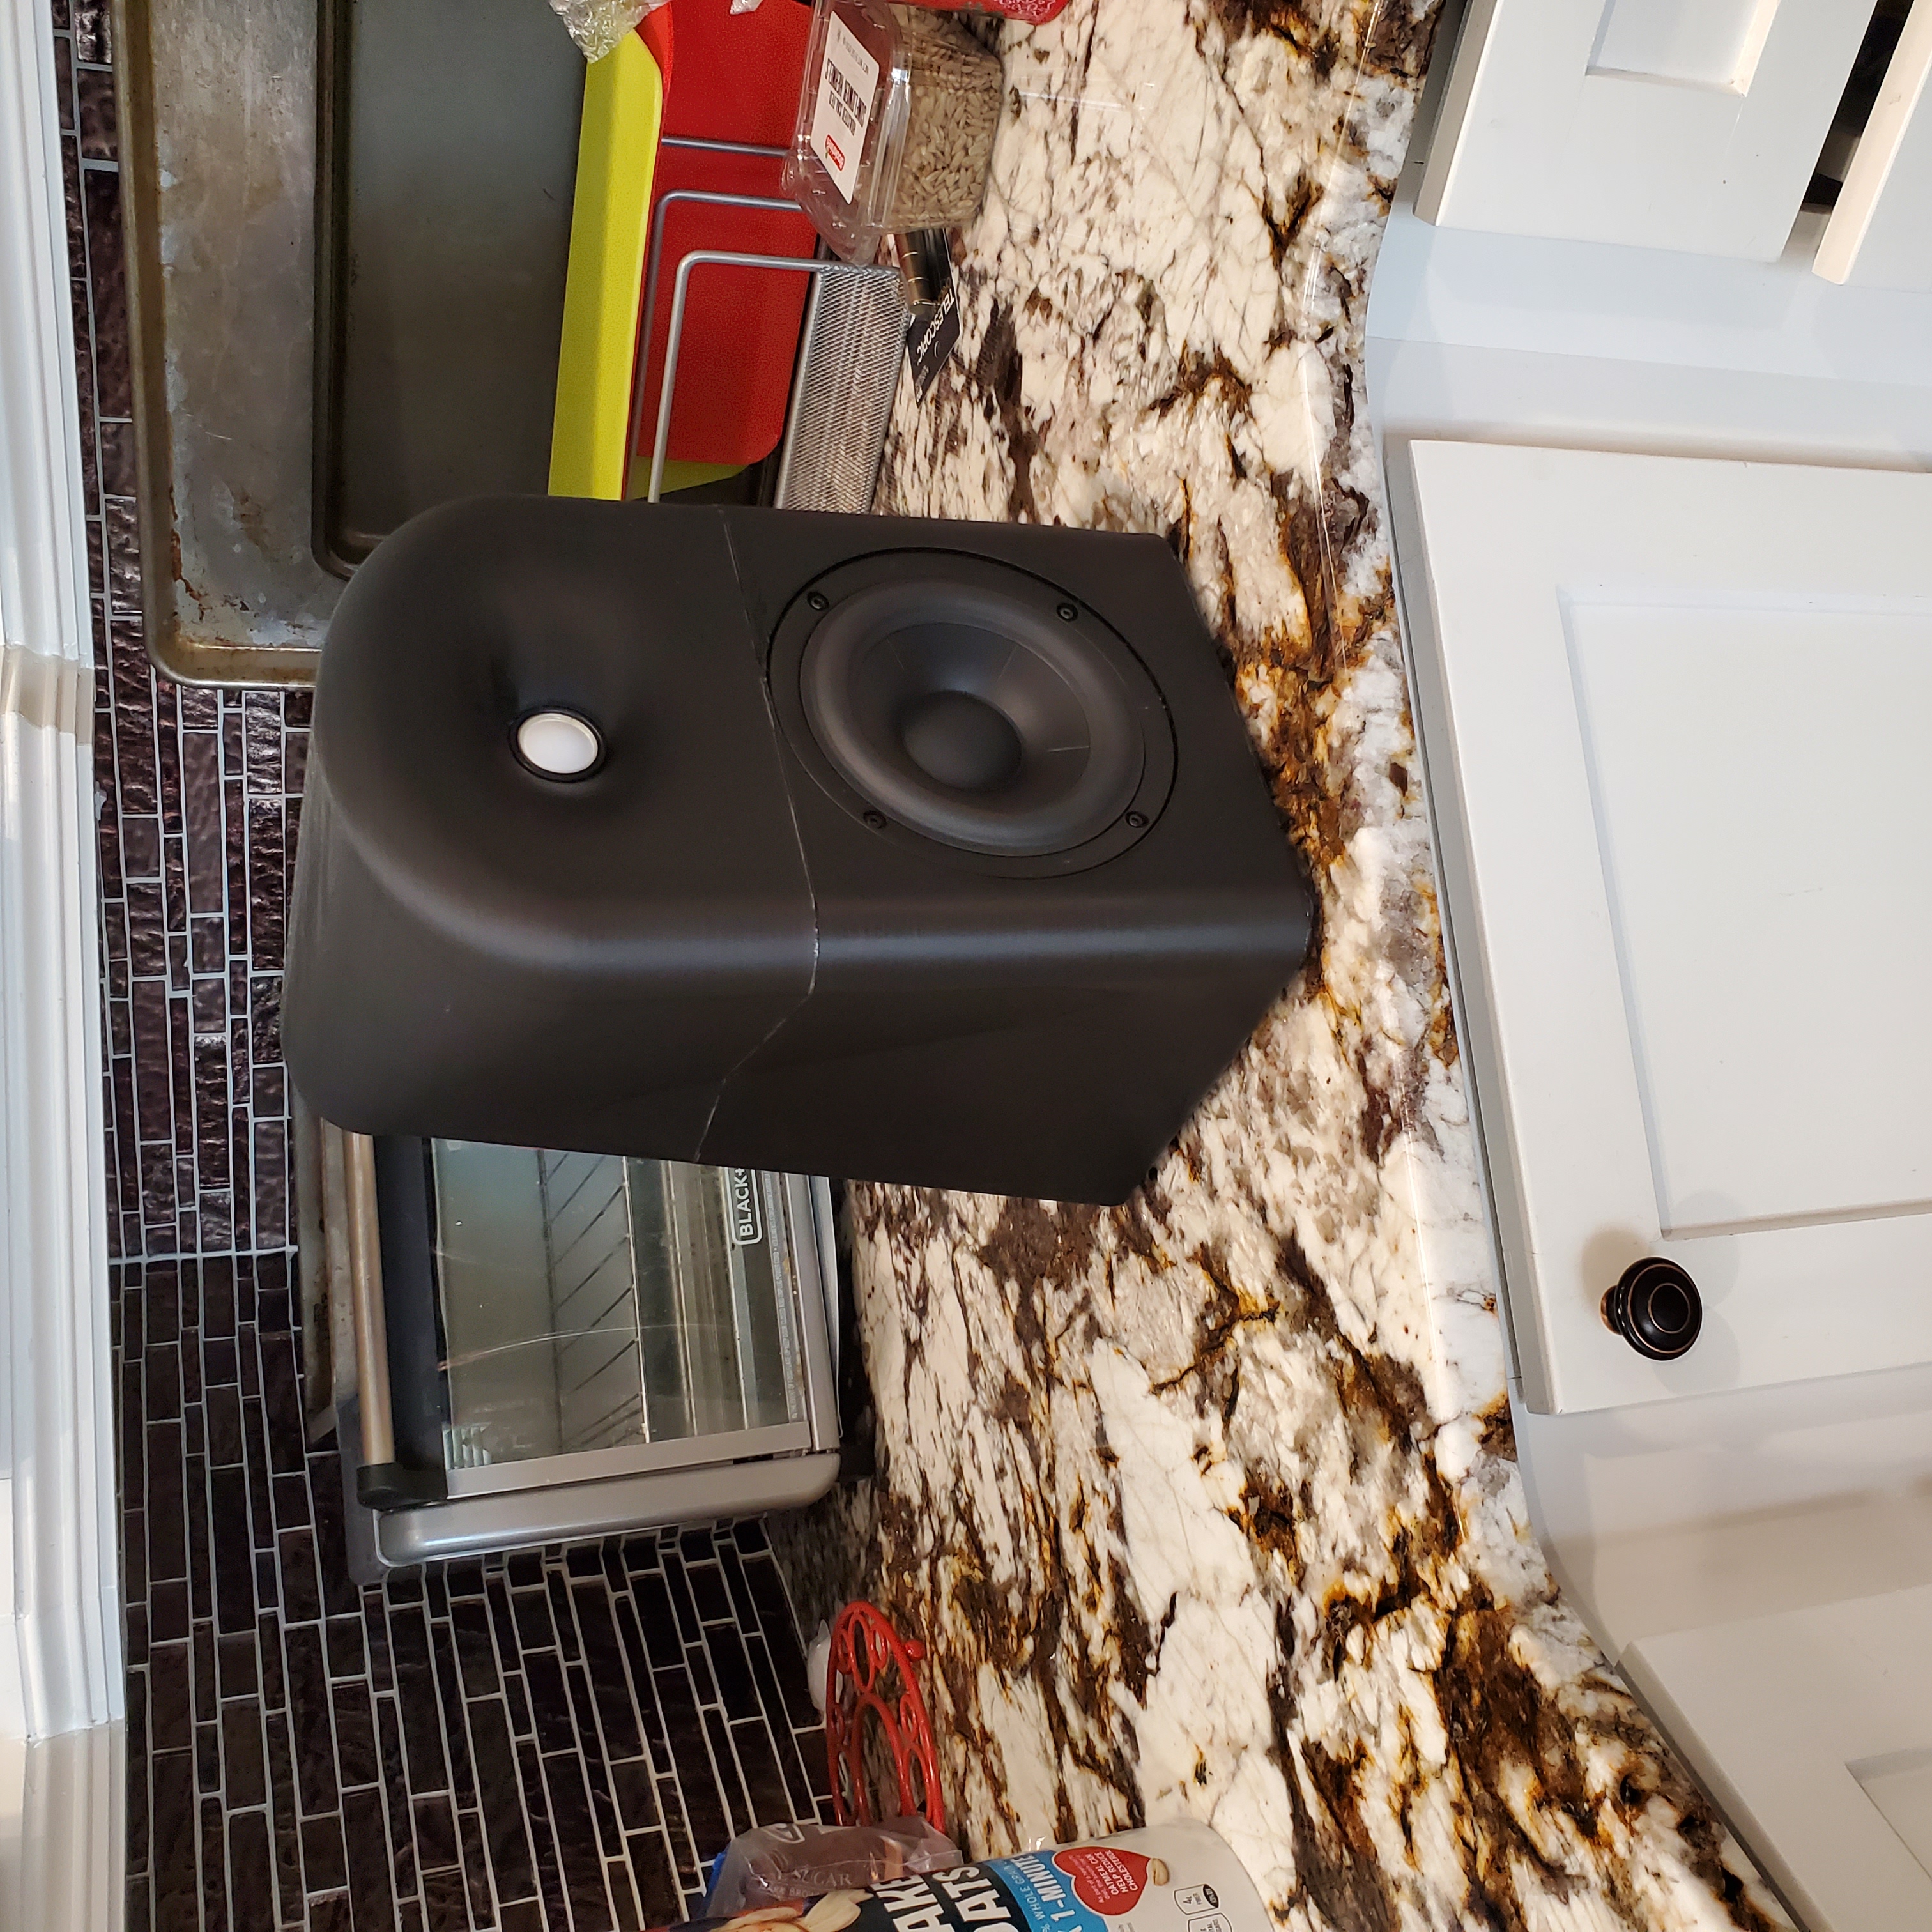
Second, I have designed a larger bookshelf speaker capable of reaching the mid 50ish hertz in a dual ported design. Builders have the option of using the front port or rear port variations. Both designs have holes in the middle of the port to allow for resonance suppression; without it, there would be a nasty dip and peak around 1.2khz! In order to properly use these models, the builder will need to purchase foam pads similar to the “magic eraser” foam pads, and adhere them all along the port. This allows for the resonance frequencies to be nulled, while not letting too much dampening of the reflex to occur.
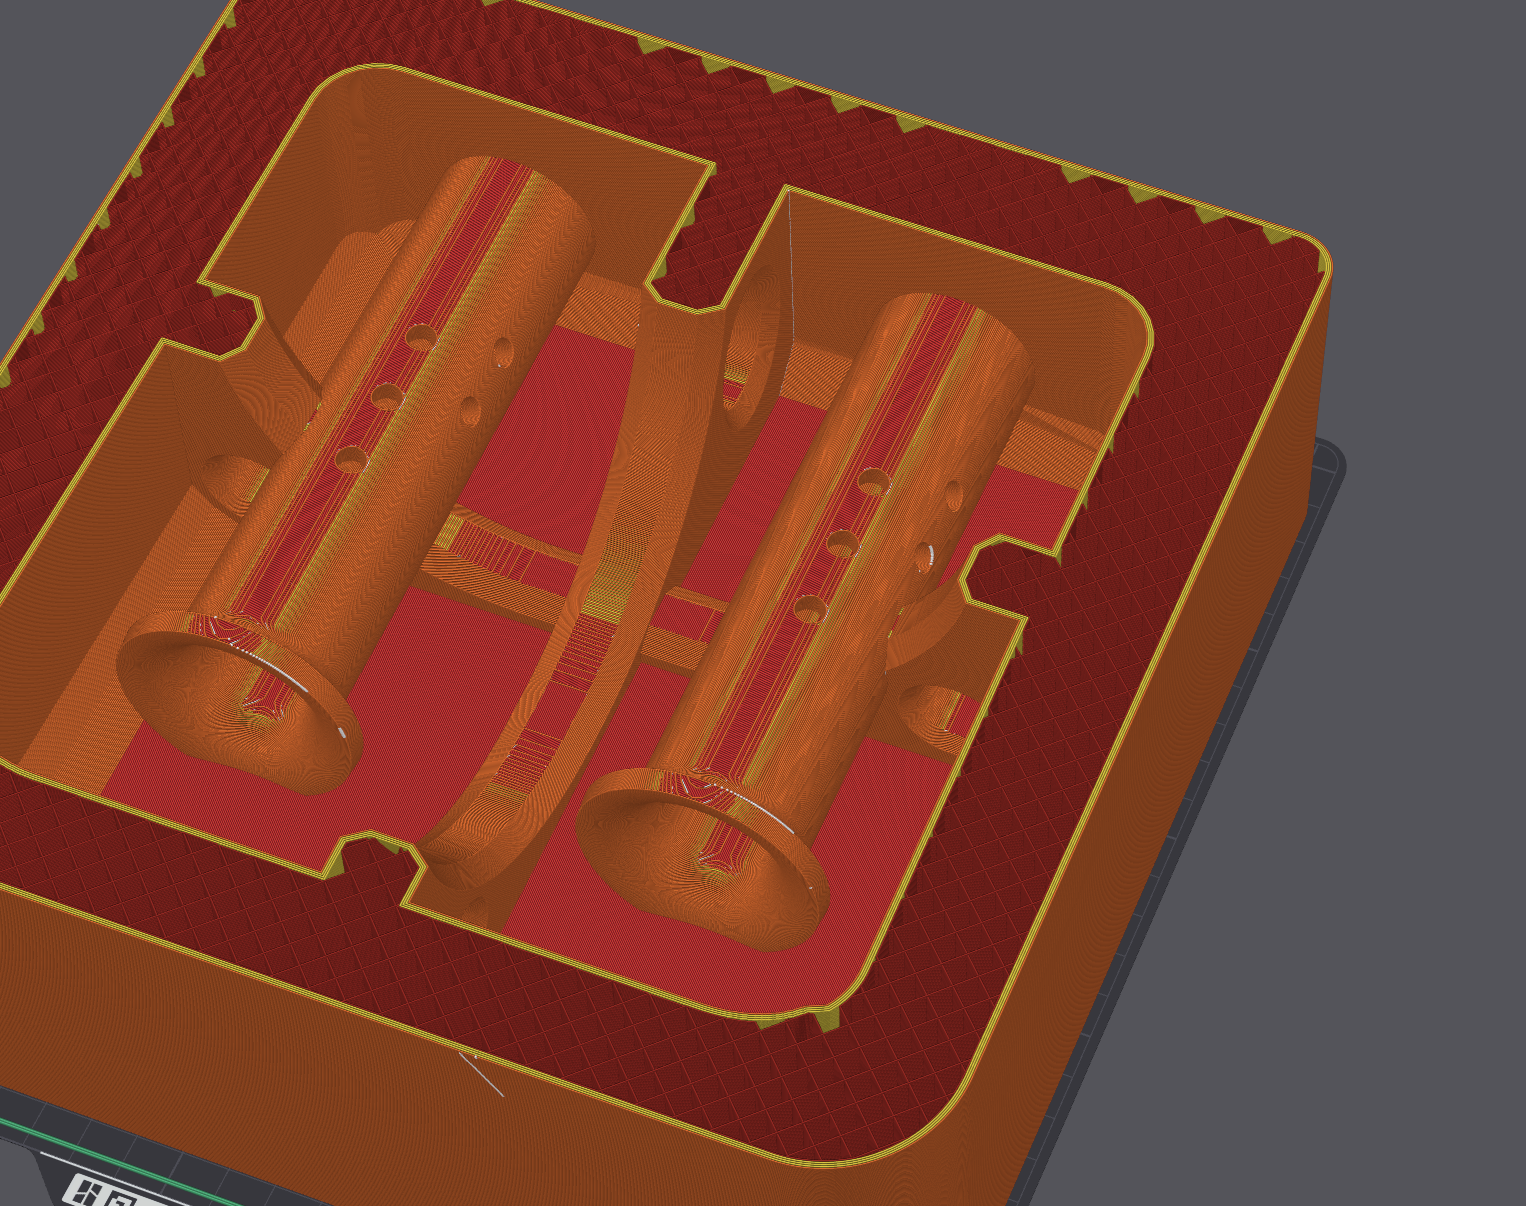
Above is a cutaway of the bookshelf speaker, showing the holes in the ports that significantly reduce port resonance.
Below is the resin filled bookshelf, which I have installed aluminum botulin sheets inside for extra dampening. Note to those who chose to install the rubber sheets: you MUST use some sort of rolling tool to vigorously roll the sheets into the cabinet, otherwise it will not work as intended. These rolling tools can be found on amazon.

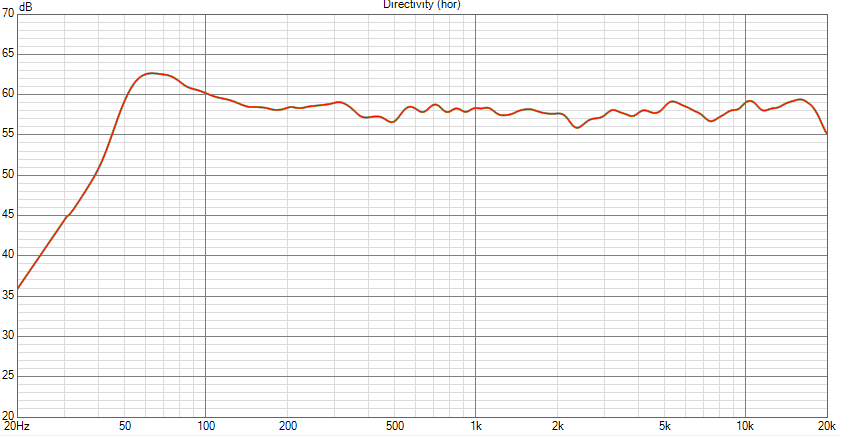
If you notice the corner of the front baffle, you will see there are some indents: this is what happens when you place the speaker upside down on a box so you can pour resin in it. The resin gets hot as it cures, and the plastic begins to warp under the weight of the speaker. I may fix it in the future, but perfect is the enemy of complete! Here is a single on axis response measurement using the 2300hz xover, with nearfield bass measurements added:
Lastly, I have created a three part D'Appolito design MTM speaker, for those who are fans of that design. This speaker should be crossed between 1800 and 2000hz in order to create the proper directivity described in De's' papers. I have completed the hardware design, but have not had time to make the crossover, so that will need to be completed by the builder.

Regarding crossovers, I recommend the builder make an external xover for the desktop speaker due to its small size. For the bookshelf, I recommend the builder split the woofer xover from the tweeter xover, and secure it to the back inside wall of the speaker. A plate can be printed for the xover to be fastened to, and the plate can be mounted to the speaker. Do not use hot glue, it will not adhere!
I may post a build guide at some point, but here are the high points to consider:
- I used 10mm M3 screws for the woofer, 20mm M3 for the tweeter,
- M3 brass hot insert nuts for all fastening points,
- Melamine Foam sponges for wall and port dampening,
- Polyfill for cabinet fill,
- JB Weld plastic (black) to bond the cabinets together
- just any foam / felt I could get my hands on between the tweeter mount and tweeter.
This print file also includes a part-plate, that is, a plate that has the mounts, braces, ports, and port plugs that are needed for some of the build.
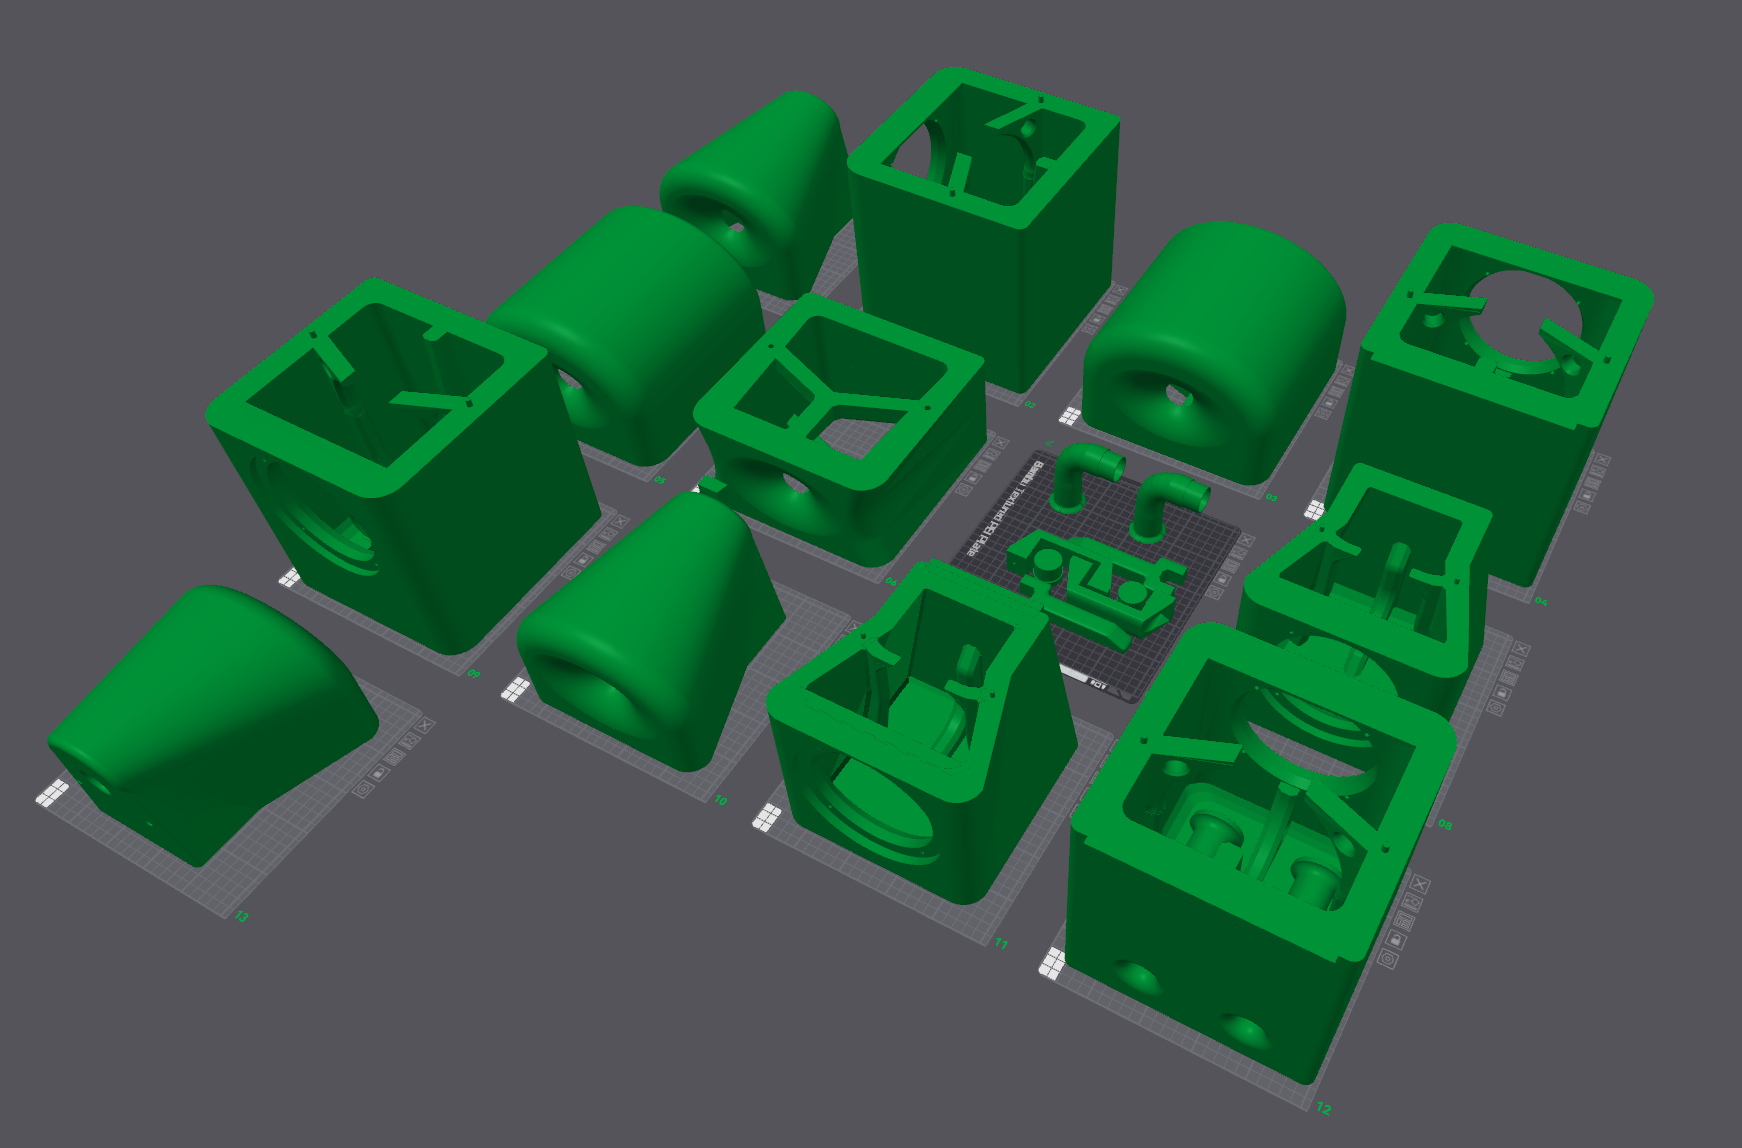
There are a few other pieces of build advice that would be helpful, like putting some tack between the tweeter face and the cabinet to seal it, and that if you do not plan on painting / finishing the cabinet, installing the tweeter before you bond the two halves together is much easier than installing the tweeter after, but is not impossible. I hope to have a build guide with pictures in the future, but I'm sure most of you makers will be able to figure it out without the guide ;).
Lots of time and effort went into testing and making the prototypes of these speakers, so please share this and give me a shoutout when you use it. I hope you enjoy and feel free to provide comments and criticism, I am all open for discussion.
Peace,
ChargedCap
.
.
.
If you like what you see and want to donate to my (expensive) filament fund, you can message me through email or on my old animation patreon page:
patreon.com/Chargedcapacitor