
Compact Spool Auto-Rewinder
Obliczymy ostateczną cenę na podstawie wybranego pliku. Sprawdzisz ją i zaakceptujesz przed płatnością.
Zapisane na tym urządzeniu.

Spool AutoRewinder design that fits inside the spool itself and takes as little space as possible Fusion360 src included
- Ocena
- 4,429 / 5
- Polubienia
- 202
- Pobrania
- 778
- Wydruki
- 8
- Wyświetlenia
- 7730
- Oceny
- 7
Aktualizacja u źródła:
Informacje o modelu
- Źródło
- Printables
- Kategoria
- Prusa Parts & Upgrades
- Licencja
- GNU General Public License v2.0
Intended to replace your MMU filament buffer.
Inspired by this design https://www.printables.com/model/168-universal-auto-rewind-spool-holder-mm but fixes 3 problems I had with it:
- Plastic spring lost elasticity over time
- Inability to place spool horizontally
- Plastic spring took too much space outside the spool, which was not acceptable for me
Features:
- Prints without supports
- Spring lasts even after a year (at least for me :D)
- All mechanism fits inside the spool - designed to take as little space as possible
- Easy ON-OFF geared handles - fits vertical stand in any “rotational position”
- Works in all directions - spool may be oriented horizontally, vertically, have some angle - rewinder will still rewind without friction - 4 bearings ensure that's possible
- 5-7 revolutions depending on spring length and size
- Modular design (you'll need all sources for Fusion360 to update derived features properly)
- Parametric design - lots of parameters to change spool width, diameter, etc
Additional models:
- Stand - https://www.printables.com/model/678368
- Metallic Spring module - https://www.printables.com/model/678373 - download it if you want to modify spring parameters
With metallic spring that I have auto-rewinder is capable of rewinding total 7 full rotations (approx)
Demo:
Given you already own MMU2 upgrade - design doesn't require any extra hardware except a metallic spring that you may find in any generic “badge reel” found in any stationary store.
List of details required for 1 auto-rewinder:
4x 608z bearings (20 of those come as a part of MMU2 shipment so you should have enough for 5 spool rewinders total)
1x metallic spring from a “badge reel”
In case you have different metallic spring - you need to download metallic spring module and modify parameters there (link above in “Additional models” section). Feel free to reach out if you need any assistance with that.
Assembly tutorial:
1. First you need to get an disassemble “badge reel”
I have one like this

2. Print all parts, get bearings and your disassembled metallic spring
Crossed parts may be discarded 
3. Put bearing onto shaft and push till it hit stopper 
4. Get slipping disc part and put metallic spring as indicated on the photo
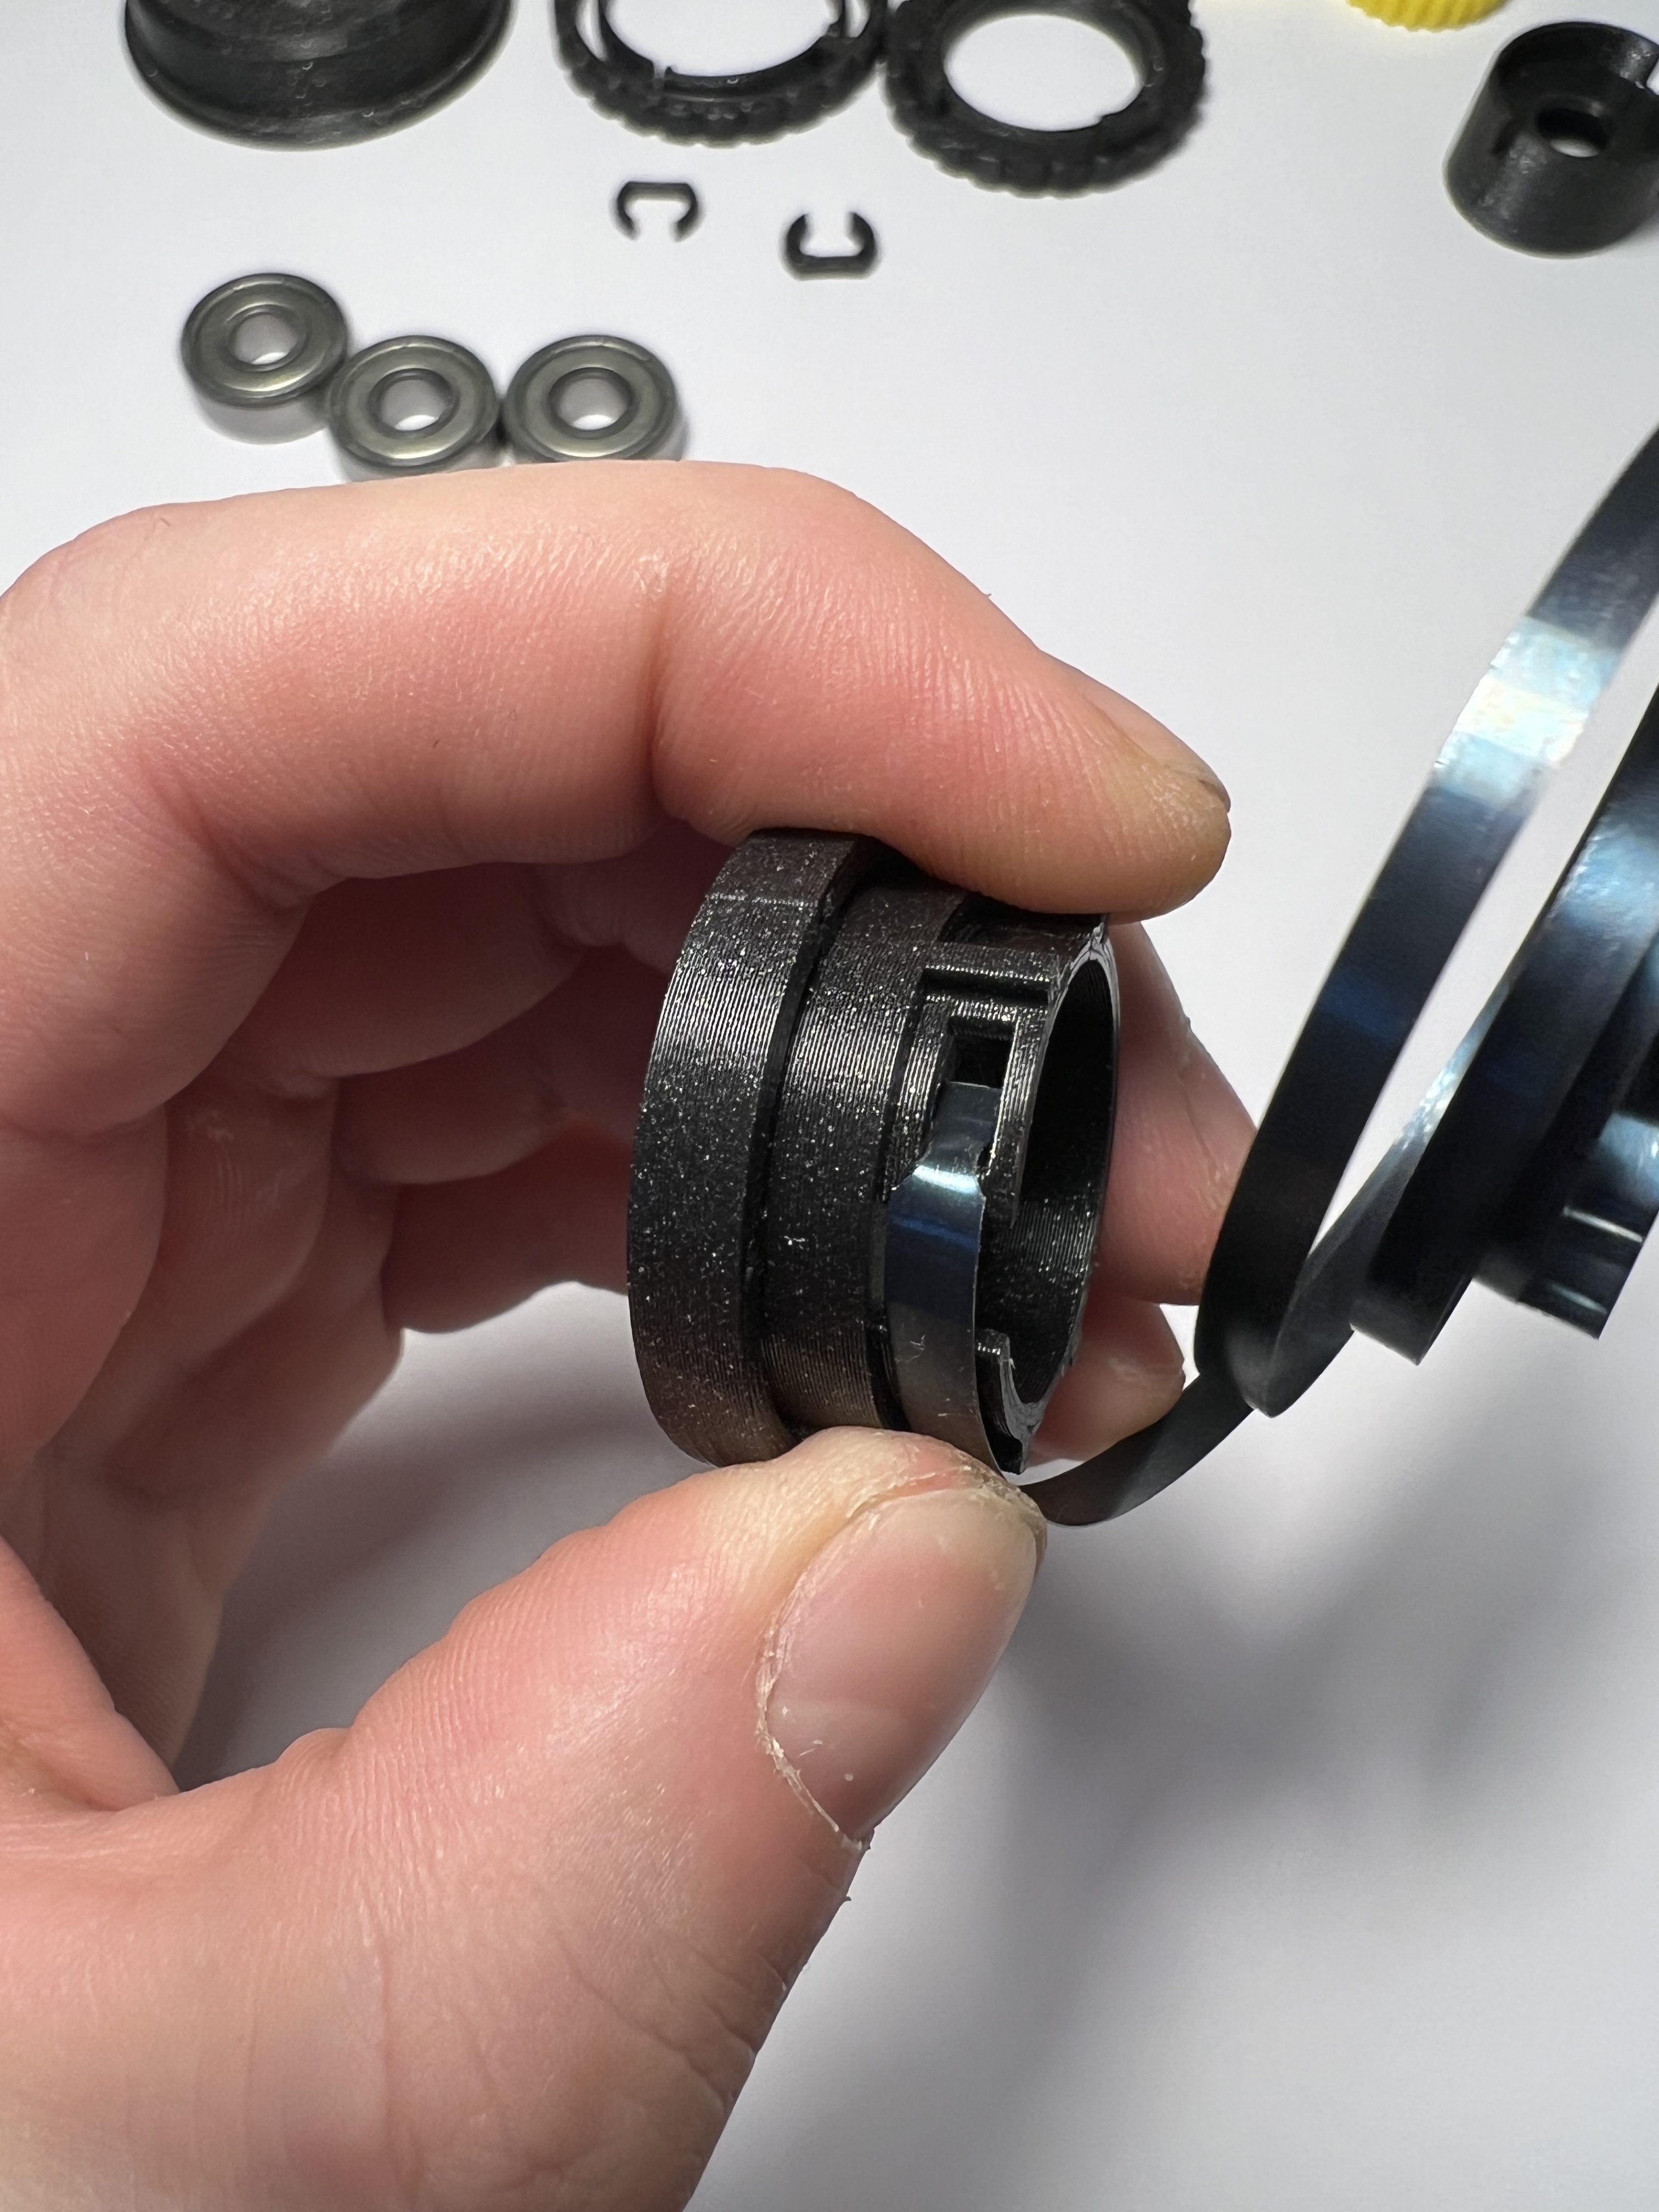
By inserting spring tip into one or another hole you'll define which direction the rewinder will “rotate”
You need to insert spring tip from the outside of a ring and push remaining of a spring inside through the gap as shown on the next photo


The ring is designed with dimensions for my type of spring, but if you have different one - you may change that parameter in Fusion360 sources provided and make it fir yours!
5. Roll remainder of a spring inside the ring


6. Get the shaft with the bearing from step 3 and insert it to the ring so bearing is secure inside


7. Put another tip of a spring through the “insert hole”

The result should be something like this:

Take your time - this is by far the hardest part of assembly, spring tend to “unwind” outside of a ring, you may keep it in place with your thumb.
8. Take ring cover and another bearing and put it on top of the shaft
It should click on


9. Get another bearing, slide it on the shaft till it fits in the cover

10. Take printed c-clip and slide it on the bearing


11. Take slipping disk and dial and put them together as shown on photos


12. Put them on the shaft


13. Tighten them by rotating like shown
Don't be afraid to apply some force - they should not break unless you go to gym, apply considerate amount of force in that case
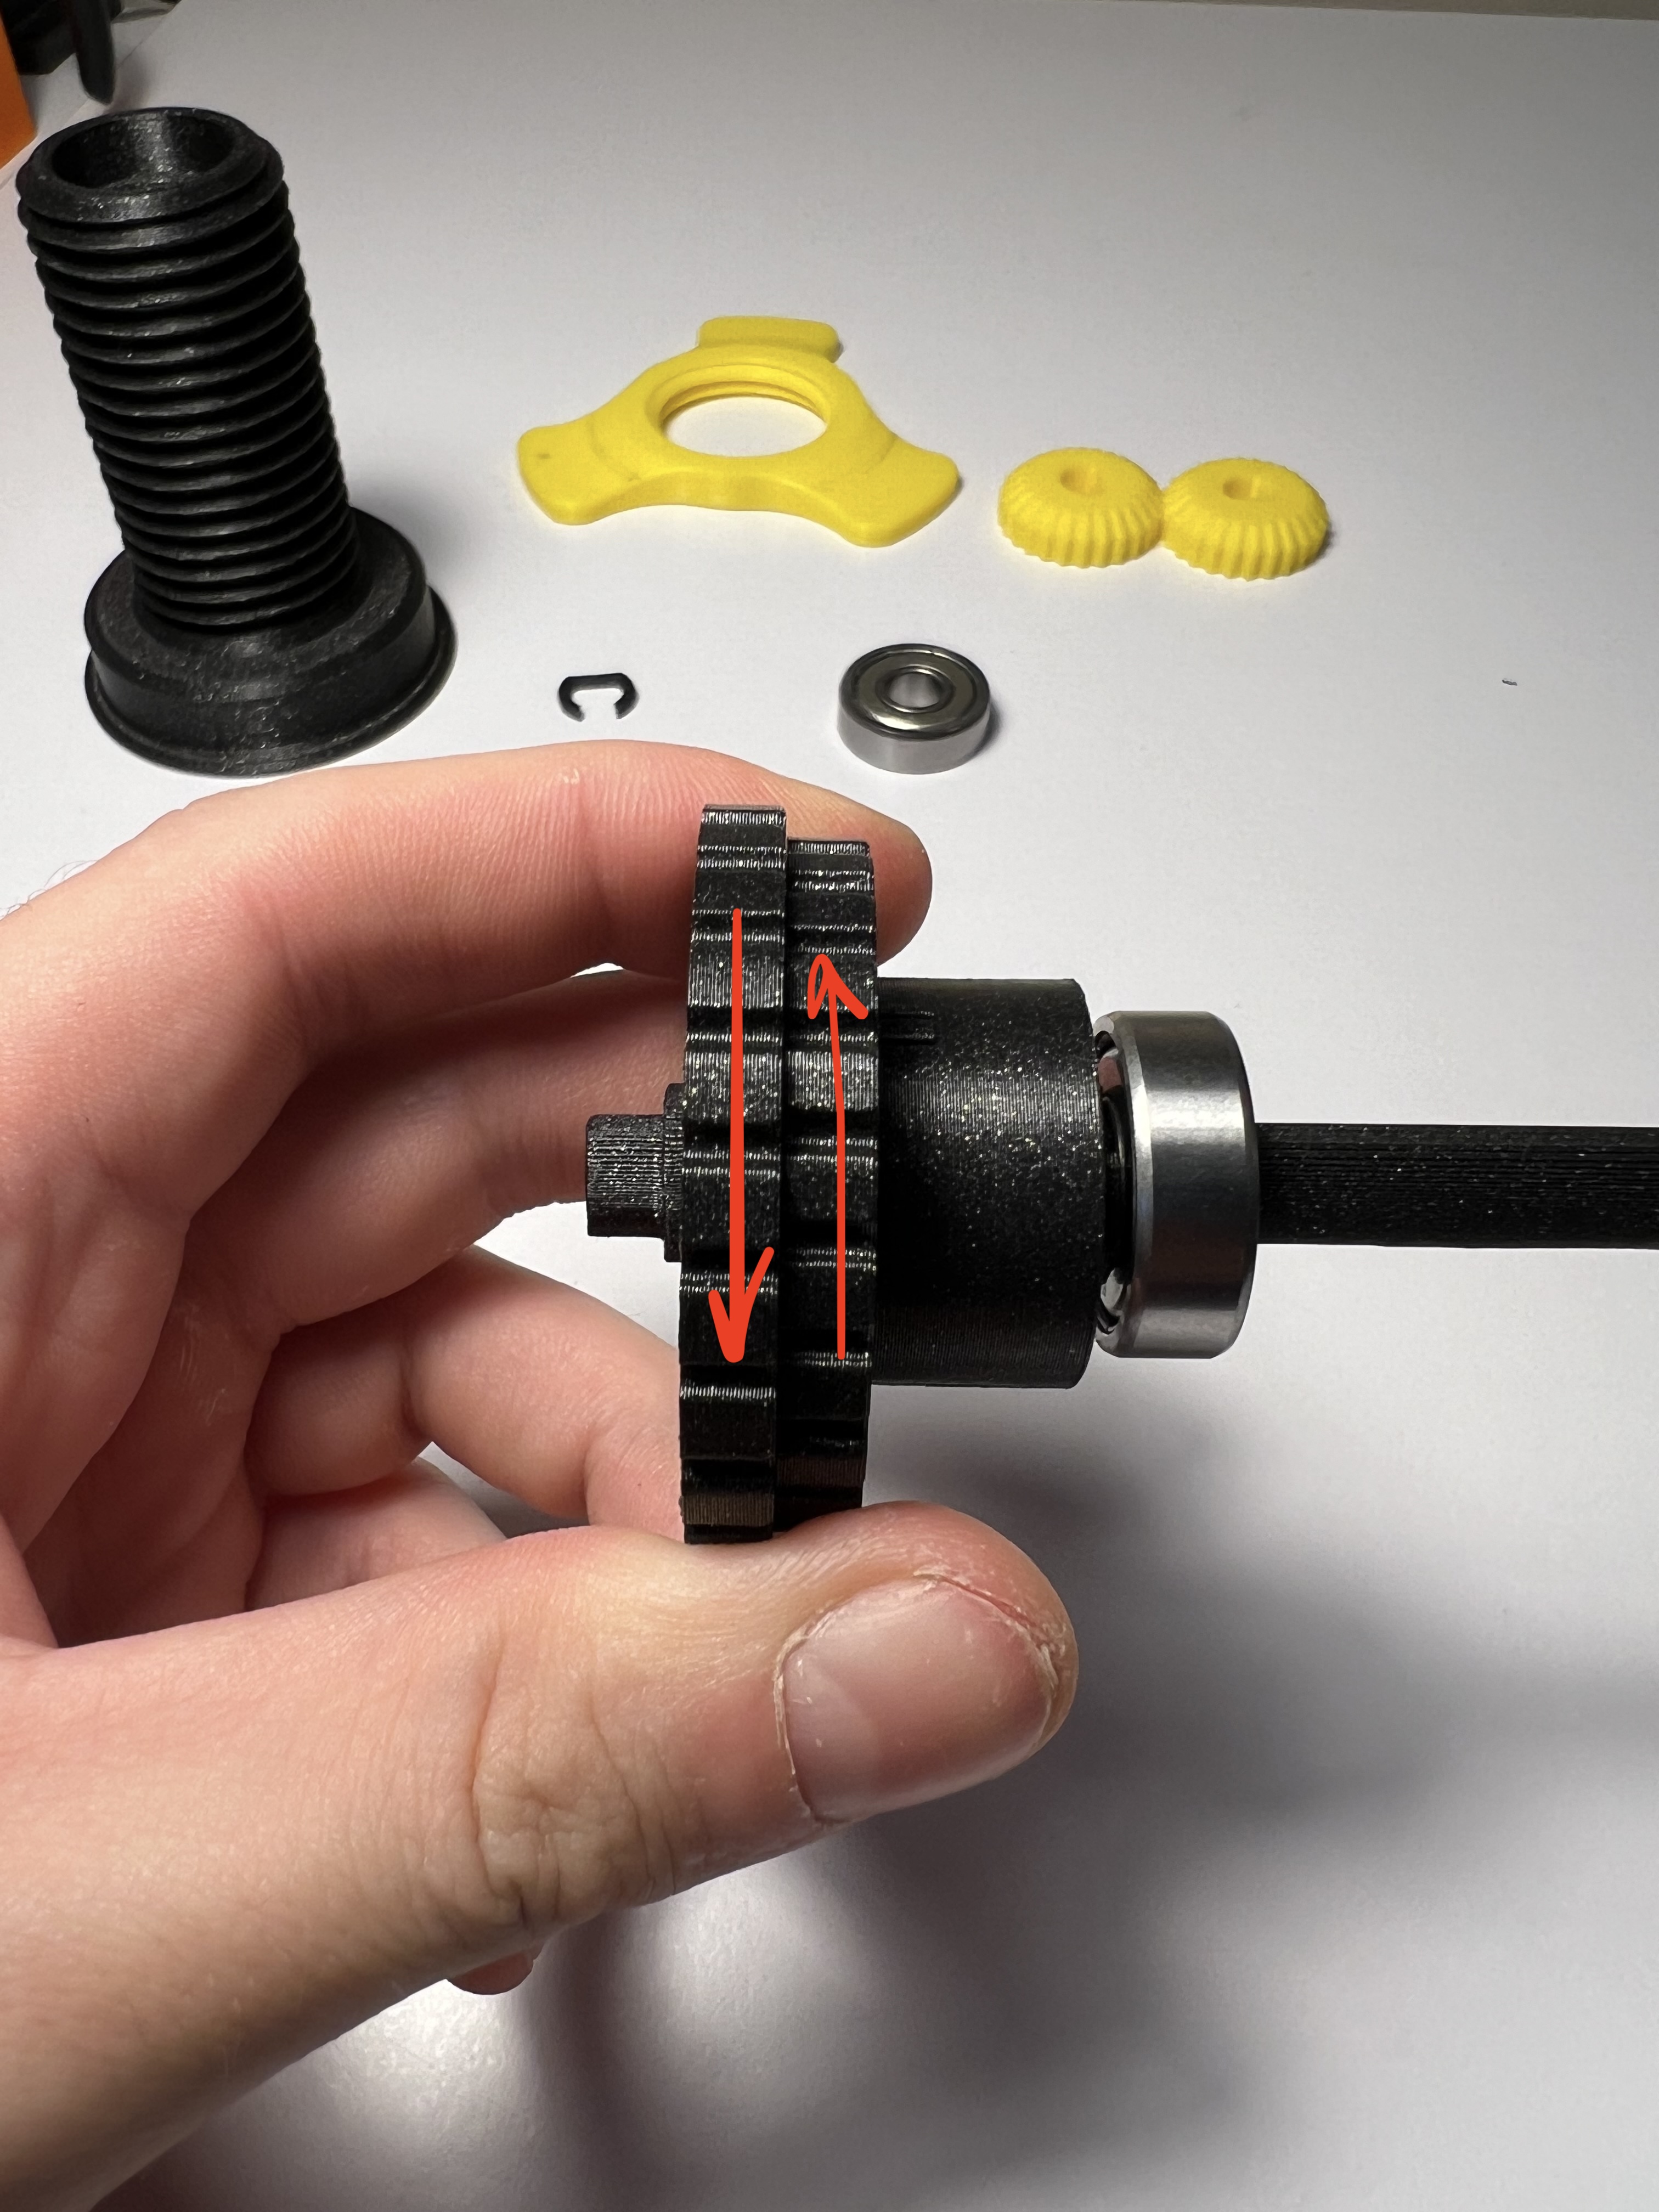
14. Put on the cover, it should slide fine
Put on another bearing and c-clip


15. Put on geared covers and you done!
Final drybox setup that uses these rewinders:

Hope this model may be helpful to you as well and feel free to reach out :)