
Customizable Spheric Lithophane Christmas Tree Ornament
Obliczymy ostateczną cenę na podstawie wybranego pliku. Sprawdzisz ją i zaakceptujesz przed płatnością.
Zapisane na tym urządzeniu.

An easy to use Blender file to create your own lithophane Christmas tree ornament with any photo you want.
- Ocena
- 5 / 5
- Polubienia
- 37
- Pobrania
- 142
- Wydruki
- 1
- Wyświetlenia
- 1181
- Oceny
- 1
Aktualizacja u źródła:
Informacje o modelu
- Źródło
- Printables
- Kategoria
- Winter & Christmas & New Year's
- Licencja
- Creative Commons — Attribution — Noncommercial — NoDerivatives
I made this for a friend of mine and realized I could upload it here as well.
It is a customizable lithophane Christmas tree ornament, which means you can use the Blender file to insert any photo you want and generate your own lithophane Christmas tree ornament.
Here's how to do it:
First, open the Blender file CustomLitophaneChristmasTreeOrnament.blend
Select the MAIN_BODY (the only model you see) [1].
Navigate to Texture tab [2].
Click on the Open Image icon and find your image [3].
Wait for Blender to process everything.
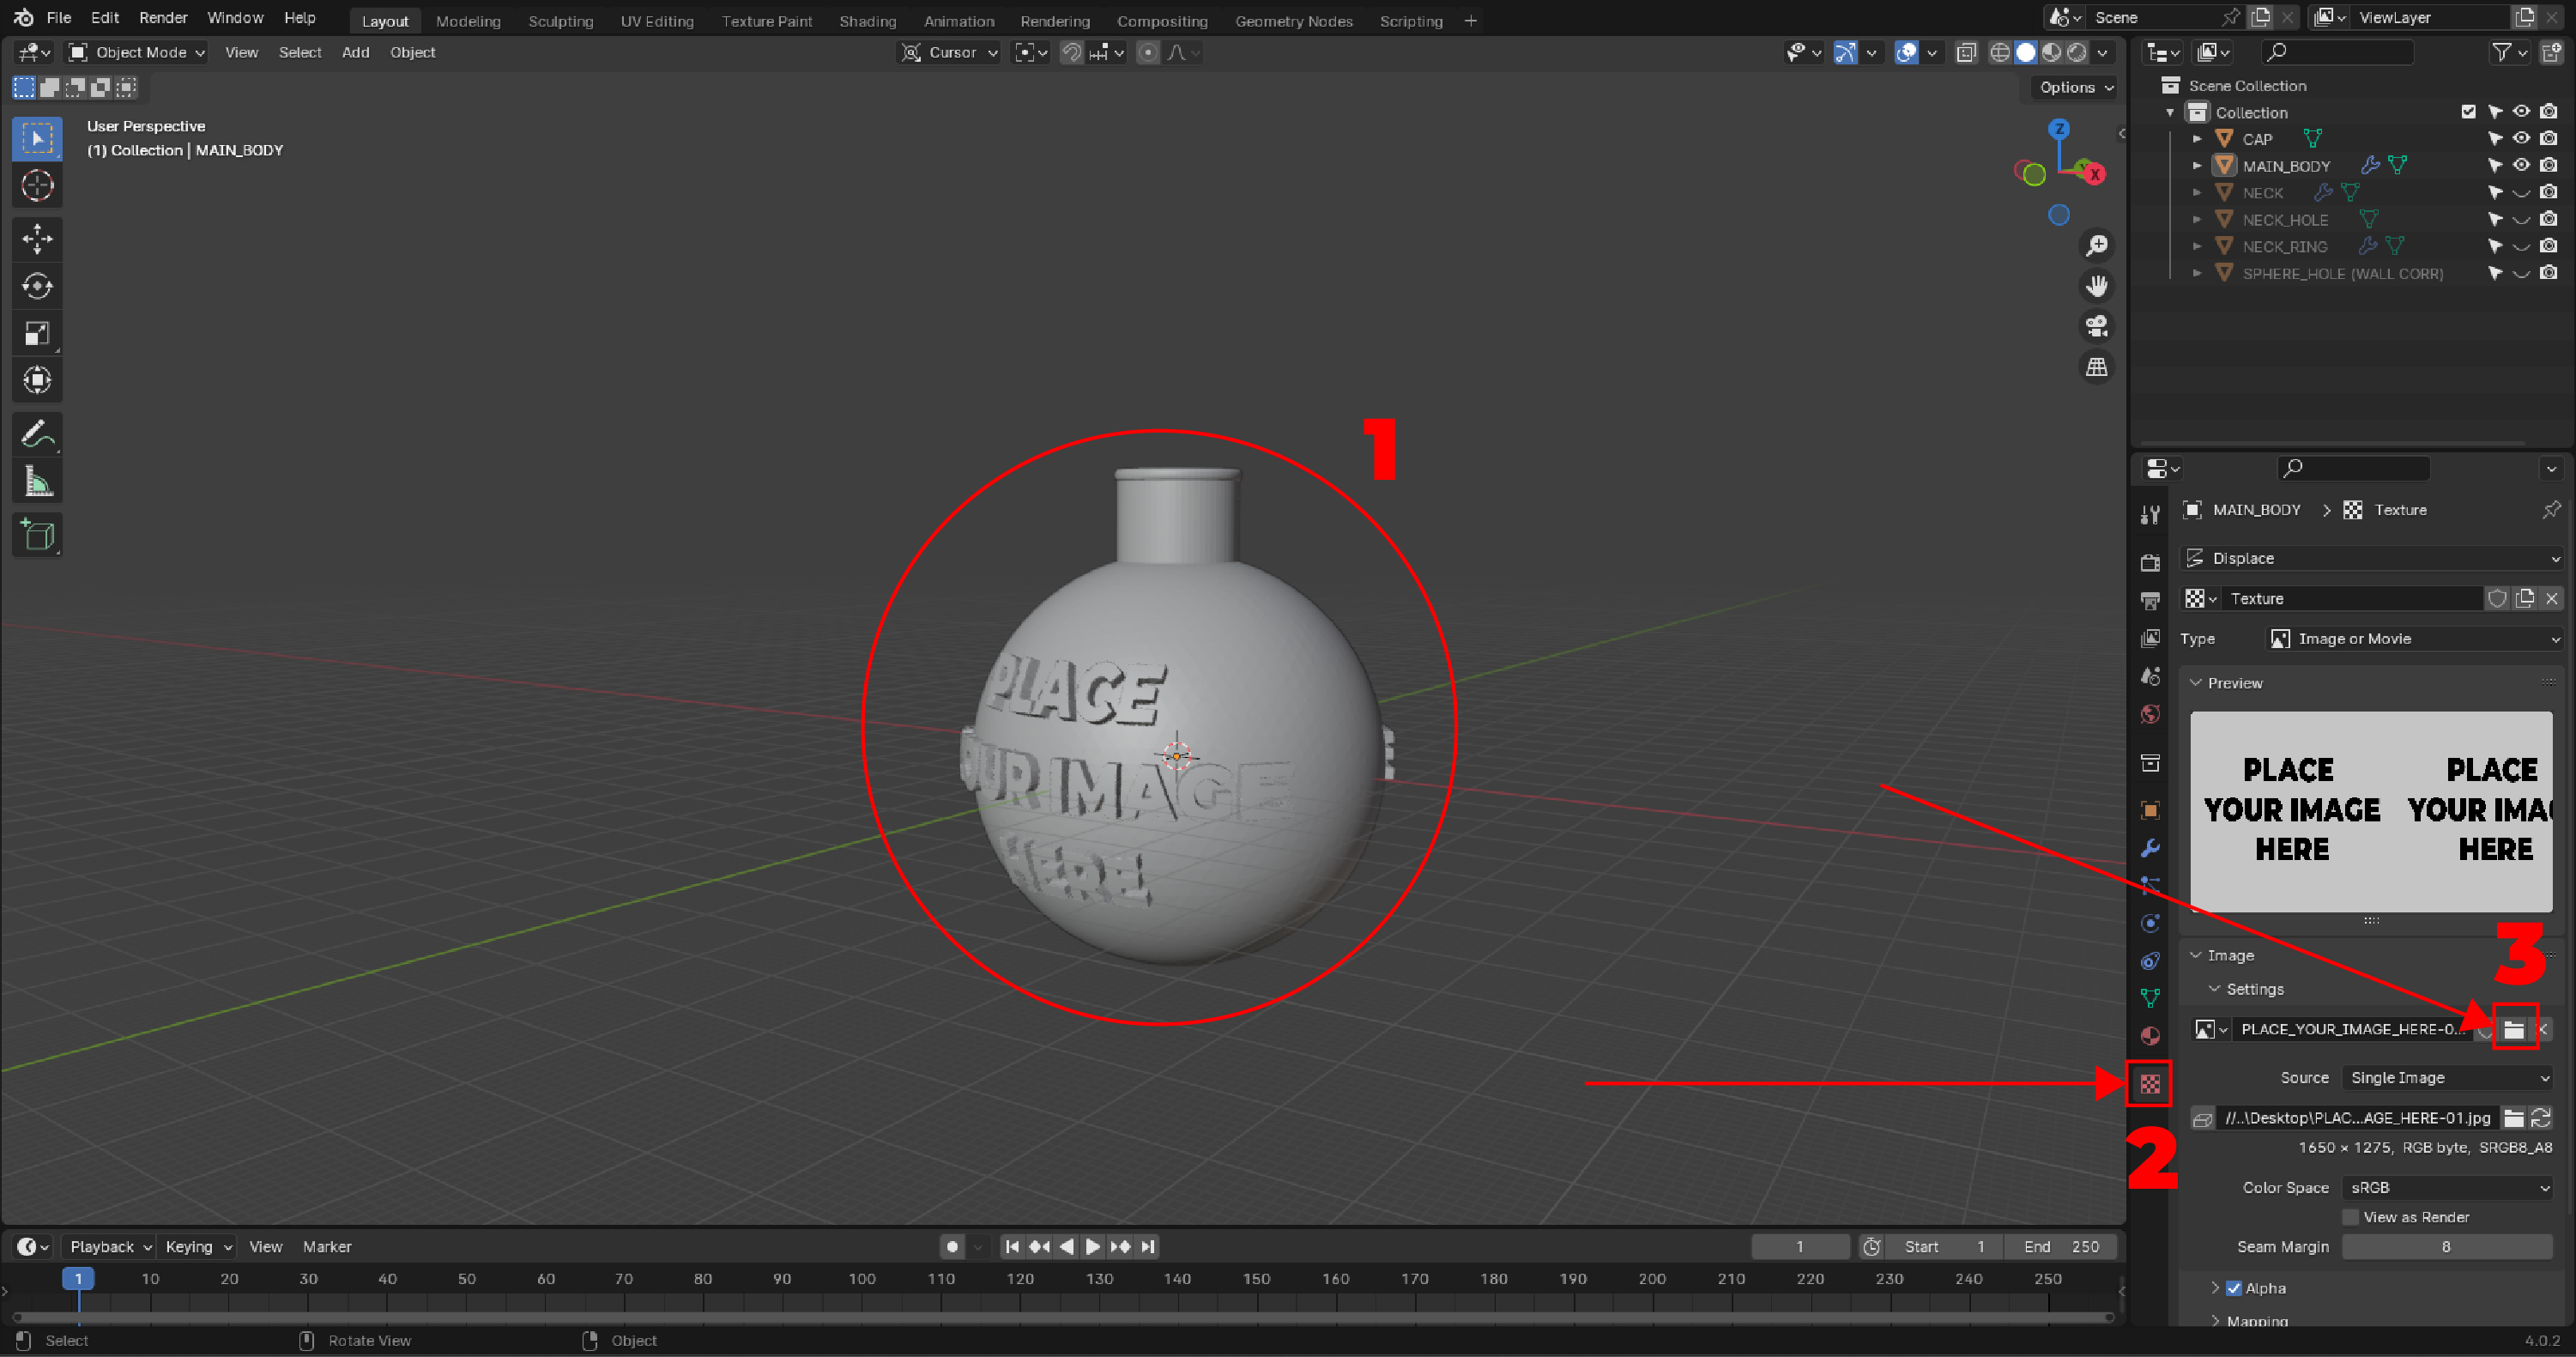
If everything looks right you should be ready for exporting.
Select MAIN_BODY, NECK and CAP (the CAP is optional, but it will prevent the supports from generating inside the ball by selecting the option to print supports on the bed only), and go to:
File -> Export -> .Stl
Check Selection Only and Scene Unit.
(You can also change Up to -Z Up, but you can change the orientation in slicer as well)
Click Export STL
There you go, you have your stl file ready. Insert it in your slicer of choice and check if everything looks good.
Happy printing!
I also added two part transparent shells around my print to make them look a bit better, but this is optional.
--------------------
In case you notice that the model in Blender doesn’t look good when you insert your image, or if, after you slice the model, you notice some thin walls not printing, proceed with the following step.
Select SPHERE_HOLE (WALL CORR) and then click the little arrow pointing left like on the image. This will enable you to change the dimensions of the hollow volume inside the sphere, thus changing the wall thickness. Reduce the size of this inner sphere and check if it works now.
Don’t forget to change the dimensions in all three axis.
The goal is to have the thinnest wall as possible that printer will be able to print.


If at all familiar with Blender, you could turn off Realtime Display in viewport on Subdivision and Displace modifiers on MAIN_BODY to improve the performance while changing the dimensions of SPHERE_HOLE (WALL CORR), but don’t forget to turn them back on.
Test different sizes of inner sphere volume to see what might look best in slicer. The thinner the wall the better the result.
Good luck!