Jefferies tube enclosure
Obliczymy ostateczną cenę na podstawie wybranego pliku. Sprawdzisz ją i zaakceptujesz przed płatnością.
Zapisane na tym urządzeniu.

This is an enclosure to make assembly of the original model easier.
- Ocena
- 0 / 5
- Polubienia
- 8
- Pobrania
- 23
- Wydruki
- 0
- Wyświetlenia
- 246
- Oceny
- 0
Aktualizacja u źródła:
Informacje o modelu
- Źródło
- Printables
- Kategoria
- Other Art & Designs
- Licencja
- Creative Commons — Attribution — Noncommercial
I downloaded and printed the original model, but neglected it because it was difficult to assemble.
One day, it occurred to me that the problem could be solved by making an enclosure to put it in, so I made one and it worked, so I am publishing it.
オリジナルモデルをダウンロードしてプリントしてみたのですが、組み立てが難しいため放置していました。
ある時、これを入れる筐体を作れば問題は解決するのではないかと思いつき、作ってみたところうまくいったので公開します。
What to print
印刷するもの
- “jefferies.stl” x 2 … original model
- “enclosure.step” x 1
- “lid.step" x 1
- “voltage meter base.step" x 1 … optional
What to buy
購入するもの
- Mirror
鏡- Size 45 x 75 mm
サイズは45 x 75mm - I used a film mirror cut with scissors
私はフィルムミラーを鋏で切って使いました
- Size 45 x 75 mm
- Half mirror
ハーフミラー- Size 45 x 75mm
サイズは45 x 75mm - I made it from an acrylic sheet with a half-mirror film
私はアクリル板にハーフミラーフィルムを貼って作りました- https://www.amazon.co.jp/dp/B08NVGT43P
- https://www.amazon.co.jp/dp/B07LGF13W6
- It has 5% visible light transmission and 75% visible light reflectance. The one that says "Magic Mirror" in the application is a good choice.
これは可視光透過率 5%、可視光反射率 75%のものです。用途にマジックミラーと記載してあるものが良いでしょう。
- It has 5% visible light transmission and 75% visible light reflectance. The one that says "Magic Mirror" in the application is a good choice.
- Size 45 x 75mm
- LED lighting
LED照明- A light close to the size of the hole (32 x 34mm) on the top of "jefferies.stl".
“jefferies.stl”の上側にある穴(32 x 34mm)のサイズに近いもの - I used automotive room lamps
私は自動車用ルームランプを使いました- https://www.amazon.co.jp/dp/B0791F7PL4
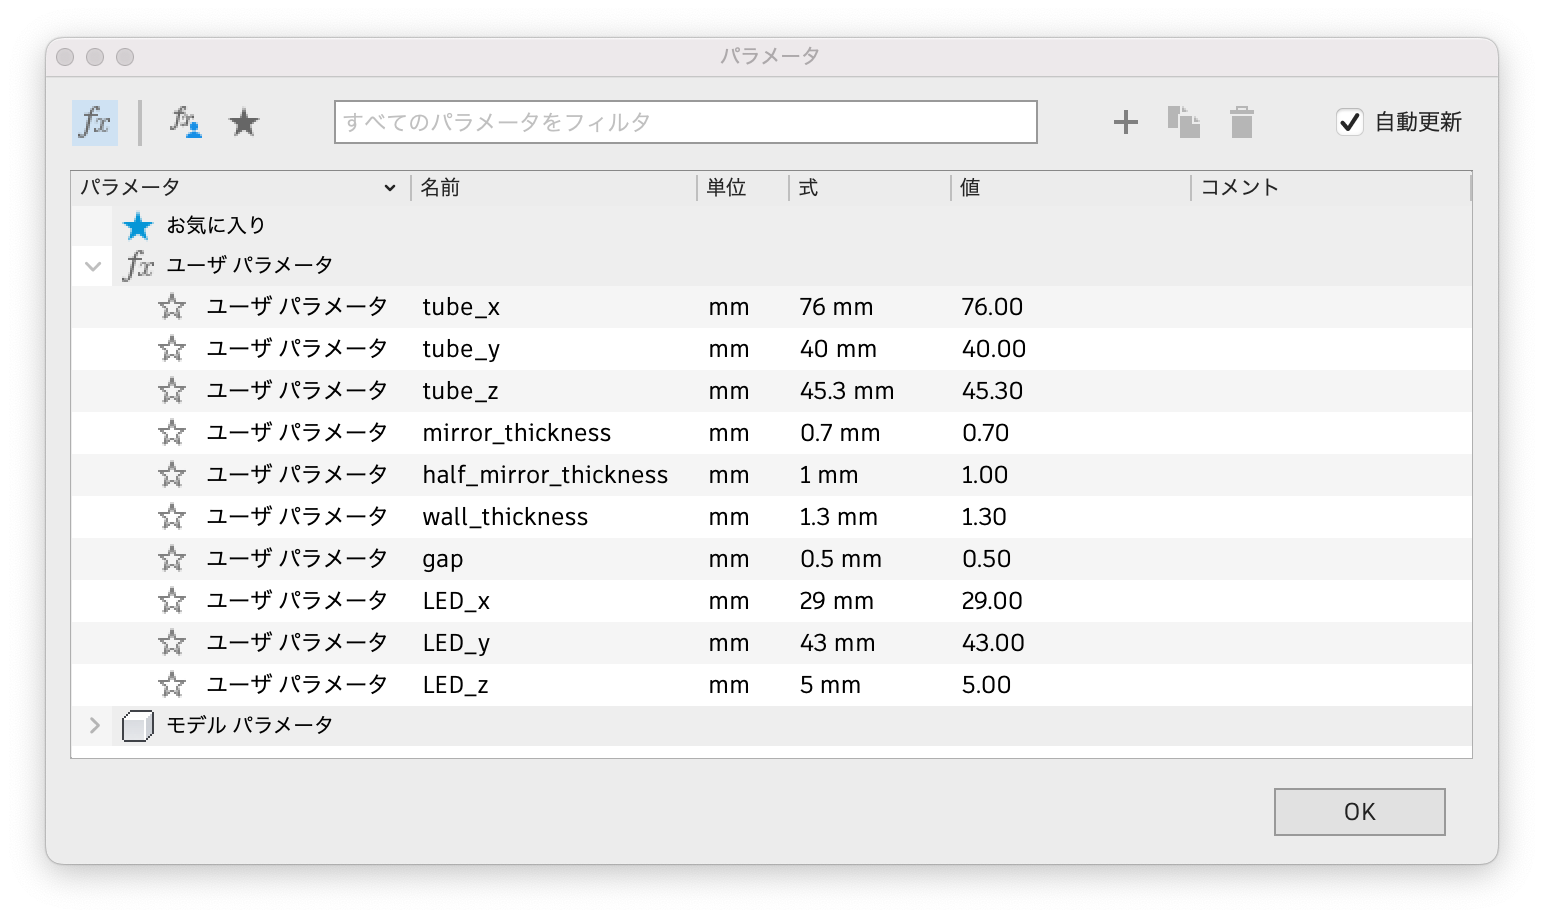
- The size is 29 x 43 x 5mm
サイズは29 x 43 x 5mmです - But this would require a converter to boost the USB 5V to 12V, so if you have one that works with 5V, that would be better.
しかしこれを使うとUSBの5Vを12Vに昇圧するコンバータが必要になります。5Vで使えるものがあるならば、その方が良いでしょう。
- A light close to the size of the hole (32 x 34mm) on the top of "jefferies.stl".
- Universal PCB
ユニバーサル基板- This is needed to attach the boost converter, so it should not be necessary if you are using LED lighting that operates at 5V.
昇圧コンバータを取り付けるために必要なので、5Vで動作するLED照明を使う場合は不要なはずです。
I used the following
私は以下のものを使いました- https://akizukidenshi.com/catalog/g/gP-15356/
- This is needed to attach the boost converter, so it should not be necessary if you are using LED lighting that operates at 5V.
- Voltmeter
電圧計- For measuring the output voltage of the boost converter.
昇圧コンバータの出力電圧計測用です - You can set the voltage to 12V while measuring it with a tester, so you don't need this voltmeter.
テスターで電圧を測りながら12Vに設定すれば良いので、この電圧計はなくても構いません - I used the following
私は以下のものを使いました
- For measuring the output voltage of the boost converter.
How to assemble
組み立て方
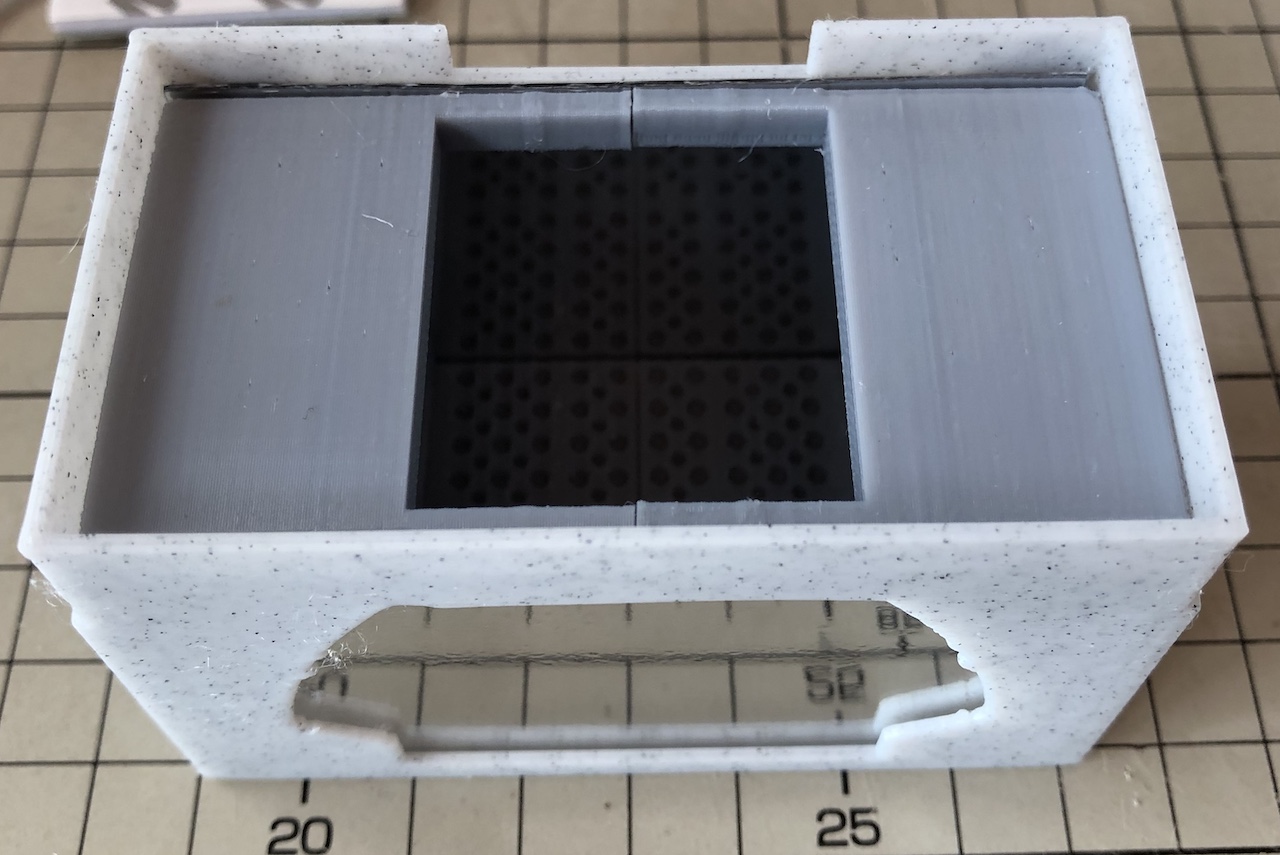
Insert the two "jefferies.stl" into the enclosure and insert the mirror in the back and the half-mirror in the front.
筐体に“jefferies.stl”を二つ入れて、奥に鏡を、手前にハーフミラーを挿入します
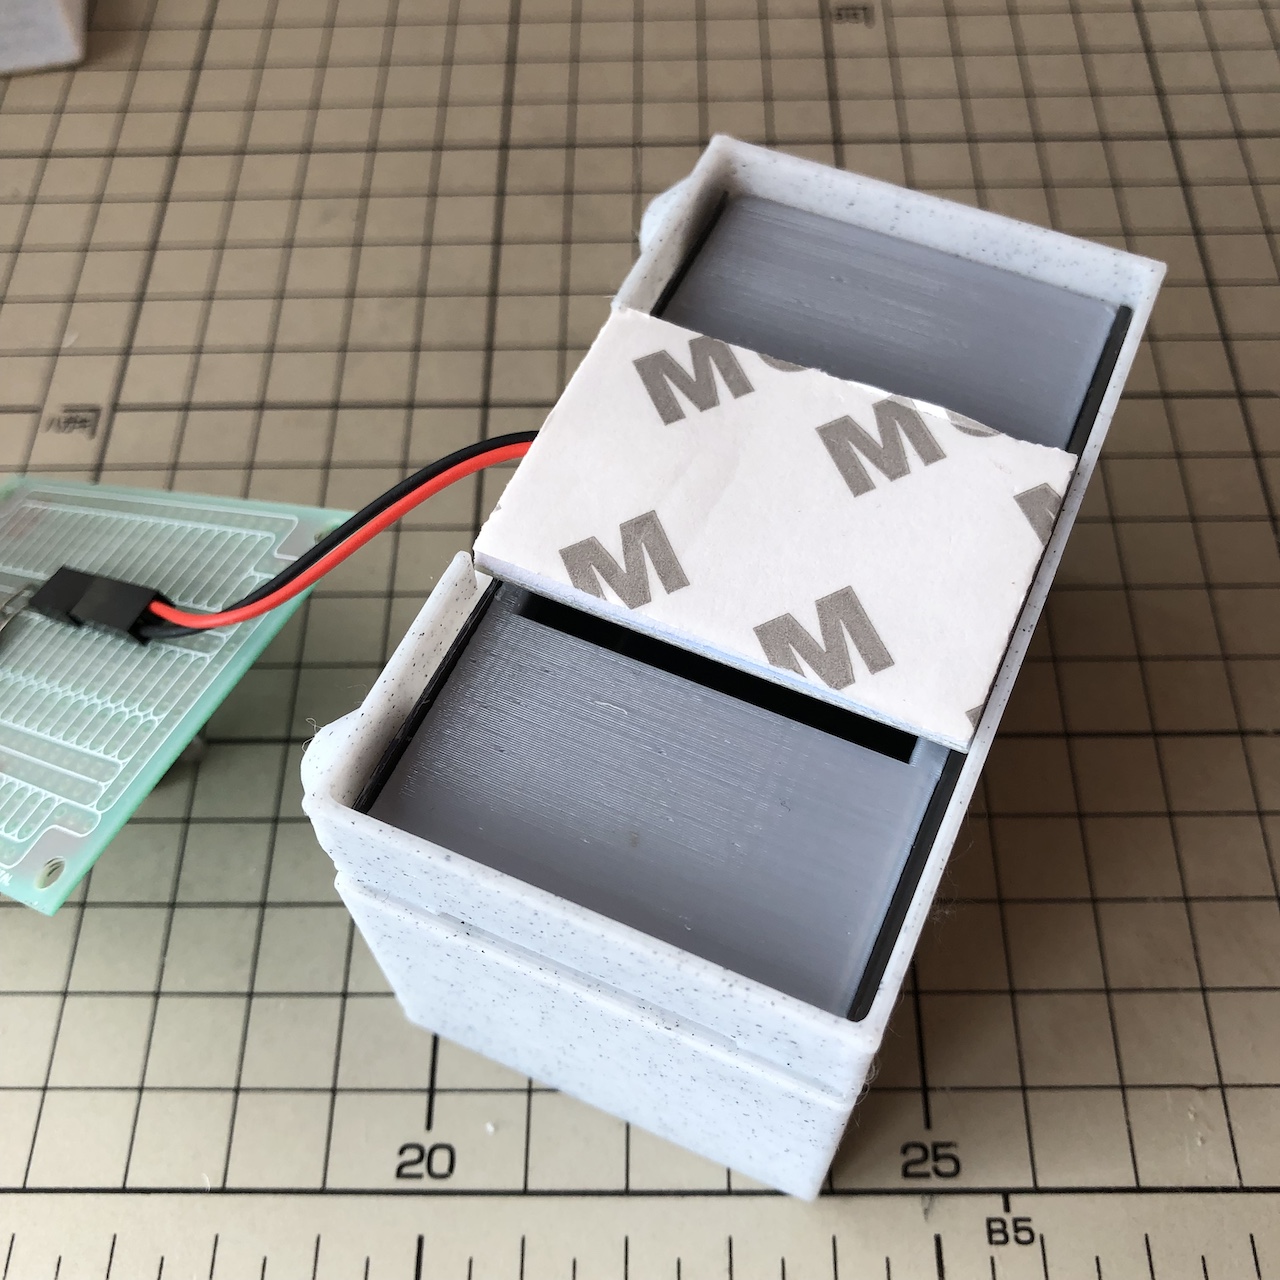
Place the LED light on top.
上にLED照明を置きます
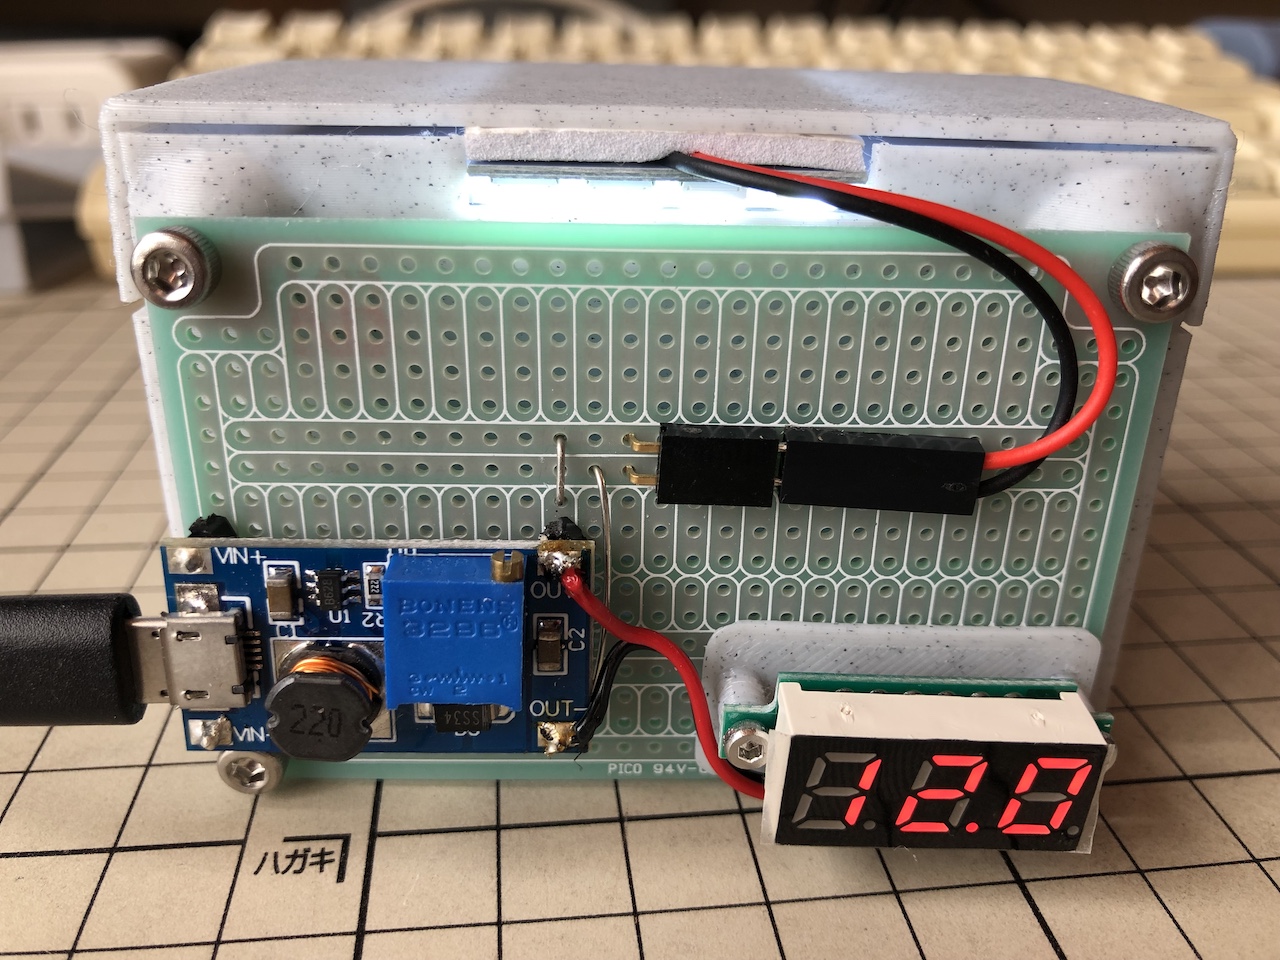
Fix the universal board on the back with four M3x6mm bolts.
背面にユニバーサル基板をM3x6mmのボルトを四つ使って固定します
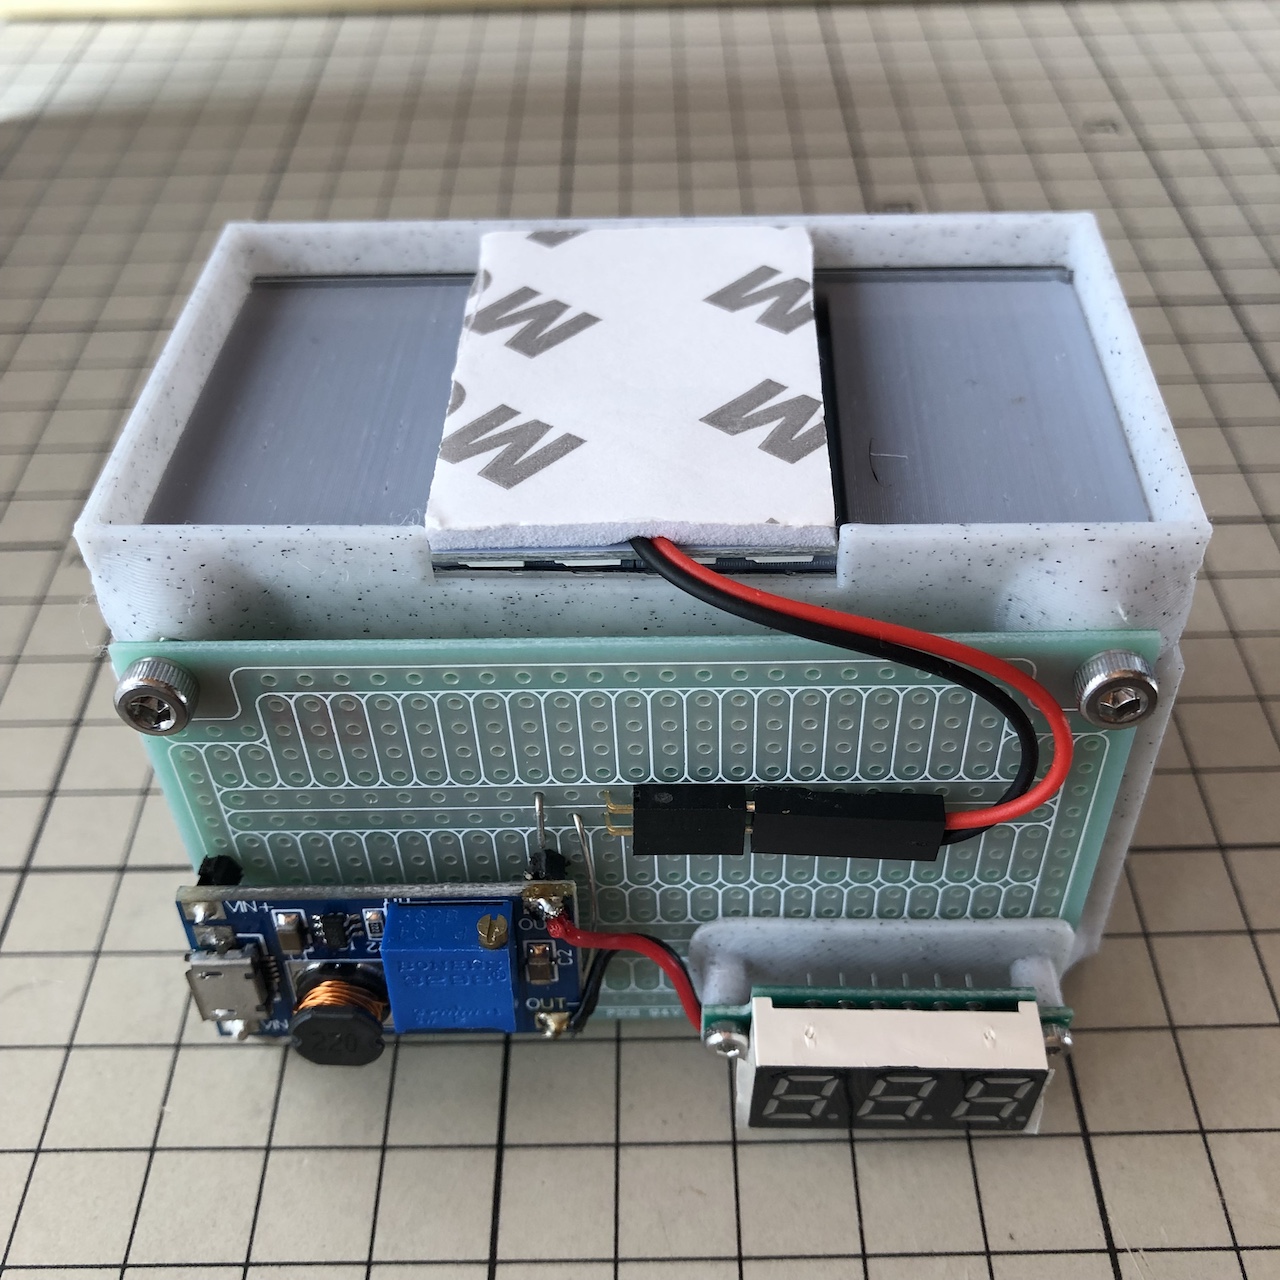
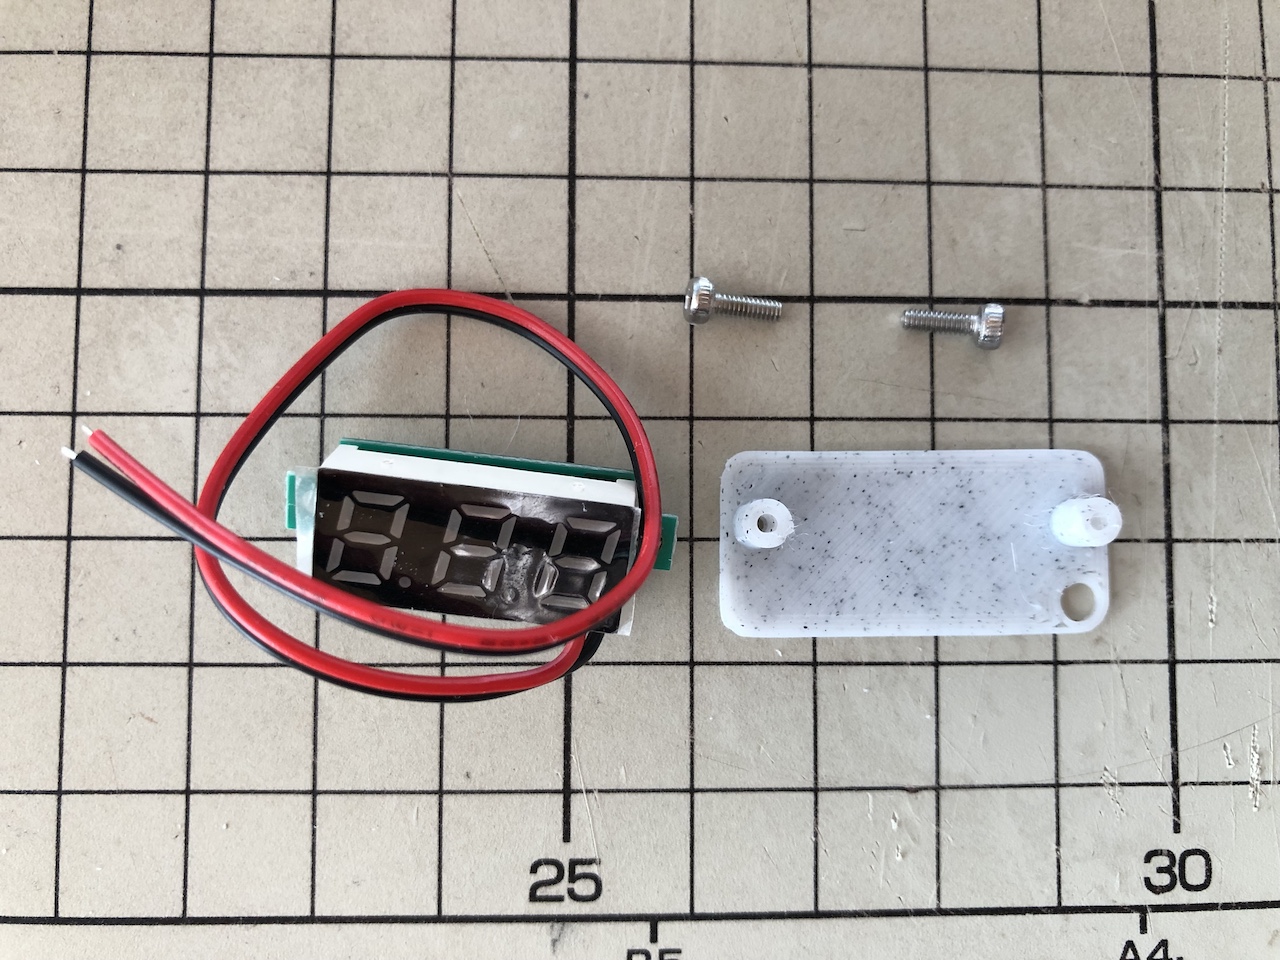
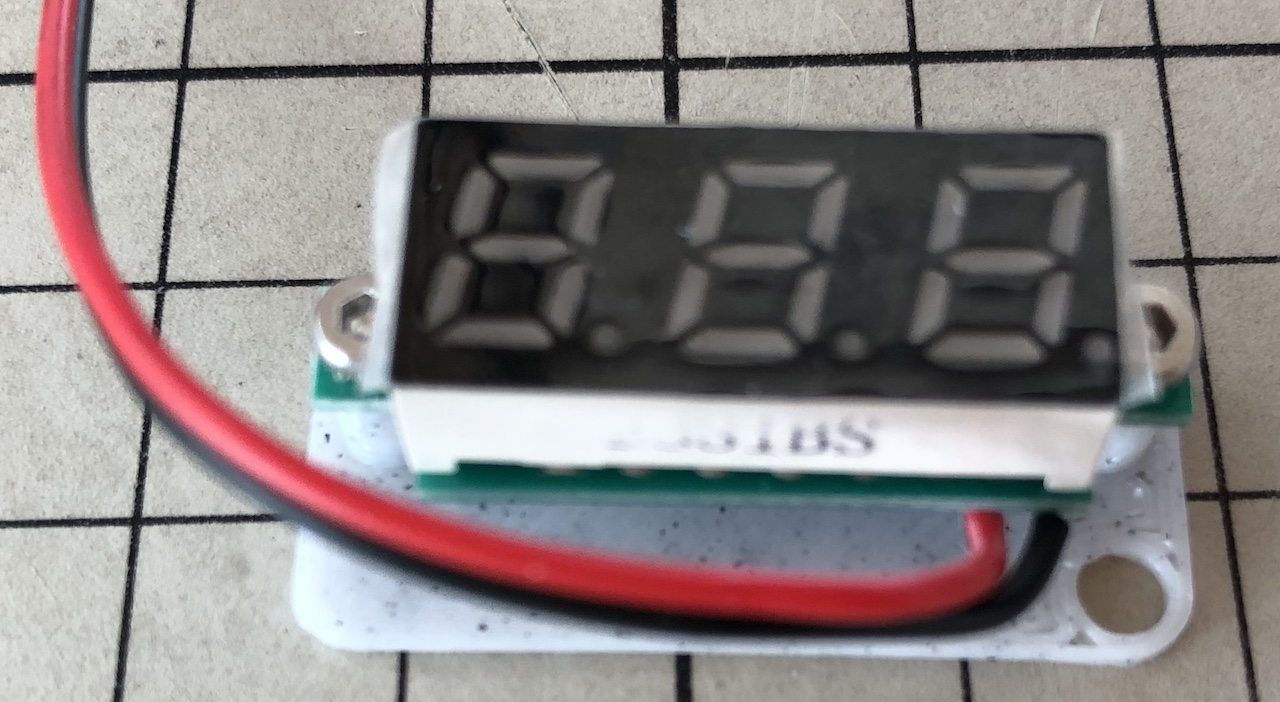
Use two M2x6mm bolts to secure the voltmeter.
電圧計の固定にはM2x6mmのボルトを二つ使います
Close the lid.
蓋を閉めます

Adjust the voltage to 12V.
電圧が12Vになるように調整します
That's it!
以上で完成です
Parameters