
3D Nintendo 64 Logo
Obliczymy ostateczną cenę na podstawie wybranego pliku. Sprawdzisz ją i zaakceptujesz przed płatnością.
Zapisane na tym urządzeniu.

The classic logo custom-modeled for ease of 3D printing and assembly, only requiring a small amount of glue.
- Ocena
- 5 / 5
- Polubienia
- 460
- Pobrania
- 741
- Wydruki
- 6
- Wyświetlenia
- 4800
- Oceny
- 5
Aktualizacja u źródła:
Informacje o modelu
- Źródło
- Printables
- Kategoria
- Video Games
- Licencja
- Creative Commons — Attribution — Noncommercial — Share Alike
I was very sad to see no readily available 3D N64 logos to compliment the plethora of fancy GameCube logo models that you can find everywhere, so I figured I should remedy that. The only ones I could find were either reliant on clunky assembly or having an expensive multi-color filament printer, so this is my solution for that.
On the subject of the red and green angled faces: Probably the easiest thing to mess up is the way the angled faces on the sides of the N's are arranged. Here's a diagram to help (the diagram is correct unlike the photo):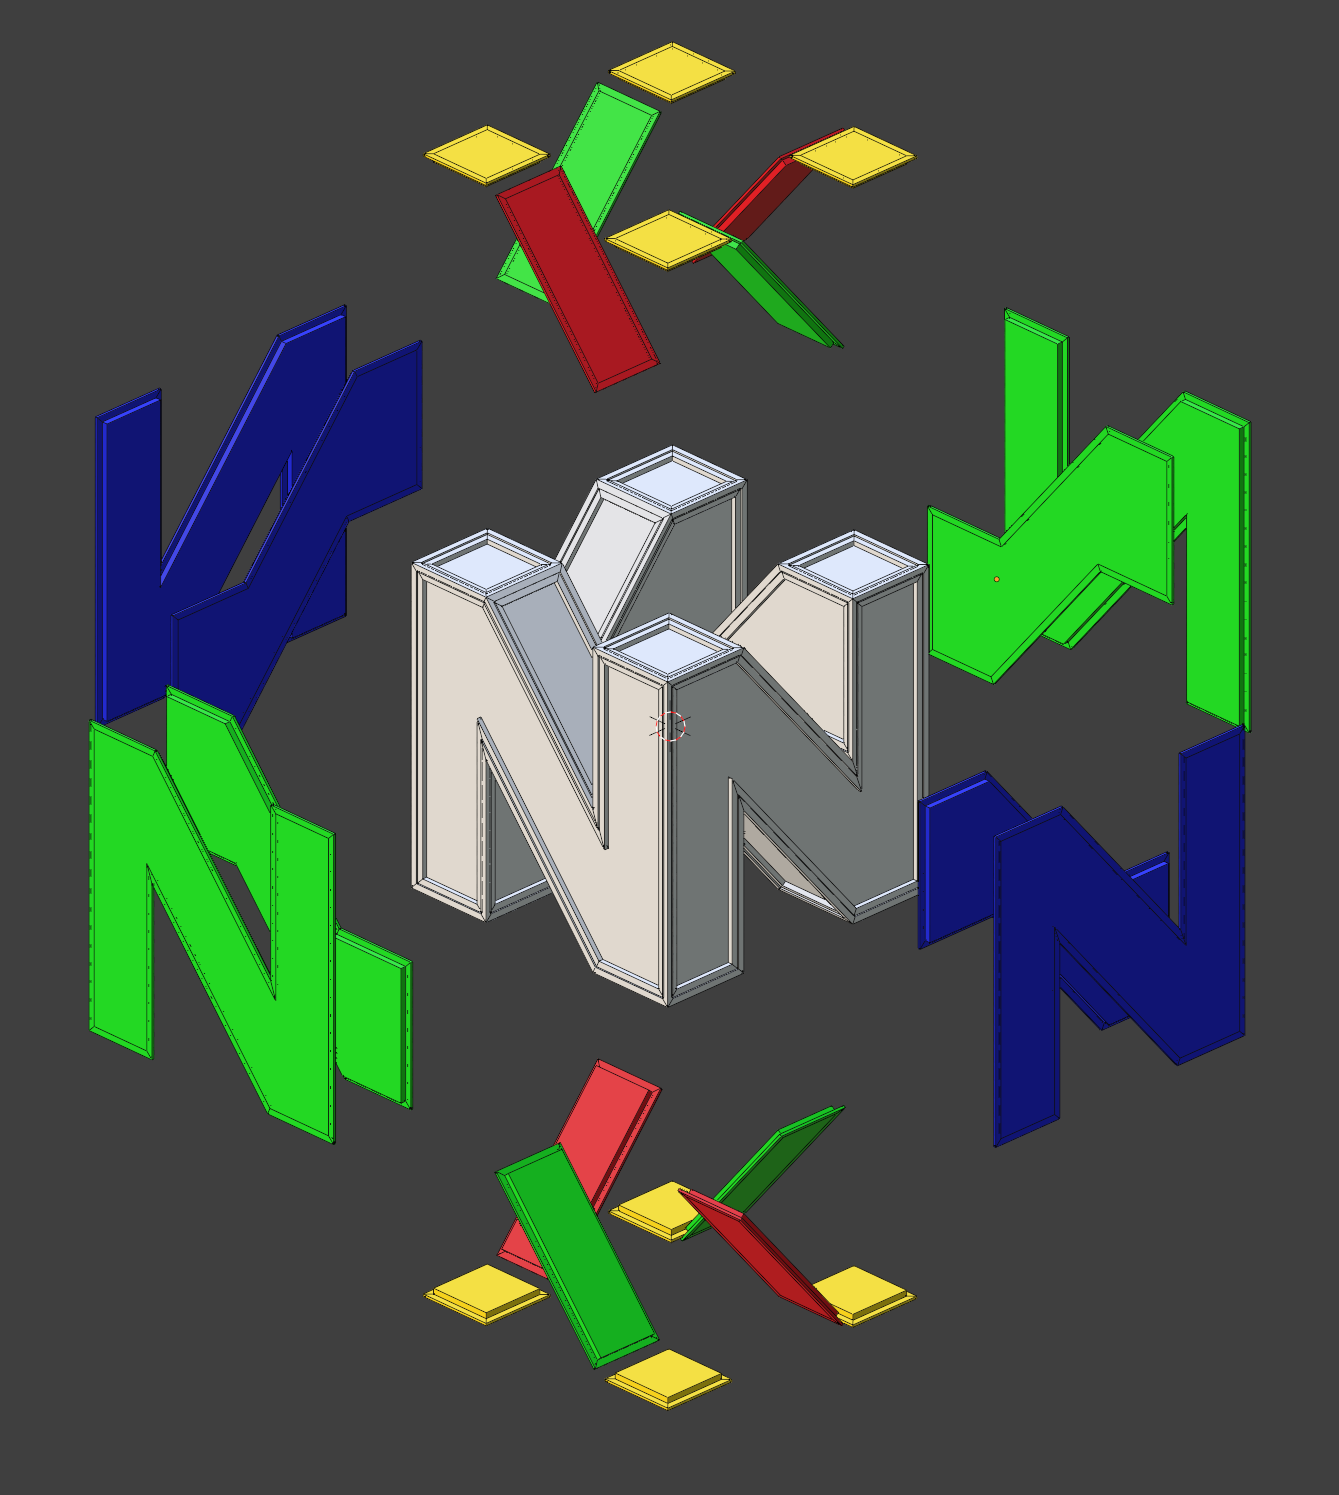
An easy way to remember is that the green and blue N's both follow the same axis, and when you look at the logo with a blue N on the left, and a green N on the right, you should see a red stripe on the two angled N's that are facing you going from top left to bottom right. Then, once you have those red faces in place, put another red face on the opposite angled section, and then alternate those with green faces on either side.
…you know what, just follow the diagram.
This model does have a noticeable border, and so I may make a revised version that has seamless edges and perhaps a better assembly process that doesn't require glue.
Here are some other misc. printing/assembly notes:
- Scaling: I made this at the smallest scale I could (40x40x40mm-ish), so that it could easily be scaled up. Scaling it down isn't recommended.
- Supports: The frame, in theory, could print without supports provided you don't mind the bottom insets being a bit droopy/not putting the yellow caps on the bottom as well. I used tree supports and close to default settings and it worked wonderfully.
- Print Orientation: Make sure to print each side so that the wide parts of the faces are on the print bed. I accidentally printed some of them the other way around and it still worked at the small scale I was doing, but just keep that in mind.
- Layer Height: I designed everything to hopefully work at .2mm layer heights, but I recommend printing everything at .1mm layer heights. Up to you.
- Cooling: Be 100% sure that the parts have fully cooled before coming off the print bed, otherwise they'll curl and you'll have a harder time gluing them in.
There probably could be a significantly fewer number of parts included in this post, but I wanted to guaranteed that I was getting the right number of parts in the right orientation every time I printed it, so feel free to ignore the duplicate ones (like the yellow and red faces).