
Turtle Dock 2.0
Obliczymy ostateczną cenę na podstawie wybranego pliku. Sprawdzisz ją i zaakceptujesz przed płatnością.
Zapisane na tym urządzeniu.

Modular turtle dock, easy to print, your turtle will thank you.
- Ocena
- 5 / 5
- Polubienia
- 49
- Pobrania
- 244
- Wydruki
- 1
- Wyświetlenia
- 3121
- Oceny
- 1
Aktualizacja u źródła:
Informacje o modelu
- Źródło
- Printables
- Kategoria
- Pets
- Licencja
- Creative Commons — Attribution — Noncommercial — Share Alike
A couple of years ago I designed my first turtle dock, it worked fine but after a couple of years, some design flaws started to surface, mainly the core structure stability and aesthetics.
With those two things in mind, I started from scratch the second one, for stability I designed the pieces with a puzzle inspired lock mechanism. On four main parts of the platform, the top one is the last to snap making it impossible for the others to fall apart.
For aesthetics, I wanted to incorporate a “natural” element to it, making it blend a bit more in the aquarium. For that, I remixed parts of a rock into the main platform (thanks to RobagoN for the rock design).
The rock parts also have the same lock mechanism and since they snap from the bottom, gravity and the weight of the pieces make it so that the rock pieces don't fall apart as well.
The dock was designed to be placed in a corner on an aquarium so we have two sides flat, the flat sides go against the glass, but you are free to do whatever you want 😄
Hexagons holes are everywhere to be possible for water to circulate inside and there is space to have a power filter (180-190mm size max).
Dimensions
With rock
Length: ~260mm
Width: ~270mm
Height: 140mm
Without rock
(If for some reason you have less space)
Length: 210mm
Width: 140mm
Height: 140mm
Hole for power filter
Length: 190mm
Width: 130mm
Height: 130mm
There is also a gap in the top platform for the power filter cable.
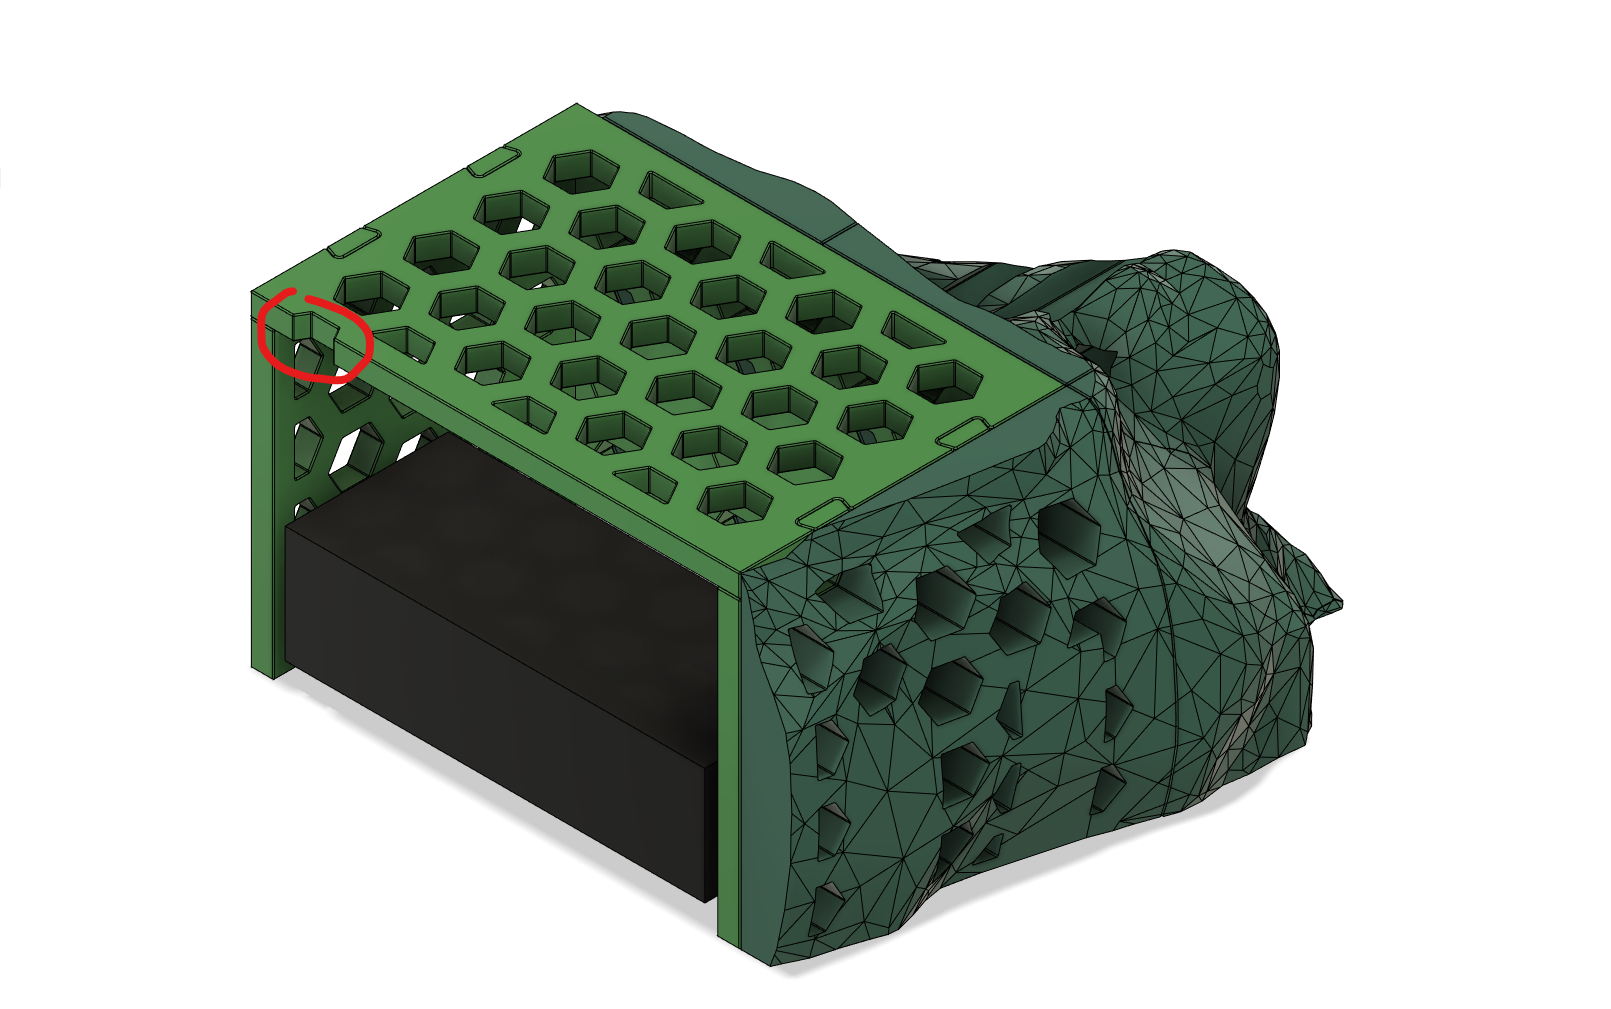
Printing
All pieces can be printed on a Prusa MK3.
Print settings
Layer height: 0.3mm
Infil: 5%
Infill pattern: Gyroid, great for strength, speed but mainly, in this scenario, for allowing the piece to be filled with water
Supports: Yes, advised mainly for the rock parts
Print instructions
Core parts
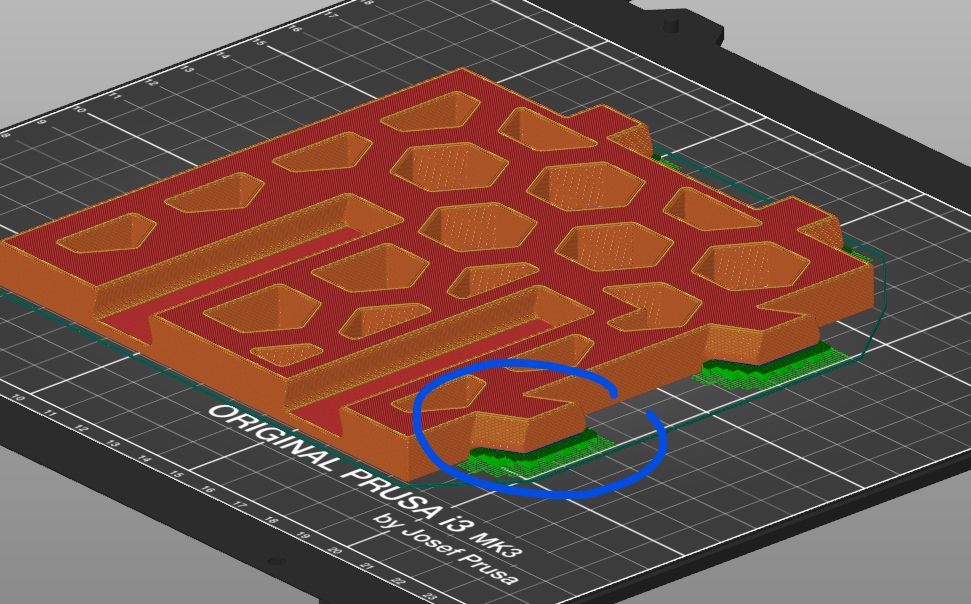
The general rule is printing with the gaps for the lock mechanism facing up.
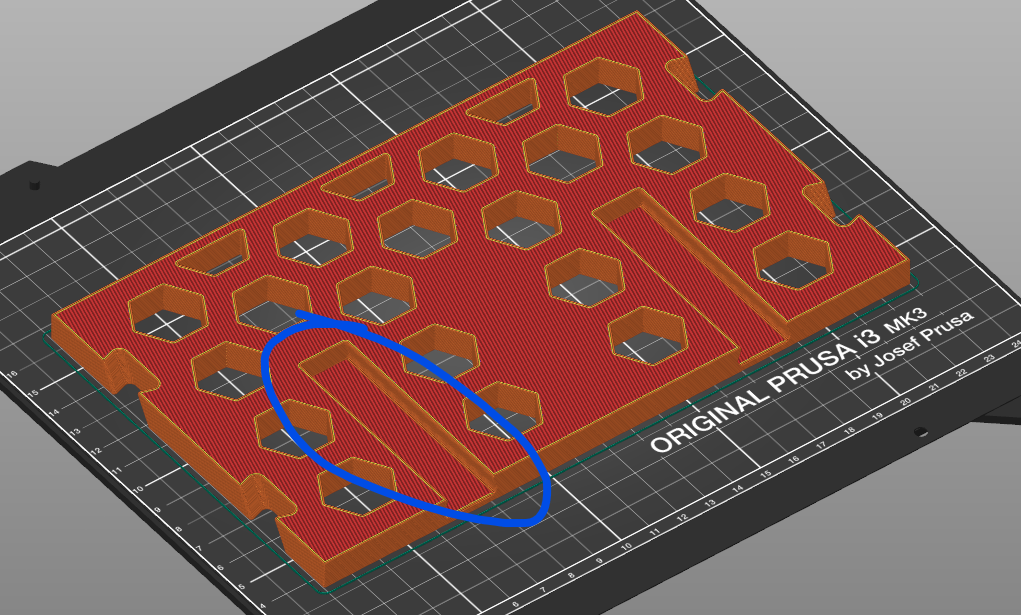
Supports are needed for the smaller walls since the snap piece is floating in this orientation.
Rock parts
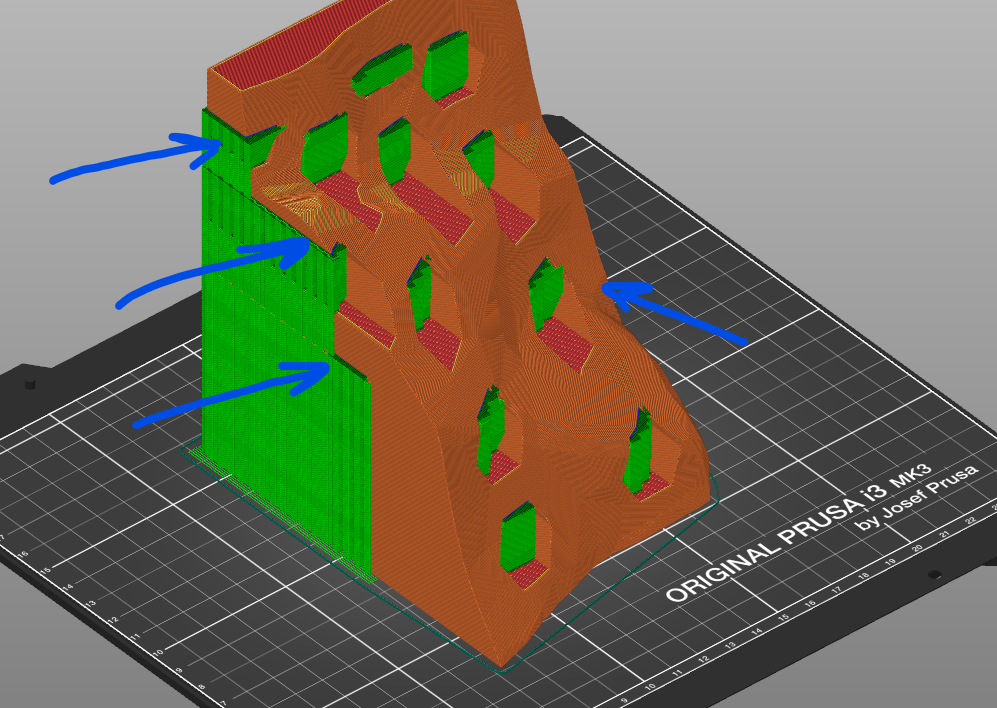
The general rule is printing the pieces in the default orientation.
Most printers should be able to print most of the pieces without major support use, the overhand in the hexagons is small but if you want the pieces to look flawless I advise at least some Paint-on supports. Also, the gaps for the locking mechanism in this orientation will have an overhang as well, some supports are advised here as well to have the correct piece offset so the parts align better. Finally, there are two parts that require supports since they have a hexagon split making some floating parts that will not print well unless support is enabled there.
Assembling
The parts were designed with a 0.1mm offset for easier assembly.
Core
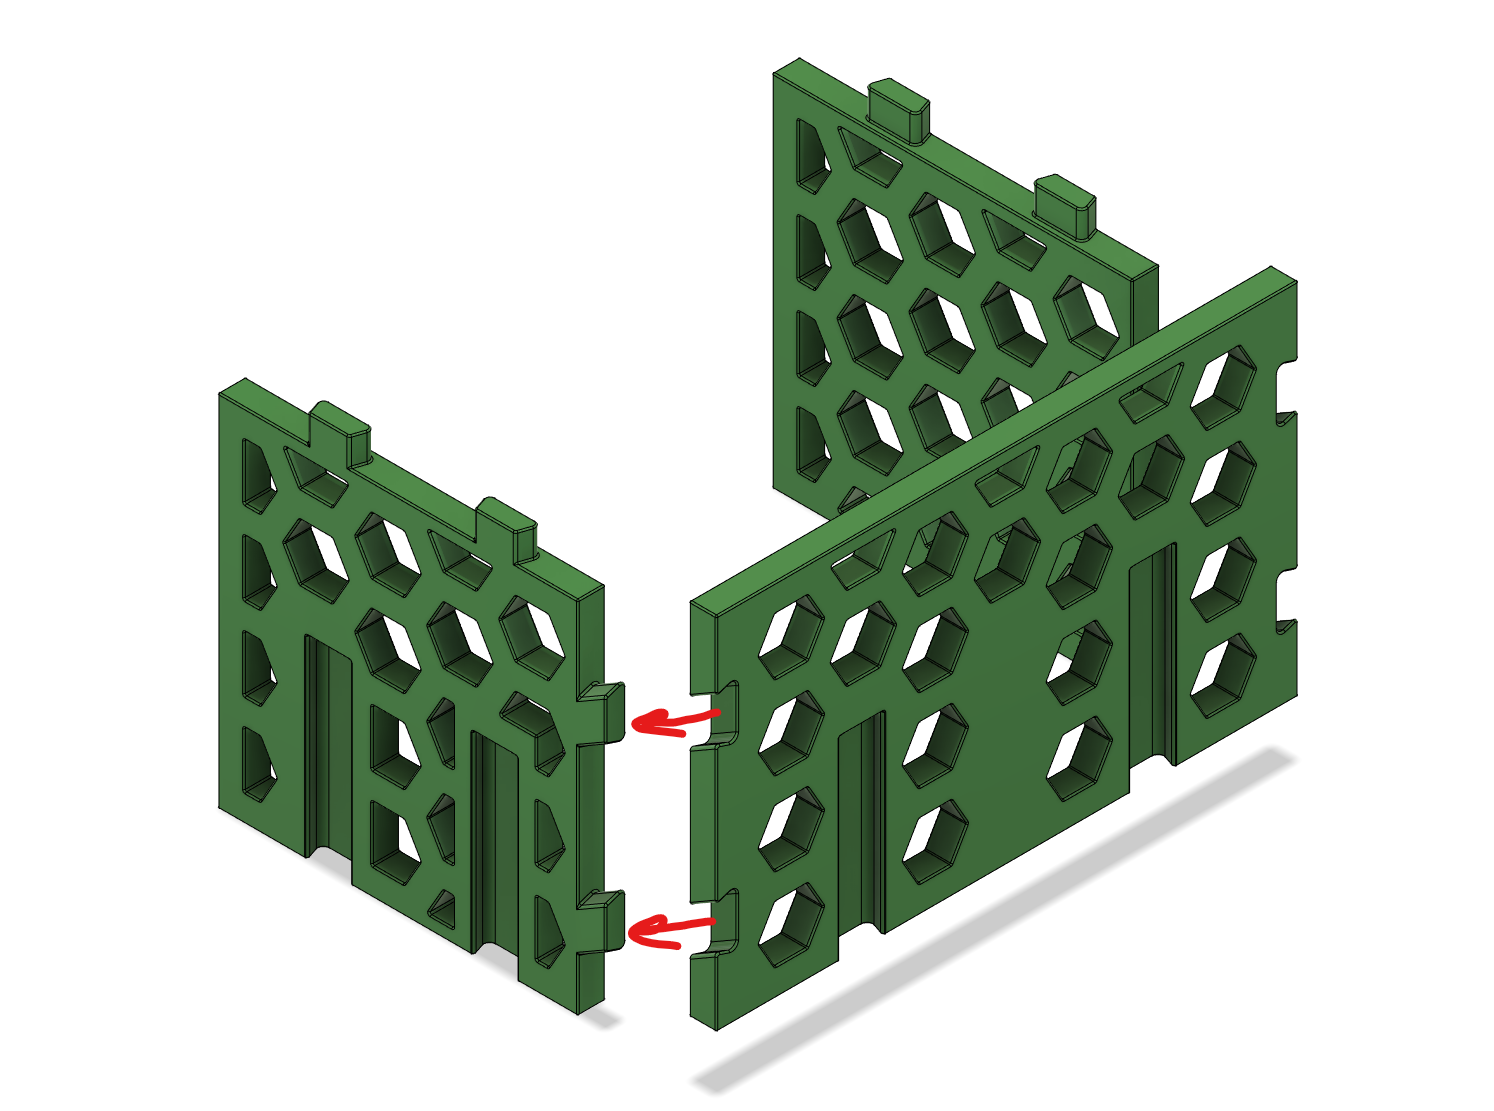
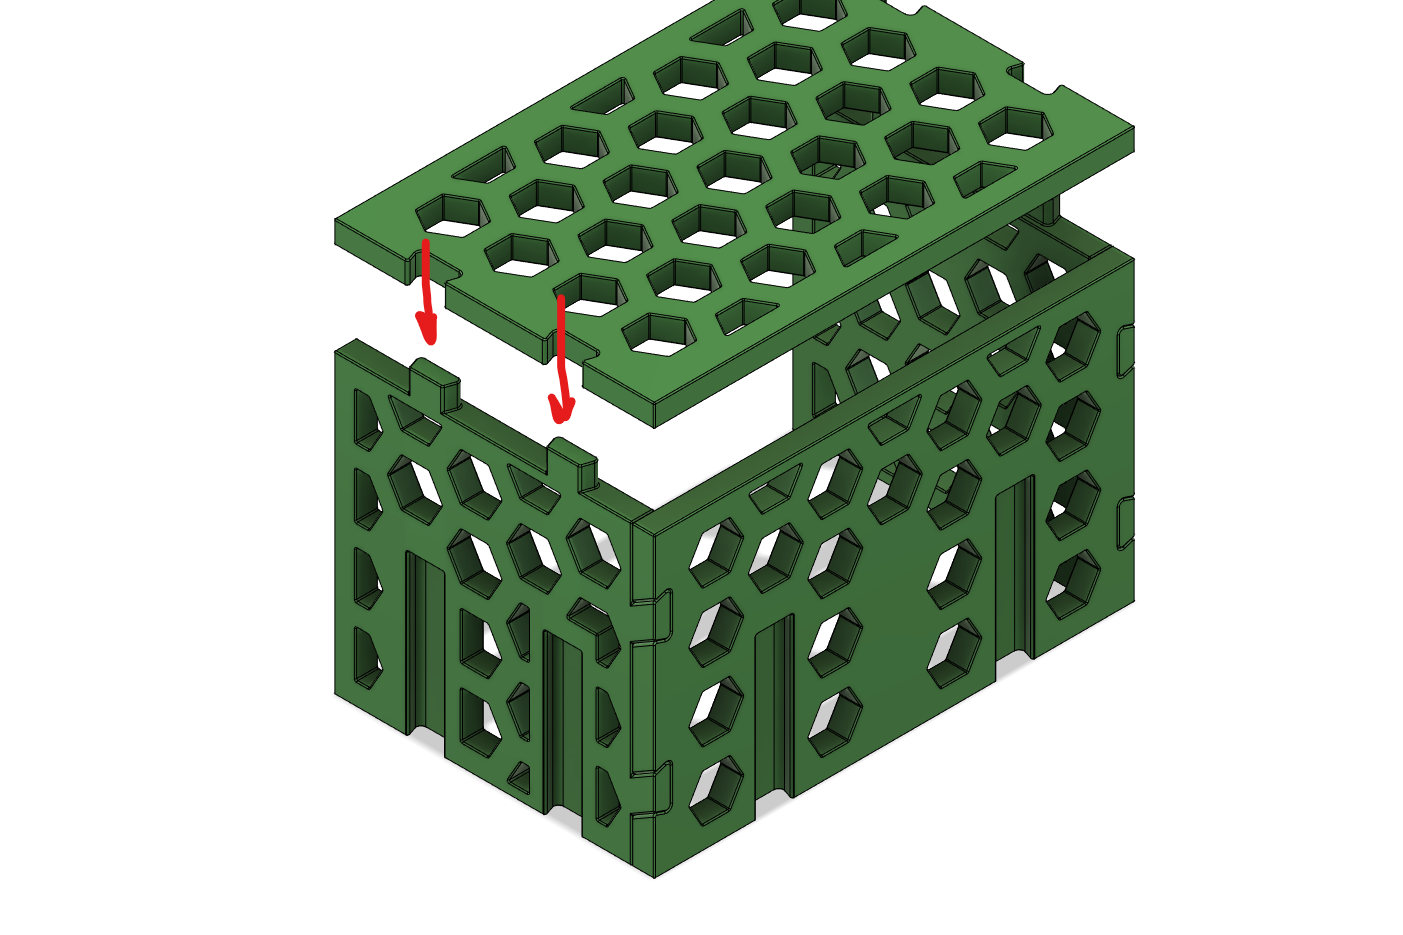

As soon as the top piece is assembled, the others won't be able to move.
Rock
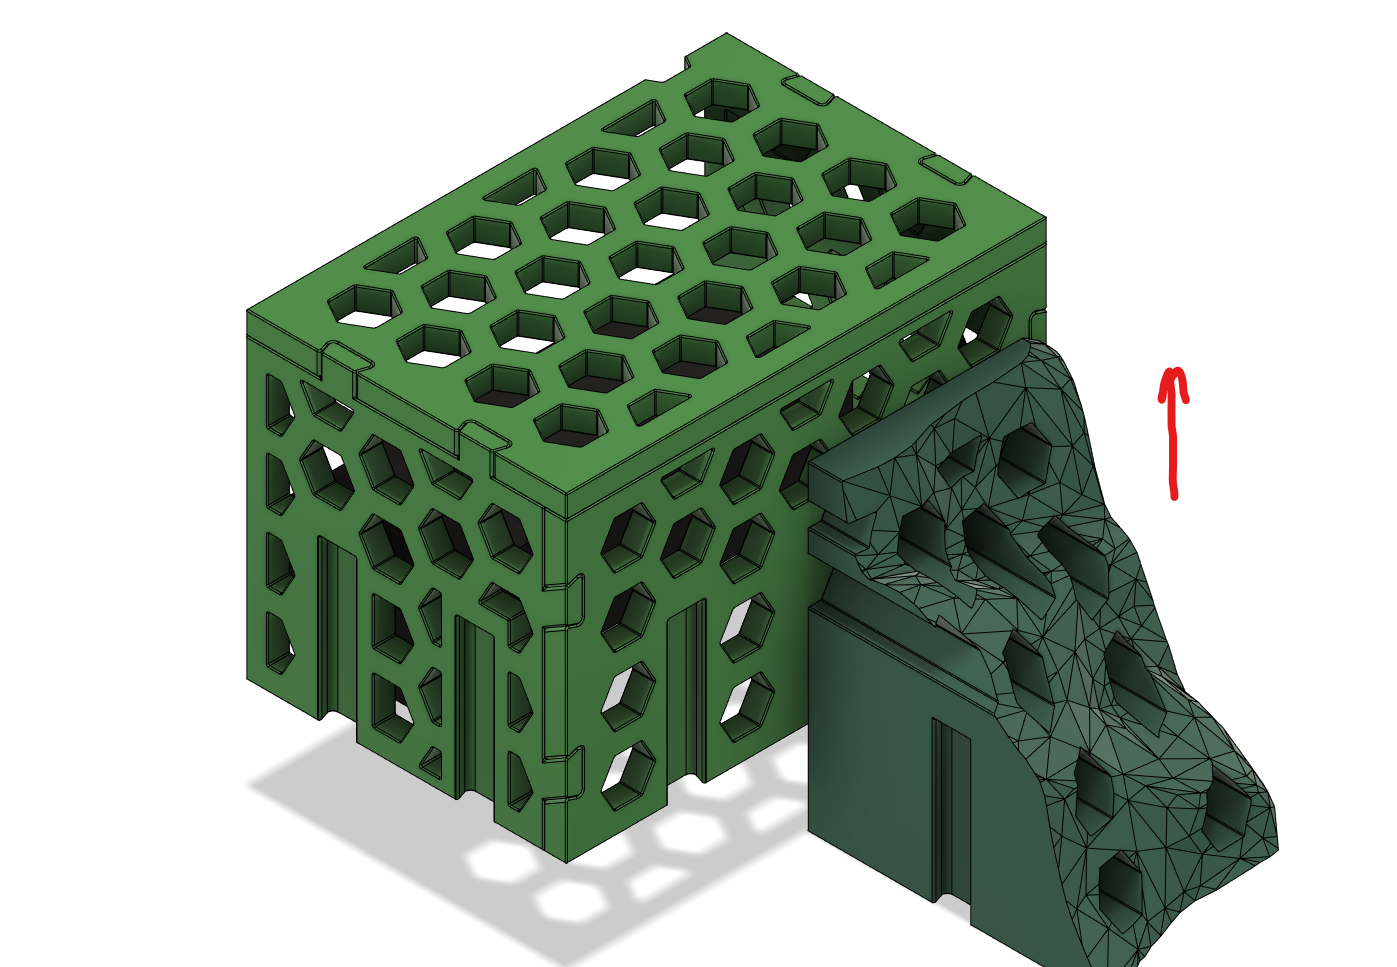
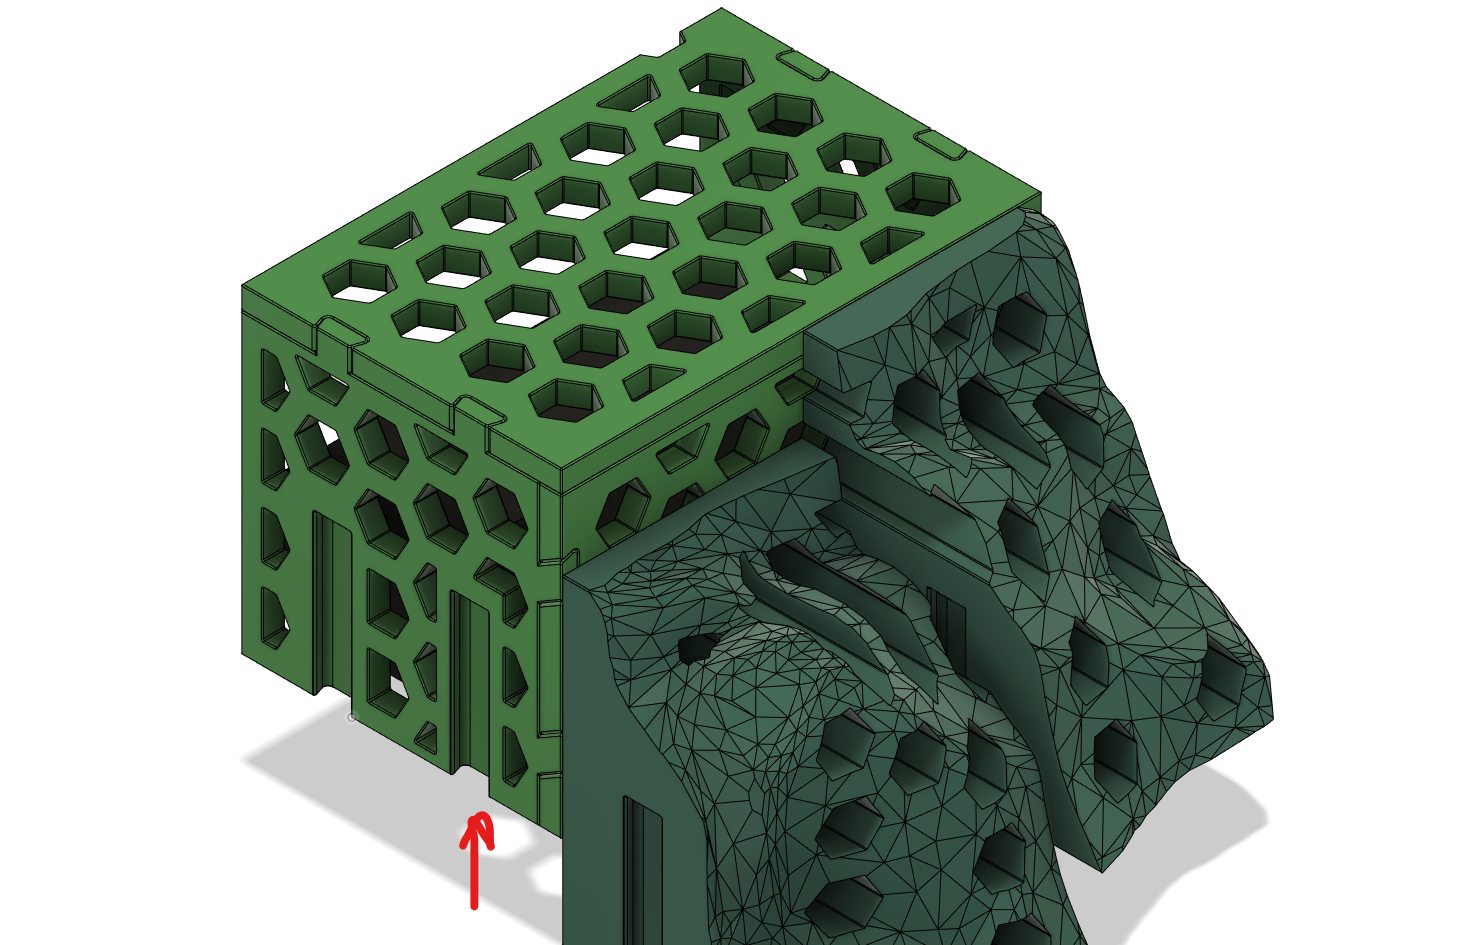
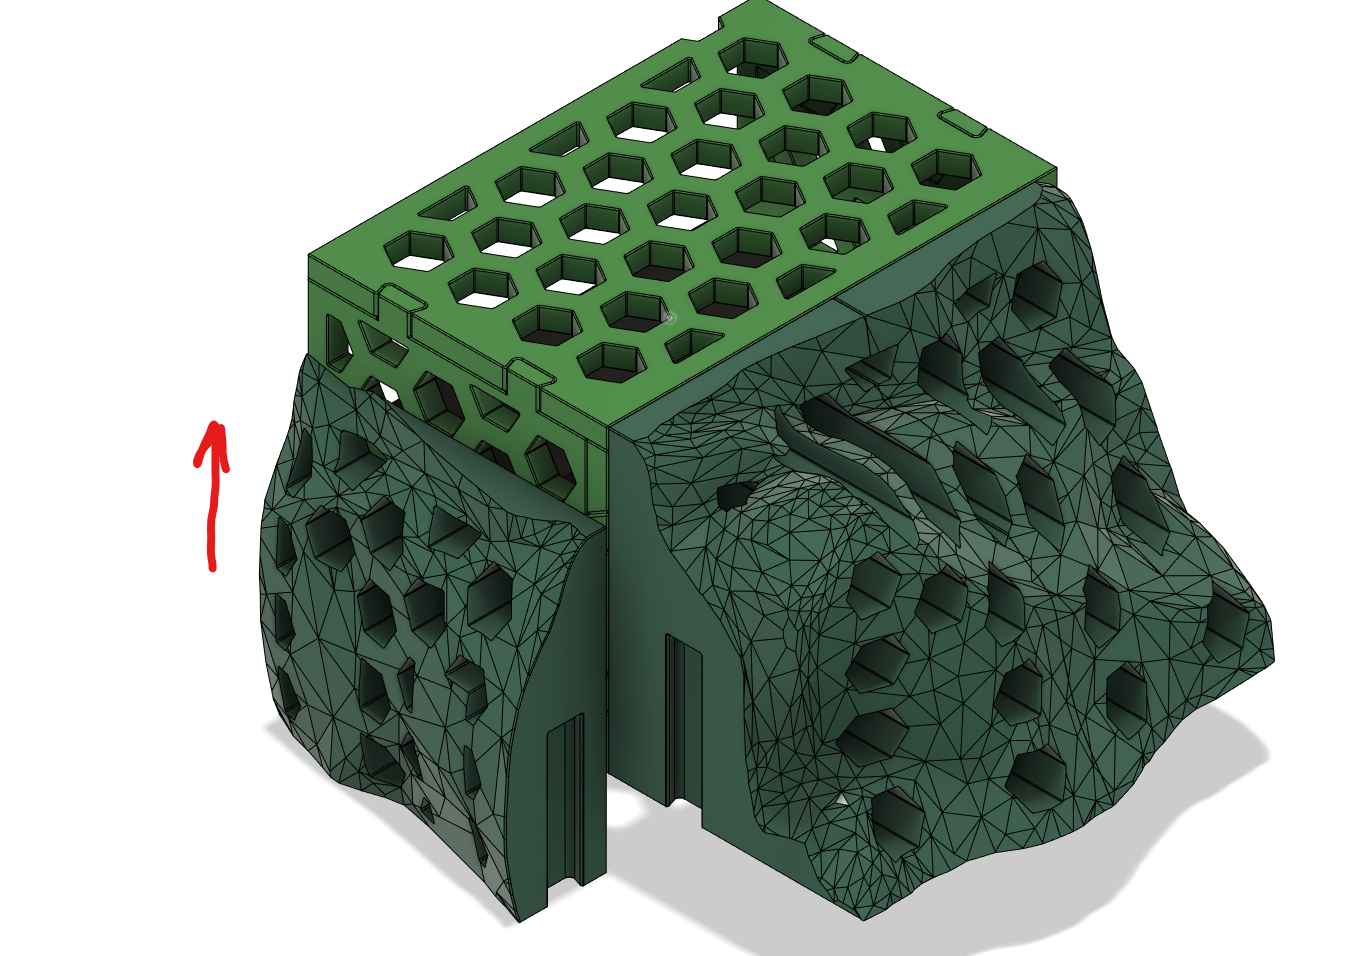
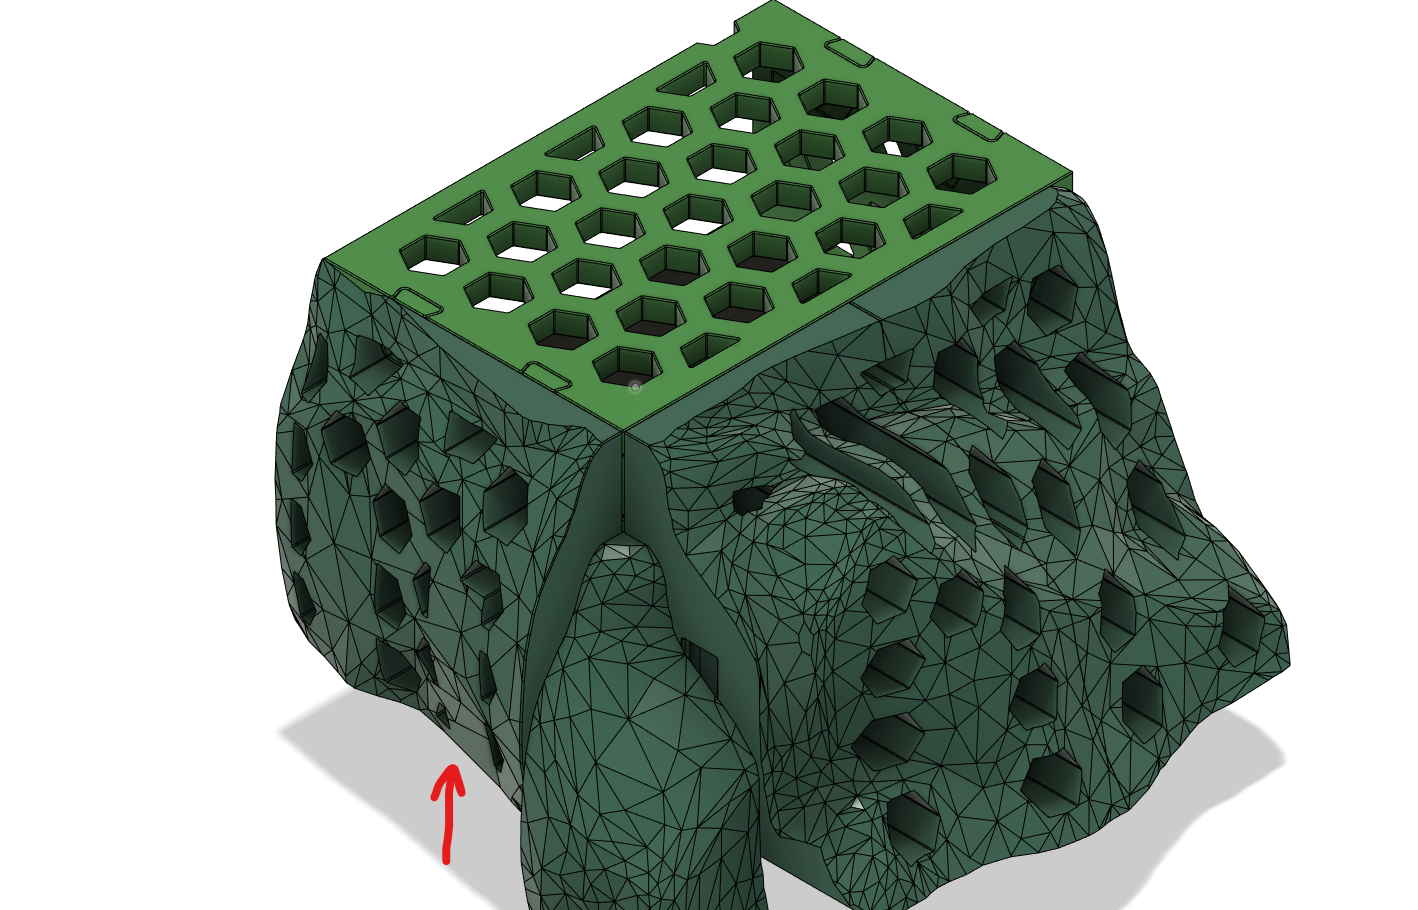
This needs to be roughly the order of the parts snapping together because of the way the pieces snap.
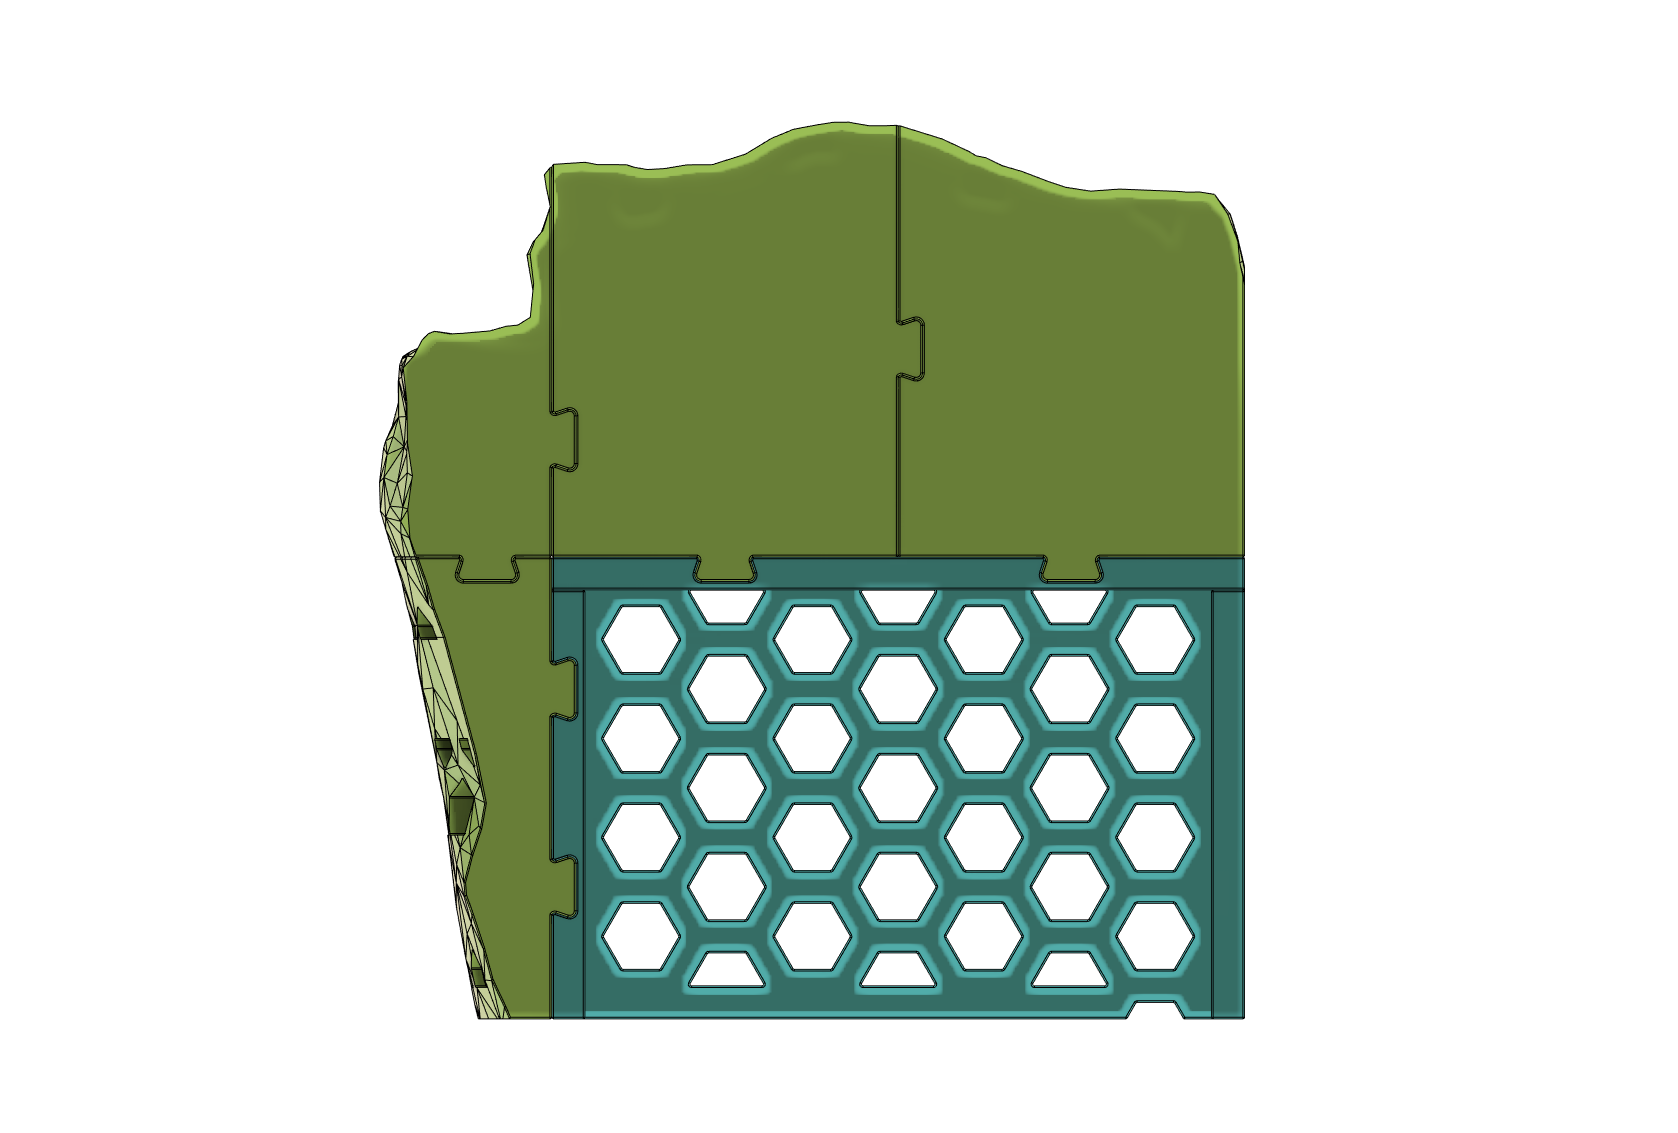
As soon as every piece is in place, and since the rock parts snap from the bottom, there is little to no possibility that the dock ends up falling apart.
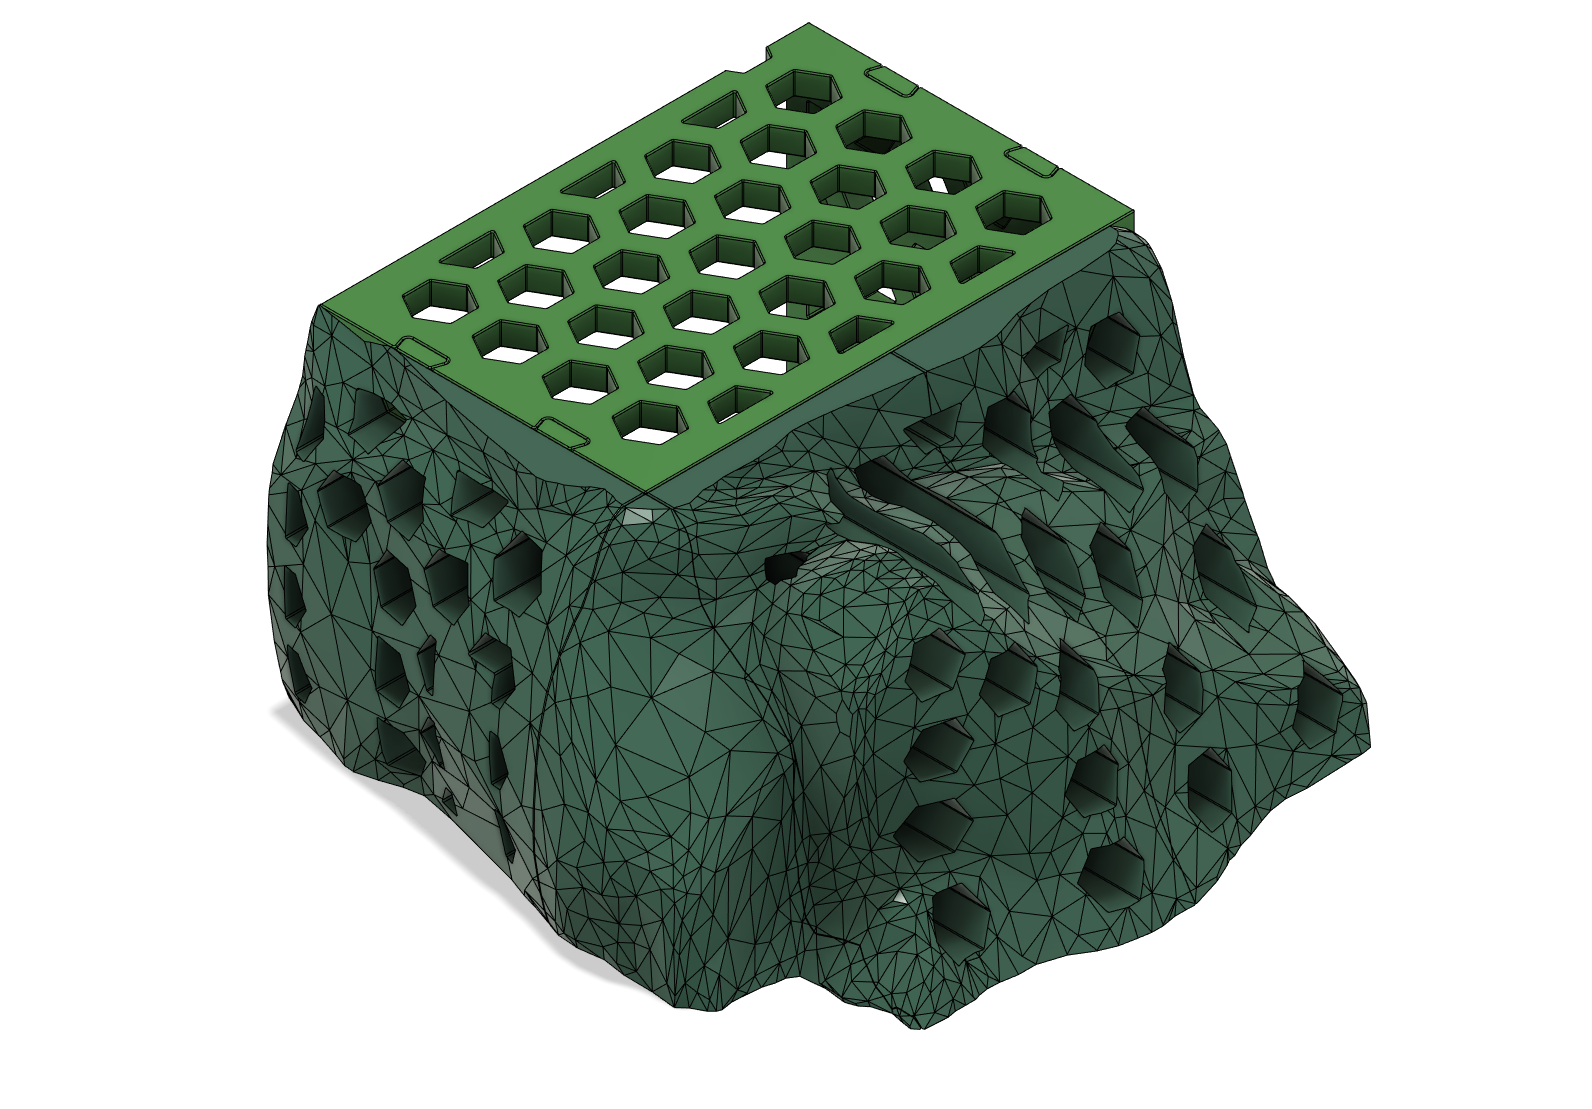
Assembly notes
If the dock will be used inside water, without doing anything else, the pieces will float. To counter that, drill some holes on the top and bottom parts of the pieces. That coupled with the Gyroid infill will make it possible to fill the pieces with water, making them sink.