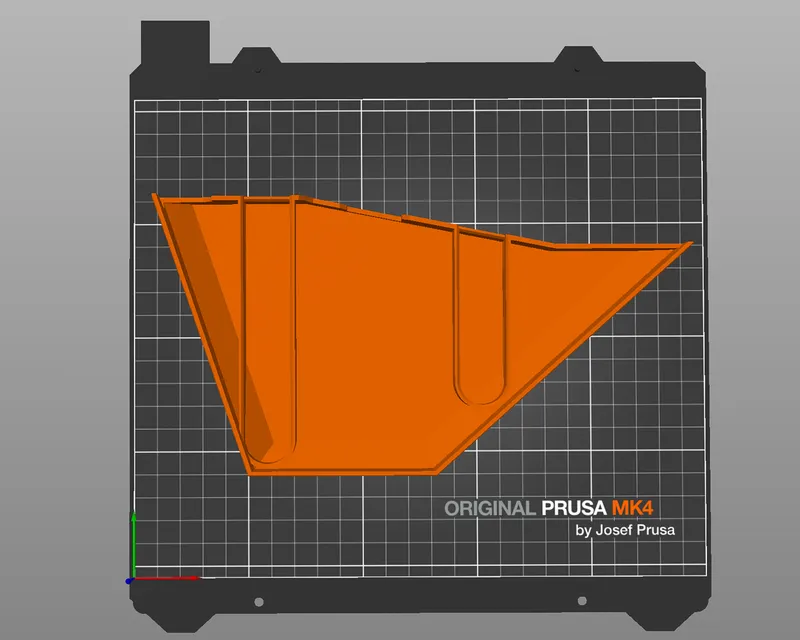
Peter H's amazing design of “fenders” for the LowRider v3 … now remixed by both Peter and myself to fit various tall YZ Plates, as well as stock plates and tall YZ plates combined with my Hidden Belts Mod + the same but for “mirrored” LR3 machines like mine (Y-rail switched to opposite side).
What is meant by “DougDanTall” YZ plates and “DanTall” YZ Plates?
Dan ( @Supraguy on V1E forum ) remixed the YZ plate design to be 50mm taller. I then remixed his design too. This graphic compares Dan's Tall YZ Plates and my remix of his taller plates:
For the nice LR3 Fenders: the following file subsets are provided:
Stock YZ Plates + Hidden Belts Mod (see Assembly Notes for thickness/spacer info)
Stock YZ Plates + Hidden Belts Mod on a “Mirrored LR3” (Y rail on opposite side)
"Doug-Dan" Tall YZ Plates (my remix of Dan’s Tall YZ Plates)
CLIP SPACERS for Stock, DougDanTall, & DanTall YZ Plate Fenders
CLIP SPACERS, set of shorter front clips for Hidden Belts Mod
CLIP SPACERS, set of Y-extend clips for Hidden Belts Mod
For the “Doug-Dan Tall YZ Plates” it was a collaboration that was 95% Peter and 5% me. I then also remixed to suit my “Hidden Belts Mod” in combination with “Doug-Dan Tall YZ Plates,” and later to suit both stock plates and "Dan" Tall YZ Plates and "Dan" Tall YZ Plates in combination with my “Hidden Belts Mod.”
At the request of Peter H, all these remixes are provided here together. He was going to post the “Doug-Dan Tall YZ Plates” and I was to post the other, but he has a lot going on, so he's graciously permitted me to. He won't say this, but he's rather famous and has an international schedule of travel and speaking engagements. When I said in my video about the fenders that he's our “famous Aussie maker friend,” I was not exaggerating about the famous part.
Also, thanks goes to Dan (@Supraguy on the V1E forum) for his extra “Tall YZ Plates,” and as always, thanks goes to Ryan (@Vicious1) for the LowRider design.
Peter's “Clip Spacers” are included to make the fenders adjustable for a variety of thicknesses of YZ plates. Note that for the Hidden Belts Mod, the front spacer has to be 25mm shorter. There is a set of these shorter spacers provided for those doing the Hidden Belts Mod.
The “Pre-drilling Template for both Y-Extend Plates” is included to aid those with the Hidden Belts Mod in alignment of pre-drilled holes, for placement of the “Y-extend Fender” (aka “Outrigger Fender Cover”).
This listing contains a lot of files, and it can be challenging to keep it all straight. There is a chance I've made an error. There are far too many variations here for me to test print all of them. If I've made an error, it is most likely to be discovered by fellow makers when they print and something does not go together right. If so, please bring the issue to my attention, and I will do my best to sort it out and fix it.
ASSEMBLY NOTES:
YZ Plate thickness and use of spacers:
Because the "suspension" for the fenders (the clips) can have thickness added (by clip spacers), while the reverse (taking away thickness) is not really doable (except by removing clip spacers), the design is based on the thickest YZ plates known, which are my 19mm plates. For LowRider makers whose YZ plates are thinner (for example, the original design calls for 1/2" thick, and some makers have aluminum YZ plates that are even thinner), you can add clip spacers to get the needed thickness. More on that below.
For the Hidden Belts Mod, since we are not aware of any "Y-extend plates" that are thicker than 1/2", the design for those is based on 1/2" thick Y-extend plates (12.7mm).
In summary: these designs are based on 19mm thick YZ plates, and 12.7mm thick Y-extend plates, with spacers available for thinner YZ plates.
The math is simple for use of clip spacers. If your YZ plate is 1/2" (12.7mm) thick, then subtract from the built-for max of 19 mm:
19mm - 12.7mm = 6.3mm.
You would then import into your slicer the needed clip spacer that is 6mm thick, and in your slicer, resize its Z height to 6.3, and print all that you need.
This applies to all the clip spacers — PeterH's for full-length clips, and, for the Hidden Belts Mod, the shorter front clip spacers and the tiny little “Y-extend plate” clip spacers.
Denominations of spacer thicknesses are: 4mm, 6mm, 8mm, and 10mm.
Again, remember your option to adjust their Z height in your slicer before printing.
How many clips and clip spacers are needed?
Let's call PeterH's normal regular clips the "long clips," and let's call the shorter front clips needed for the Hidden Belts Mod the "short clips."
For regular fenders (not doing the Hidden Belts Mod), you need 4 long clips, two for each side.
For mod'd fenders for doing the Hidden Belts Mod, you need 2 long clips (one for each side), and 2 short clips (one for each side), and 6 of the tiny little clips for the Y-extend plates (three for each side).
How many clip spacers are needed?
The answer is: the exact same number (and length) as your clips — see above.
PRINT NOTES:
All parts print as oriented, with no supports needed for any part.
Rotation of larger parts can help with fit on the print bed. In particular, the DougDanTall “TOP” fenders can fit on a BIQU B1 bed, which is 235x235 mm, but only rotating it at a certain angle. I'm not sure whether the DanTall “TOP” fender can fit a normal bed (sorry).
The mounting clips are all designed to print standing up diagonally at a 45-degree angle, and have built-in break-away support tower ridges. There is no need to enable supports in your slicer, because the support towers are part of the printable model, and they break away very easily after printing. The 45-degree print angle is very helpful in strengthening the clips against breaking along layer lines.
The following details are copied and pasted from the original listing by Peter H:
They do not improve the operation of the Lowrider3 in any way, but if pretty is your thing perhaps you can convince yourself that they keep the dust and little fingers out of the moving parts.
The instructions below will possibly never be finished. I am yet to print the final clip version and will photograph the installation when I do - it only differs in small detail from the one I have operating in the photos.
I am happy to answer questions, make modifications and so on, and while I do check comments here and on the V1e Facebook group, the most efficient way to have your questions answered is to contact me via THIS THREAD at the V1e forum.
They are easy to print, no supports needed and I used PLA. Assembly is also not much more difficult than replacing a hub cap on a motor car, but there are some quirks which I will outline below.
INTRODUCTION
It all started as a bit of harmless fun that over the course of the year got just a little out of hand, here is my original concept from January 2023 perhaps some Enterprising person would like to adapt the current design :
My complete BUILD THREAD on the V1e forum is long and tedious, but one year later with a few sets of covers and clips in the bin, this is what I have in my shed.
PRINTING THE FENDERS
There are no real tricks to any of the parts - I've used “Hilbert Curve” bottom layers on the covers because that for me at least is a quite forgiving texture. The parts easily fit on a Prusa Mk3/4 build plate (250 x 210 build plate), no supports are needed.
I've used PLA, but I see no reason why any other filament couldn't be used.
You can leave the little V1e logo cutout as is or print the infill piece and glue it from behind with a dab of super glue (as seen in the pictures above)
PRINTING THE SPACERS
The spacers are the only "Parametric" part - print in a thickness to suit your YZ plate thickness. The clips are designed to be 16mm from the inside surface of the plate, so if your plate is 16mm thick you don't need a spacer.
To calculate the spacer size required simply subtract the thickness of your build plate from 16, i.e. if your plate is 12mm thick you will need a 4mm spacer.
I have provided a selection of spacers to fit common sizes. If you need something that's not there it's a simple matter of scaling the Z in your slicer to suit your required size.
PRINTING THE CLIPS
The detail of the clips included here has changed from the one I have tested, so until I have a chance to build and destroy a couple in testing, please take this as a sort of Beta print - it's OK the big prints won't change, and the clips are probably OK just not tested in their current form.
I prefer to use a minimum of four wall thicknesses and PLA - this gives a very (very!) stiff clip that sometimes takes a bit of effort to dislodge. Some may prefer to print them in PETG to give a softer spring, but I can't vouch for their holding with a lot of vibration taking place. Thankfully they are simple to print and easy enough to replace.
ASSEMBLY
I will upload a sequence of assembly photographs in the near future - hopefully these notes are clear enough for the time being.
Cables
You won't be able to use the cable tie holes built in to the standard parts, however if you tie them together neatly in a loom they will run logically and neatly.
I recommend my PRINTED CABLE TRAY to secure them, which does a very neat job, but increases the fiddly nature of the task due to the minimal space available!
Spacers
The spacers (blue in the above illustration) are used to adjust the clip offset to match the thickness of plate. Place them between the clip and the plate.
Clips
The holes in the clips line with the mounting holes in your linear rails. I have used longer M3 bolts and simply through bolted. This is a bit fiddly to do, is complete overkill, but you can be assured that everything aligns perfectly.
Alternatively there are a pair of 4.5mm holes in each spacer/clip so that you can screw fix them to the plate if you are using ply or MDF. If you do that, clip the top cover in place and locate it over the plate in position to accurately align the screw holes, drill, screw and repeat with the bottom cover in place.
The Fender Parts
These simply click into place, however like all simple things there is an easy way and a hard way. Best method is to hold the top and bottom together with the cable feeding through the exit and then work both of them onto the clips together.
A final bump to snap them into place should be all that is needed.
LEAD SCREWS TOO LONG?
The standard 90mm leadscrews are a perfect length and there is no benefit in having them longer than the limit of travel. Don't worry if your screws are a little long, it's easy to cut them to a length if you follow my simple instructions AT THIS LINK
Or if you don't want to do that, it's easy enough to cut a small slot in the top cover LIKE THIS EXAMPLE.
NON STANDARD OR TALLER PLATES?
I am aware that there are quite a few builds with taller Z provision - unfortunately there are a number of versions about but if you would like to use “fenders” on your build let me know and I may be able to modify a set to fit.