
Filament Samples / Swatch with Box
Obliczymy ostateczną cenę na podstawie wybranego pliku. Sprawdzisz ją i zaakceptujesz przed płatnością.
Orientacyjna cena wydruku pliku
3,66 € – 4,48 € netto (bez VAT)
Dla pliku: FilamentSampleBox_Lid_0.2mm_PLA_MK3S_4h1m.gcode
To wstępna wycena jednego pliku. Dokładną cenę poznasz przed zamówieniem.
Plik i założenia wyceny
Plik użyty do wyceny
Średnia wycena orientacyjna: 4,07 € netto (środek widełek).
- Masa podana przez autora
- 52 g
- Czas druku podany przez autora
- 4,02 godz.
- Materiał u źródła
- PLA
- Materiał wyceny
- PLA
- Drukarka wyceny
- Bambu Lab P1S - 0.4 nozzle
- Proces wyceny
- 0.20mm Standard
Orientacyjna wycena wyłącznie wybranego pliku, oparta na masie i czasie druku podanych przez autora. Warianty plików nie są sumowane. Ostateczna cena zostanie obliczona po analizie pliku.
Zapisane na tym urządzeniu.
Filament sample with different layer heights for translucency effect test and storage box for 42 samples.
- Ocena
- 4,947 / 5
- Polubienia
- 487
- Pobrania
- 1181
- Wydruki
- 23
- Wyświetlenia
- 6415
- Oceny
- 19
Aktualizacja u źródła:
Informacje o modelu
- Źródło
- Printables
- Kategoria
- Accessories
- Licencja
- Creative Commons — Attribution — Noncommercial — Share Alike
Why another filament swatch?
If you're looking for a simple filament sample card with a matching box, you'll go mad. Well, me. Sample too small, too much detail, no space … to few space for labeling ...
At some point I was sitting in front of dozens of browser tabs with filament sample cards and you hear the artist voice in me say: "Really? seriously? Guys I don't want cards with built-in printer benchmarks and super complicated patterns that take three hours to print or are so small they can't fit legible lettering on them. I want a color card with room for lettering. If a filament doesn't make it through the benchmarks, prints, etc., then it won't end up in the box anyway. ARGH!"
So go to the drawing board and take the inspirations, mix them together and design your own box. That's what I made of it.
Model

The model consists of a sample card (two types) and a setting box.
Sample Card
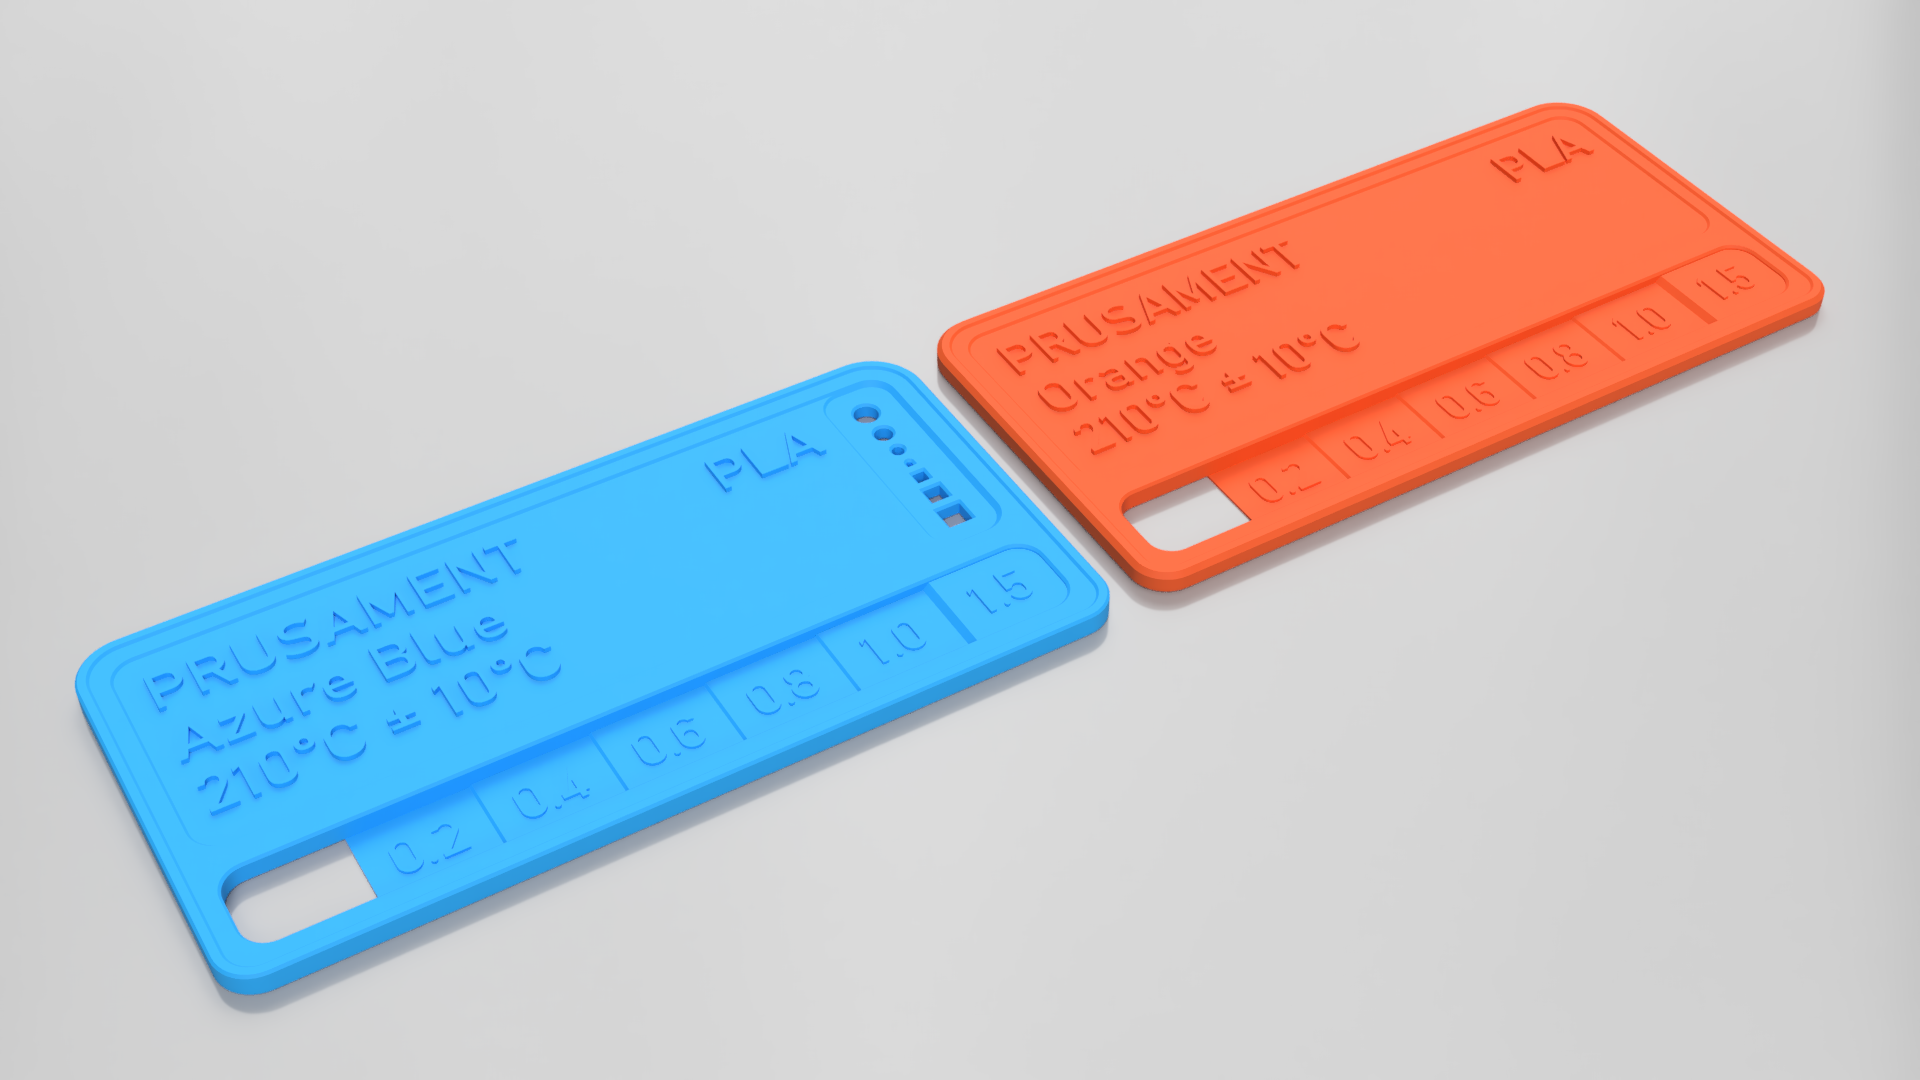
The example card is 68.0 x 34.0 x 2.0 mm in size and available with a small benchmark for accuracy and layer thickness examples in 0.2, 0.4, 0.6, 0.8, 1.0 and 1.5 mm to evaluate the translucent effect of the filament.

Labeling works perfectly with the Pruca Slicer. Example Prusa Slicer projects can be found in the files.
Settings / Sample Box
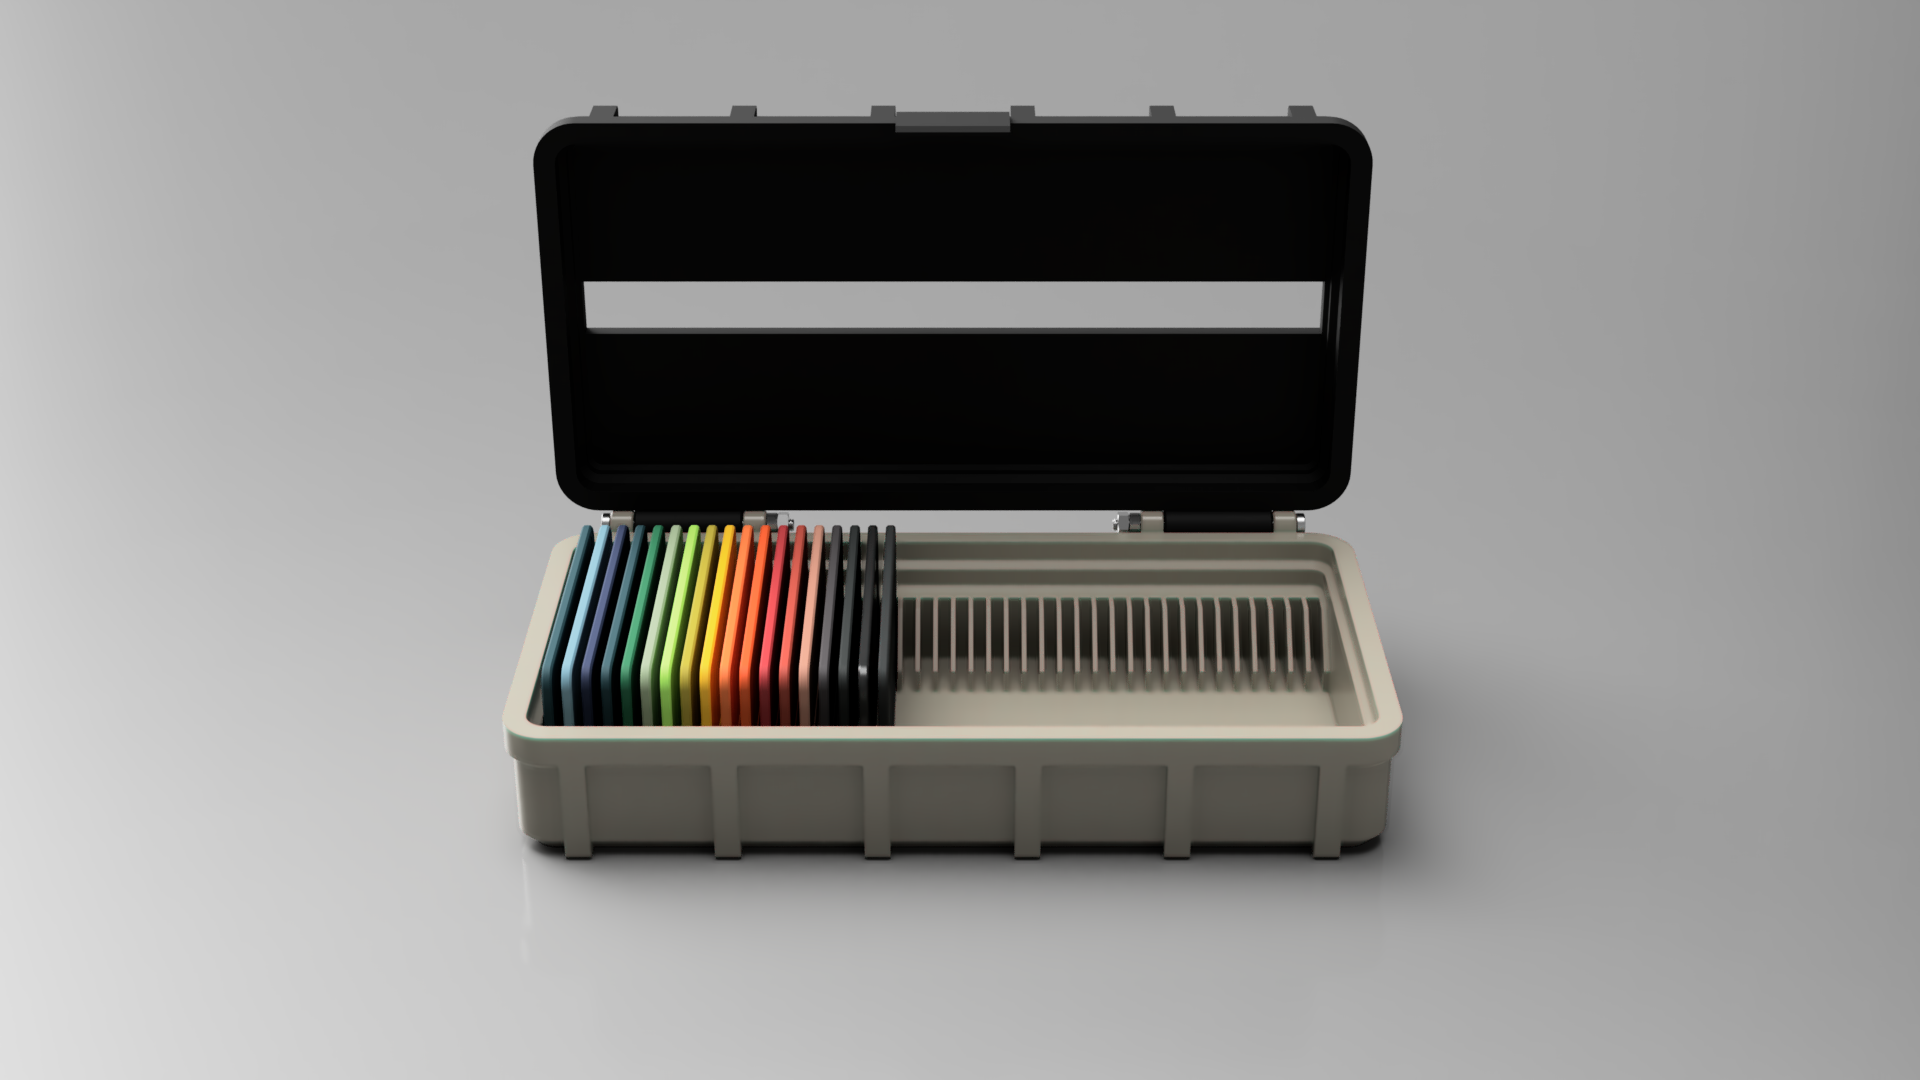
The box with hinged lid is 173.0 x 96.5 x 40.5 mm and can store 42 color sample cards. Why 42? That's why, and by the way: Don't panic and don't forget your towel! 😉
Printing
Sample Card
Now, printing the sample cards depends a lot on the filament you want to try. So use the best settings for your filament, and when you're done, outdo yourself... uh... wait? That was something else … Never mind!
Match the print settings for the sample cards to the specifications for the filament. The information on the roll is a good start, so if you know the ideal print temperature, just write it on the card.
I recommend to use 0.2 mm for layer height.
Box
For the box use a non flexible filament, such as PLA, PETG, etc. I used PLA. All parts can be printed without supports. The 3D-files are already optimally aligned for printing.
Settings
Nozzle: 0.4 mm
Infill: 15 %
Supports: No
Raft: No
Layer Height: 0.20 mm
Assembly

For assembly the lid to the box, you'll need two M3x40 screws with two M3 nuts. (I used these from Amazon)
Remix
To remix the model or make your own changes, you will find STEP files in the files.
Update and change log
2024-07-23: Added a body STL file without slots.