
Marantec Comfort 220 Reference point
Obliczymy ostateczną cenę na podstawie wybranego pliku. Sprawdzisz ją i zaakceptujesz przed płatnością.
Zapisane na tym urządzeniu.

Reference point for Marantec toothed belt drive / Referenční bod pro pohon Marantec s ozubeným řemenem
- Ocena
- 0 / 5
- Polubienia
- 4
- Pobrania
- 84
- Wydruki
- 0
- Wyświetlenia
- 520
- Oceny
- 0
Aktualizacja u źródła:
Informacje o modelu
- Źródło
- Printables
- Kategoria
- Garage
- Licencja
- Creative Commons — Attribution — Noncommercial — Share Alike
[EN]
My Marantec Comfort 220 garage door stopped opening properly. The cause was that the reference point that activates the switch inside the drive had fallen off the toothed belt.
A replacement reference point can be purchased as a spare part. I ordered it (price approx €15) and it is a simple piece of metal that is smaller than a thumbnail. When assembling it, I found the original reference point had fallen off and found it to be all plastic. So I made my own 3D model of a switch point suitable for printing on a 3D printer.
My actuator is a Marantech Comfort 220, but this part should fit multiple types of Marantec actuators if they use a toothed belt
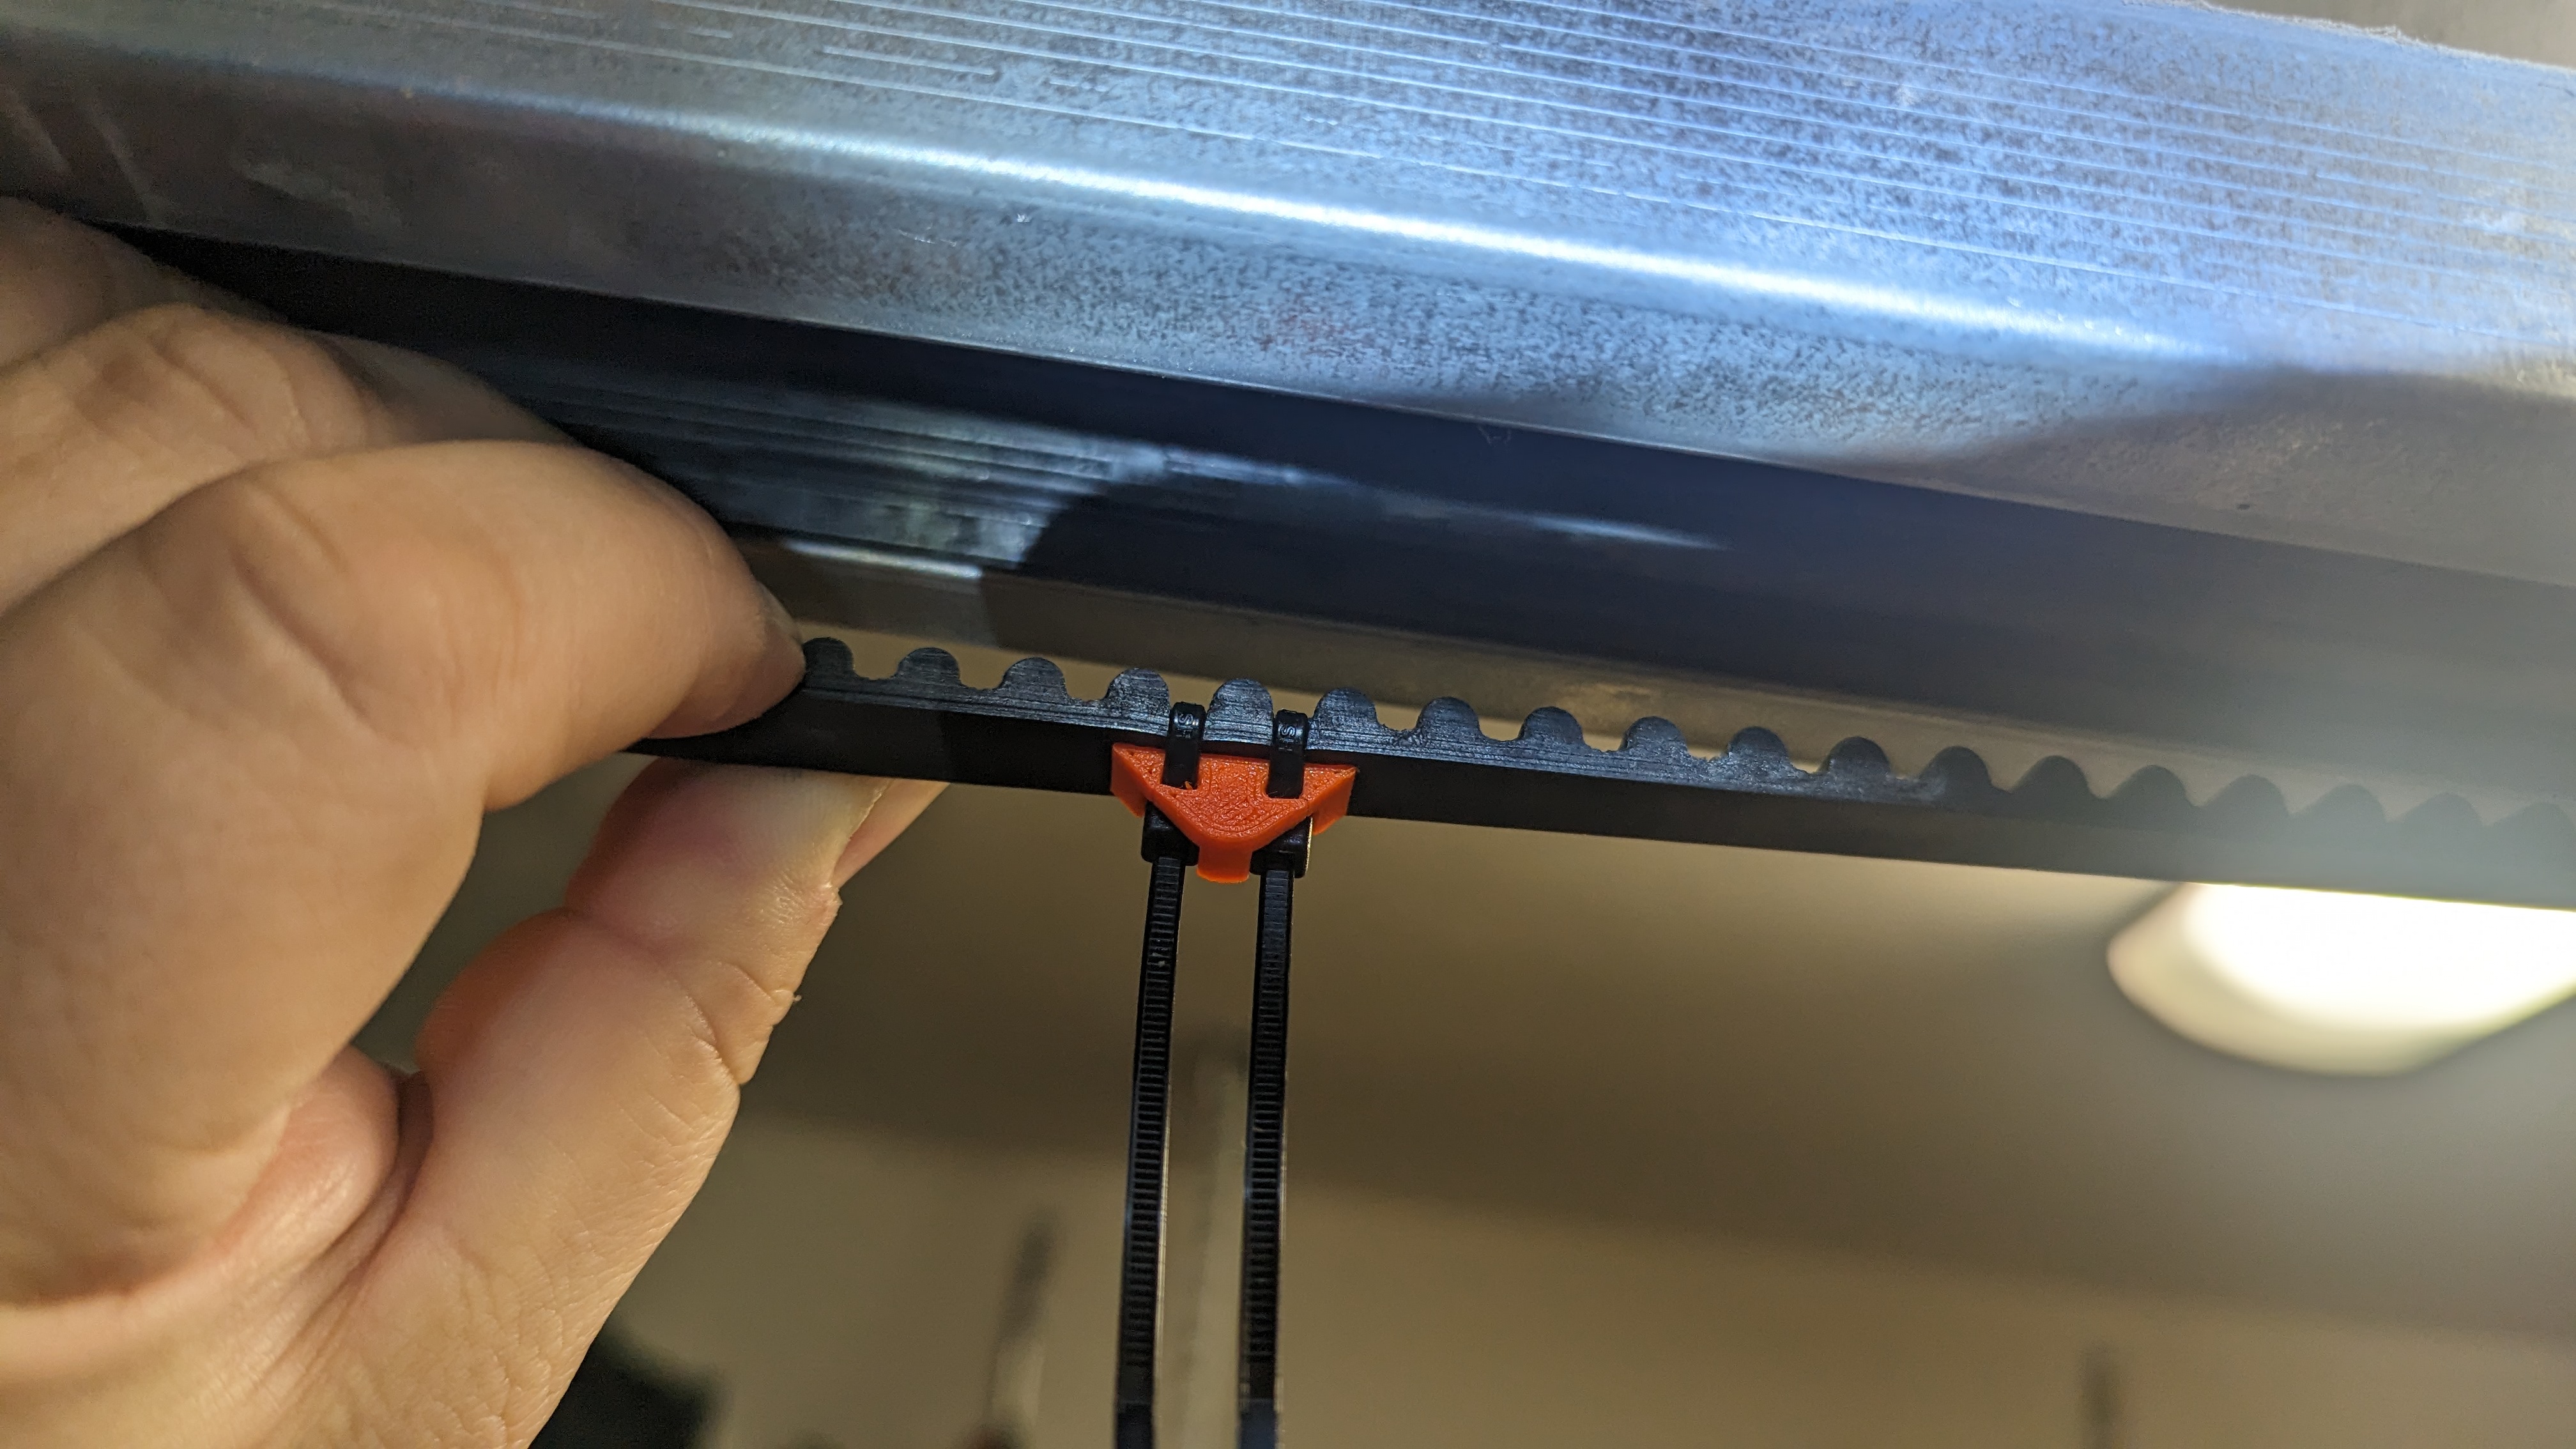
The reference point is attached to the toothed belt using 2 pieces of 2.5mm wide ZIP tape.
The model is very simple and quick to print. Printing, installing and re-adjusting the door will take less than an hour and you will still have time to drink your coffee.
Material list
- Fischer UBN 2,5x100 ZIP strip - 2pcs
- printout of MarantecReferncePointWithZIPTies - 1pc
Installation
Installation takes about 20 minutes.
You will need:
- instructions for your type of drive
- a utility knife
- a screwdriver to open the actuator cover to access the programming buttons
- ladder
Instalation procedure:
- The door must be closed when installing the reference point.
- The point is installed on the toothed belt approximately 80 cm from the drive on the side where the belt enters the drive. The 80cm is just the recommended position. It must only be ensured that the reference point passes through the operator during each opening and closing cycle.
The installation of the reference point is shown i.e. in this video - The reference point is attached using 2pcs of ZIP tapes to the belt, so that the printed part is on the smooth side of the belt and the pulling tapes go through the sides of 1 tooth.
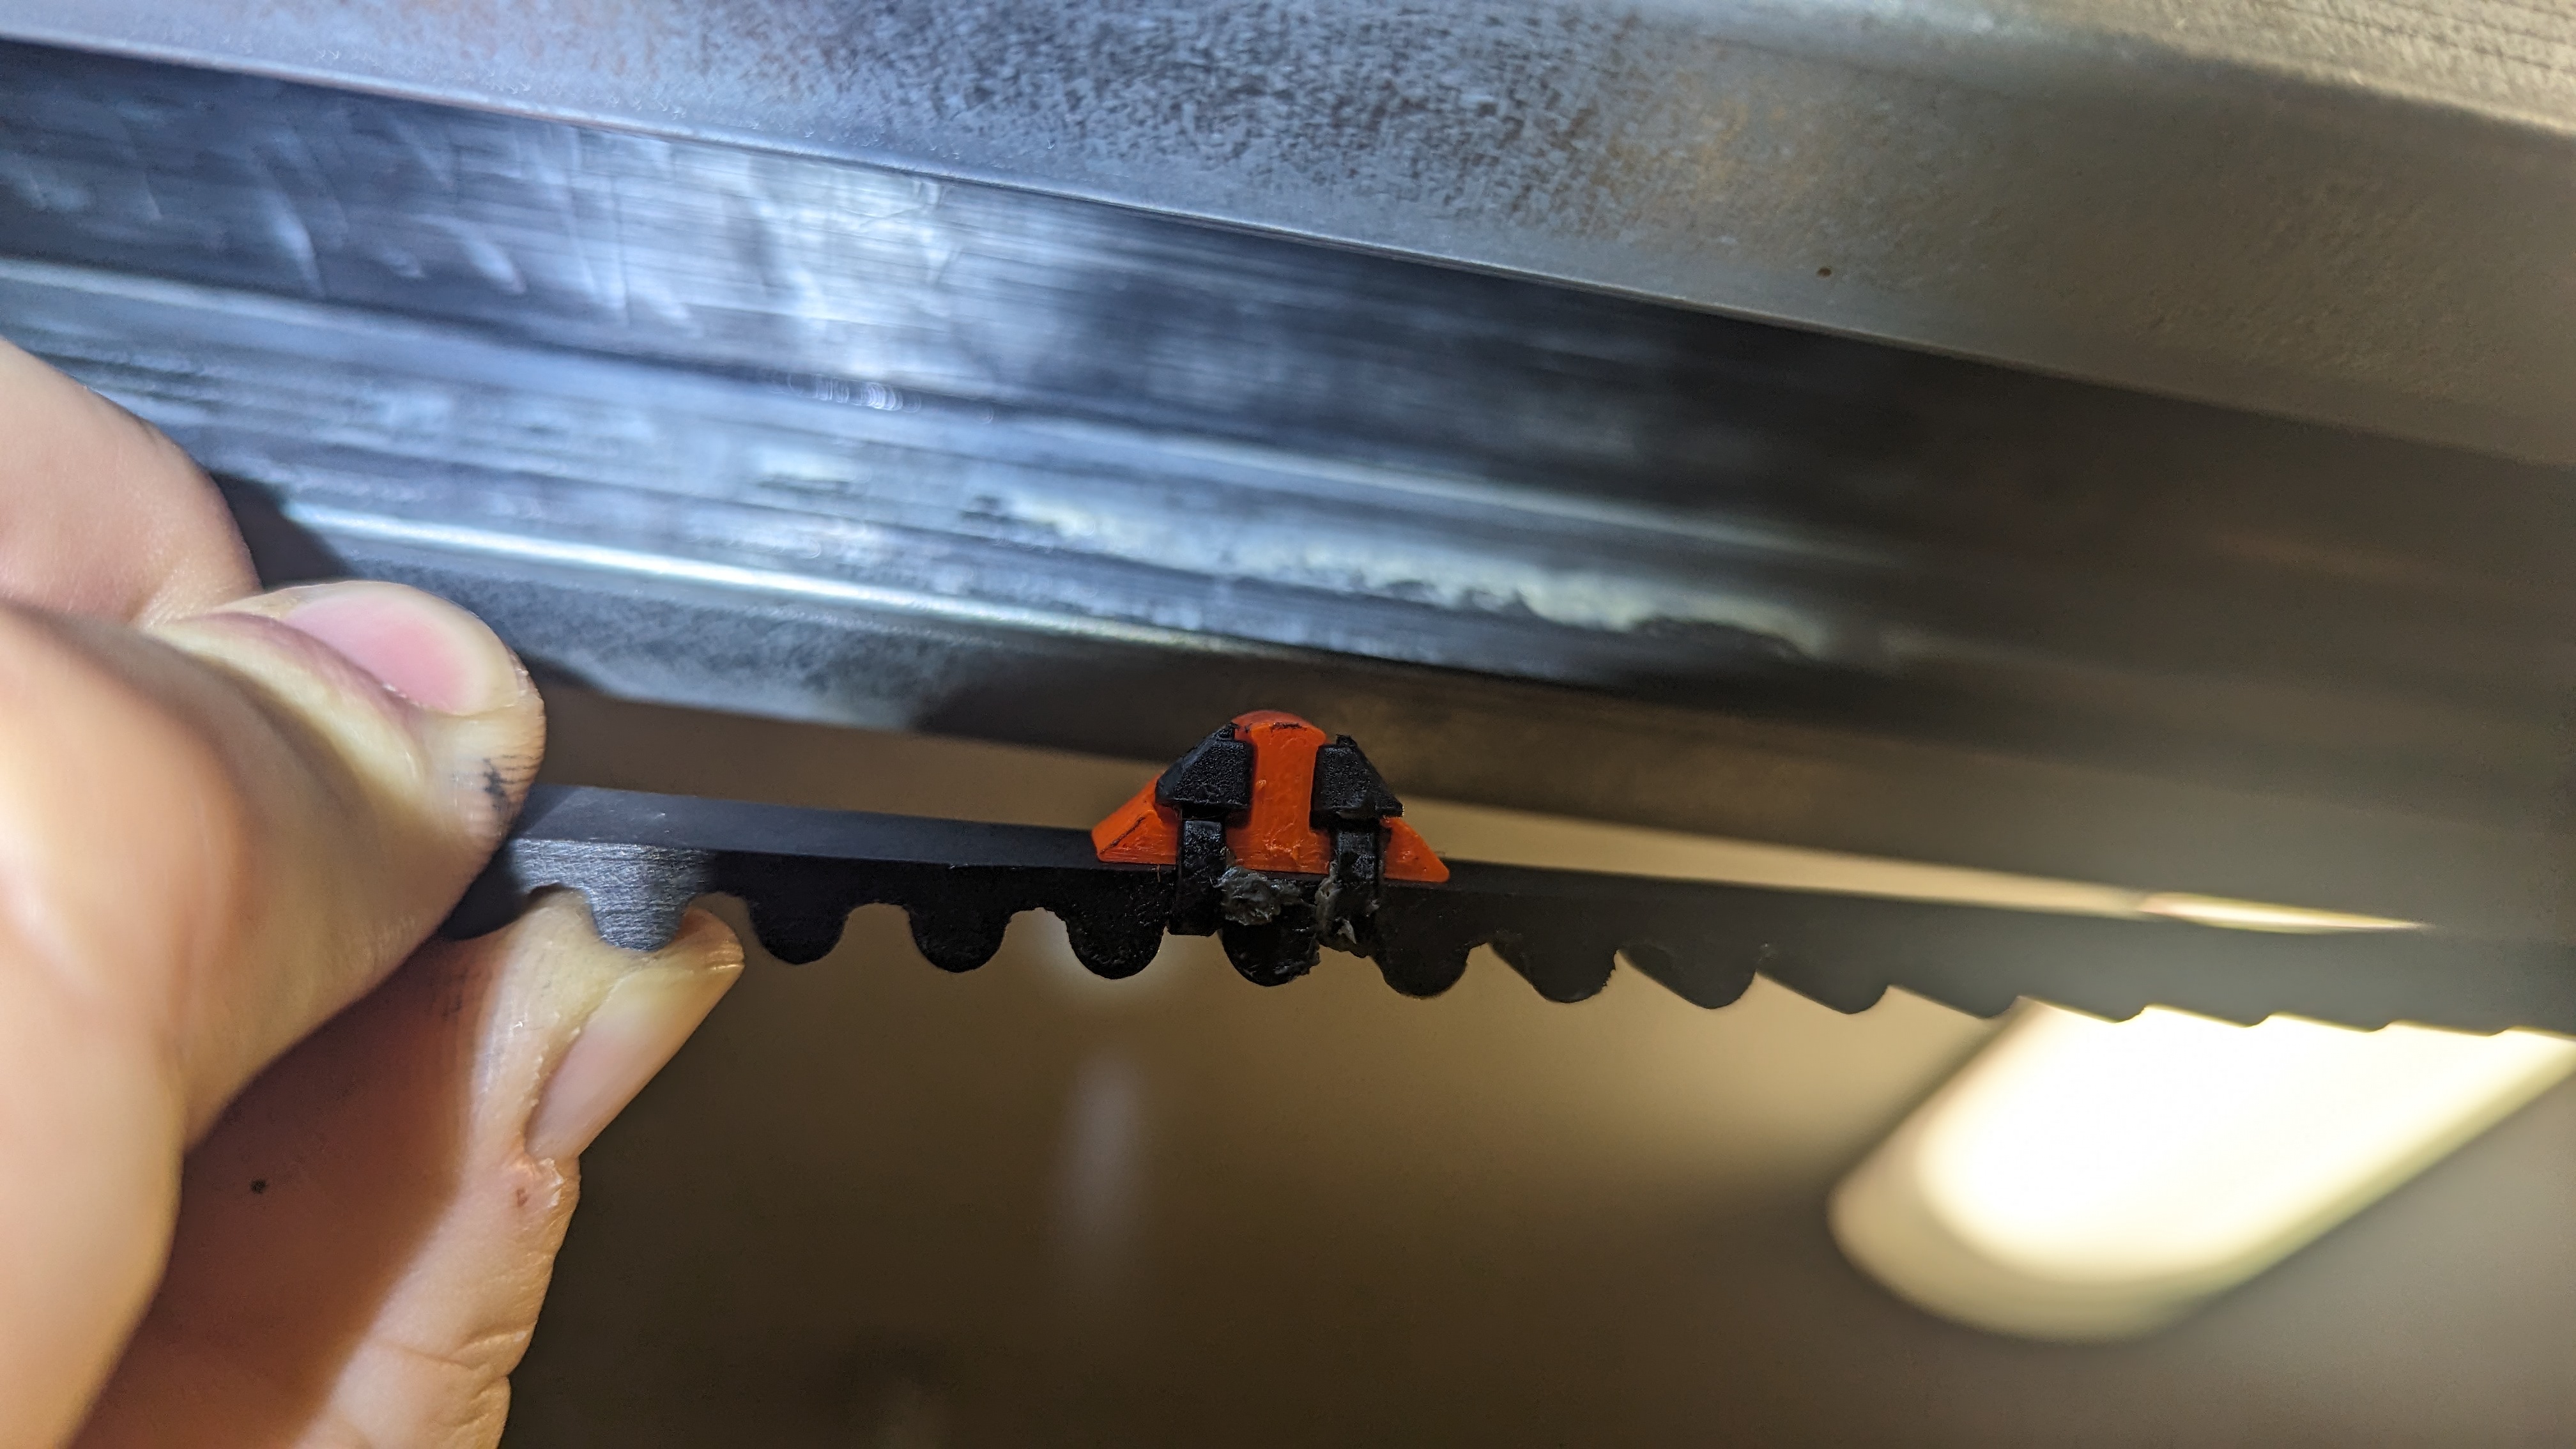
- After the tapes are tightened, a knife is used to cut the tapes to line up with the profile of the reference point.

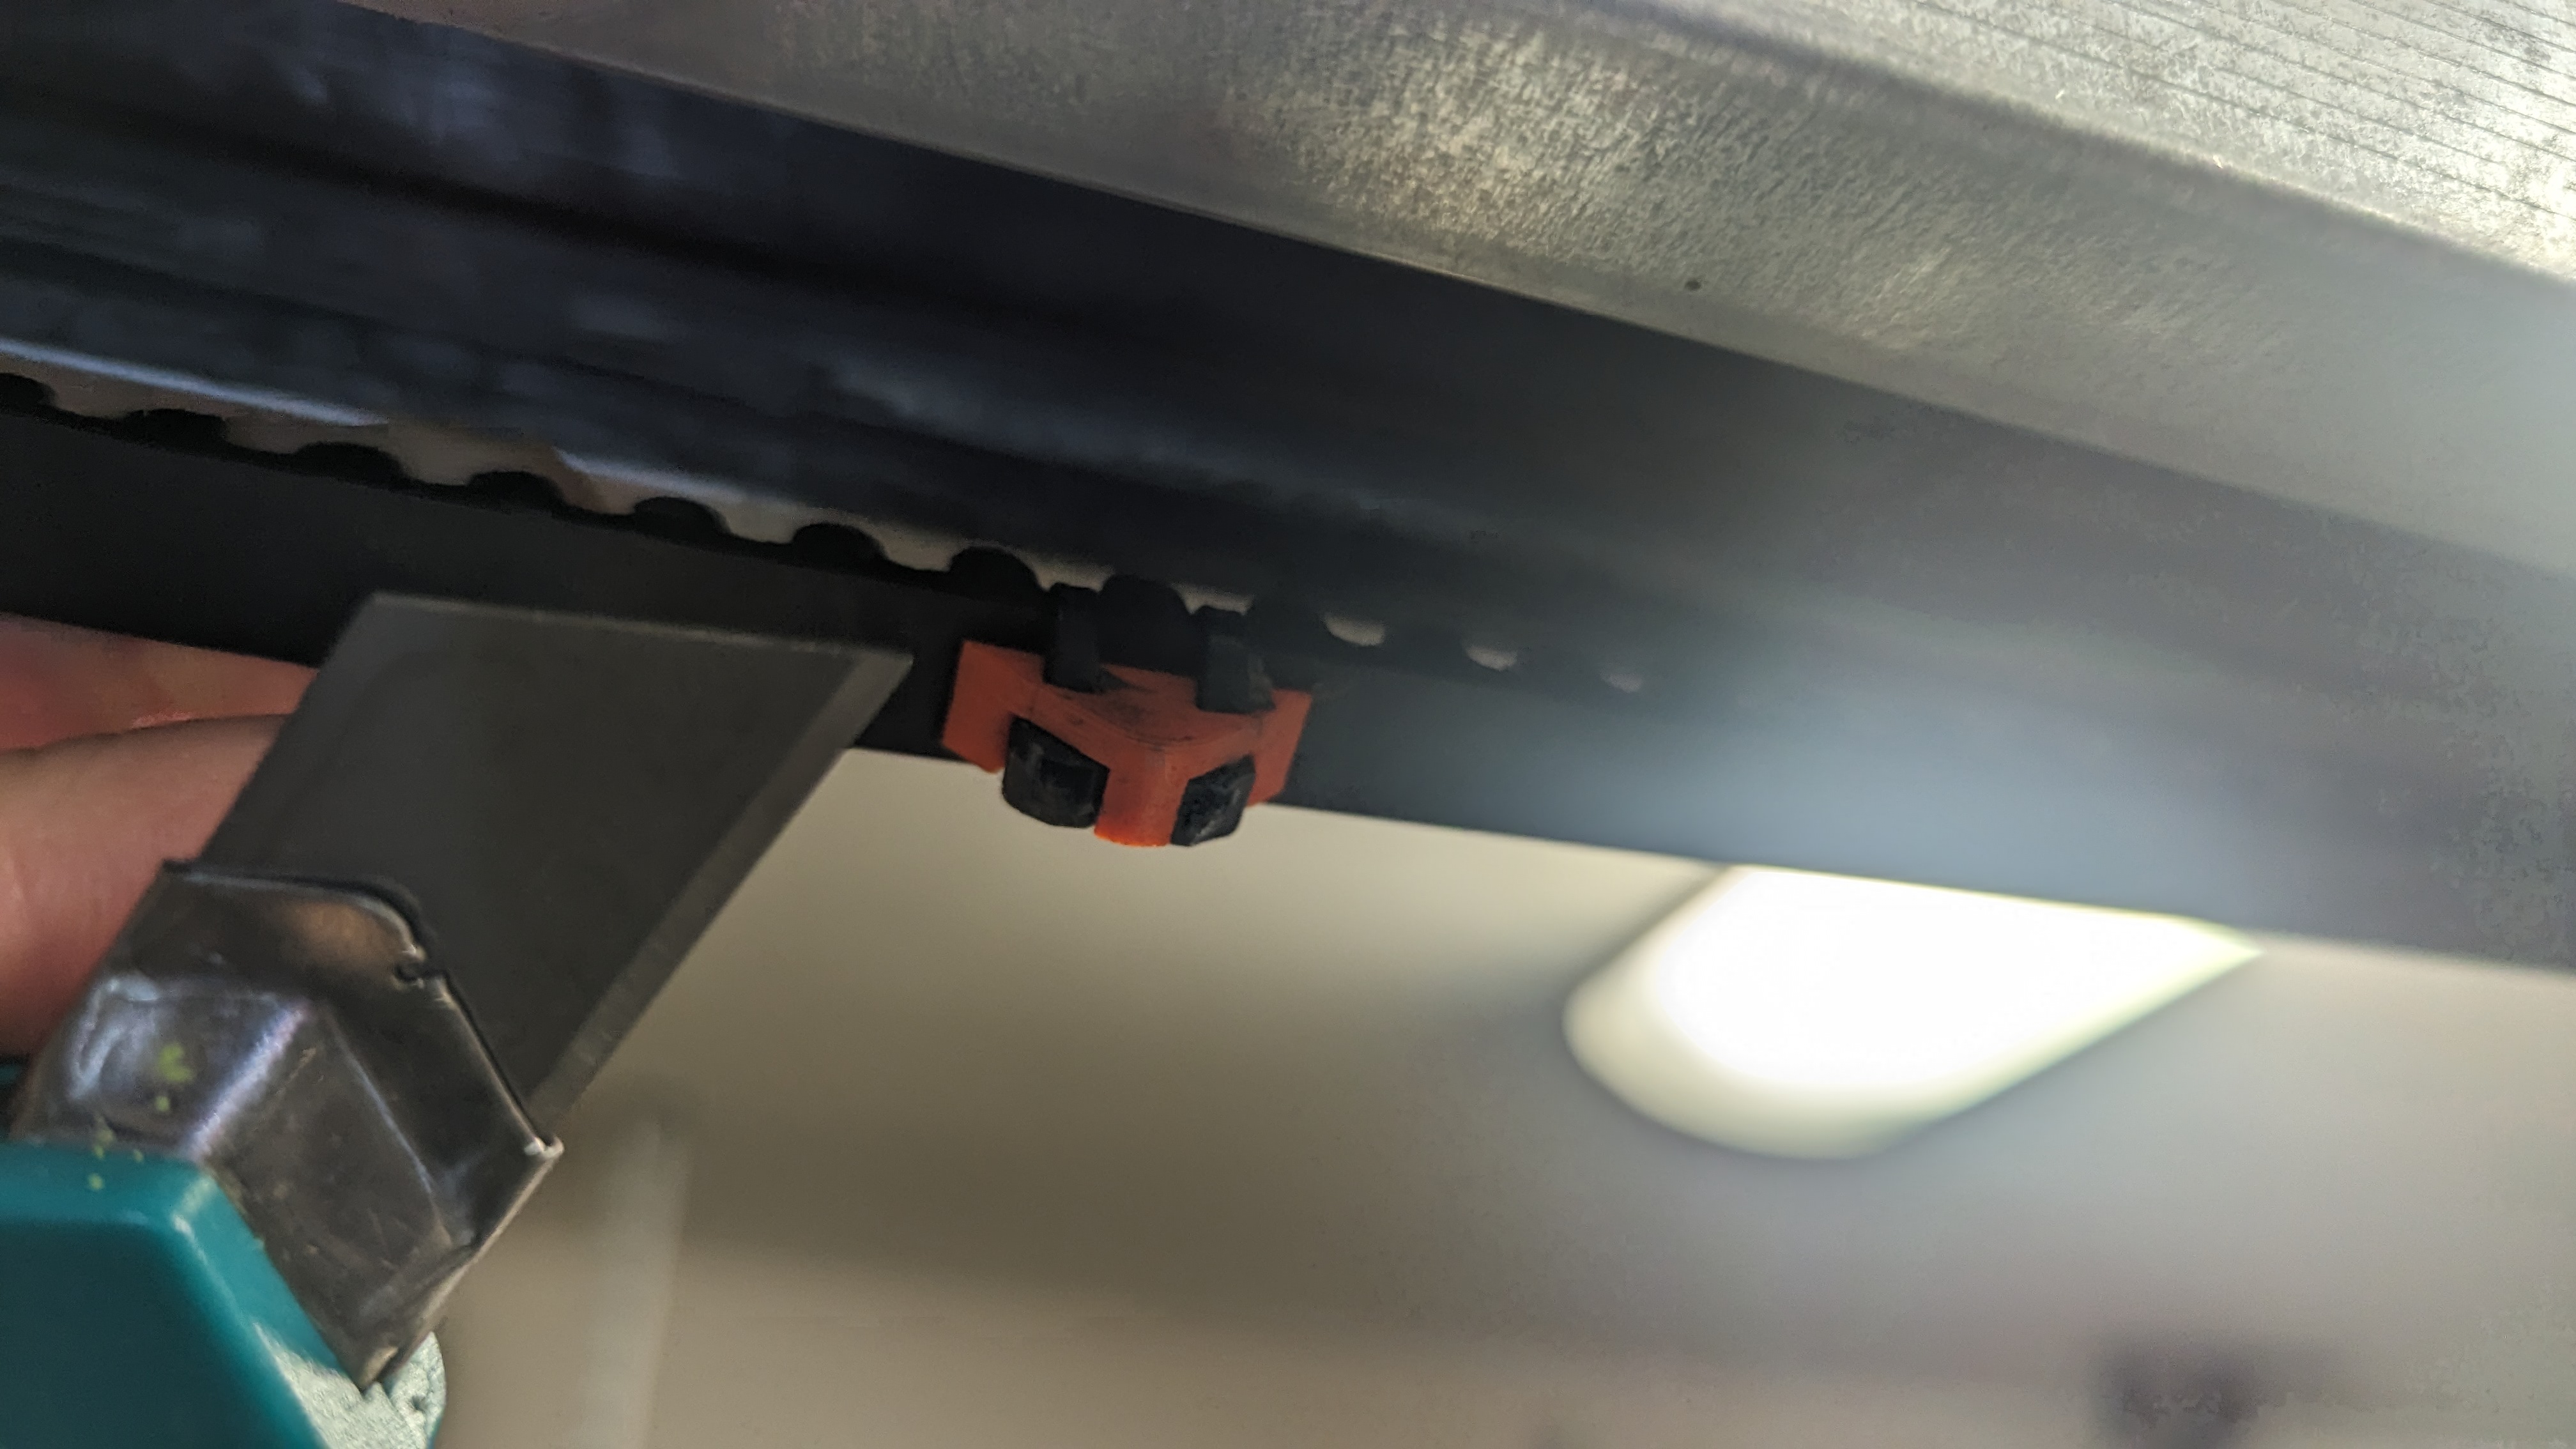
- After installation, the open and closed position in the drive must be re-set - see the commissioning chapter in the user manual.
[CZ]
Garážová vrata s pohonem Marantec Comfort 220 mi přestala správně dovírat. Příčinou bylo, že z ozubeného řemene upadl referenční bod, který aktivuje spínač uvnitř pohonu.
Náhradní referenční bod lze koupit jako náhradní díl. Objednal jsem si jej (cena cca 360,-Kč) a je to obyčejný kousek kovu, který je menší než nehet na palci. Při montáži jsem našel původní referenční bod, který upadl a zjistil jsem, že by celý z plastu. Udělal jsem si tedy vlastní 3D model spínacího bodu vhodného k tisku na 3D tiskárně.
Mů pohon je Marantech Comfort 220, ale tento díl by měl pasovat na více typů pohonů Marantec pokud používají ozubený řemen
Referenční bod se na ozubený pás připevňuje pomocí 2 ks ZIP pásek o šířce 2,5mm.
Model je velmi jednoduchý a rychle se tiskne. Vytištění, instalace a nové seřízení vrat Vám nezabere ani hodinu a u toho si stihnete ještě vipít kávu.
Seznam materiálu
- ZIP pásek fischer UBN 2,5x100 - 2ks
- výtisk modelu MarantecReferncePointWithZIPTies - 1ks
Instalace
Instalace zabere cca 20 minut.
Budete potřebovat:
- návod k vašemu typu pohonu
- zalamovací nůž
- šroubovák pro otevření krytu pohonu ke zpřístupnění programovacích tlačítek
- žebřík
Postup instalace:
- Při instalaci referenčního bodu musí být dveře zavřené.
- Bod se instalauje na ozubený řemen cca 80 cm od pohonu na straně kde řemen vjíždí do pohonu. Není nutné nějak přesně uročovat polohu bodu. 80cm je doporučená poloha. Musí být pouze zajištěno , že při každém cyklu otevření a zavření vrat projede referenční bod pohonem.
Instalace referčního bodu je ukázána například na tomto videu - Refernční bod se připevní pomcí 2ks ZIP pásků na řemen, tak že tištěný díl je na hladké straně řemenu a stahovací pásky prochází po stranách 1 zubu.

- Po utažení pásků se nožem zaříznou pásky tak aby lícovali se s profilem referenčního bodu.

- Po instalaci je potřeba znovu nastavit v pohonu polohu otevřeno a zavřeno - viz uživatelská příručka kapitola uvedení do provozu.