
Thrixels - a system for 3D printed pixel art.
Obliczymy ostateczną cenę na podstawie wybranego pliku. Sprawdzisz ją i zaakceptujesz przed płatnością.
Zapisane na tym urządzeniu.

Design and make your own pixel art kits of any shape and size, with as many different colours as you can print!
- Ocena
- 0 / 5
- Polubienia
- 43
- Pobrania
- 124
- Wydruki
- 0
- Wyświetlenia
- 2069
- Oceny
- 0
Aktualizacja u źródła:
Informacje o modelu
- Źródło
- Printables
- Kategoria
- Building Toys
- Licencja
- Creative Commons — Attribution — Share Alike
I'm proud to finally share Thrixels, a system of completely 3D printed and totally open parts for making colourful pixel art! It's been 6+ months of development to reach v1.0 and I think it's finally at a point where I'm confident it'll be useful to others. If you think this looks cool, please try out some test prints and let me know how it goes - any and all feedback is valuable.
I've been posting about this project throughout its development on Mastodon using the #Thrixels hashtag - have a look if you're interested about the process, the testing, and the changes that were made along the way!
The first example image above is a colour reproduction of the Arecibo Message - credit to Arne Nordmann for the original graphic: https://en.wikipedia.org/wiki/Arecibo_message
Here's a time lapse video of me putting together the QR code mosaic. If you're a New Order fan, you'll especially enjoy this video and the link in the code!
Updates
- Fixed the geometry of test print 1B (8x8 substrate)
Features
Each thrixel (3D pixel! I know it's a silly name but it didn't seem to be taken by too many other things) measures 4x4 millimetres in size and 6 millimetres tall, and slots into a base (the “substrate”) with other thrixels to form any pattern or graphic you like. They are intended to be printed in bulk in different colours and can be used to make any pixel art you can find enough colours for. Only got two different colours? You can still make text or QR codes!
The substrate itself is completely configurable - if you've got a bit of 3D modeling know-how, you can combine the individual parts into larger bases of any size and shape, and either print them as single parts, or combine multiple sections of substrate to make larger mosaics (the dopefish below is made up of four sections!).
Made a mistake putting together a pattern? No problem - you can remove any thrixel by poking a small screwdriver through the corresponding hole in the base.
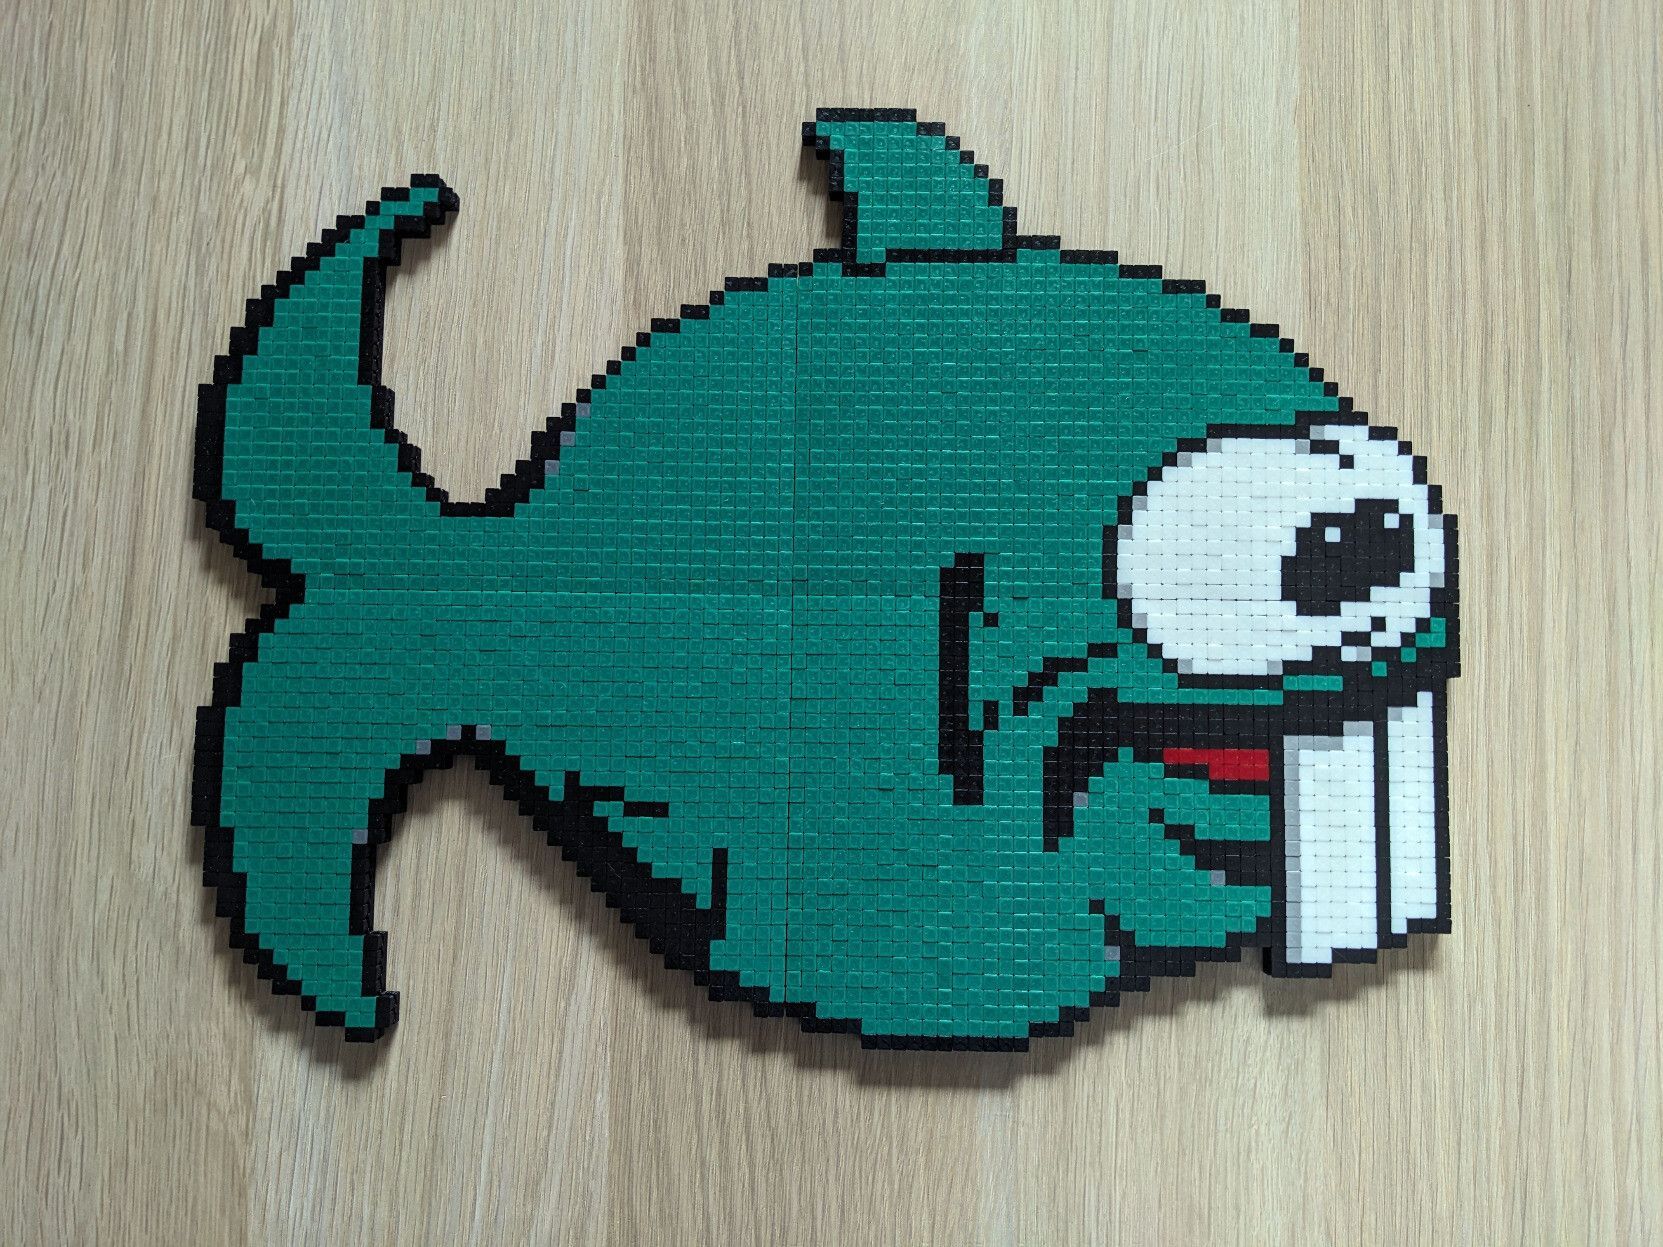
#CGAPrints
Alongside this project, I've also been trying to find different colours of PLA that match to the original IBM 16-colour palette, with the intention to use thrixels to re-create interesting graphics from retro PC games. Once it's complete, I'll publish the list of filaments and colours I chose for others to use as well. You can also follow the #CGAPrints hashtag on Mastodon if you're curious about that project.
Licensing
I've chosen to release this project under Creative Commons CC BY-SA. This means you can basically do what you like with these files, for free, including make money; just credit me as the creator of the original by linking to this page from wherever your publish it, and release your version under CC BY-SA as well.
Getting started
I strongly recommend running some test prints before committing to any large projects. I've provided the following files for this purpose:
- Thrixels v1.0 test print 1a - 8x8 thrixels.stl - A small set of 64 thrixels in total. Each thrixel is 4 by 4 millimetres in width, and they are laid out with a 1mm gap in between. Print one of these.
- Thrixels v1.0 test print 1b - 8x8 substrate.stl - A matching base to fit 64 thrixels in a simple square. Print one of these.
These will get you started with making small, basic mosaics. For people keen to make larger workpieces, here's a set of parts you can use to validate your printer for those:
- Thrixels v1.0 test print 2a - 8x8 quarter substrate.stl - A base piece for 64 thrixels, with two adjacent edges modified to allow it to precisely match up with others for a seamless gap between bases. You'll want to print a total of four of these.
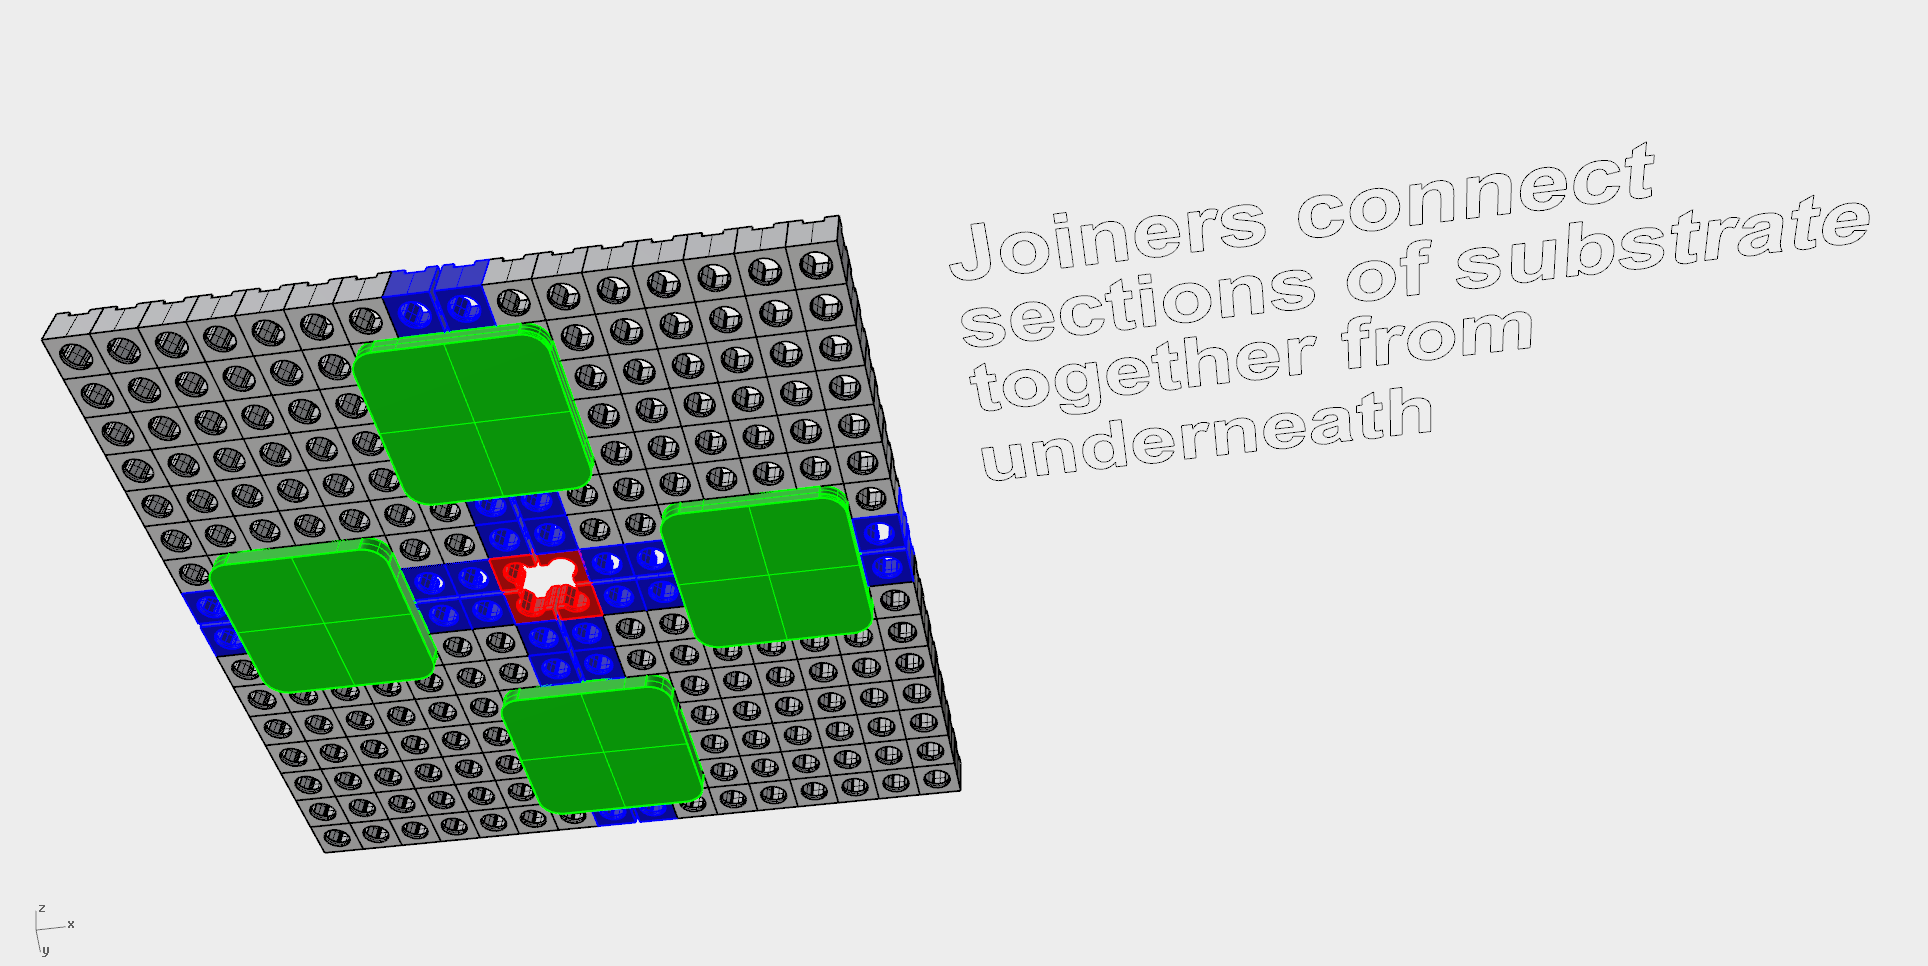
- Thrixels v1.0 test print 2b - 4x4 joiner.stl - A piece that joins two base pieces together - things should clip together like Lego. You'll want to print four of these as well.
Recommended settings
Primary material - I have only ever used PLA to print these, as it's a very simple material to tweak settings for. You might achieve success using more exotic materials, but I don't suggest bothering.
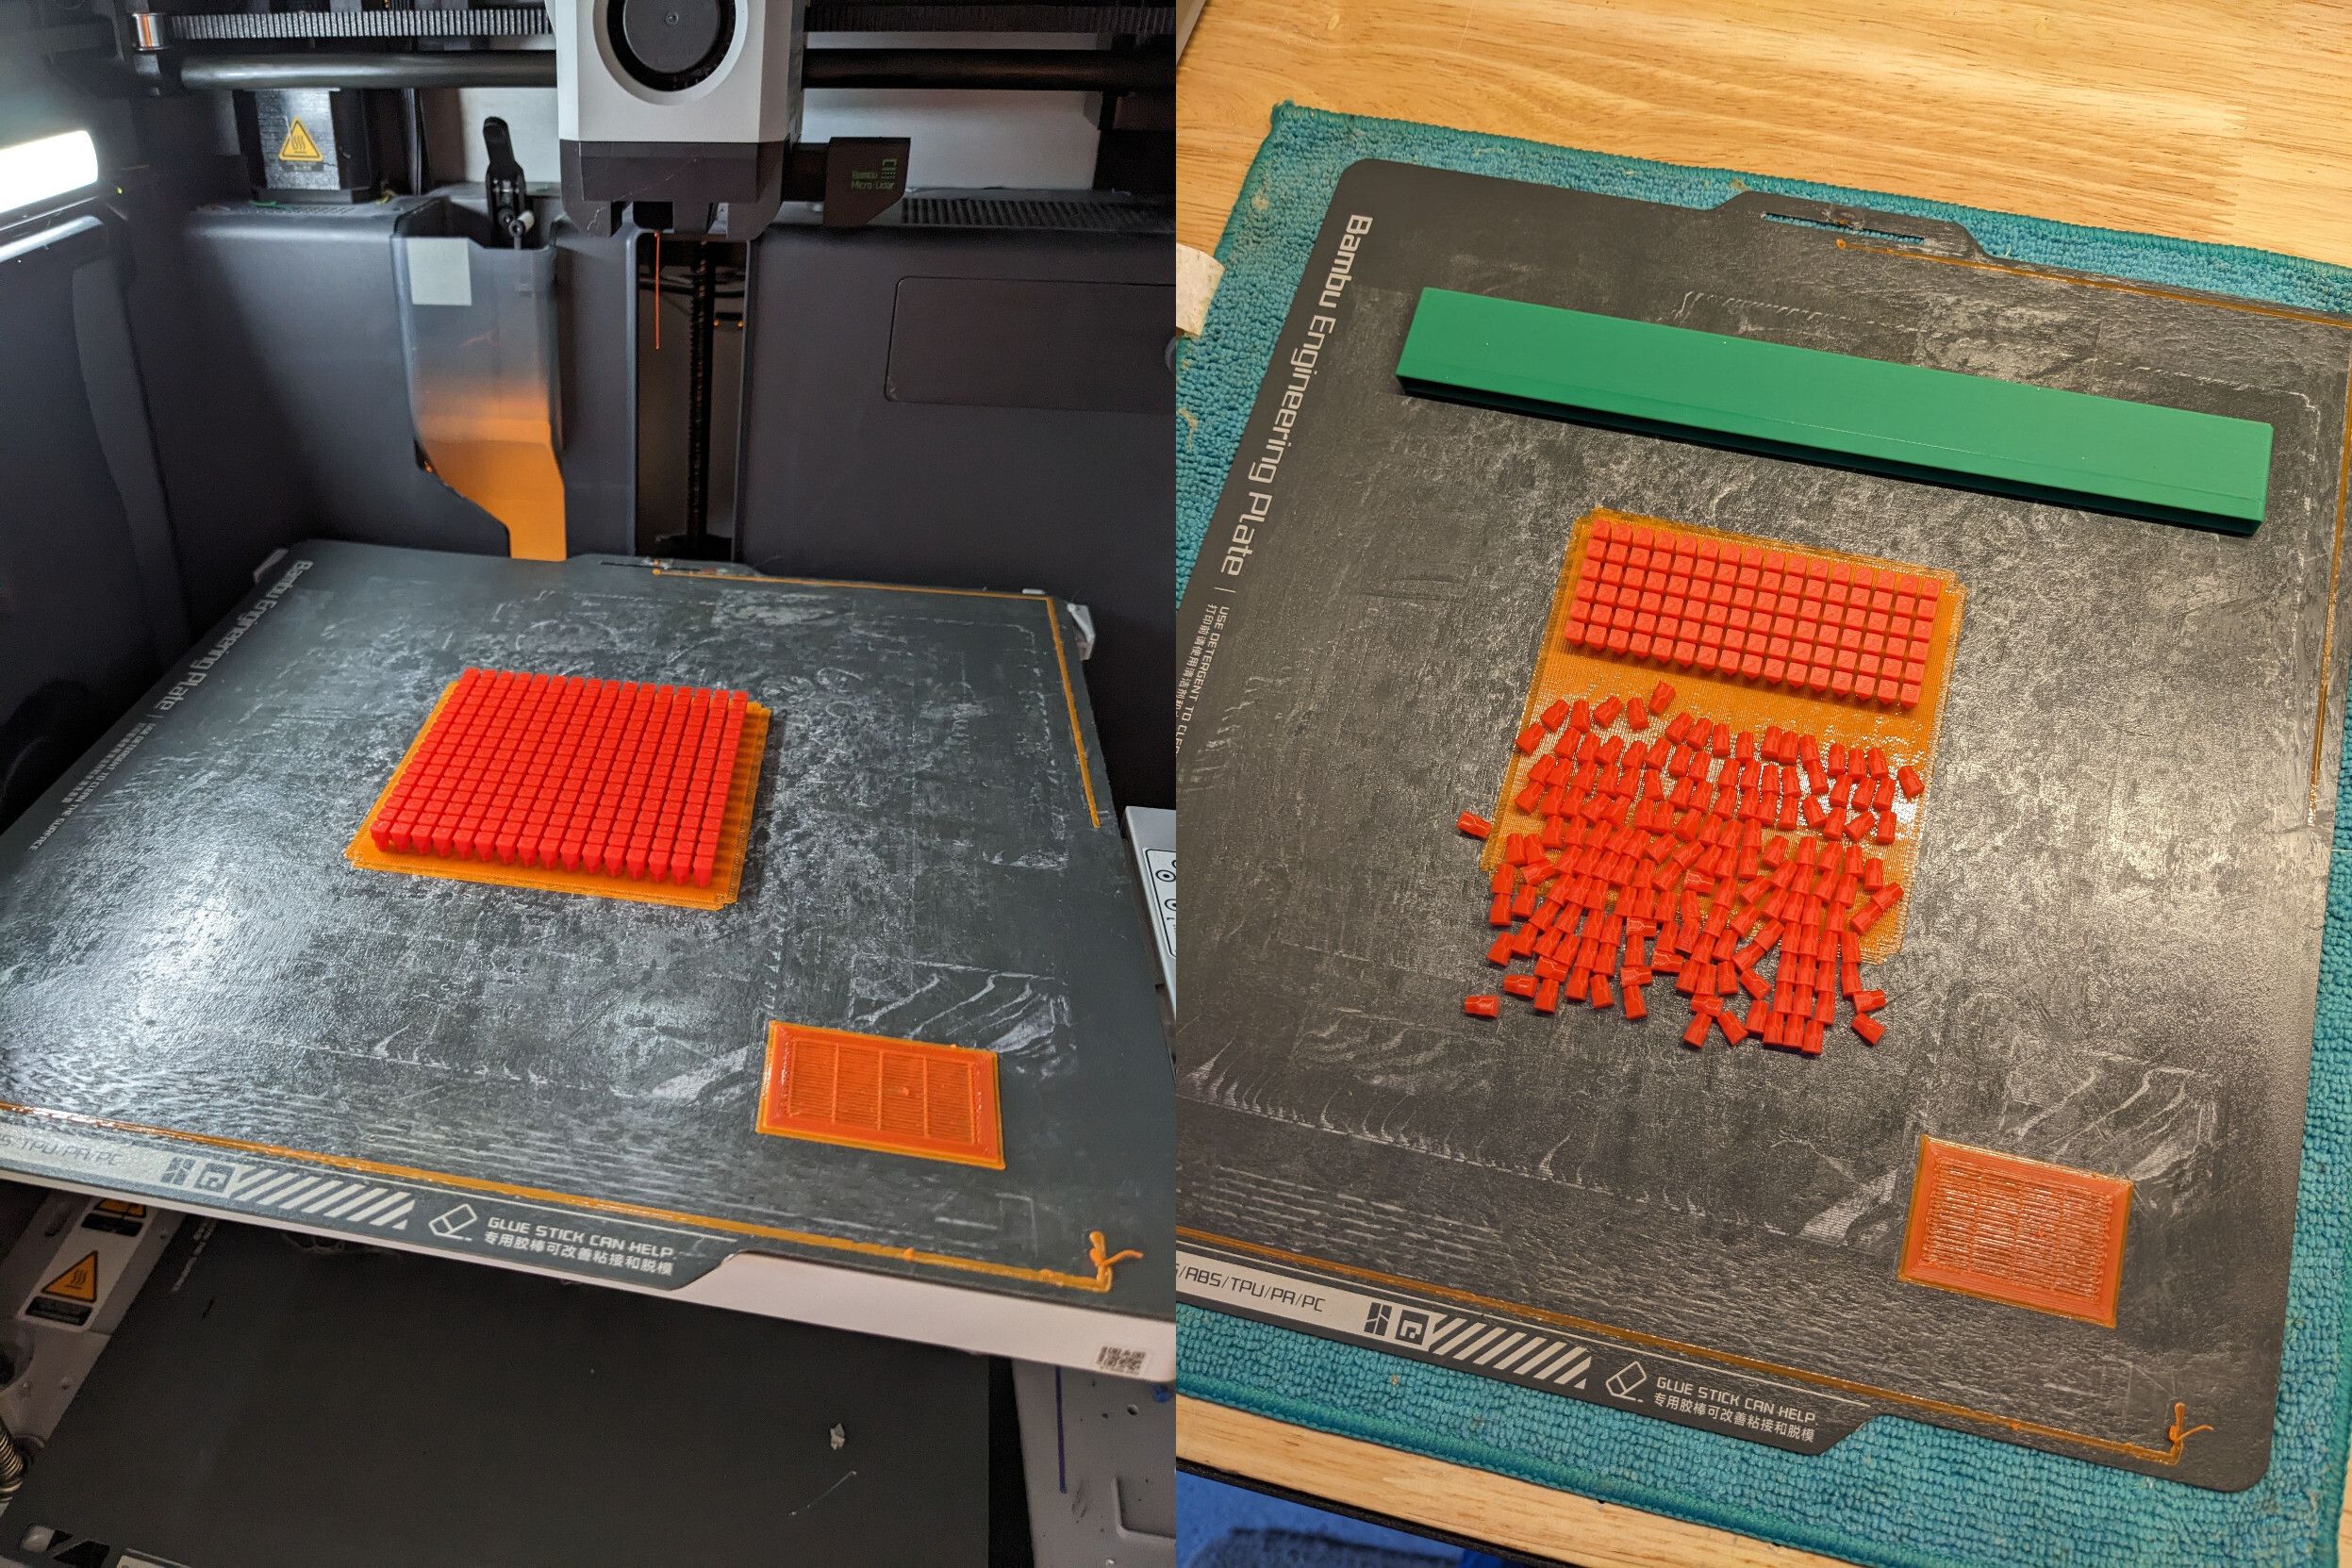
Support material - These files were developed on a Bambu Lab X1C with AMS. I highly recommend printing these parts on a 100%-density raft made from a dedicated support material. PLA and PETG are great support materials for each other as they don't stick together very much - I'm currently printing all my thrixels in PLA on a PETG raft.
Nozzle size - My X1C has a 0.4mm nozzle. I have not tried these prints with other sizes, nor do I plan to - smaller nozzles would probably be fine but take longer, larger nozzles might not have the resolution to print the files as they are. If your printer has a 0.5mm nozzle, I would suggest scaling everything up by 25% to match, and make your thrixels 5x5mm instead of 4x4mm.
Layer height - I use a 0.12mm layer height for all these files. A finer layer height, generally, will result in higher quality parts that fit together more easily, but with a proportional increase in print time; a taller layer height will make them fit worse together. Feel free to experiment, but you should start with 0.12mm.
Ironing - For the best possible surface finish to your pixel art, I recommend ironing the top layer of your thrixels using a concentric pattern. This is both to get as smooth a top surface as possible, and ensure rotational symmetry across every part; rectilinear or other ironing patterns will work fine, but you'll introduce a weird streets-and-lanes sort of artefact to your mosaics that won't look good, and you don't want to spend extra time carefully examining your thrixels one by one to make sure they line up.
Other considerations - Don't spend any time at all thinking about infill density or other tricks to reduce the amount of filament used. Even printing a thousand thrixels at once will only take about 80g of filament. That same print will take close to 14 hours on an X1C, and it'll look and feel agonisingly slow, but it's still less than a minute per thrixel.
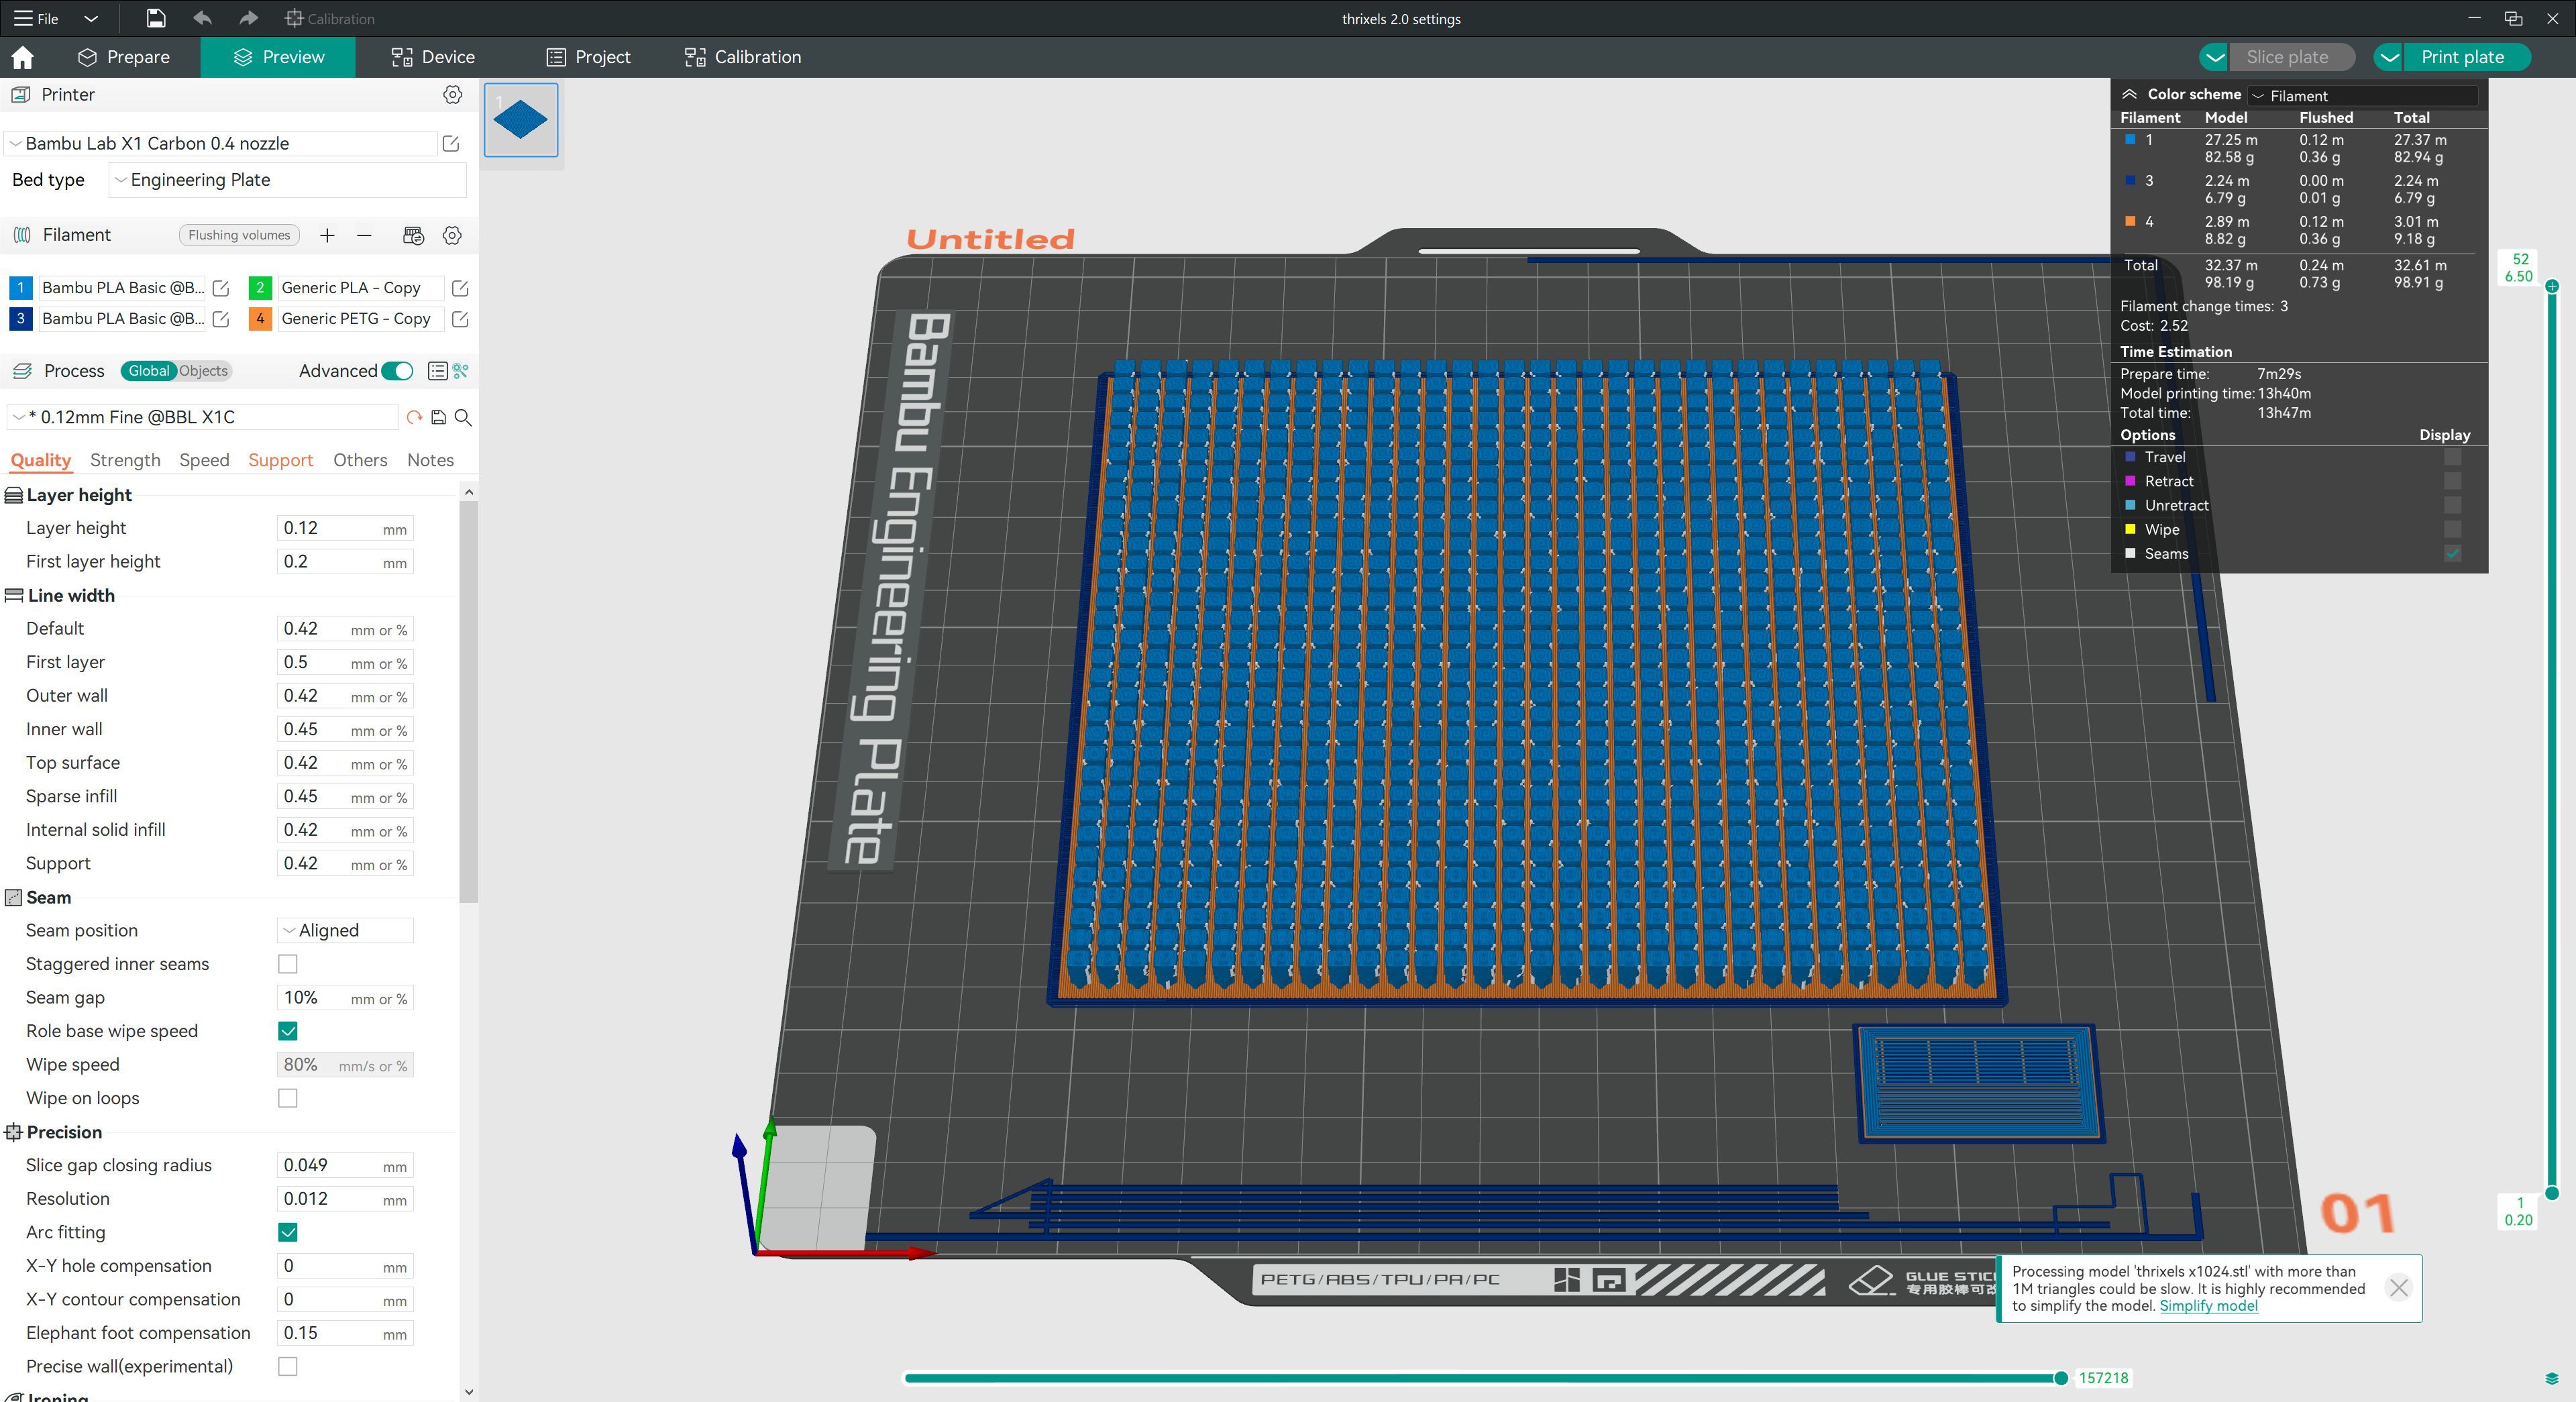
The rest of the files
I have provided a few files in STEP format so that they are easier to load and modify in your 3D modeling program of choice, without having to awkwardly convert STLs back to whatever format you're familiar with. This is to make it as easy as possible to make your own modifications to the files, and to design and build up your own thrixel substrates in whatever size and shape you choose.
- Thrixels v1.0 x1.stp - the model of one single thrixel. Use this to modify the basic thrixel design, or multiply it to build up to whatever quantity of thrixels you want to print at once.
- Thrixels v1.0 substrate - mid.stp - the model of one single section of substrate. Combine these seamlessly to make a simple base for a thrixel mosaic.
- Thrixels v1.0 substrate - edge.stp - to combine multiple base pieces together in a seamless pattern, use these substrate pieces along the mating edge of each base piece. They have a tiny amount cut away so they won't interfere with each other when placed together, allowing the thrixels on top to form a seamless mosaic.
- Thrixels v1.0 substrate - corner.stp - use these only when creating a large mosaic in two dimensions. These corner pieces should be used where two mating edges of a base join. For more about using the corner and edge pieces, see “Making large bases” below.
I'm also providing these STLs for ease of use:
- Thrixels v1.0 STL - x1.stl - don't actually print this, it's just one single thrixel in STL form. Use this to quickly test slicing thrixels for printing, and to get a feel for how they should look and work overall.
- Thrixels v1.0 STL - x256.stl - a grid of 16x16 thrixels. This is usually the number I print at once. Note that this is a large, complex file and may take a lot of time, CPU and memory to slice. If your slicer offers to simplify the geometry, say no (it will ruin how each piece looks or fits together).
- Thrixels v1.0 STL - 16x16 base.stl - a simple base for a 16x16 thrixel mosaic, enough space to mess around with/get used to how thrixels work.
- Thrixels v1.0 STL - 31x31 base.stl - a single base piece that will fit 31x31 thrixels, which is enough space for a typical QR code. This is will take just under a thousand thrixels, so you'll want to print 500-600 each black and white thrixels to make sure you have enough. This is also a large file and may take significant time, CPU and memory to slice. Don't simplify the geometry for this one either - just be patient.
- Thrixels STL - breaker bar.stl - this is a long, hollow bar I use to snap printed thrixels off their raft, row by row. This is the neatest and most reliable way I've found to do this - originally I was doing it by hand, but that resulted in many thrixels pinging away into corners and under tables never to be found again.
- Thrixels STL - scoop.stl - a small, thin scoop I use to collect thrixels after breaking them off a raft. You can obviously use whatever scoop you like, but I took the opportunity to try designing something myself.
- Thrixels STL - scoop large.stl - a larger, v2 of my scoop that's designed to collect large numbers of printed thrixels. The swoopy bit in the middle is meant to make it easier to pour thrixels into bags for storage/sorting.
Do you want to see something else here? A pre-modeled base of a certain size and shape, a different accessory, some particular number of thrixels in a single STL, a STEP version of something to modify? Let me know in the comments and I'll see what I can do.
Making large bases
I've hastily thrown together these screenshots to show how to model thrixel bases so they can tile together seamlessly. Let me know if this isn't enough information or if you have any questions on how this is meant to work and I can try to explain it a bit better.

Future stuff
Made something cool with it on your own? Post a ‘make’ or a ‘remix’ and show me what you've done!
Got any suggestions or requests, or having trouble getting something working? Leave a comment and I can try and help you out.