
Chinon Auto 3001 Multi Focus Replacement Faceplate
Obliczymy ostateczną cenę na podstawie wybranego pliku. Sprawdzisz ją i zaakceptujesz przed płatnością.
Zapisane na tym urządzeniu.
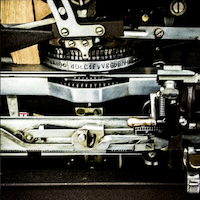
Replacement left-side face place for you Auto 3001 camera, to either fix it up or bling it out
- Ocena
- 0 / 5
- Polubienia
- 0
- Pobrania
- 37
- Wydruki
- 1
- Wyświetlenia
- 405
- Oceny
- 0
Aktualizacja u źródła:
Informacje o modelu
- Źródło
- Printables
- Kategoria
- Photo & Video
- Licencja
- Creative Commons — Attribution — Noncommercial — Share Alike
So you finally grabbed one of these sweet Chinon point-n-shoots, but you used it a little too hard and the faceplate fell off? Maybe you just decided that it would be cool to personalize your new image maker, to make it a bit more special to you? Whatever the case, here are some unique ones for you to print and slap on there.
This is a very simple design, I know, and that's half of what makes it cool in my book. Could almost anyone design this? Sure, but I did all the measuring, testing, printing and testing so you don't have to! Nice, right? If you print one and like it enough, consider tossing me a quick tip for saving you the time and annoyance of the measure-print-tweak rinse and repeat dance.
There are four options here. The file names each match what you see, so pick the one that speaks to you and have at it. Or grab 'em all and have fun swapping them out when the mood strikes.
Oh, I print basically everything I design, so if you wanna see a printed version of this, check out the “Makes” tab.
Four model options
- “Not a Leica” is if you just wanna make things clear for people. Snark intended
- “Chinon Auto 3001” is to just keep things simple
- “Snap Snap Flash Flash” basically just describes what you are out doing with this machine
- “Blank” is if you wanna go minimalistic, or if you wanna add your own words
About printing
- Using a 0.2mm is ideal, and is what I'd recommend for better resolution of those thin lines and letters.
- I printed mine a 0.1mm layer height
- I'm pretty sure you can get away with basically any filament material you want. Just be sure to have your printer settings tuned accordingly. I printed one in PETG and another in PLA
- Screw supports, you don't need ‘em. But do print these with the face down on the bed. It’ll look a lot nicer that way (especially if you have some of those cool pattern beds!)
Installing (it's super simple)
- Test fit and if you need to shave a tiny bit off one of the sides, that's no biggie. I printed/tweaked enough that I don't think you'll need to, but that's got a lot to do with how well you have your printer adjusted and tuned, so be prepared for the possibility
- Get some flexible glue, in case you need to remove it down the road. You could probably use something like rubber cement, but I used some E6000 (https://amzn.to/4aUs3Jm) for mine. It works great for this sort of thing.
- Be sure to not glue any screws into place. Keep that glue away from and holes/openings in the camera body. I am in no way responsible for the way you glue things. I've cautioned you to be careful, the rest is up to you (but it is really easy).