
Dice tower with self loading mechanism
Obliczymy ostateczną cenę na podstawie wybranego pliku. Sprawdzisz ją i zaakceptujesz przed płatnością.
Zapisane na tym urządzeniu.

This self-loading dice tower can re-roll your dice by simply pressing the handle. Also works as a regular dice tower.
- Ocena
- 4,611 / 5
- Polubienia
- 868
- Pobrania
- 1521
- Wydruki
- 17
- Wyświetlenia
- 14 956
- Oceny
- 18
Aktualizacja u źródła:
Informacje o modelu
- Źródło
- Printables
- Kategoria
- Other Toys & Games
- Licencja
- Creative Commons — Attribution — Noncommercial — Share Alike
UPDATE! V2 now with fancy brick texture! 🎉
This self-loading dice tower can re-roll your dice by simply pressing the handle. Also works as a regular dice tower.
Printing
I used regular PLA for this print. No supports are needed, except for axle-main (exclude support from pinholes, see attached .3mf -files).
- axle-main.stl - This part requires supports
- axle-retaining-pin.stl - Print 2
- axle-retaining-ring.stl - Print 8
- axle-short.stl - Print 6
- lever-inner.stl
- lever-long-2.stl
- lever-long.stl
- lever-short.stl
- link.stl
- pin-long.stl - Print 2
- tower.stl
- trap-door.stl
- trap.stl - Print 2
- tray.stl
Assembly
Doesn't require any hardware, all parts can be printed. This should be a somewhat easy project, but I made simple drawings of what should be done in what order. Please let me know in the comments if something needs more clarifying!
Step 1: The inside assembly

Attach lever-inner to axle-main and secure it with axle-retaining-pin. Make sure all parts are oriented correctly.
Step 2: The tray
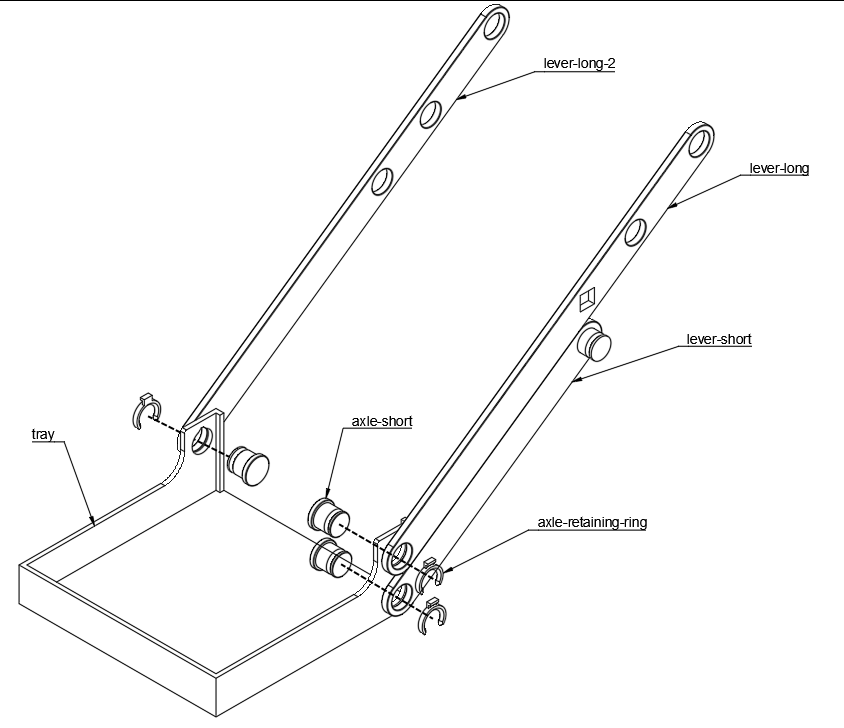
Attach lever-long, lever-long-2 and lever-short to tray with 3x axle-short and secure those with 3x axle-retaining-ring. The lever-long and lever-long-2 are different parts! Make sure you don't mix them up.
Step 3: The lower trap
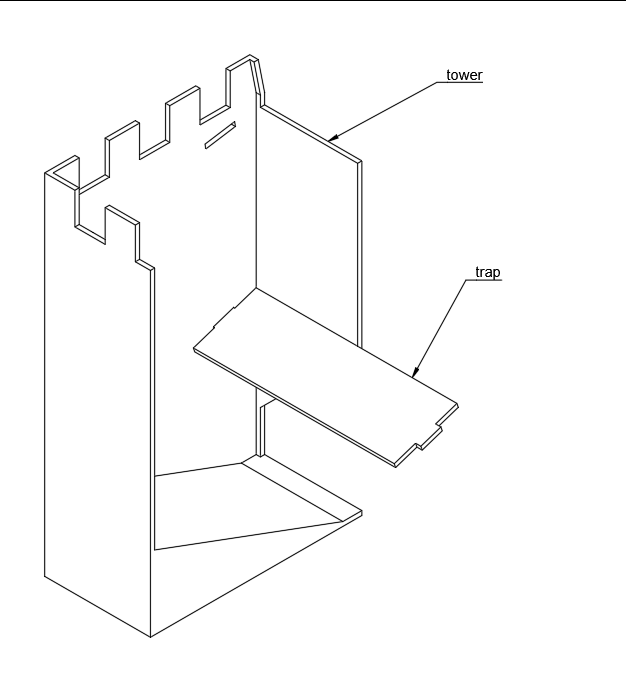
Place trap inside the tower. You may need to bend the part a bit, but it should snap on when placed correctly.
Step 4: Attach the left side
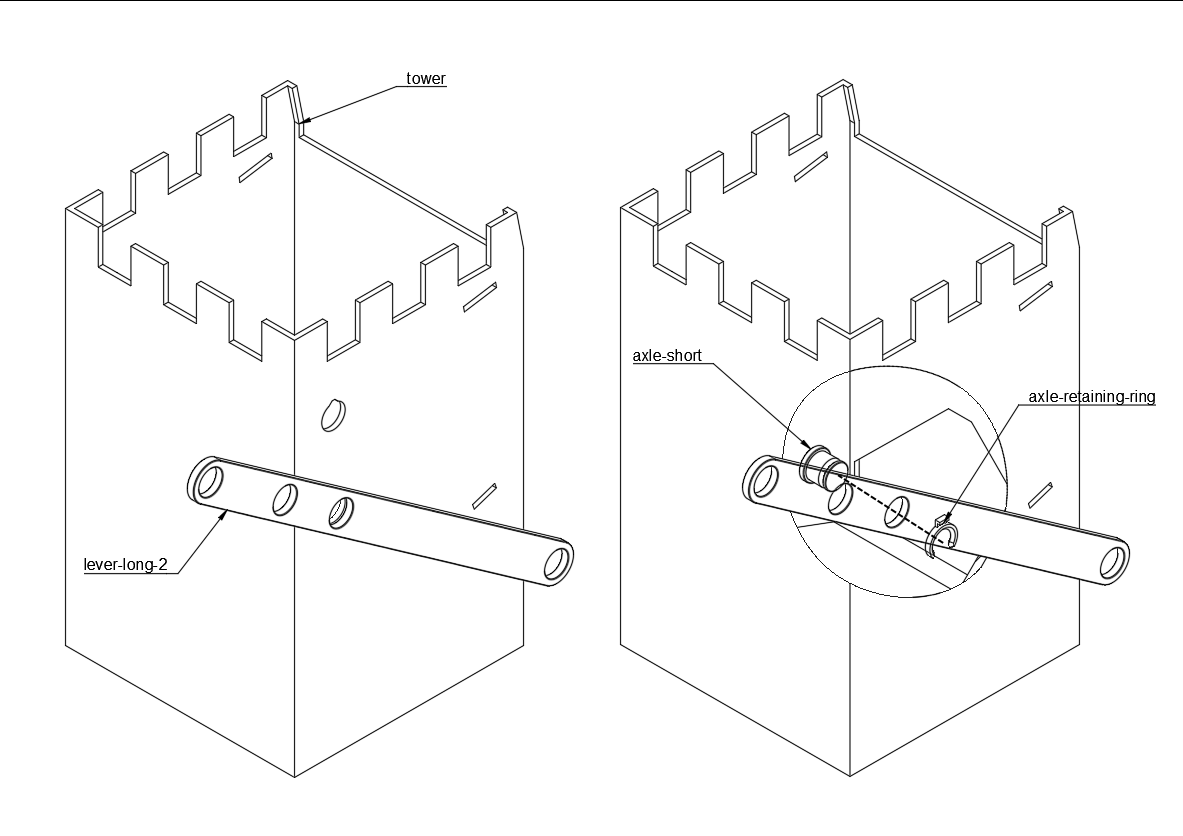
Attach the lever-long-2 to the tower with axle-short and axle-retaining-ring. Make sure to use the correct hole (see images).
Step 5: Attach the right side
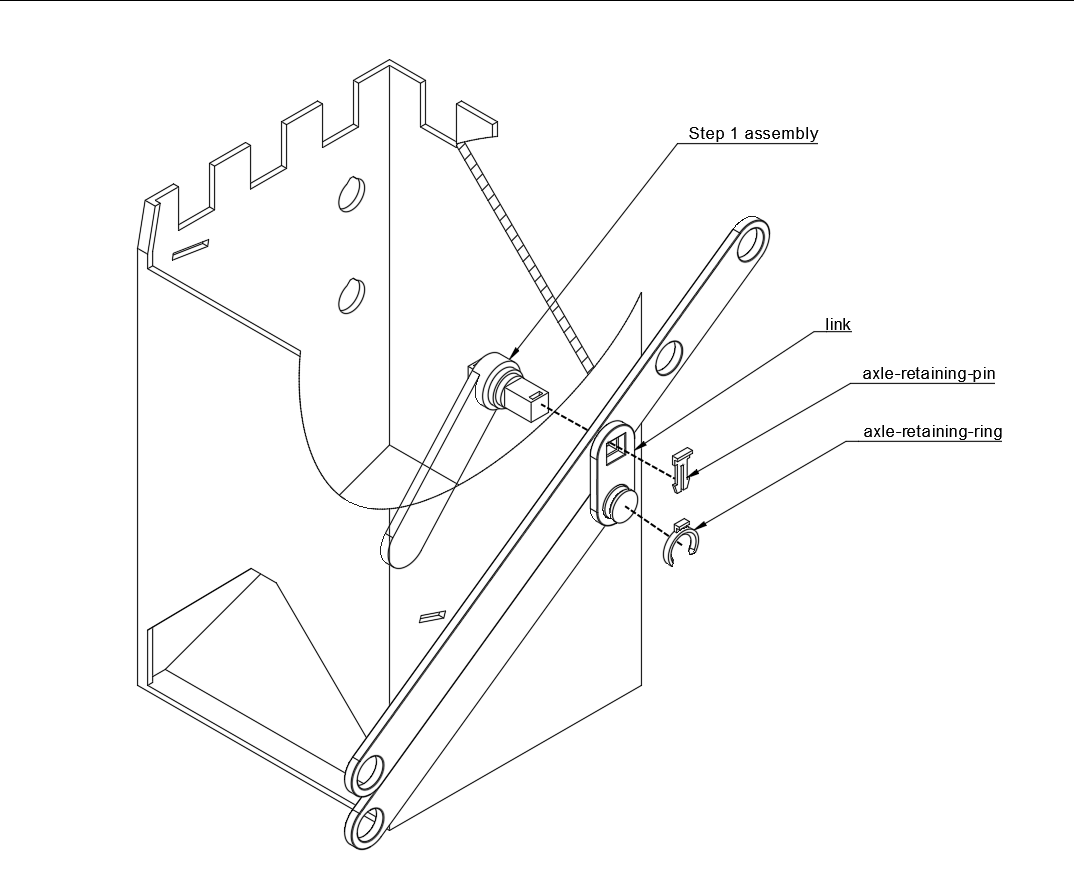
Attach main axle from step 1 through the holes on tower, lever-long, and link. Then secure it with axle-retaining-pin. Notice the correct orientation of lever-inner.
Step 6: Attach trap door

Attach trap-door with 2x axle-short and 2x axle-retaining-ring
Step 7: Attach upper trap
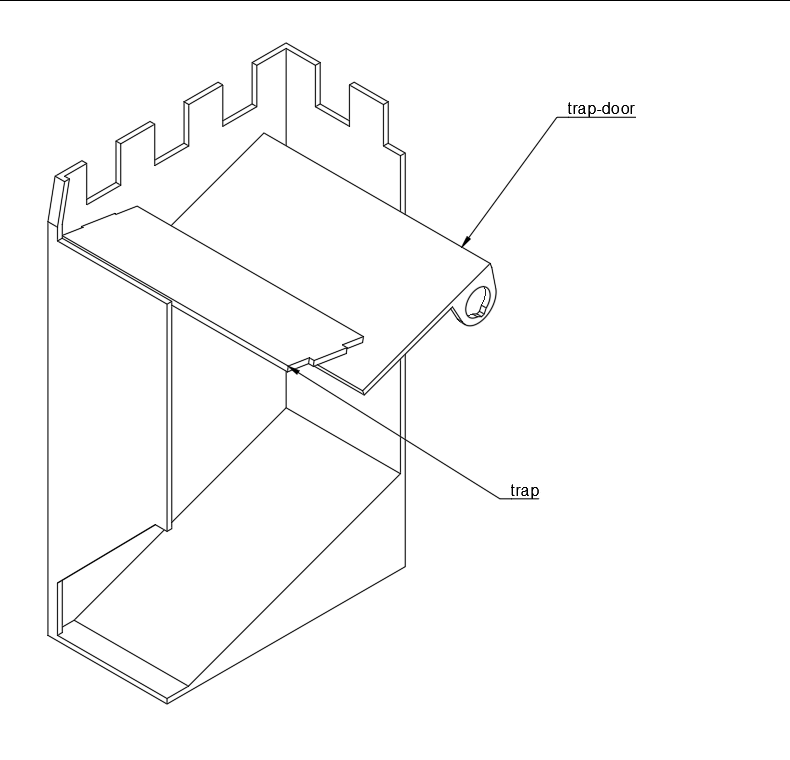
Attach trap like you did in step 3. Make sure that trap rests against lever-inner in a low position.
Step 8: Attach handle and rotation limiter
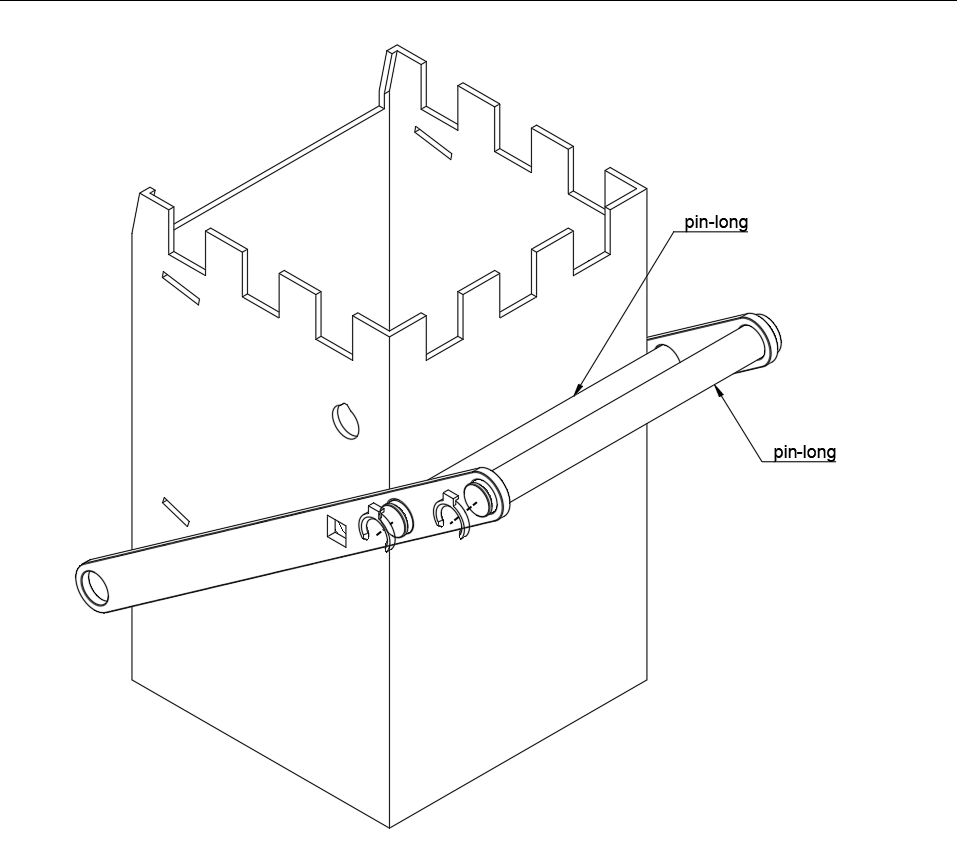
Push 2x pin-long through lever-long-2 and lever-long and secure those with 2x axle-retaining-ring.
Step 9: Check it works
Push the handle down and make sure that trap-door is moved to against trap-upper. Check that there are no extra parts.
If you like this model or have improvement suggestions, I would love to see make or comments! Happy rolling!
Changelog
- v1: Initial release
- v2: Added brick texture
- v2.1: Small adjustments to remove bump when tray is in upper position
Notes
This tower was inspired by Lego Self-Loading Dice Tower v2 by Pattspatt
Like how clamps and pins work? Make your own using Set of simple pins and matching retaining rings