
GaggiaBoard PCBv3.1/v4 Housing (Gaggiuino)
Obliczymy ostateczną cenę na podstawie wybranego pliku. Sprawdzisz ją i zaakceptujesz przed płatnością.
Zapisane na tym urządzeniu.

Print-in-place hinged housing for Gaggiuino PCBv3.1 and PCBv4 (with onboard STM32) only. NOT compatible with PCBv3.
- Ocena
- 5 / 5
- Polubienia
- 137
- Pobrania
- 3432
- Wydruki
- 11
- Wyświetlenia
- 17 947
- Oceny
- 11
Aktualizacja u źródła:
Informacje o modelu
- Źródło
- Printables
- Kategoria
- Kitchen
- Licencja
- Creative Commons — Attribution — Noncommercial — Share Alike
Status: Released!
Compatibility Warning!
PCBv3.1 and PCBv4 (with onboard STM32 chip) are the only compatible PCBs.
PCBv3 (which uses the WeAct BlackPill) is not compatible and should use the Protective Housing.
Description
This housing holds PCBv3.1 and PCBv4 from the Gaggiuino project. It's designed to protect the board while allowing access to all connectors without removing the housing.
Why another housing? Some individuals removed their PCB from the older Protective Housing to change wiring/connections, powered up the system to test without reinstalling into the housing, and fried their board/components. This new housing drastically reduces that risk, plus it's smaller, stronger and more flexible, allows for much easier wire routing, and has better mounting options.
Parts
Gap-filling or gel cyanoacrylate (super glue)
Mounting Magnets (For magnetic machine housings, pick one option)
Note: If your machine housing isn't magnetic you can use dual lock tape, hook and loop tape, or let the housing sit freelyBase Mount: 3 disc magnets, 5 mm dia. x 1 or 2 mm thick
https://www.aliexpress.com/item/3256803930463196.html
Note: you can use spare magnets from the HW Scales or ToFnLED modelsWall Mount: 2 disc or bar magnets, 12+ mm dia./width, 2 mm thick
Printing
PETG (PLA/ABS/ASA won't work)
0.4 mm wall lines and nozzle
0.2 mm layers
2 or 3 wall lines
orientation as modeled, no supports

Assembly
Gently pinch the end of the PCB retaining fingers to free them. Do not over-compress. You may also insert the PCB to break them free, but that'll scrape off a bit of the material.

Glue magnets in place. The base mount magnets are ideal for Gaggia Classic variants.

The wall mount magnets are an option for Gaggia Classic variants but are ideal for Silvia. Attach magnets as required, do not cover vents.

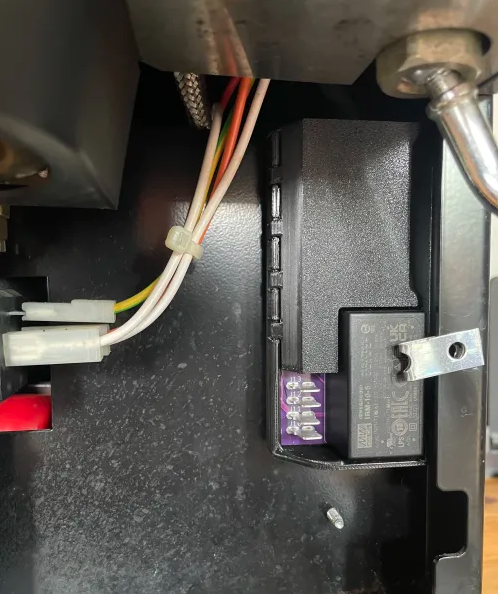
For Gaggia Classic variants, the housing should be placed in the back corner behind the funnel with the PSU and AC connectors at the base.

For Silvia, place against the wall as shown
Changelog
2026-02-20 - Added cut path for extra QWIIC connector clearance
2024-05-30 - removed potential collision if hinge bridges sagged, increased latch force, stiffened housing cover, added finger catch for opening.