
ProPipette - luer splip syringes conversion kits
Obliczymy ostateczną cenę na podstawie wybranego pliku. Sprawdzisz ją i zaakceptujesz przed płatnością.
Zapisane na tym urządzeniu.
This project presents a series of conversion kits for 10ml, 20ml and 60ml luer splip syringes, to make ProPipettes
- Ocena
- 0 / 5
- Polubienia
- 25
- Pobrania
- 34
- Wydruki
- 0
- Wyświetlenia
- 827
- Oceny
- 0
Aktualizacja u źródła:
Informacje o modelu
- Źródło
- Printables
- Kategoria
- Medical Tools
- Licencja
- GNU General Public License v3.0
ProPipette conversion kits available
The three models currently available are:
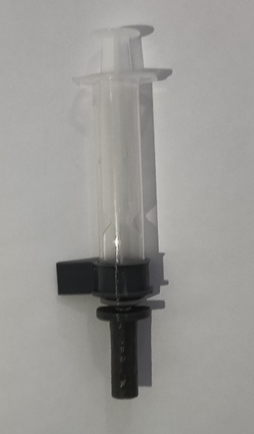 | Kit for 10ml luer slip syringe.
3D printable parts: - Universal spout printed in TPU (This spout works for all luer slip type syringes). - Printed TPU plug for 10 ml syringe. Filaments in use: - TPU No 3d printable parts: - One 10ml luer slip syringe Tools - Drill with 1mm drill bit. - Tin soldering iron
|
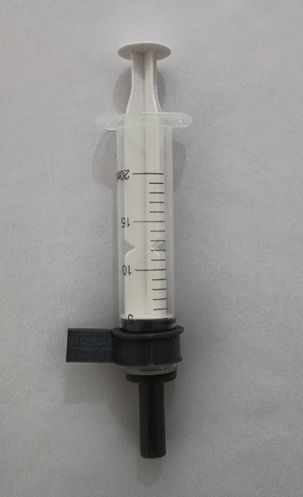 | Kit for 20ml luer slip syringe:
Includes: - Universal spout printed in TPU (This spout works for all luer slip type syringes). - Printed TPU plug for 20 ml syringe. Filaments in use: - TPU No 3d printable parts: - One 20ml luer slip syringe Tools - Drill with 1mm drill bit. - Tin soldering iron |
 | Kit for 60ml luer slip syringe:
Includes: - Universal spout printed in TPU (This spout works for all luer slip type syringes). - Printed TPU plug for 60 ml siringe. - Body printed in PLA or PETG to facilitate the operation of the syringe plunger (Due to the bigger size of the 60ml syringe). Filaments in use: - TPU - PLA or PETG No 3d printable parts: - One 60ml luer slip syringe Tools - Drill with 1mm drill bit. - Tin soldering iron |
Printing recommendations
The gcode is included in the files for reference. The most important parts to be mindful of are those of TPU.
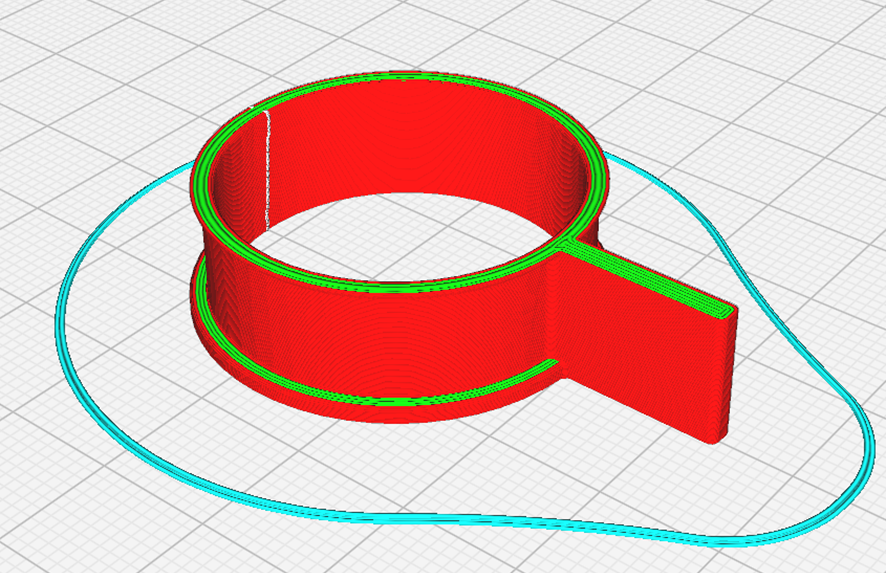
Its recommended that, for the parts that require TPU (the plugs and the spout) to be printed at slow speed and with 0.12mm layer height (or lower, as long as your printer can manage said layer height). This is because these parts need to be as airtight as possible.
Also, make sure the seam it’s in the back of the ring of the plugs and opposite to the handle, as shown in the next figure:
Assembly steps for 10 ml and 20ml luer slip syringe kits
The 10ml and 20ml luer slip syringe kits are basically the same model, with two printables components each. The difference is the size of the plug.
Step 0: Parts and tools
No printable parts:
- One 10ml luer slip syringe (or a 20ml luer slip syringe, depending of the selected one).
TPU Printable parts:
- One Propipette 10ml luer slip - Plug 10ml v1.5.0 (or the 20ml version, depending of the selected syringe).
- One Propipette luer slip - Universal Spout Luer Slip TPU v1.2.0
PLA or PETG printable parts.
- None
Tools:
- Drill with 1mm drill bit
- Tin soldering iron
Step 1: Smoothing the plug and spout
With the tin soldering iron, smoot the TPU parts in the red areas shown in the figures. Be sure to be in a well-ventilated space.
The idea is to make the seal the layer, but be careful of not over-melting the plastic.

Step 3: Drill a hole in the syringe
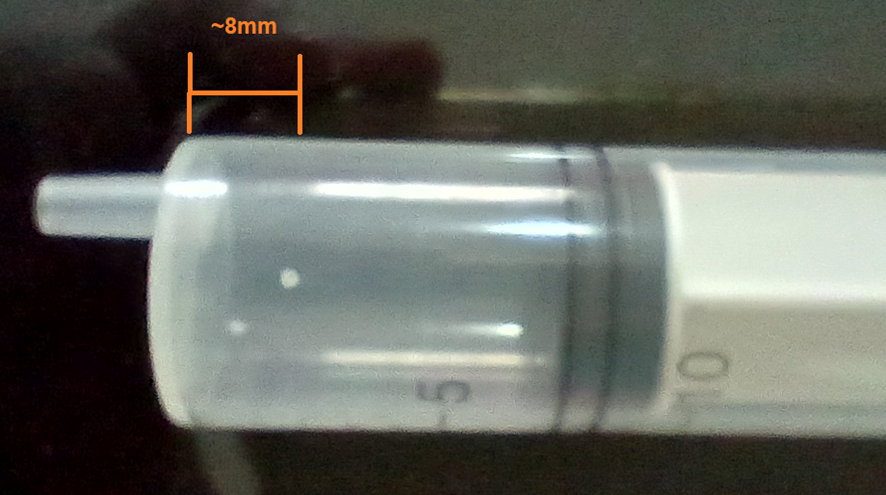
Use the drill with a 1mm bit to make a small hole in the syringe, at about 8mm from the beginning of the body, as shown in the figure.
Step 4: assembly
Inset the plug in the syringe. Make sure the lump that was smoothed with the tin iron soldering is aligned with the hole. You can peep from the other side of the syringe to see the alignment.
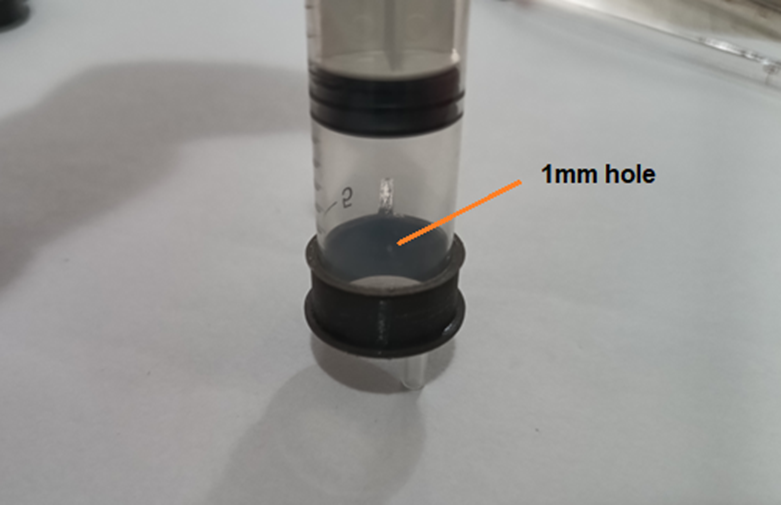
After this, insert the spout in the syringe.

Step 5: Use
The operation of the propipete is very simple:
- Insert the Pipette in the spout.
- Use the plunger to suck liquid.
- Move the handle of the plug in the direction of the bigger ring to pour the content.

Assembly steps for 60ml luer slip syringe kit
The 60ml version needs a body for two reasons:
- The size of the syringe can difficult the operation of the plunger.
- Its necessary a plunger stopper, because of the big difference in area of the head of the plunger and the face of the liquid in the pipette makes possible for the column of liquid to move the plunger.
Step 0: Parts and tools
No 3d printable parts:
- 60ml luer slip syringe
TPU Printable parts:
- Propipette 60ml luer slip - Plug 10ml v1.5.0
- Propipette luer slip - Universal Spout Luer Slip TPU v1.2.0
PLA or PETG printable parts.
- Propipette 60ml luer slip - Body V1.1.0
- Propipette 60ml luer slip - Plunger rack V1.2.0
- Propipette 60ml luer slip - Threaded stopper V1.1.0
- Propipette 60ml luer slip - Wheel axle V1.2.0
- Propipette 60ml luer slip - Wheel brake v1.0.0
- Propipette 60ml luer slip - Wheel support V1.3.0
- Propipette 60ml luer slip - Wheel v1.2.0
Tools:
- Drill with 1mm drill bit
- Tin soldering iron
Step 1: Smoothing the plug and spout
With the tin soldering iron, smoot the TPU parts in the red areas shown in the figures. Be sure to be in a well-ventilated space.
The idea is to make the seal the layer, but be careful of not over-melting the plastic.

Step 3: Drill a hole in the syringe
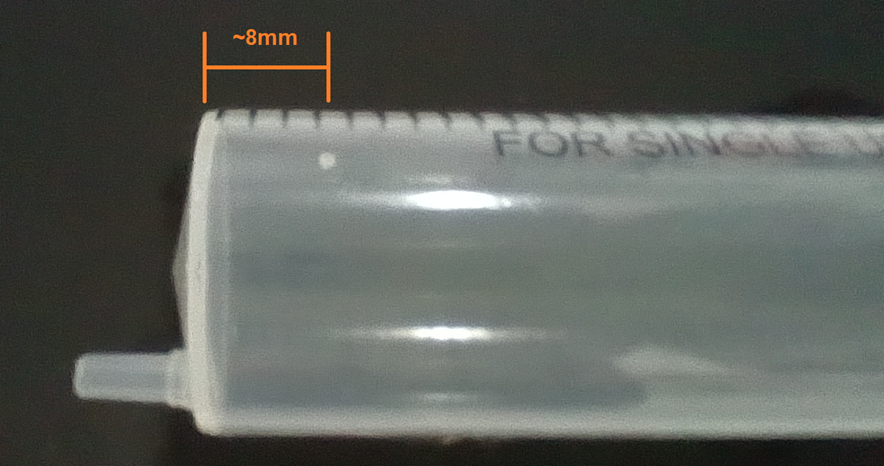
Use the drill with a 1mm bit to make a small hole in the syringe, at about 8mm from the beginning of the body, as shown in the figure.
Since this model use a body, the hole needs to at an angle to the tip or syringe.

Step 4: assembly
Retire the plunger. Inset the plug in the syringe. Make sure the lump that was smoothed with the tin iron soldering is aligned with the hole. You can peep from the other side of the syringe to see the alignment.
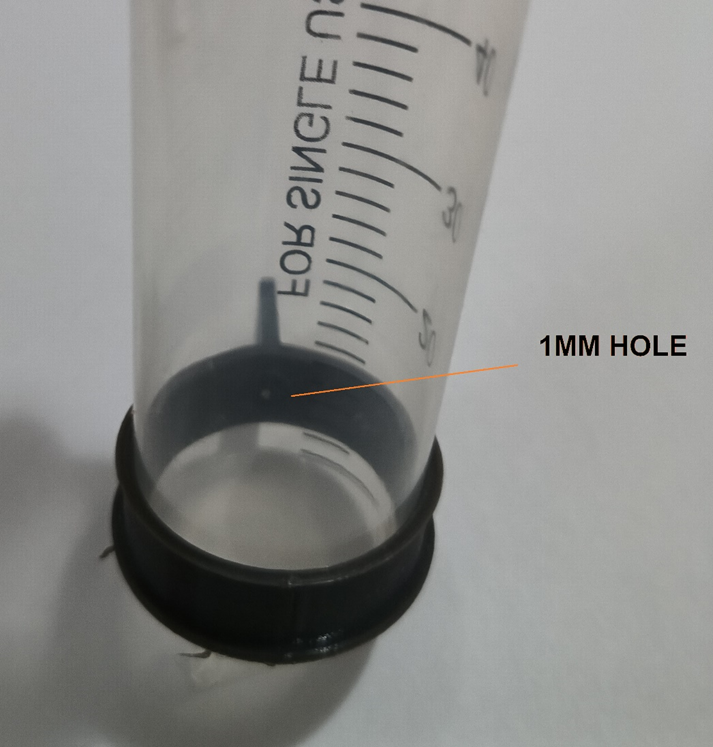
After this, insert the spout in the syringe.

Insert the body in the syringe.

Insert the wheel support and secure it with the threaded stopper.

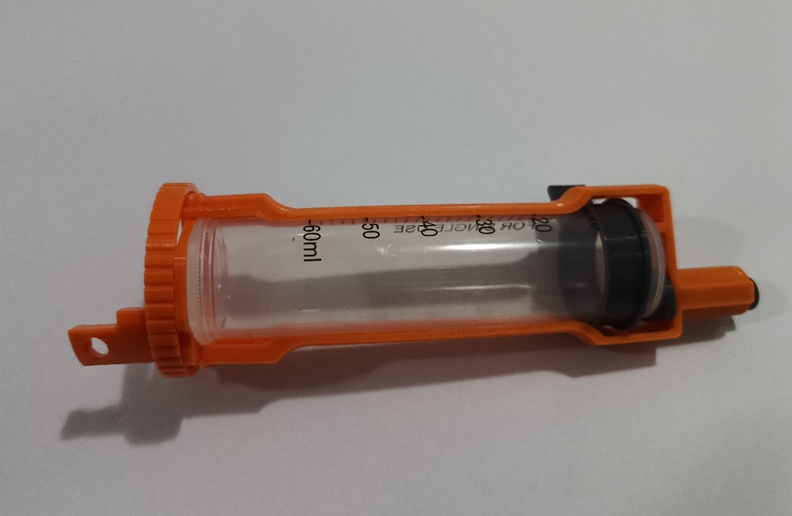
Insert the plunger

Insert the plunger rack

Insert the wheel axle, but only half way. The curve side of the axle needs to align with the curve of the support.

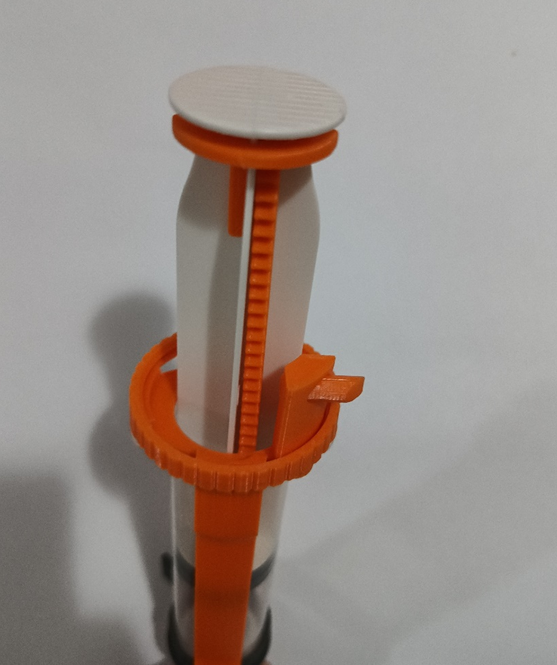
Insert the Wheel and push the axle all the way in.

Insert the stopper


5: Use
The operation of the propipete is a little more complex than the others versions, but is still relative simple:
- Insert the Pipette in the spout.
- Use the wheel to suck liquid. Due to the stopper, you need to go past the amount required, and the use the handle to release the excess.
- Move the handle of the plug in the direction of the bigger ring to pour the content.
- To move the plunger directly, press the stopper to move it out of the way.
