
Calibration Tower - Pressure Advance (M572) or Linear Advance (M900)
Obliczymy ostateczną cenę na podstawie wybranego pliku. Sprawdzisz ją i zaakceptujesz przed płatnością.
Zapisane na tym urządzeniu.
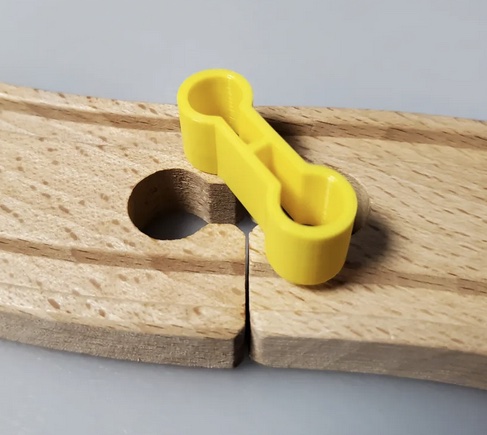
A recreation of the favorite Pressure/linear Advance calibration from Orca Slicer using PrusaSlicer
- Ocena
- 5 / 5
- Polubienia
- 88
- Pobrania
- 896
- Wydruki
- 8
- Wyświetlenia
- 6026
- Oceny
- 6
Aktualizacja u źródła:
Informacje o modelu
- Źródło
- Printables
- Kategoria
- Test Models
- Licencja
- Creative Commons — Attribution — Noncommercial — NoDerivatives
;tldr - Quick Start:
- Select the model (! Use Prusa Slicer 2.6.0 or newer ! ) - “Direct Drive” for the MK4 or “Bowden” for the Mini+., Additionally, you can select a layer height to test.
- Simply load the file in Prusa Slicer and slice the model
- Check that the desired M572 or M900 code is actually present in the G-code viewer between layer changes using the following 3 steps: Not seeing the custom command? Go down to “Debug Mode” at the end of this article.

- Start the print, and then jump down to “Interpreting the Results” below.
Introduction:
This model recreates the Linear Advance (M900) calibration from Orca Slicer, but using Prusa Slicer and a custom G-Code macro to calibrate the pressure advance value M572.
The linear / pressure advance value will be increased after each layer, starting at zero and ending at 1.0. So every possible combination is tested.
This model is printed using 2 perimeters, zero top and bottom layers, and zero percent infill.
Requirements:
Prusa Slicer 2.6.0 or newer (support for Macro Language)
https://github.com/prusa3d/PrusaSlicer/wiki/PrusaSlicer-Macro-Language
At the time of writing, the customer G-code does not work on on Bambu or Orca Slicers.
Do I need to calibrate Pressure or Linear Advance?
This depends on the firmware your printer is running. The newest Prusa Input Shaper firmware 5.0.0-alpha1 (May 2023), Prusa changed over to using Pressure Advance (M572) for their Mini+ and MK4 machines
https://forum.prusa3d.com/forum/input-shaping/firmware-5-0-0-alpha1/
For all other firmware, have a look at the RepRap list:


Source: https://reprap.org/wiki/G-code
Interpreting the Results:
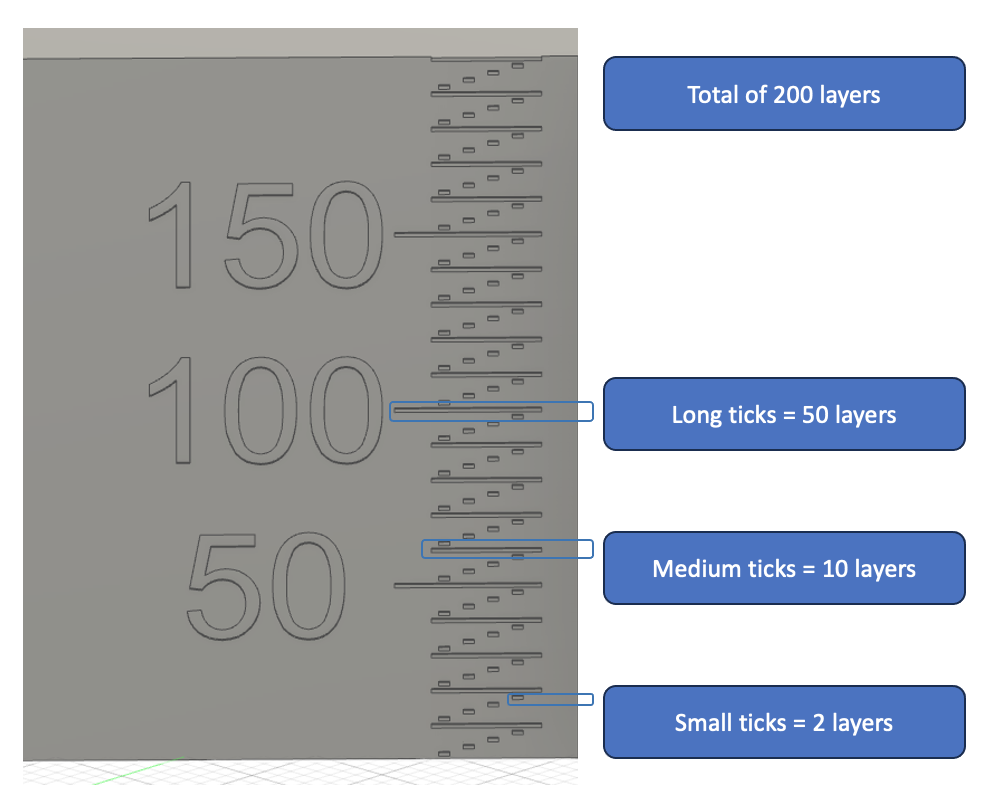
The layer lines are part of the model, so you do not need your calipers any more to measure the position of that perfect line.
There are a couple artifacts you need to evaluate: The layer ticks and the seams.
Layer Ticks:
The layer ticks stick out 0.2 mm from the model, so they should be just barely visible.

Seams:

You will notice that a too small value will result in over-extruded seams and too large of a value will produce under-extrusions. Here the task is to select the best seam, even if it is not perfect.
Why are my seams so bad?
Normally the pressure / linear advance is set once during the initial start of printing. In this model it is set between each layer.
From what I can see, every time the value is changed the printer makes a small pause to save the value. This results in seams that are worse than expected. This model us a purely subjective evaluation - you look for the best seam.
Calculating your new pressure / linear advance value:
Bowden Model:
The model sweeps from a value of 0.0 to 1.0. Given 200 layers, this gives your a layer step size of 0.005
So lets say your best layer is layer #61 → 61 x 0.005 = 0.305
Direct drive Model
The model sweeps from a value of 0.0 to 0.3. Given 200 layers, this gives your a layer step size of 0.0015
So lets say your best layer is layer #61 → 61 x 0.0015 = 0.0915
Modifying the custom G-code:
Lets say you want to optimize this even more, and conduct a smaller sweep between 0.5 and 0.8 to fine-tune your values. There are just two variables you need to change:
Settings → Printers → Custom G-code → Before layer change:
{local SJB_calibration_start_value = 0.5} {local SJB_calibration_end_value = 0.8}
SJB_calibration_start_value = the value to start the sweep at (layer 2)
SJB_calibration_end_value = the value to end the sweep at (layer 200)
Want to test at a specific printing speed?
Usually, the perimeters are printed quite slow. In the newest versions of PrusaSlicer, you can see the actual printing speeds:
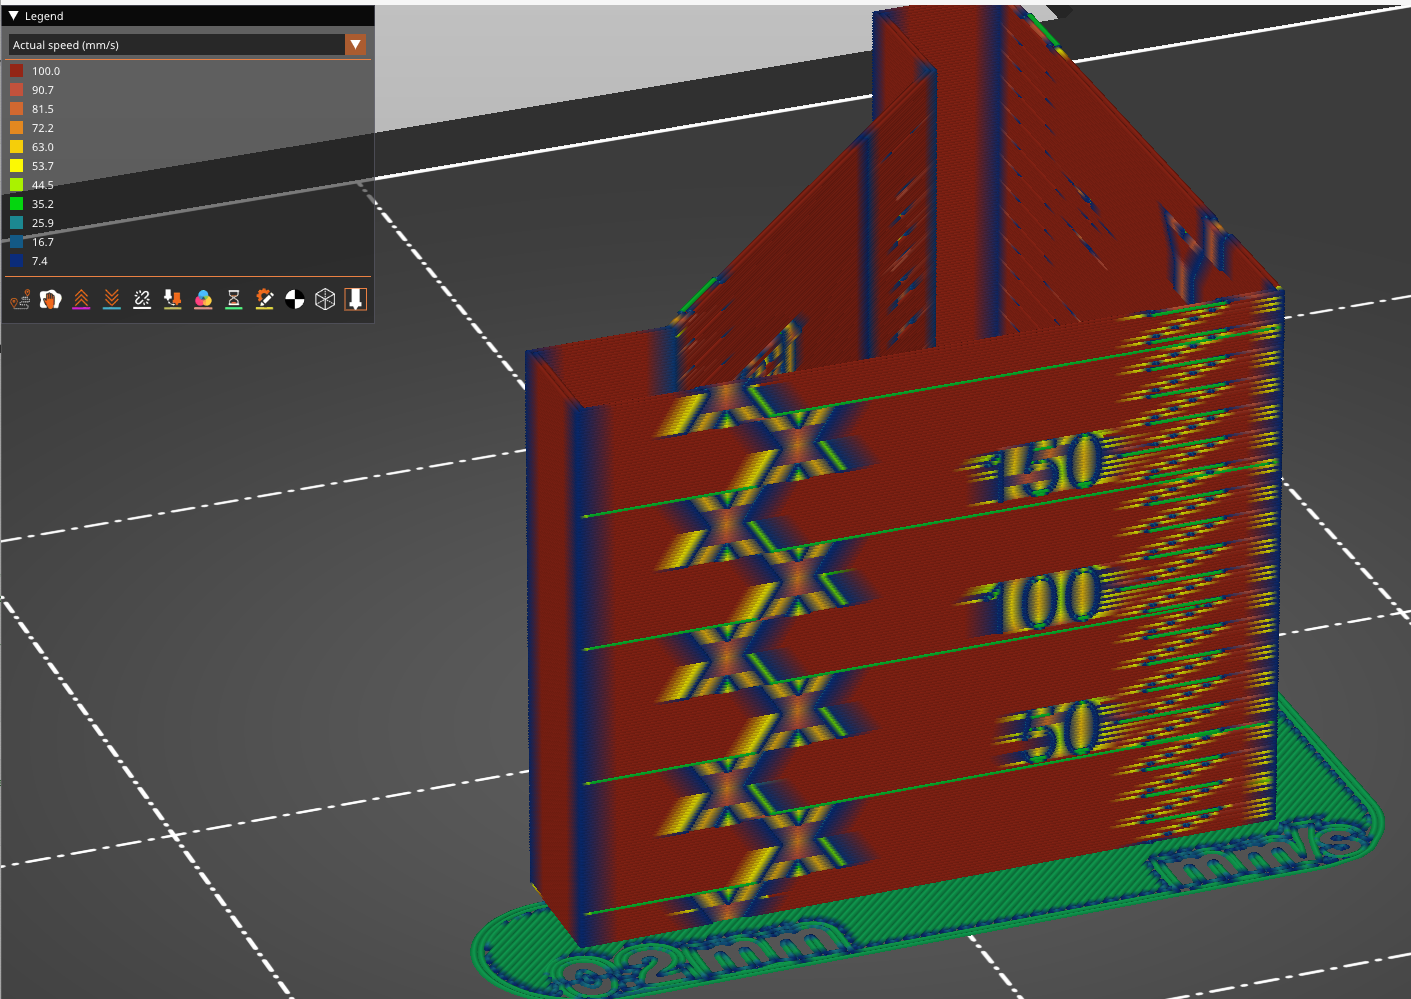
In order to achieve faster speed, you need to tune the following parameters:
Settings → Print Settings → Speed for Print moves → Perimiters, Small perimieters, and External perimeters
→ Set these three values to the speed you want to test (e.g. 100 mm/s)
The following settings may prevent you from reaching the desired perimeter speed:
Settings → Filaments → Cooling → Slow down if layer print time is below:
→ Set this value to zero to prevent the speed from being limited
Settings → Filaments → Advanced → May volumetric speed:
→ Increase this value if your speed is being throttled.
Debug Mode:
Not seeing the custom commands in your final G-code? Try these steps:
- Confirm you are using PrusaSlicer 2.6.0 or newer.
- under Print Settings → Output options → G-code substitutions → uncheck the “Regula expressions” box in the first substitution:

- Slice the model again. Now all the calculations involved in creating the custom command are visible and can be debugged.

Possible errors:
; Calculated step size: 0 if the step size is zero, then there was most likely an error withe the input values. Make sure they are a decimal value, otherwise the slicer treats them like text values and not numbers:
Wrong: use of integer values
{local SJB_calibration_start_value = 0} {local SJB_calibration_end_value = 1}
Right: use of floating values “0.0” and “1.0”
{local SJB_calibration_start_value = 0.0} {local SJB_calibration_end_value = 1.0}
Still not successful? Post a screenshot similar to the one above in the comments with the following info:
- Which version of Prusa Slicer are you using, and Operating System (e.g. Version 2.8.0+MacOS-x64)
- Which model did you use? (e.g. 0.3mm_LayerHeight_Bowden_PressureAdvanceTower_v5)
- The screenshot of the variables above.
Happy Printing!