
CoreXY Conversion for RigidBot 3D Printer - Core XY
Obliczymy ostateczną cenę na podstawie wybranego pliku. Sprawdzisz ją i zaakceptujesz przed płatnością.
Zapisane na tym urządzeniu.

I acquired an old RigidBot 3D printer and set about converting it to Core XY.
- Ocena
- 0 / 5
- Polubienia
- 14
- Pobrania
- 131
- Wydruki
- 1
- Wyświetlenia
- 1611
- Oceny
- 0
Aktualizacja u źródła:
Informacje o modelu
- Źródło
- Printables
- Kategoria
- Other Printer Parts & Upgrades
- Licencja
- Creative Commons — Attribution — Noncommercial
CoreXY Conversion for RigidBot 3D Printer
If you still have a RigidBot 3D Printer (first of all… WHY??) here is a great way to modernize it a bit by converting it to CoreXY.
Many of Luke's parts have been converted to use M3 heat inserts since screwing directly into plastic will probably not last long term. Any of the original parts that are included will be noted in their descriptions.
Tools needed for this conversion:
- 2.5mm hex wrench
- Screwdrivers
- M4 tapping drill bit
- Center punch (helpful for drilling/tapping frame)
- Wiring tools (snips, crimps, terminals, etc.)
Extra parts I purchased for conversion over what was removed from the printer:
- 6x M5x35mm Screws
- Extra M3 Screws
- M3 Heat Inserts
- Pulleys for belt system
- Smaller pulleys for motors (recommended over stock 32 tooth pulleys)
- Belts (they are longer than the stock printer)
- Extension cable for extruder (only required for direct drive)
- Filament sensor (completely optional)
- Parts for whatever tool head option you go with (I used a Dragon Burner)
None of the included links are affiliate links and since the prices change regularly, shop around to get the best deals. I made this project harder on myself by cutting down the X axis (way too much) which required purchasing a 180x180 bed, bed screws, and PEI sheet. Don't do what I did, build it at it's original size, and you can save a ton of headaches, heartache, and money. All told, the required parts are less than $30.
These other parts that I designed may help along the way:
- RigidBot to Orbiter V2 adapter and strain relief
- Completely optional. You could use a bowden setup or other extruder if desired.
- Electronics case to use Creality or SKR Mini E3 style board
- You can also use the factory mainboard, but I find the SKR boards to be easier to deal with, and I happened to have a spare Creality board laying around.
- Frame clips for wire management
- These aren't my design and I would recommend printing them at 98-99% as they are a bit loose as is. Interior should be 19.5mm
Printing:
I used the Voron Design print settings:
- .2mm layers
- 4 walls
- 5 top and bottom layers
- 40% cubic infill
PLA works just fine since it is not enclosed, but use other, stronger filaments as you desire.
Unfortunately, supports are required for many parts. Use your favorite support settings especially for the belt and motor mounts.
Please see the attached PDF for detailed, step by step instructions, and feel free to reach out with any questions or issues!
Happy Printing!
Update 4/25/25:
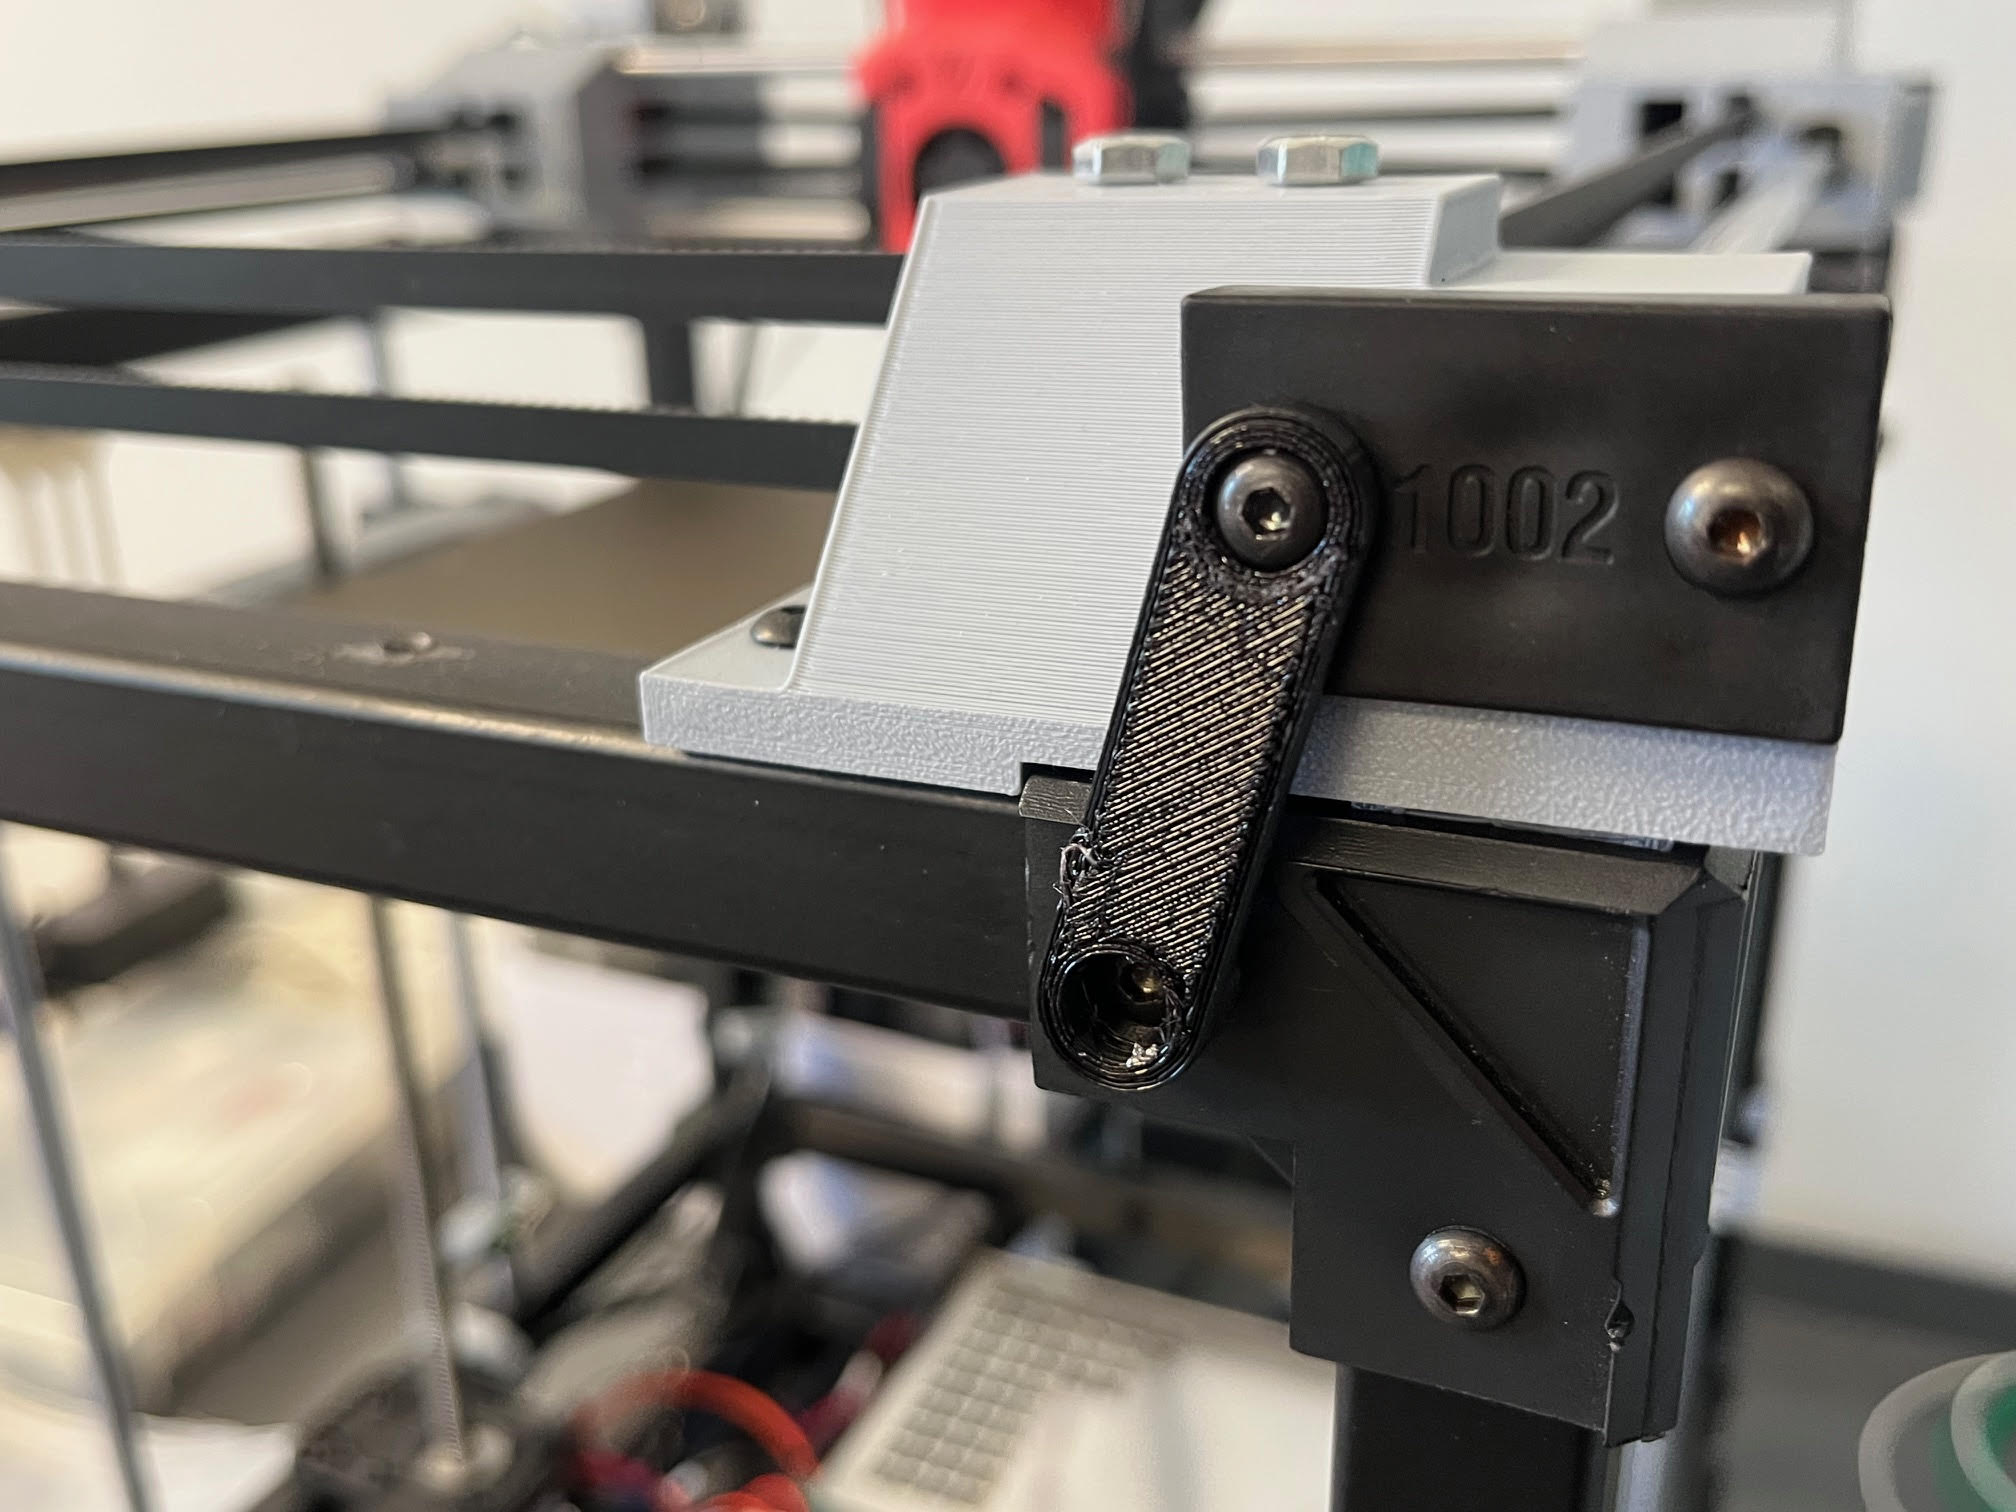
I noticed that the front two belt guides would creep up and off the frame causing Z offset issues. I added two “Front Hold-down” pieces to attach the pieces to the frame better to hopefully avoid this creep in the future.