
Steam Locomotive 310.0134 KAFEMLEJNEK [1:25]
We calculate the final price from your selected file. You review and accept it before payment.
Saved on this device.

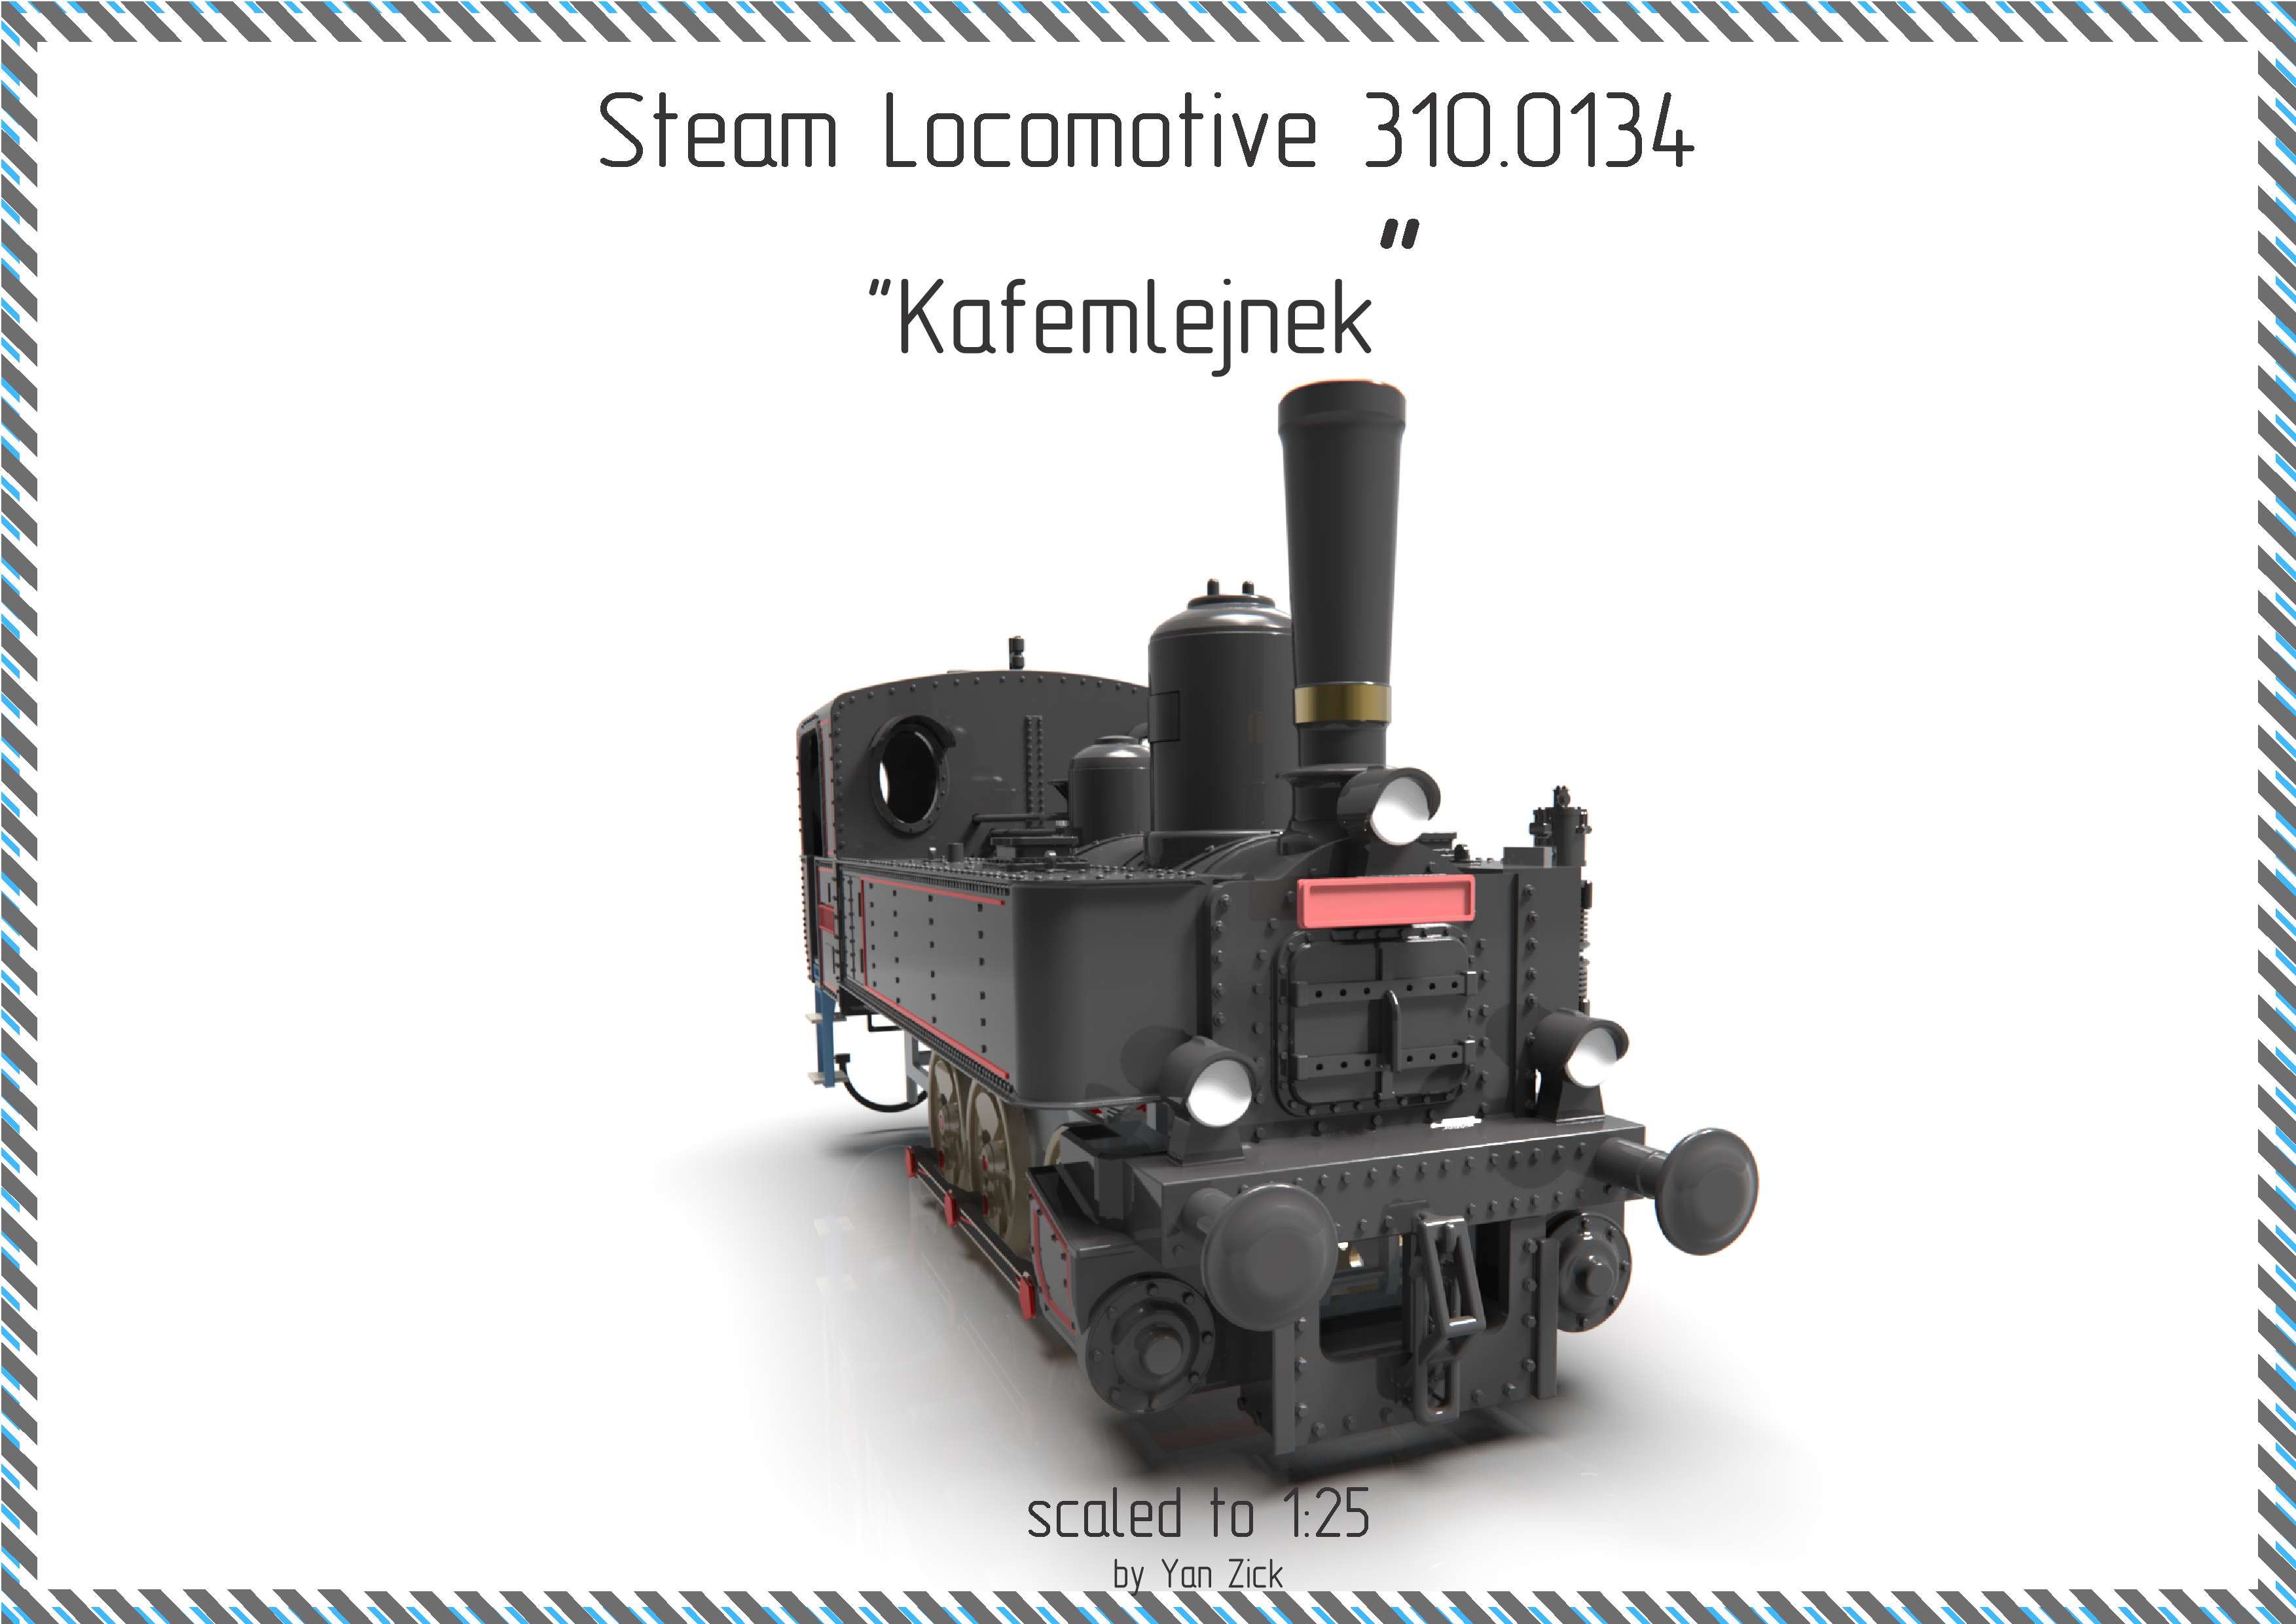
1913s czech steam locomotive 310.0134 "Kafemlejnek" scaled to 1:25
- Rating
- 4.667 / 5
- Likes
- 116
- Downloads
- 731
- Makes
- 8
- Views
- 3,400
- Reviews
- 6
Updated at source:
Model information
- Source
- Printables
- Category
- Vehicles
- License
- Creative Commons — Attribution — Noncommercial — Share Alike
Besides the printable parts, you'll also need:
2x M4 x 16 self-tapping screws with countersunk heads
4x M4 x 35 self-tapping screws with countersunk heads
Glue
✰✮✰✮✰✮✰✮✰✮✰✮✰✮✰✮✰✮✰✮✰✮✰✮✰✮✰✮✰✮✰✮✰✮✰✮✰✮✰✮✰✮✰✮✰✮✰✮
If you see a four-digit number at the end of a part name (like MAIN_BODY_PART_v2303.stl), just ignore it. It’s only there to help me keep track of updated versions of the part if I've made any improvements.
These numbers won’t show up in the assembly guide.
✰✮✰✮✰✮✰✮✰✮✰✮✰✮✰✮✰✮✰✮✰✮✰✮✰✮✰✮✰✮✰✮✰✮✰✮✰✮✰✮✰✮✰✮✰✮✰✮
IF YOU’RE NOT USING MY G-CODES FOR PRINTING, READ THIS:
This model includes several parts where it's crucial to follow specific print settings—like the number of perimeters, adding supports, brims, and so on. If you’re printing from *.stl files, please review and follow my slicer recommendations below carefully...
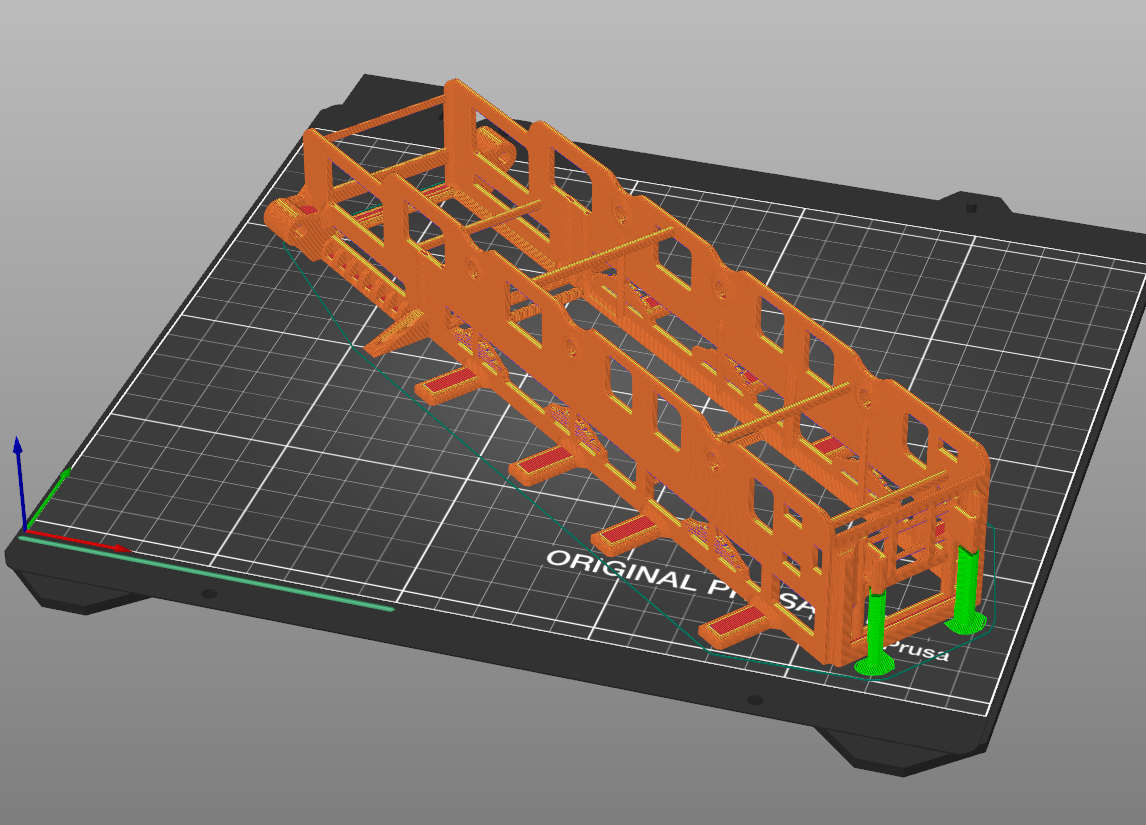
MAIN_CHASSIS.stl
Use the Paint-on Supports feature and create supports on the front part of the model, just like you see in the picture.
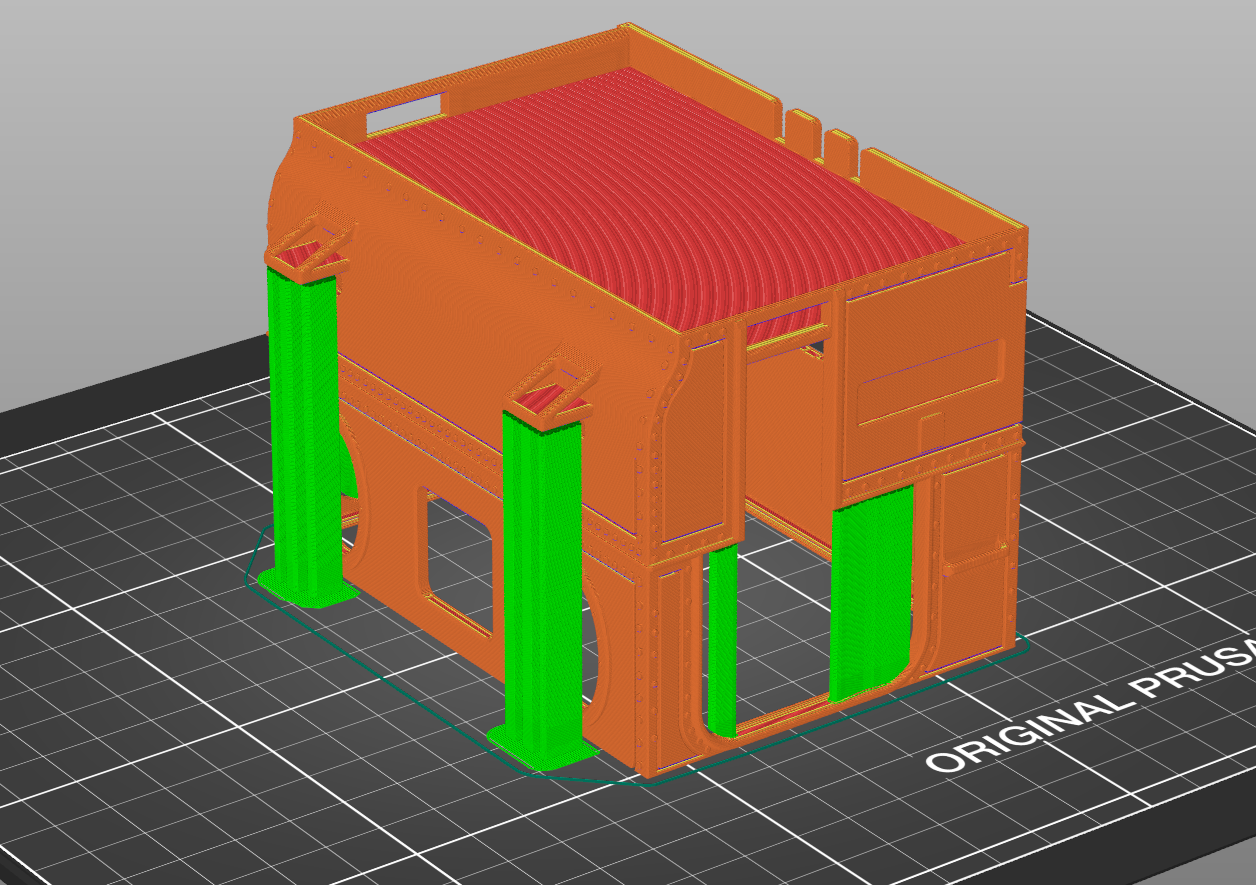
CAB.stl
It’s important to keep the part oriented upside down (just like in the picture) to ensure the best quality for the bottom side of the floor and a smooth fit with other parts.
Use the Paint-on Supports feature to create supports exactly as shown in the picture.
add 4mm inner brim
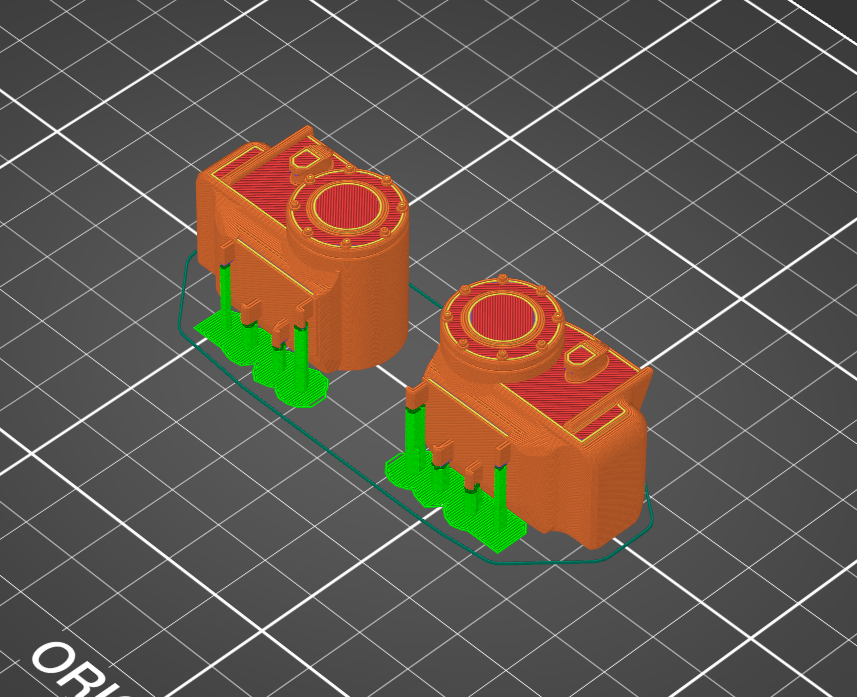
CYLINDERS.stl
For this part, you'll need to create custom supports as shown in the image.
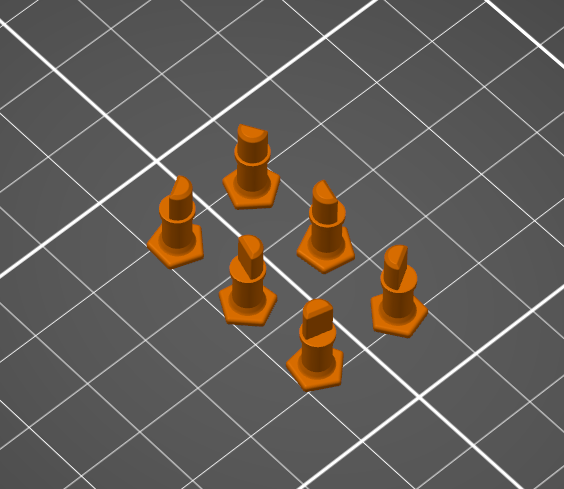
CONNECTOR.stl
I recommend using PET-G material.
Set the perimeter count to 4 or 100% infill for extra durability.
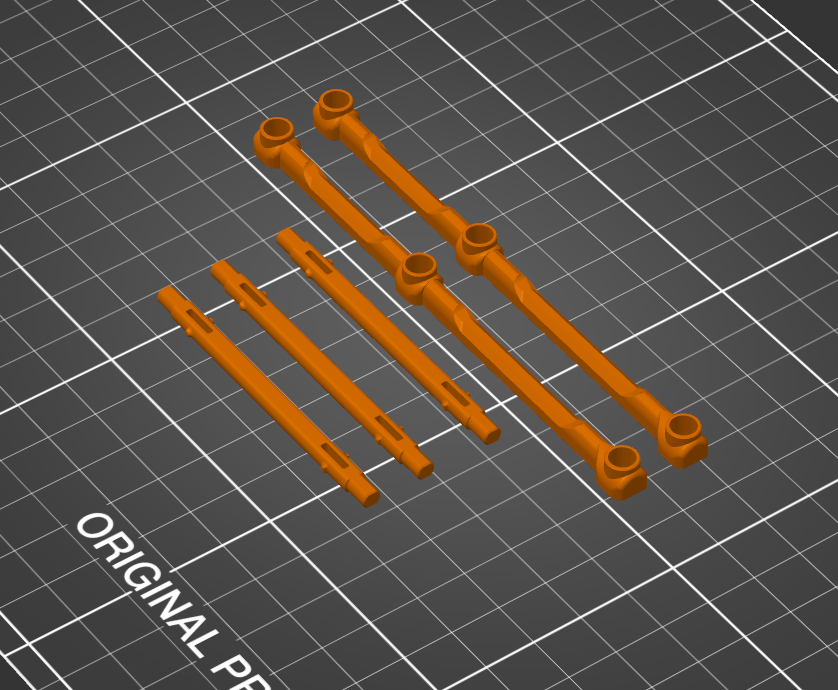
VENTIL_GEARS.stl + AXIS.stl
Set the perimeter count to 3
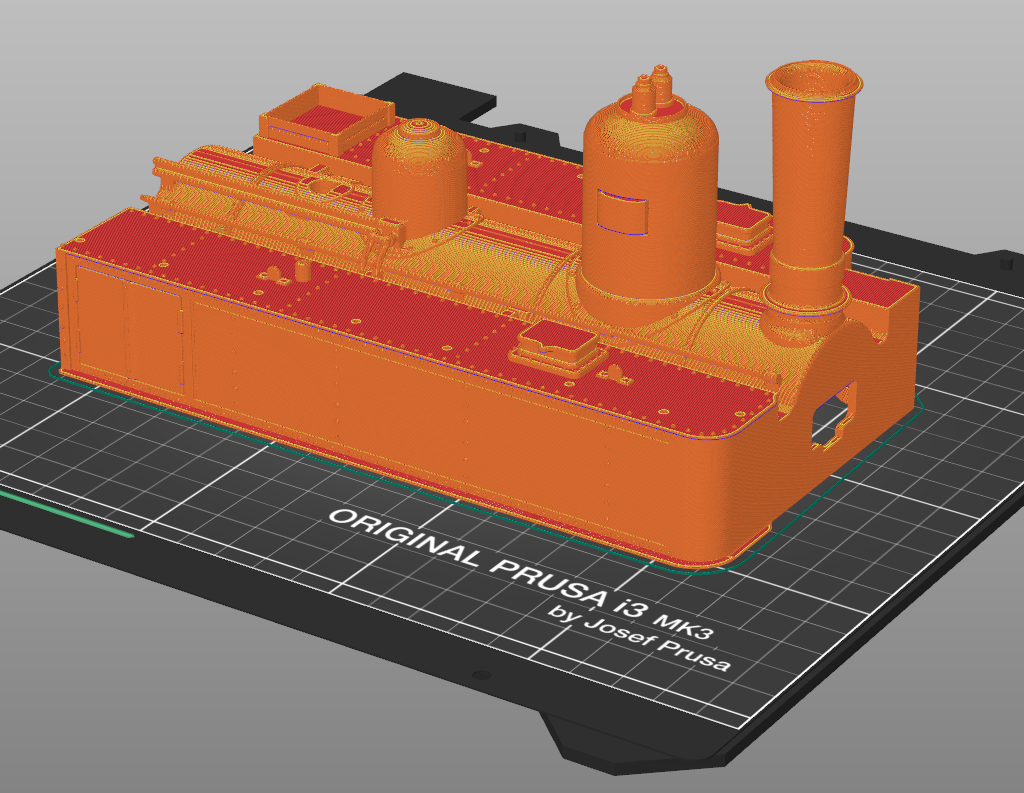
MAIN_BODY_PART.stl
I designed this part specifically so it can be printed without any supports, and it worked out perfectly. You don’t need to worry about leaving the internal cavity empty — no supports needed for this piece at all. ;)
add 4mm inner brim
⬆⬆These were just a few parts where it's essential to follow specific settings in your slicer to maintain their functionality or perfect appearance. For the rest of the parts, feel free to print them as needed. ;)
parts ventil_gears.stl, connector.stl, wheels.stl need to be checked and cleaned up first. There shouldn't be any leftover plastic or strings in the holes from printing, or any other junk. These parts are designed with tight tolerances, so make sure everything’s cleaned up before assembly. If you do it right, you might not even need glue.
✰✮✰✮✰✮✰✮✰✮✰✮✰✮✰✮✰✮✰✮✰✮✰✮✰✮✰✮✰✮✰✮✰✮✰✮✰✮✰✮✰✮✰✮✰✮✰✮
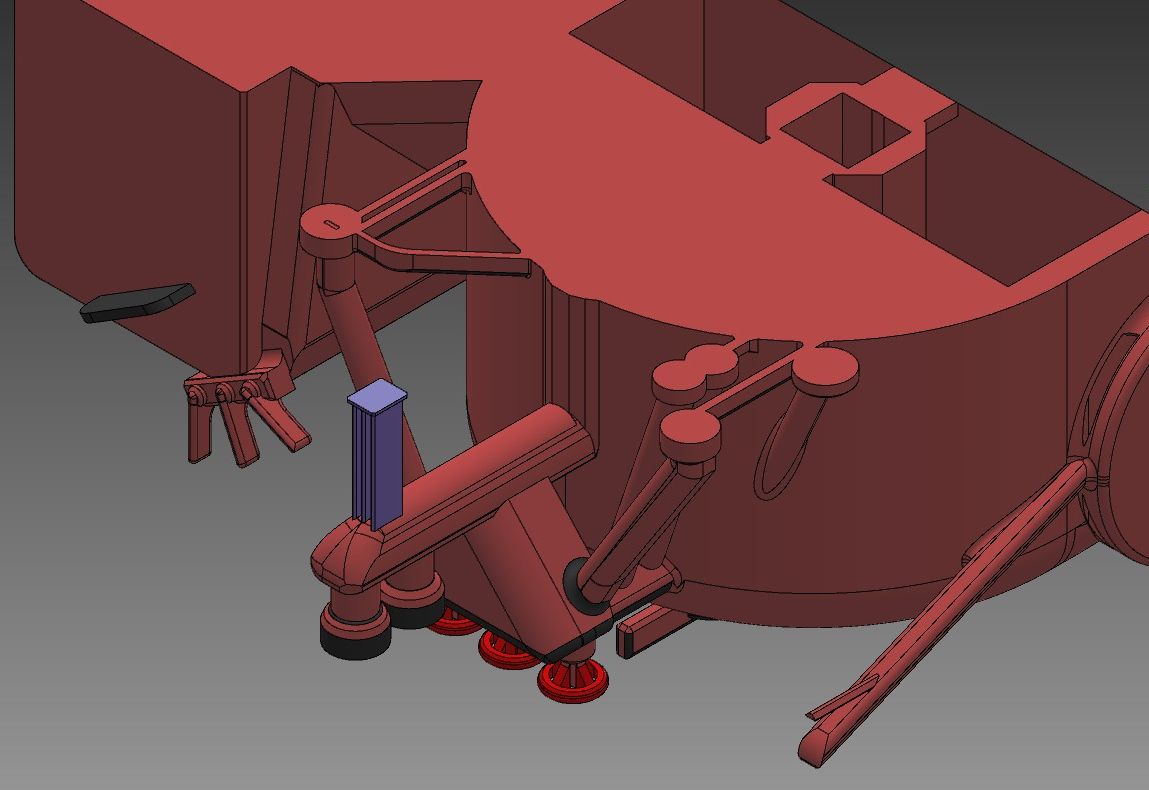
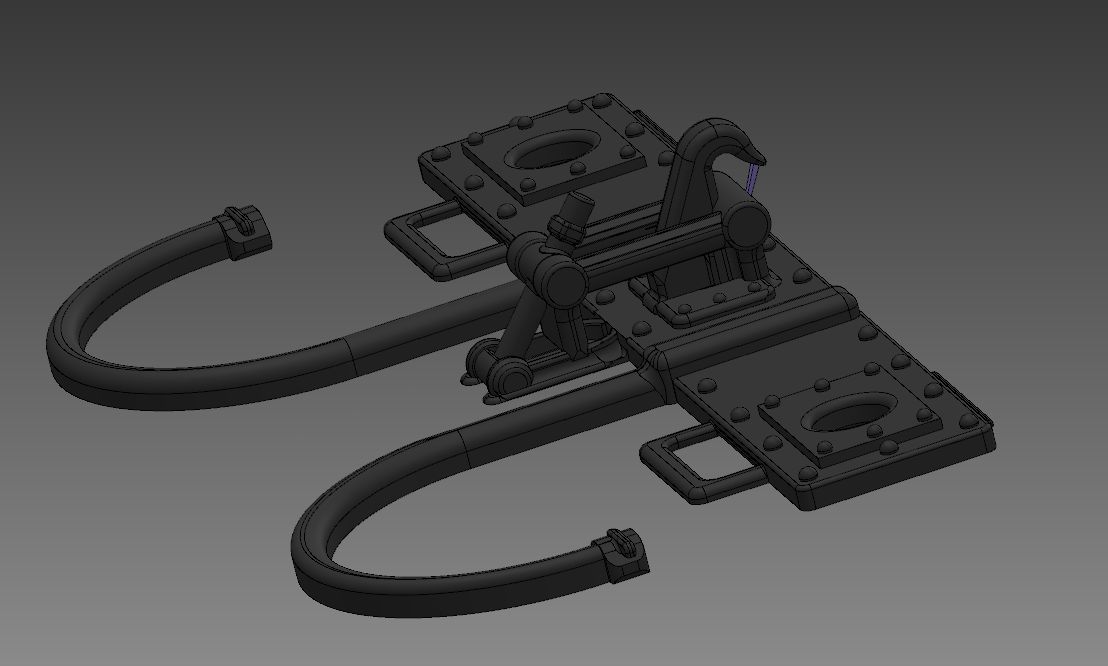
⬇⬇For these three parts, the purple section indicates support material that needs to be removed after printing.⬇⬇
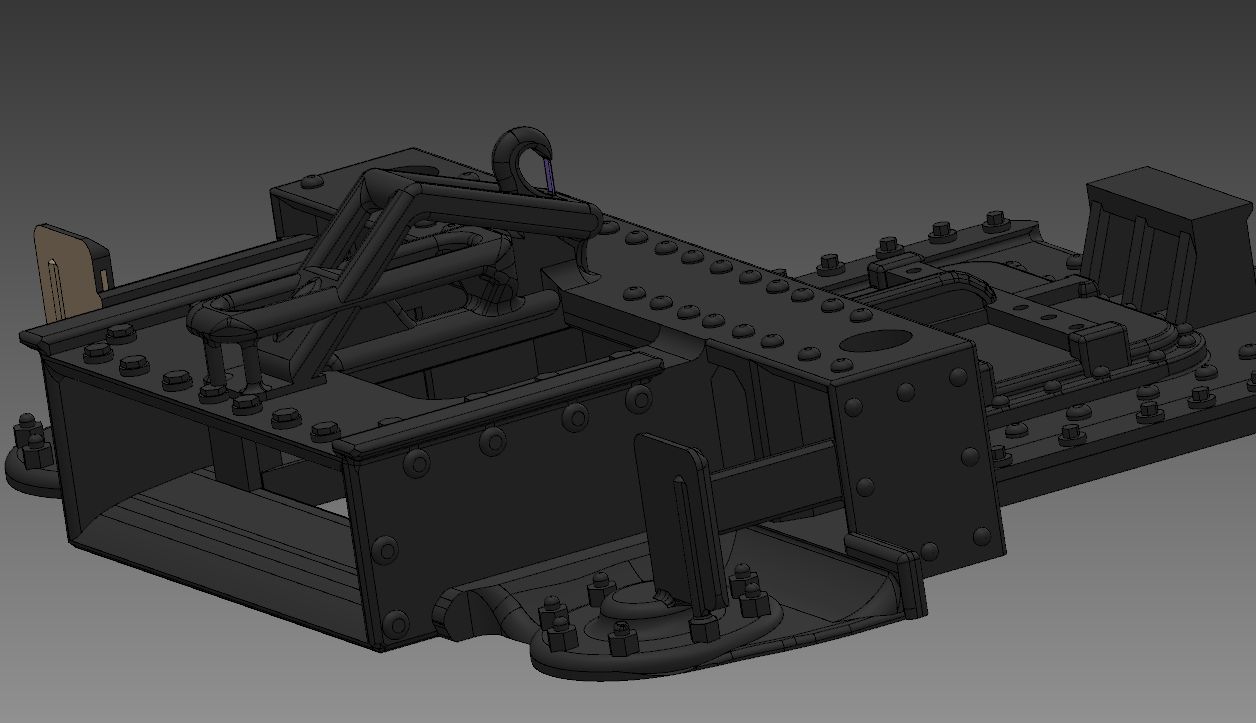
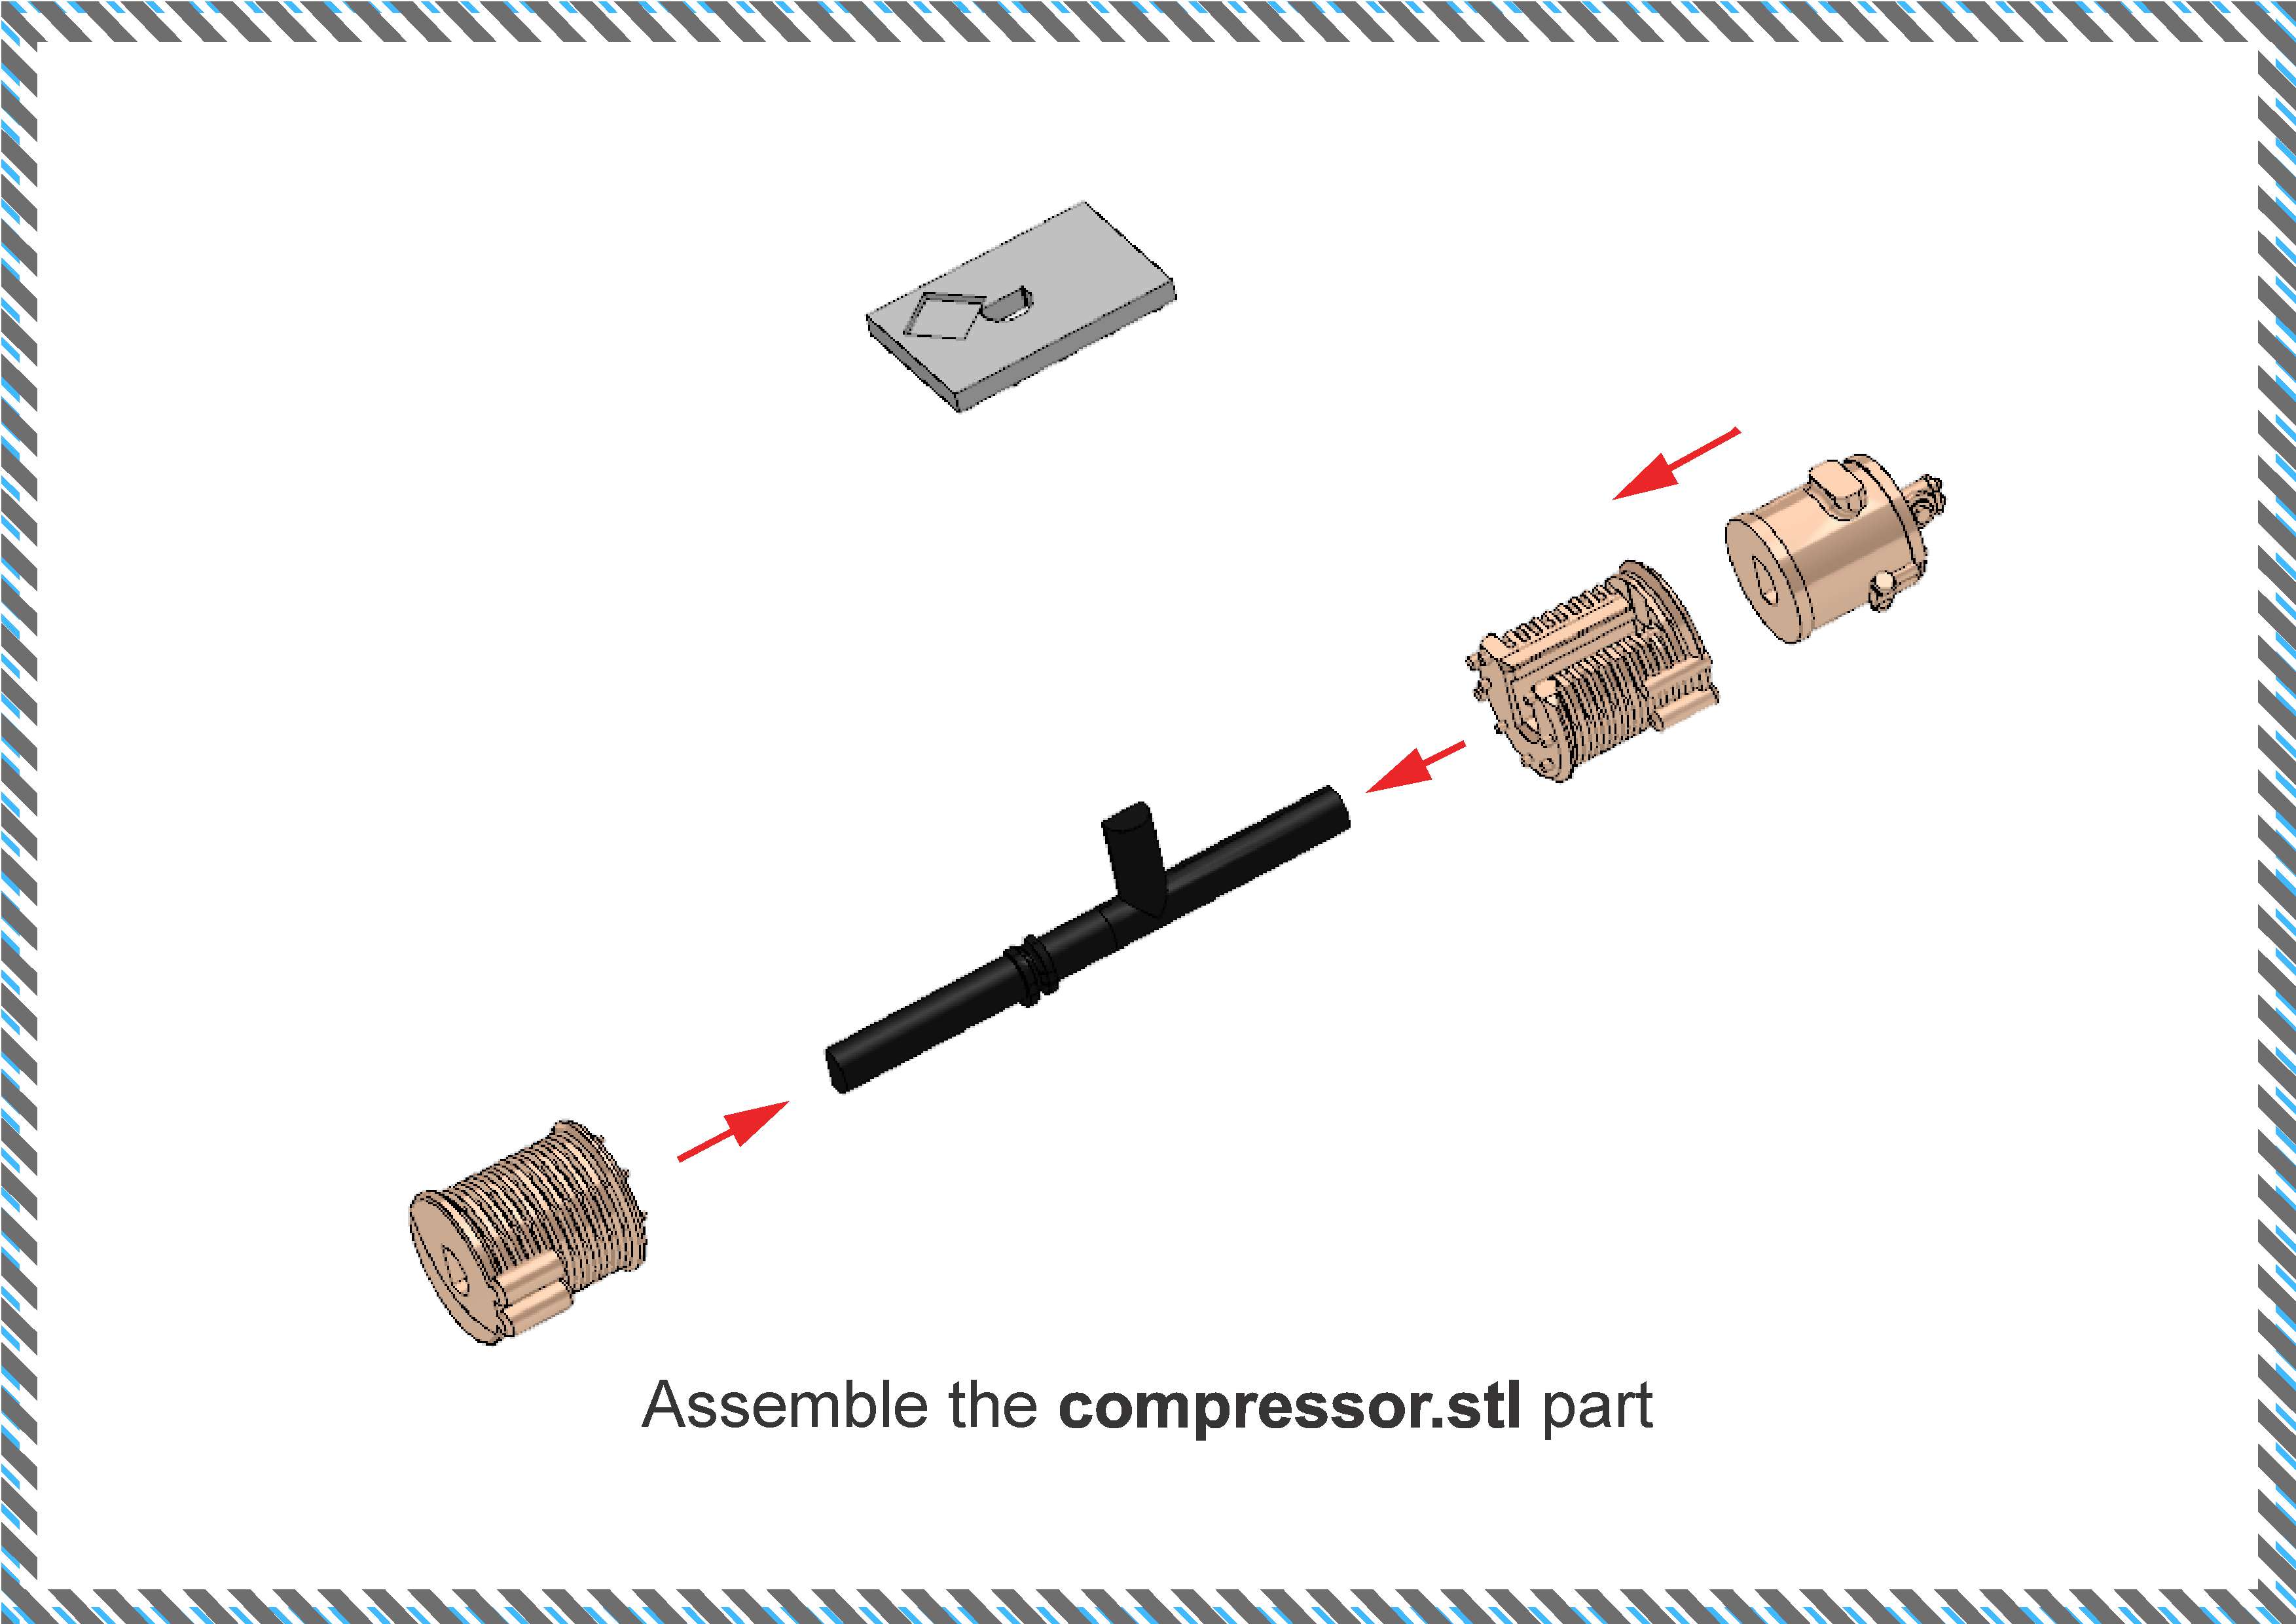
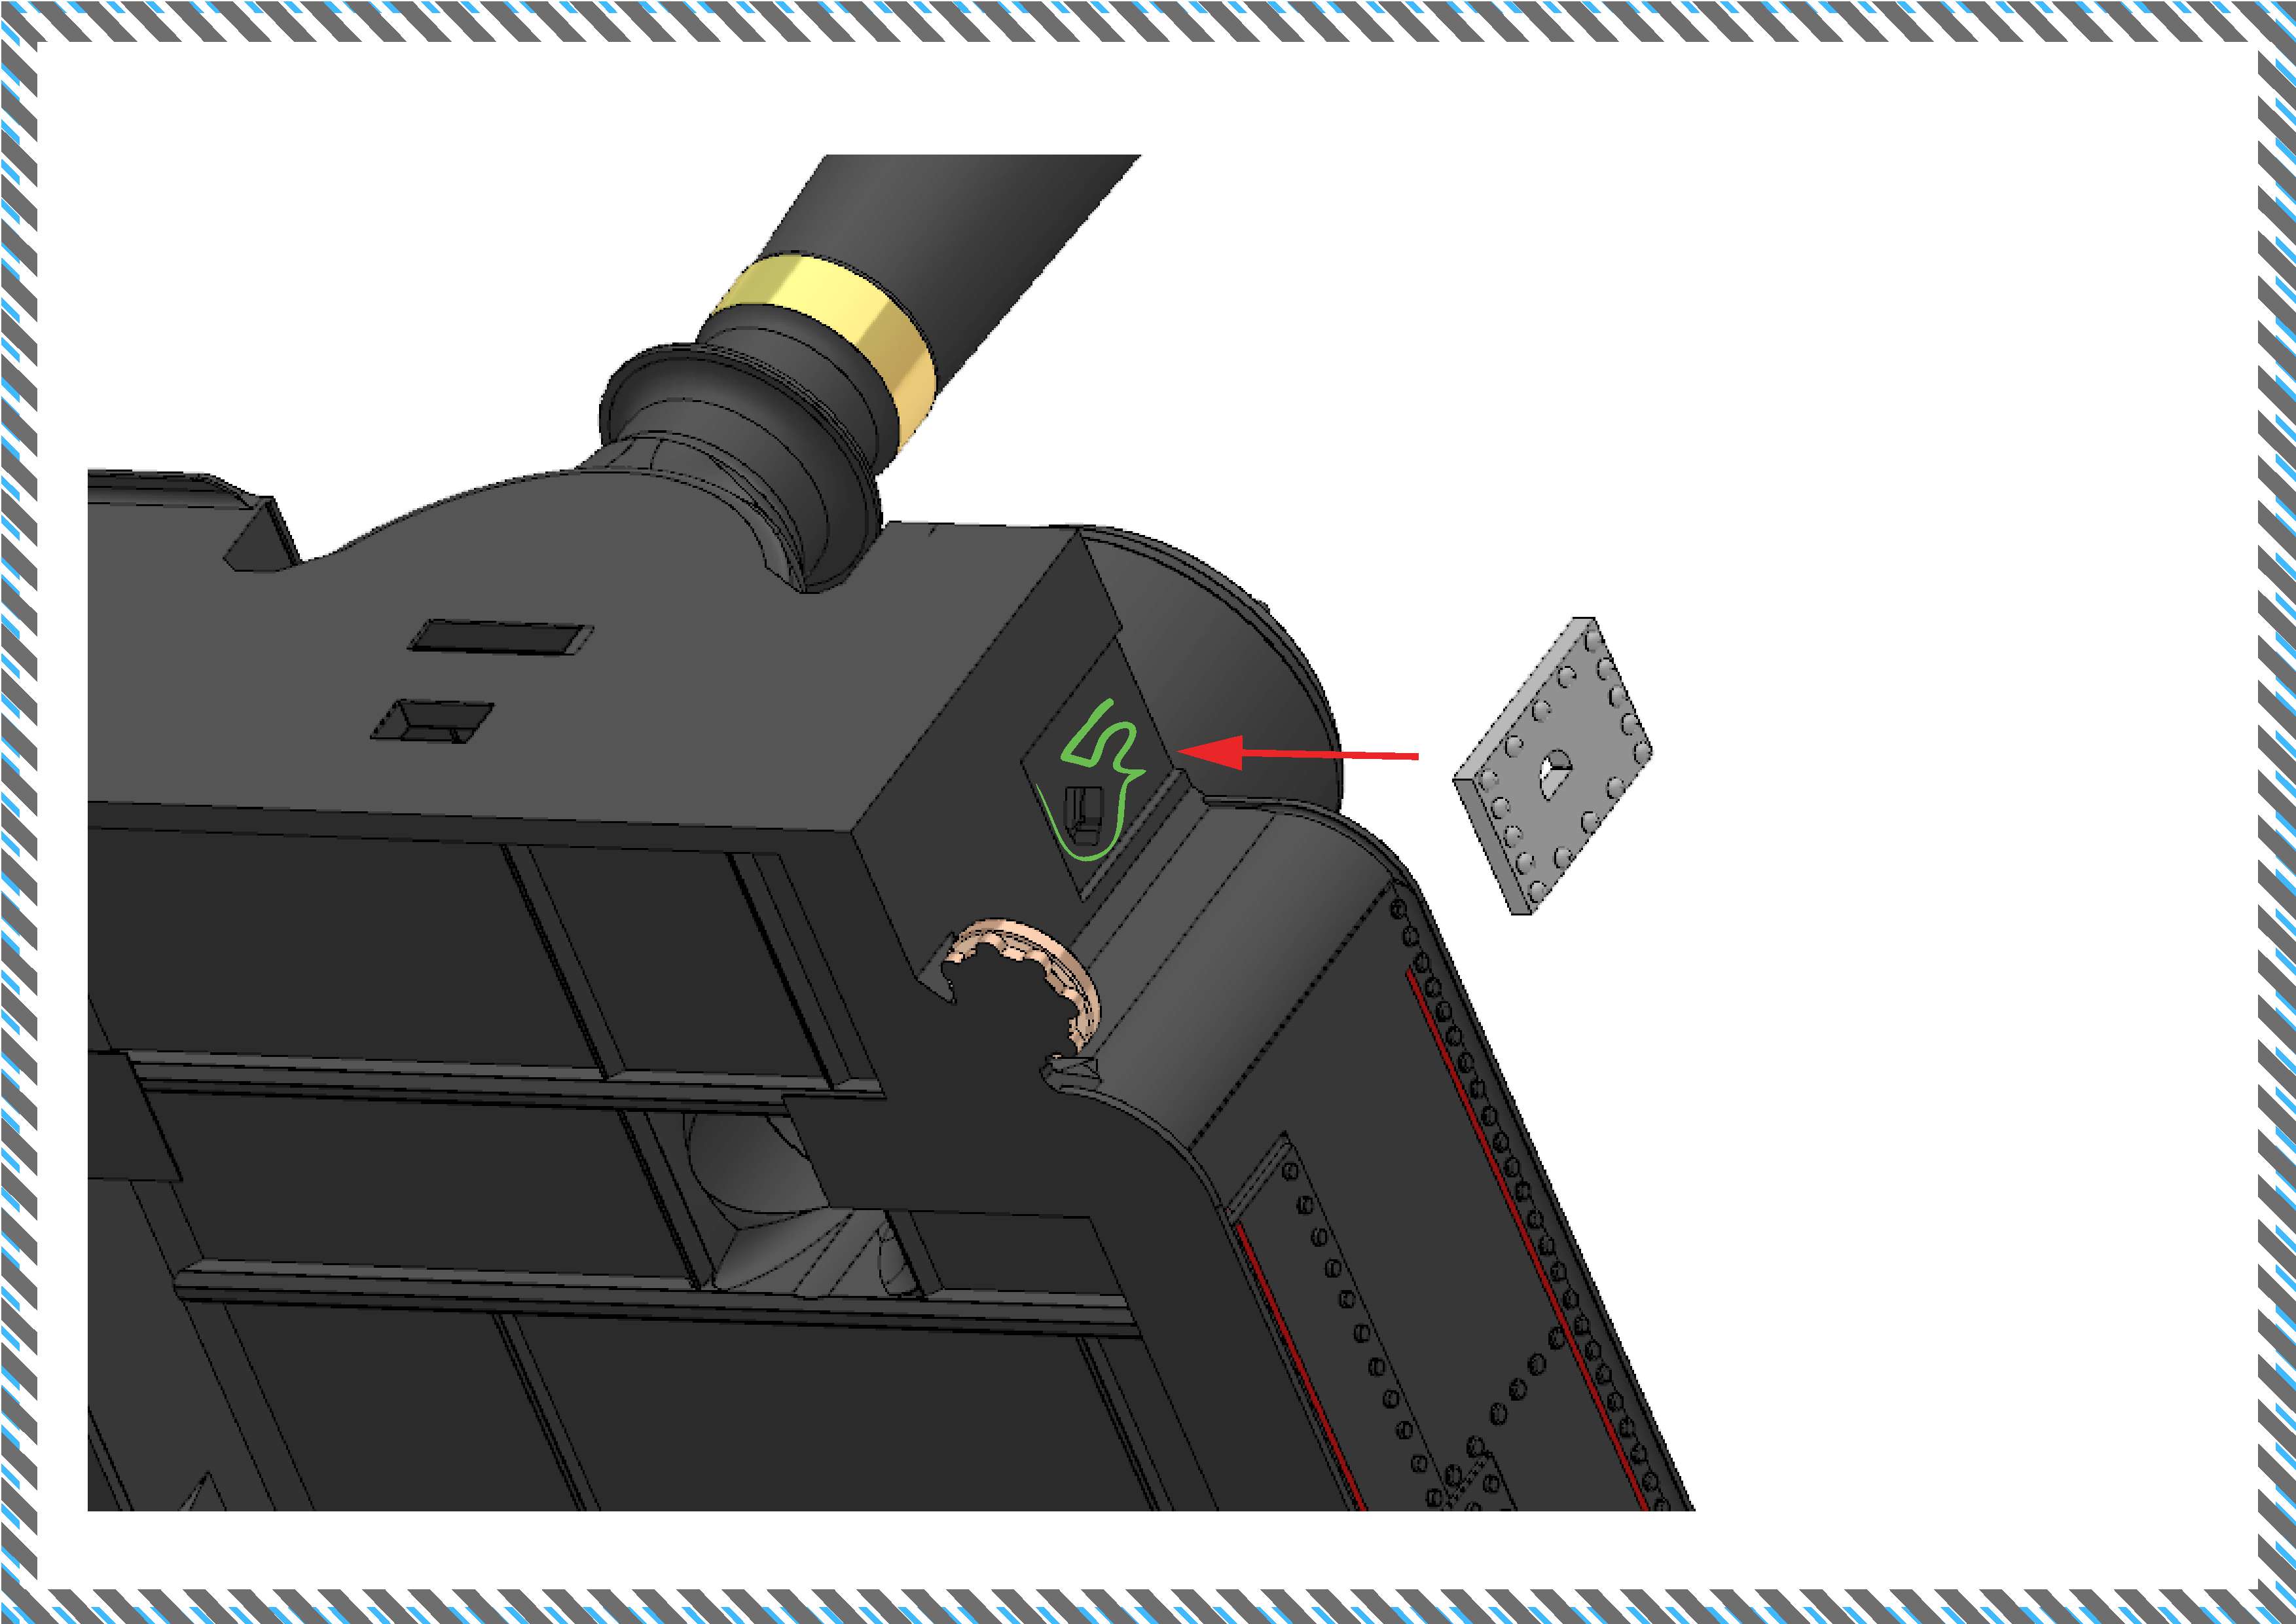
assembly guide:
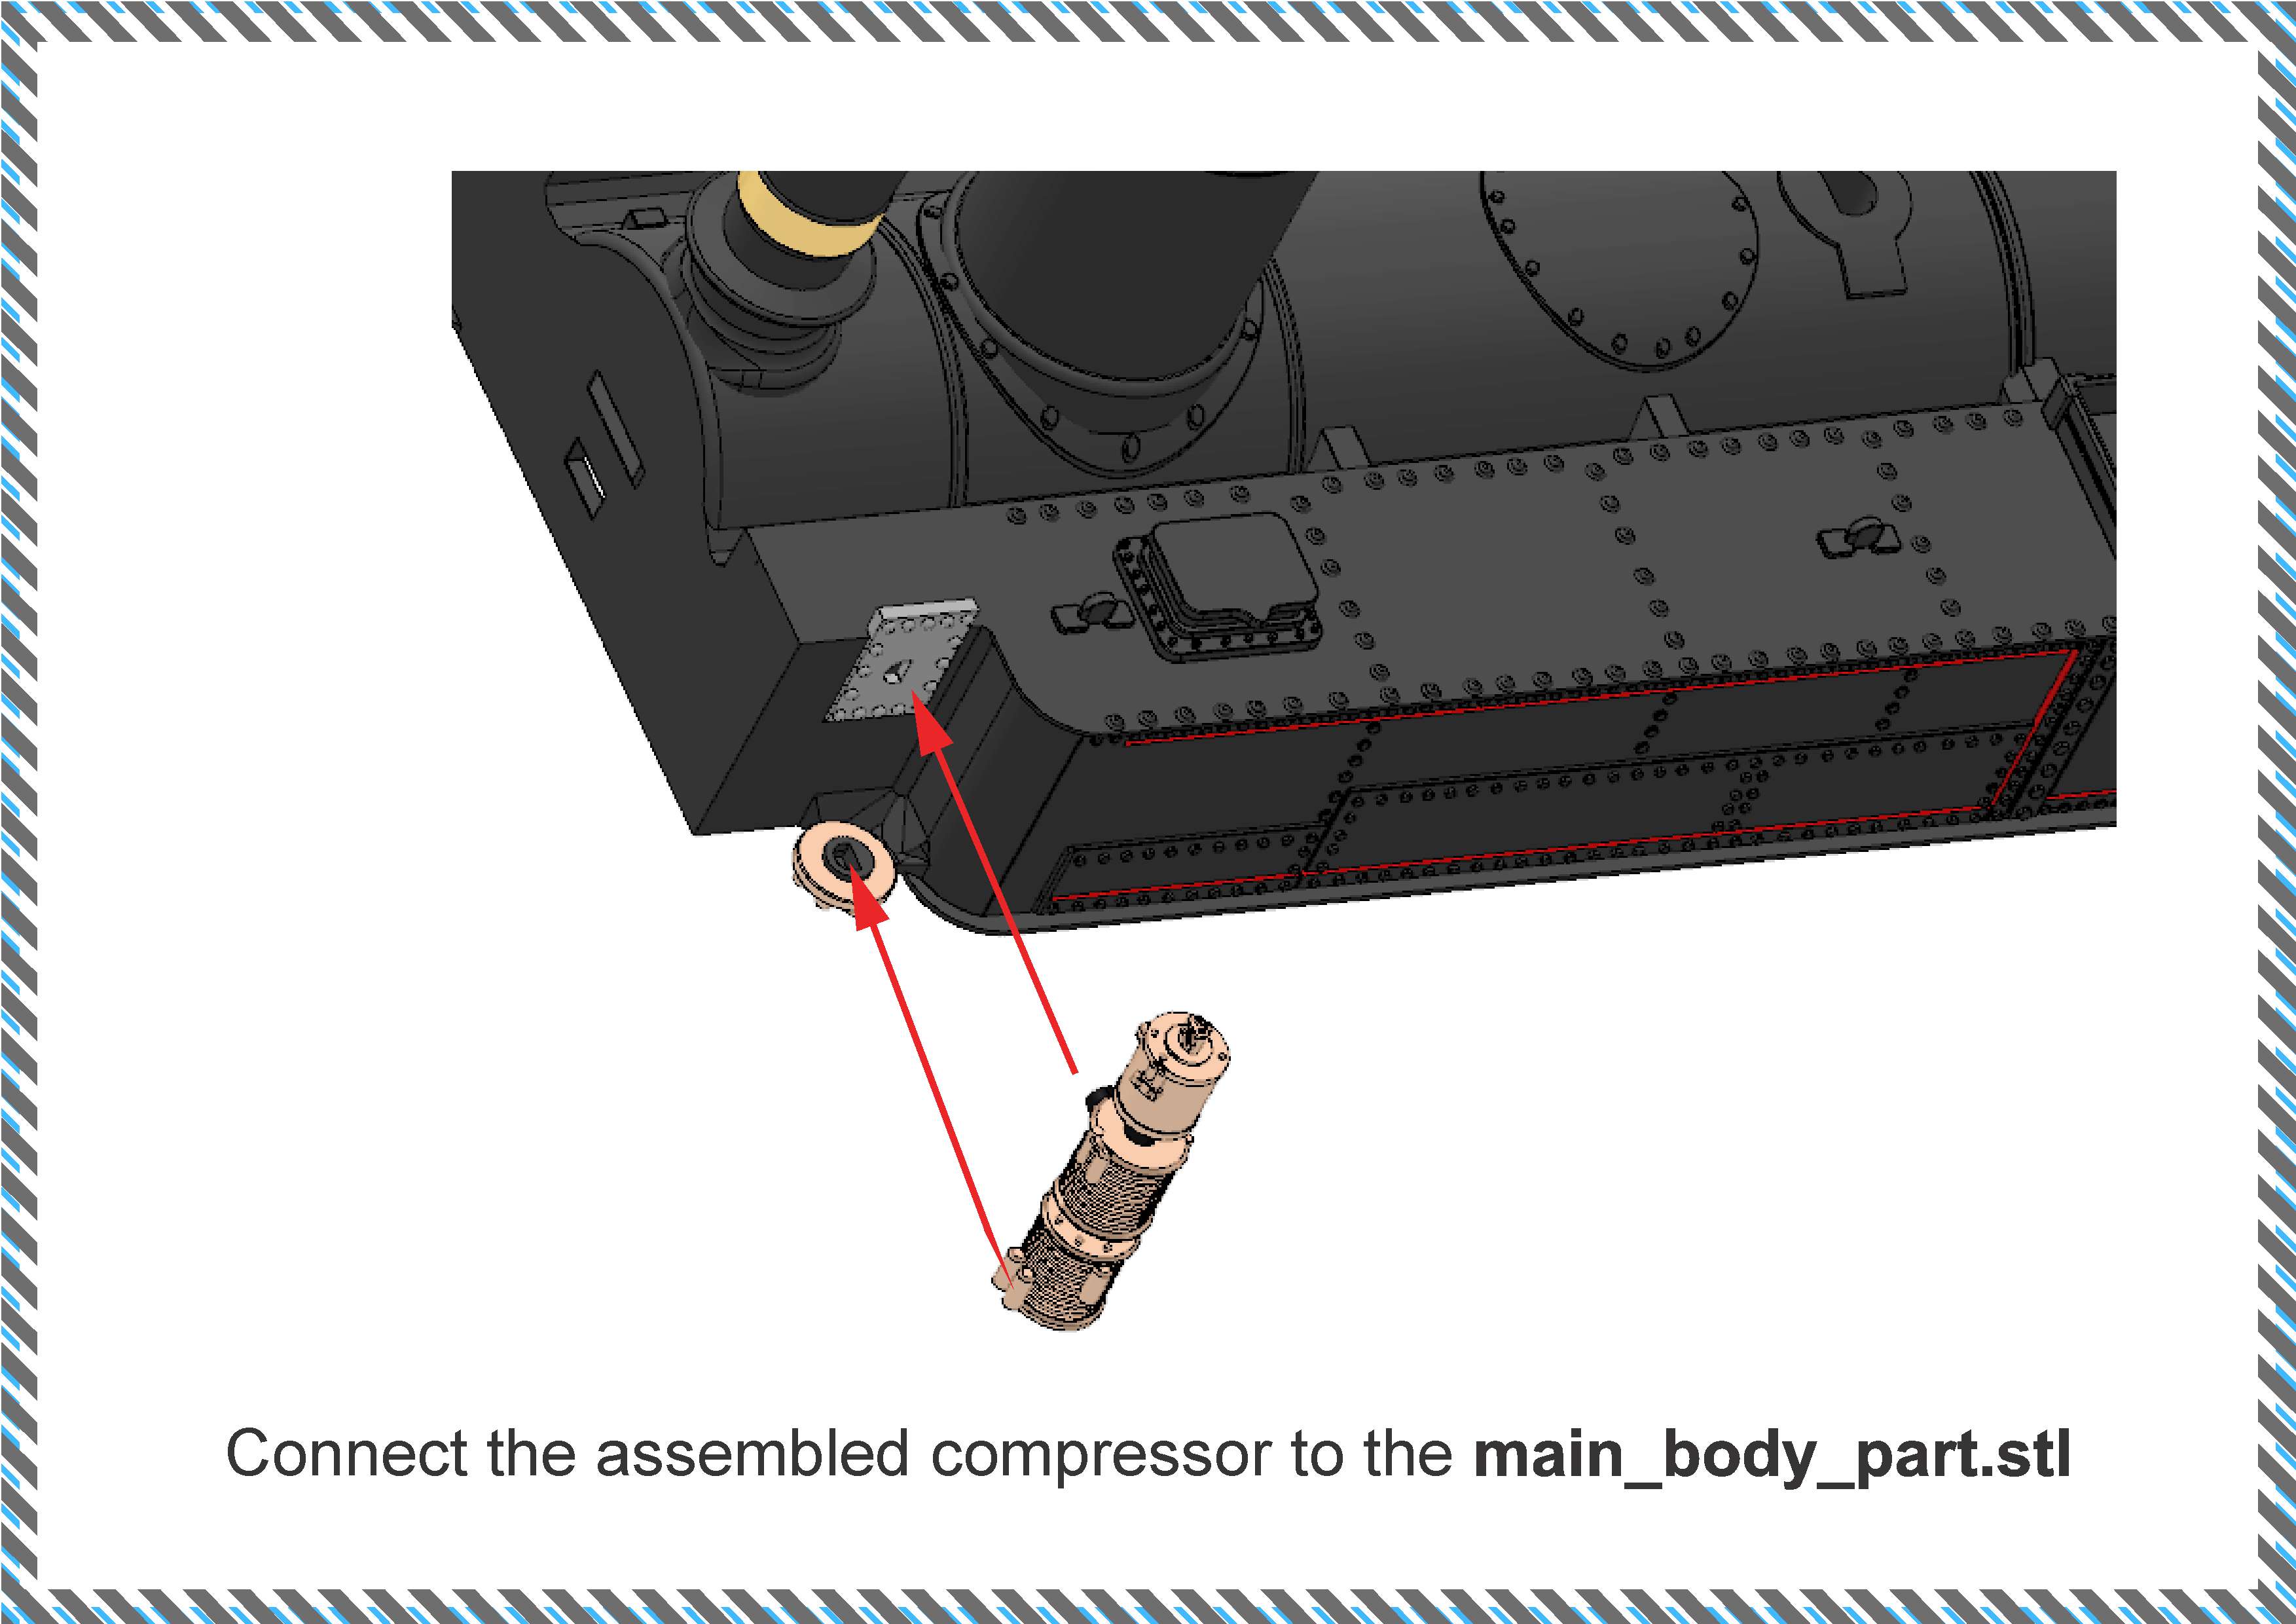
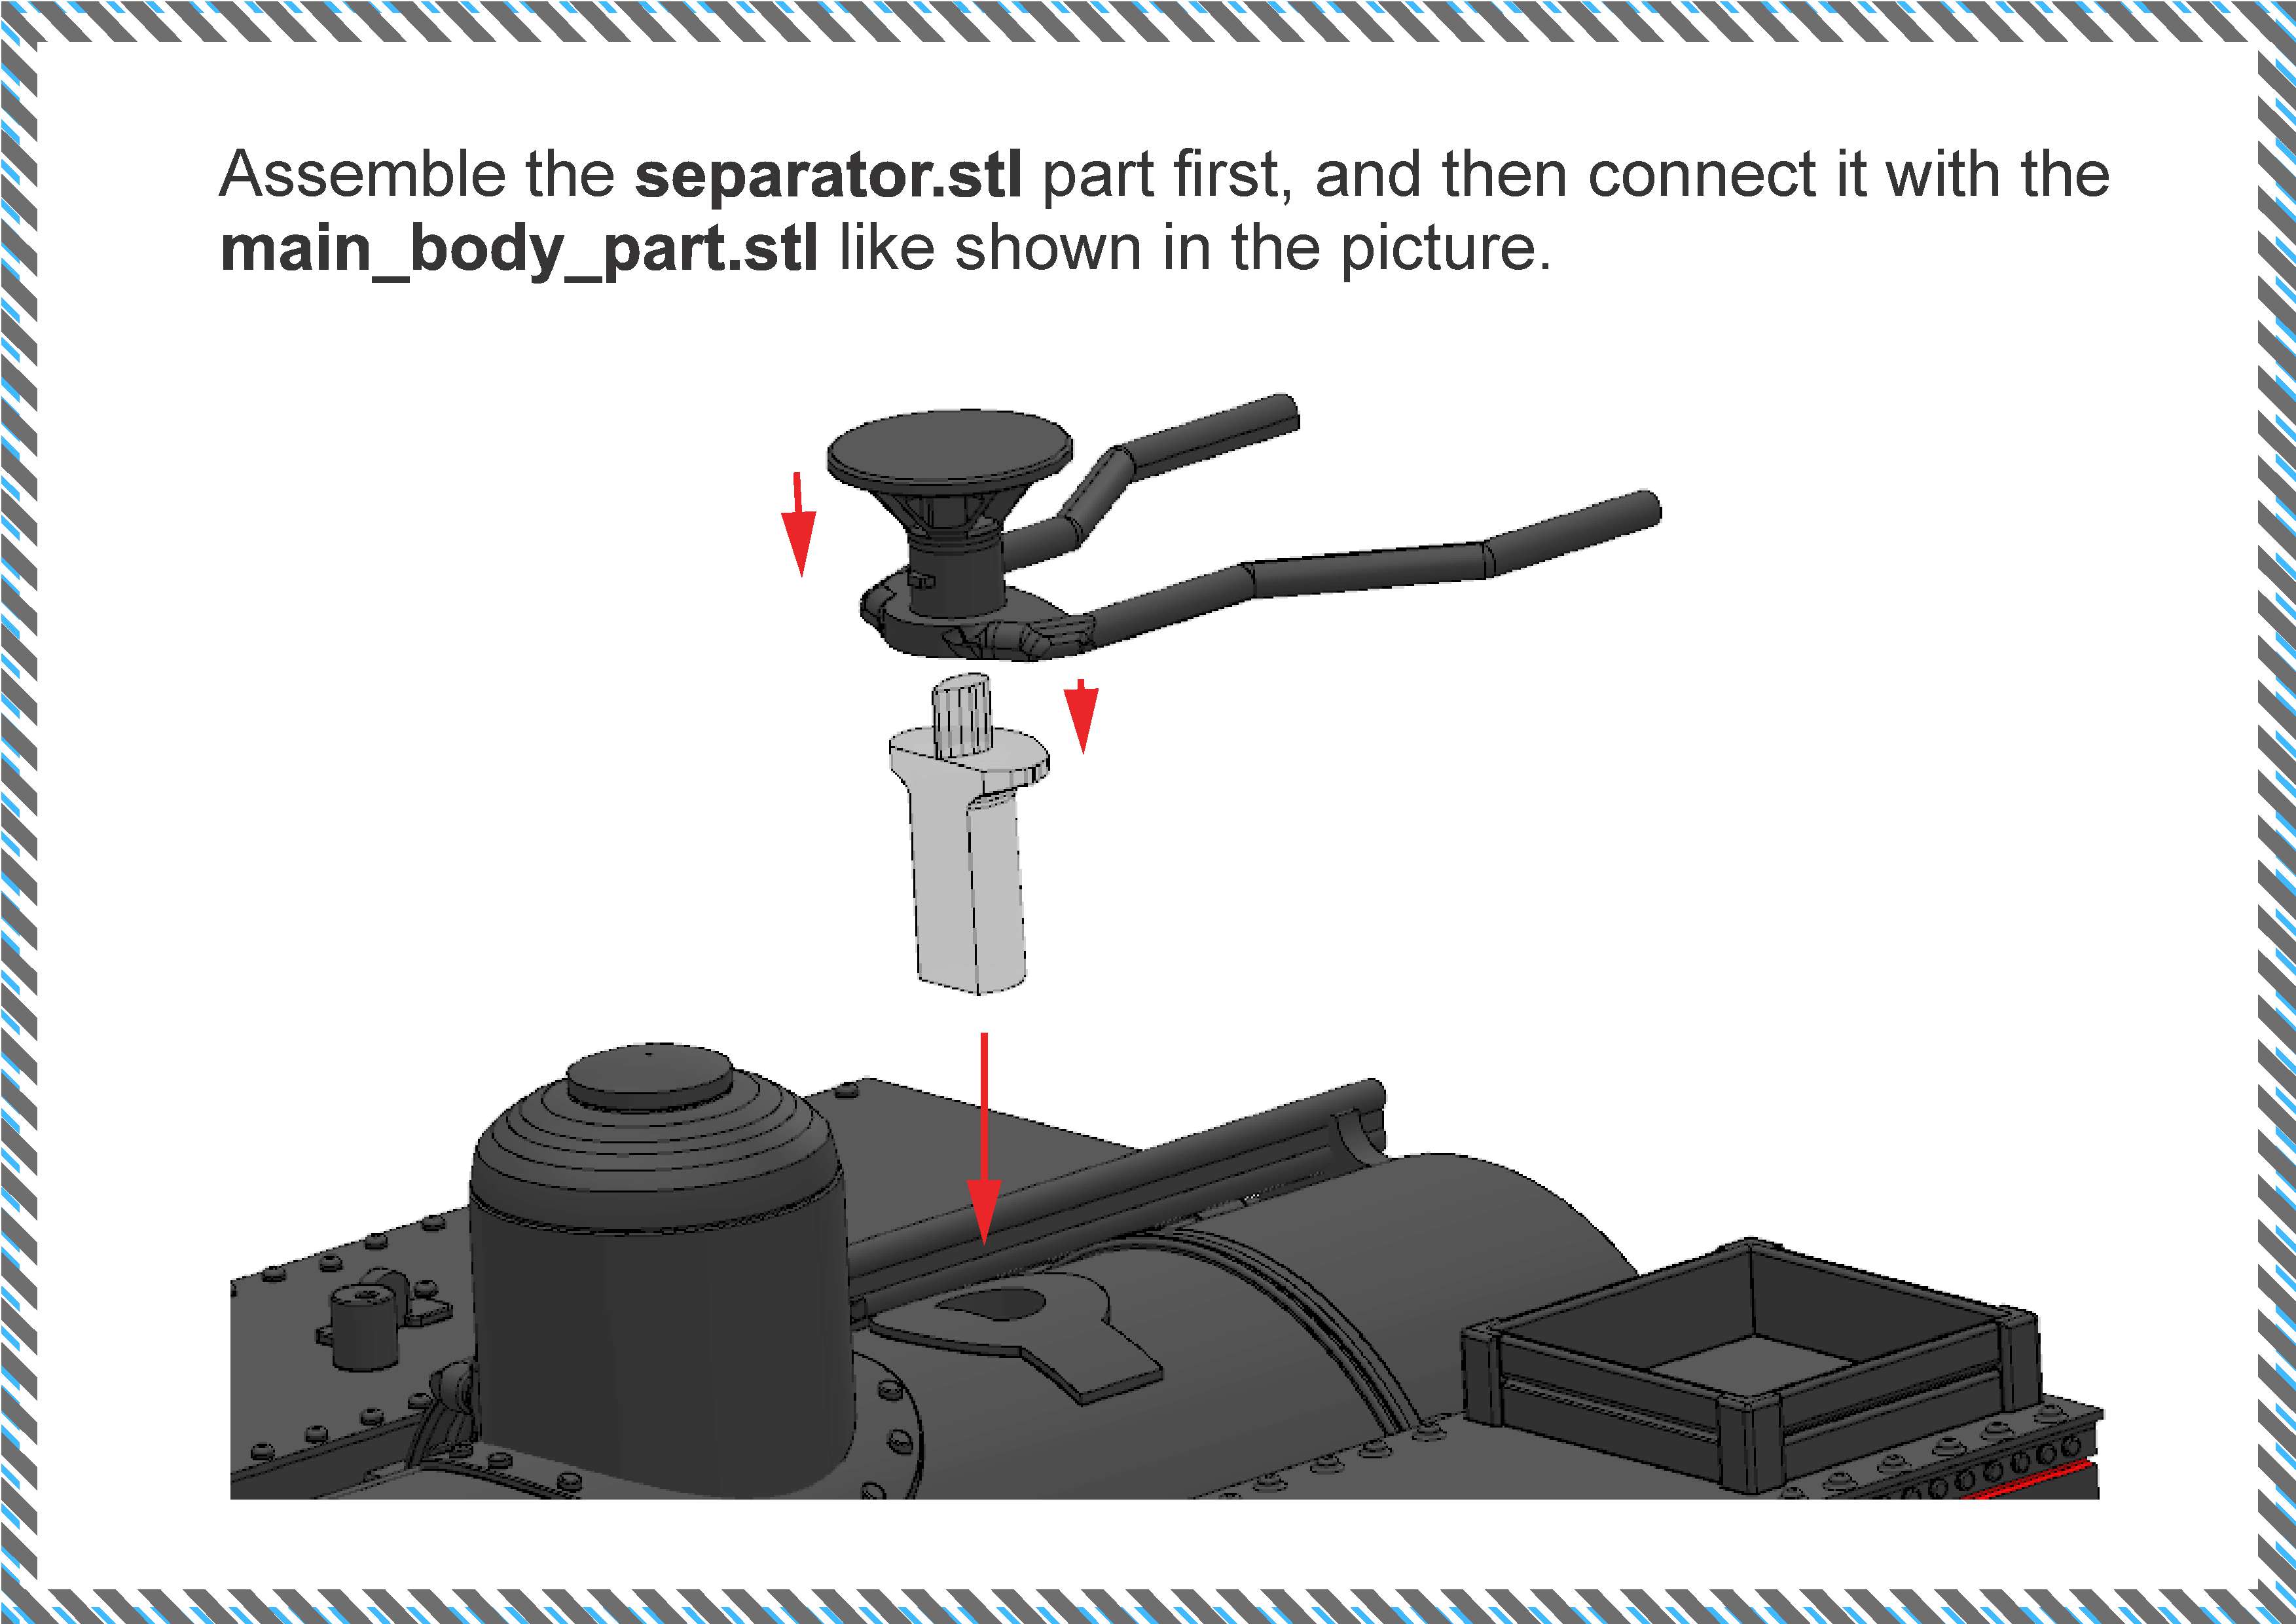
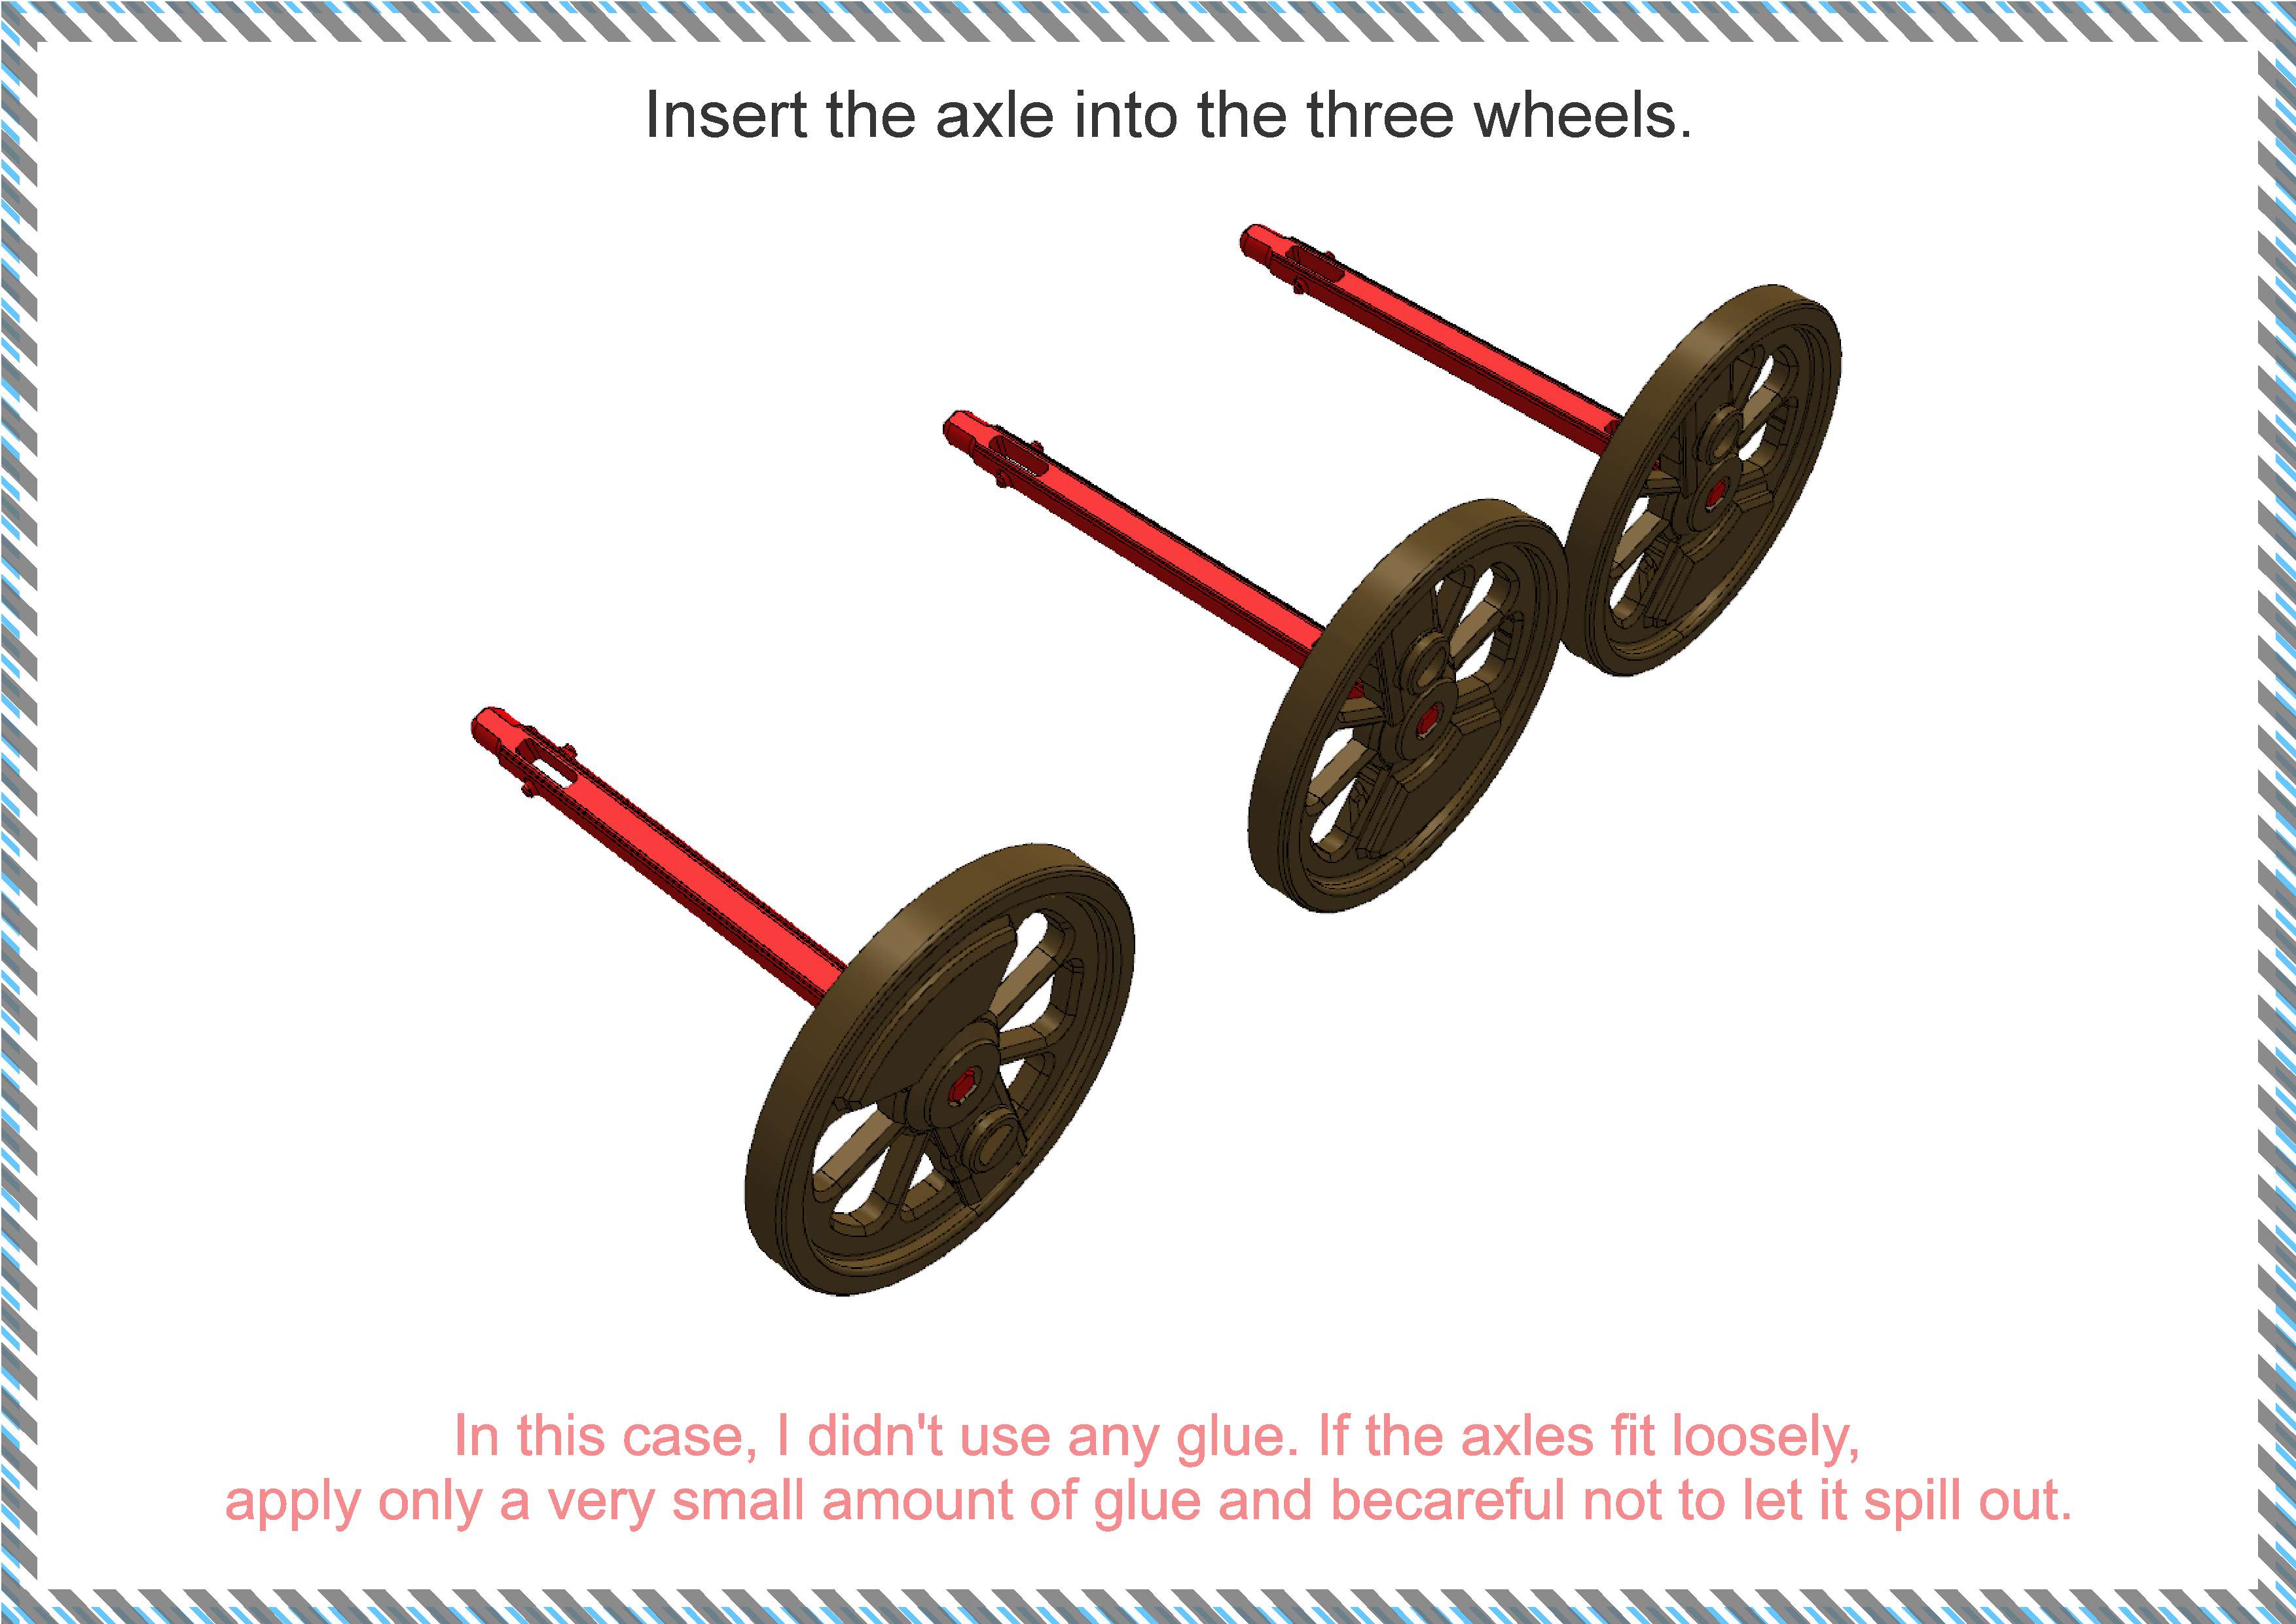
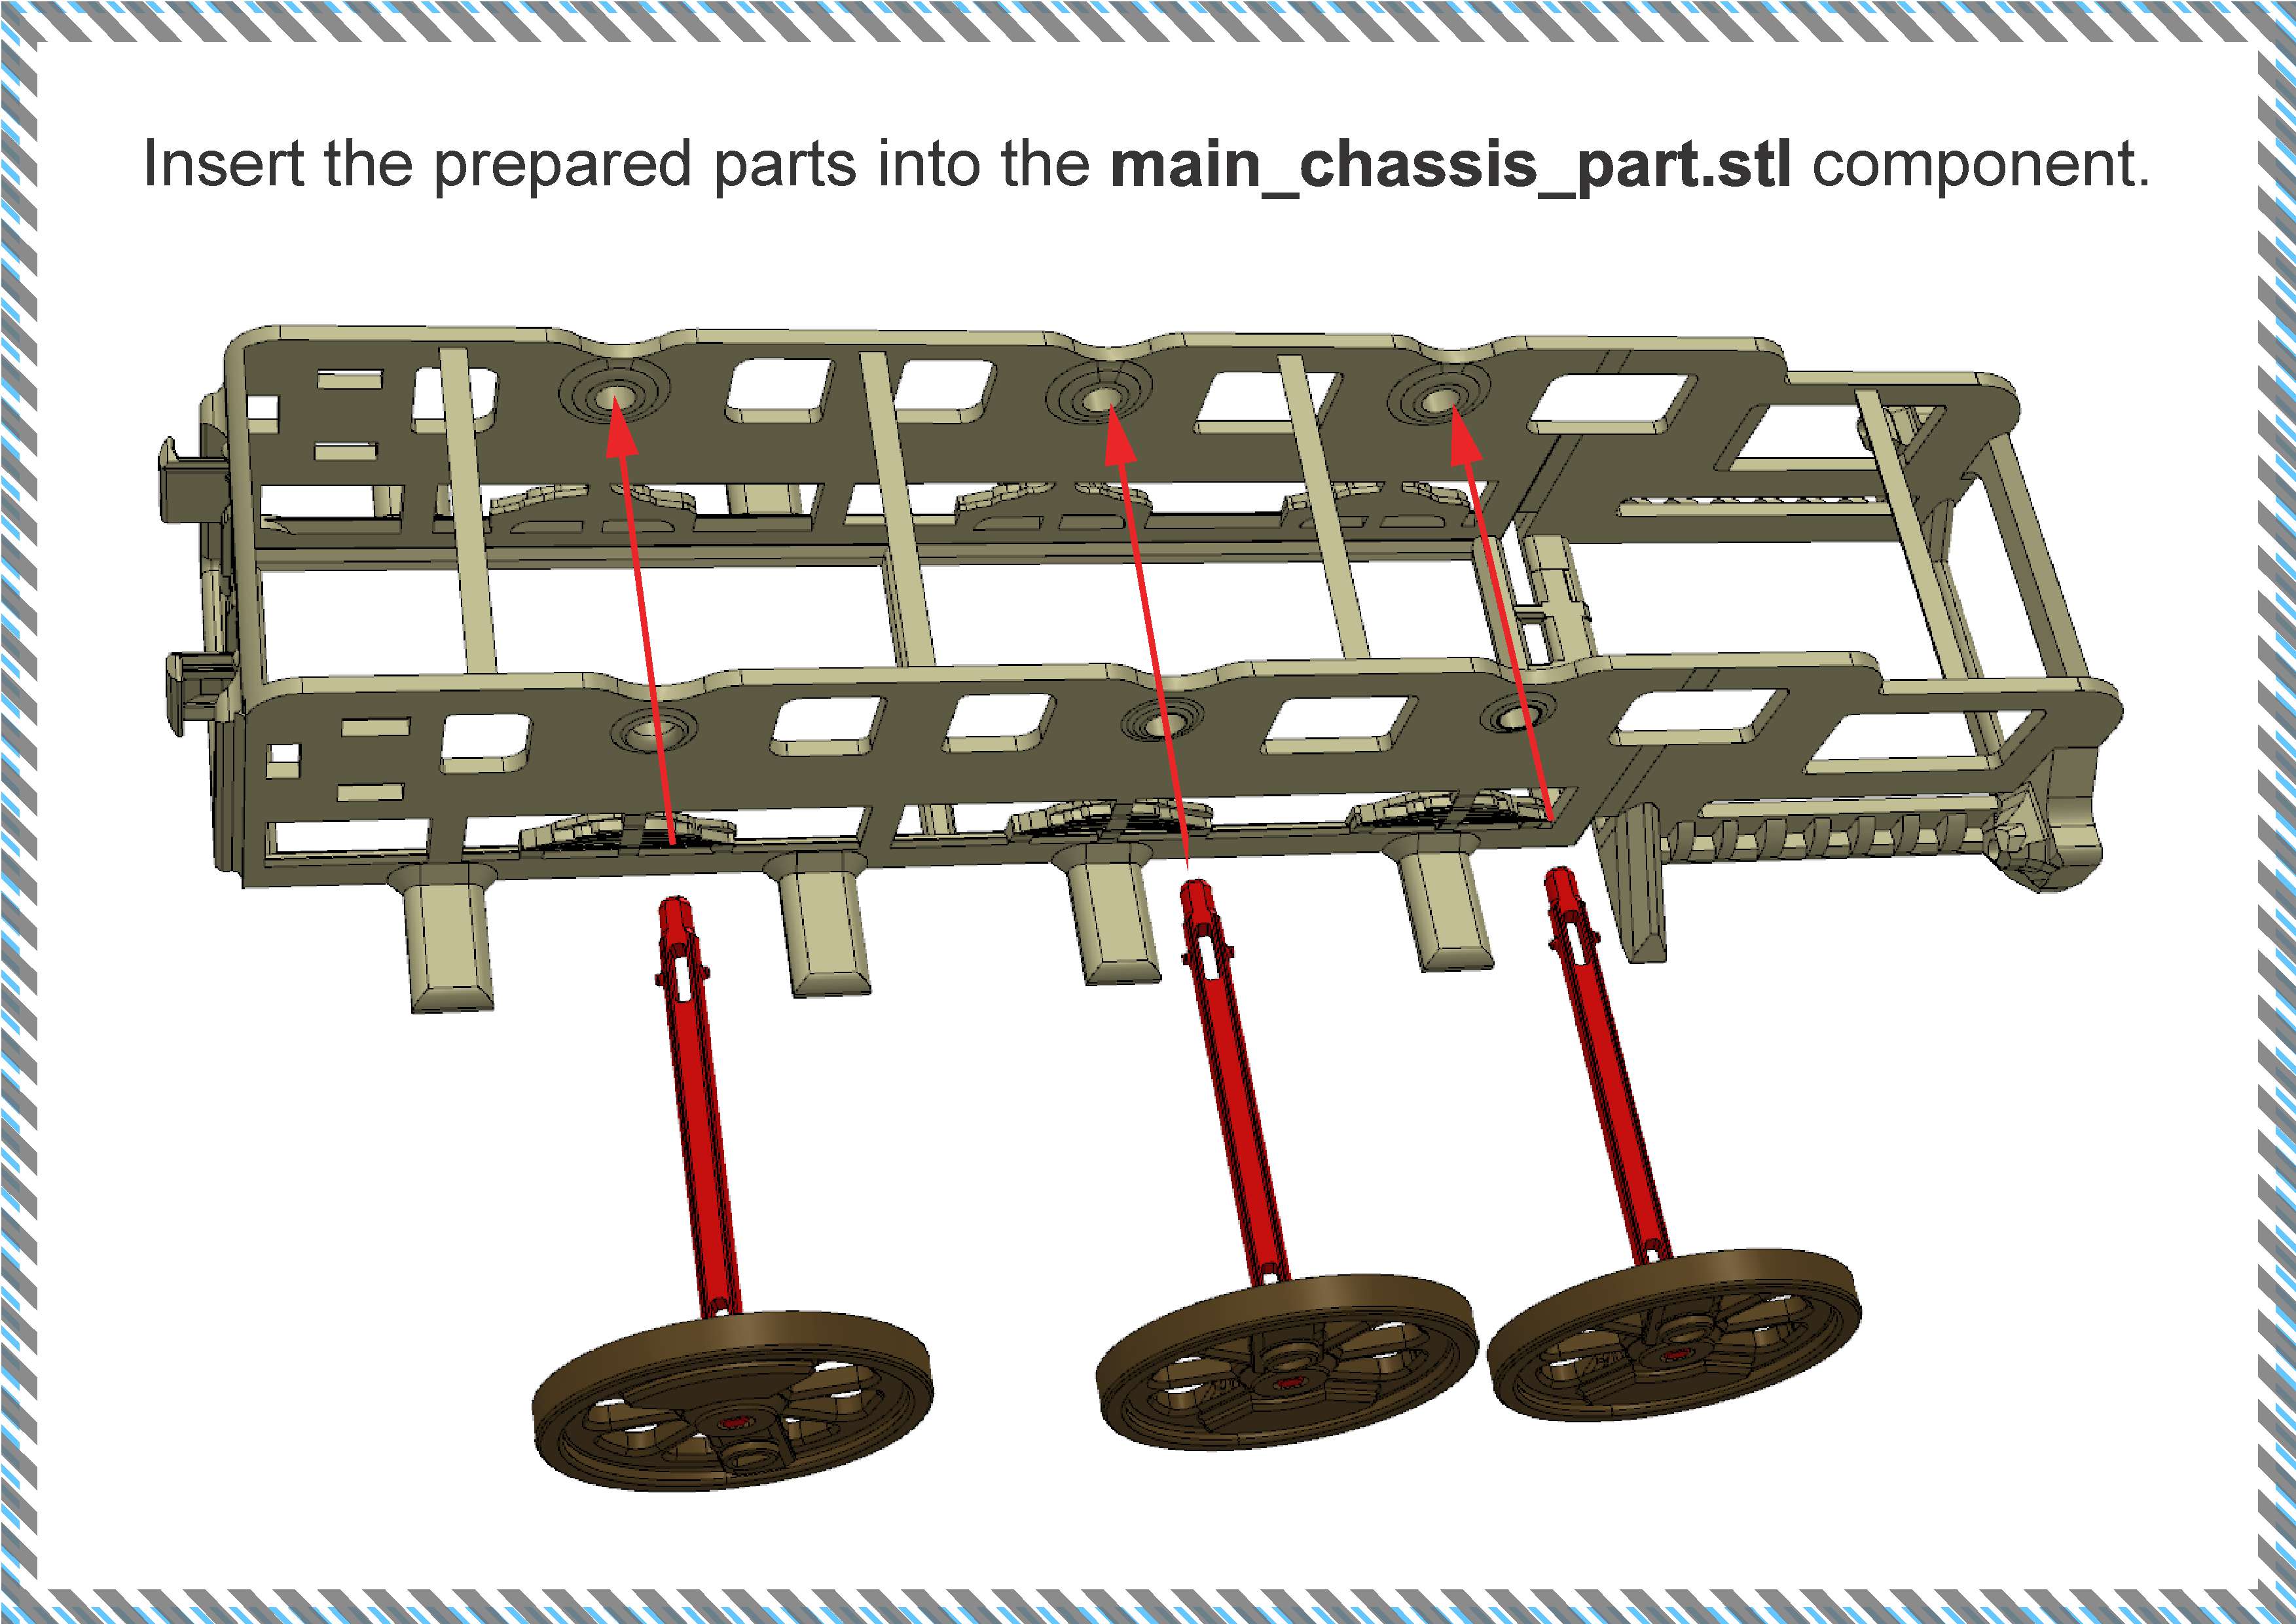
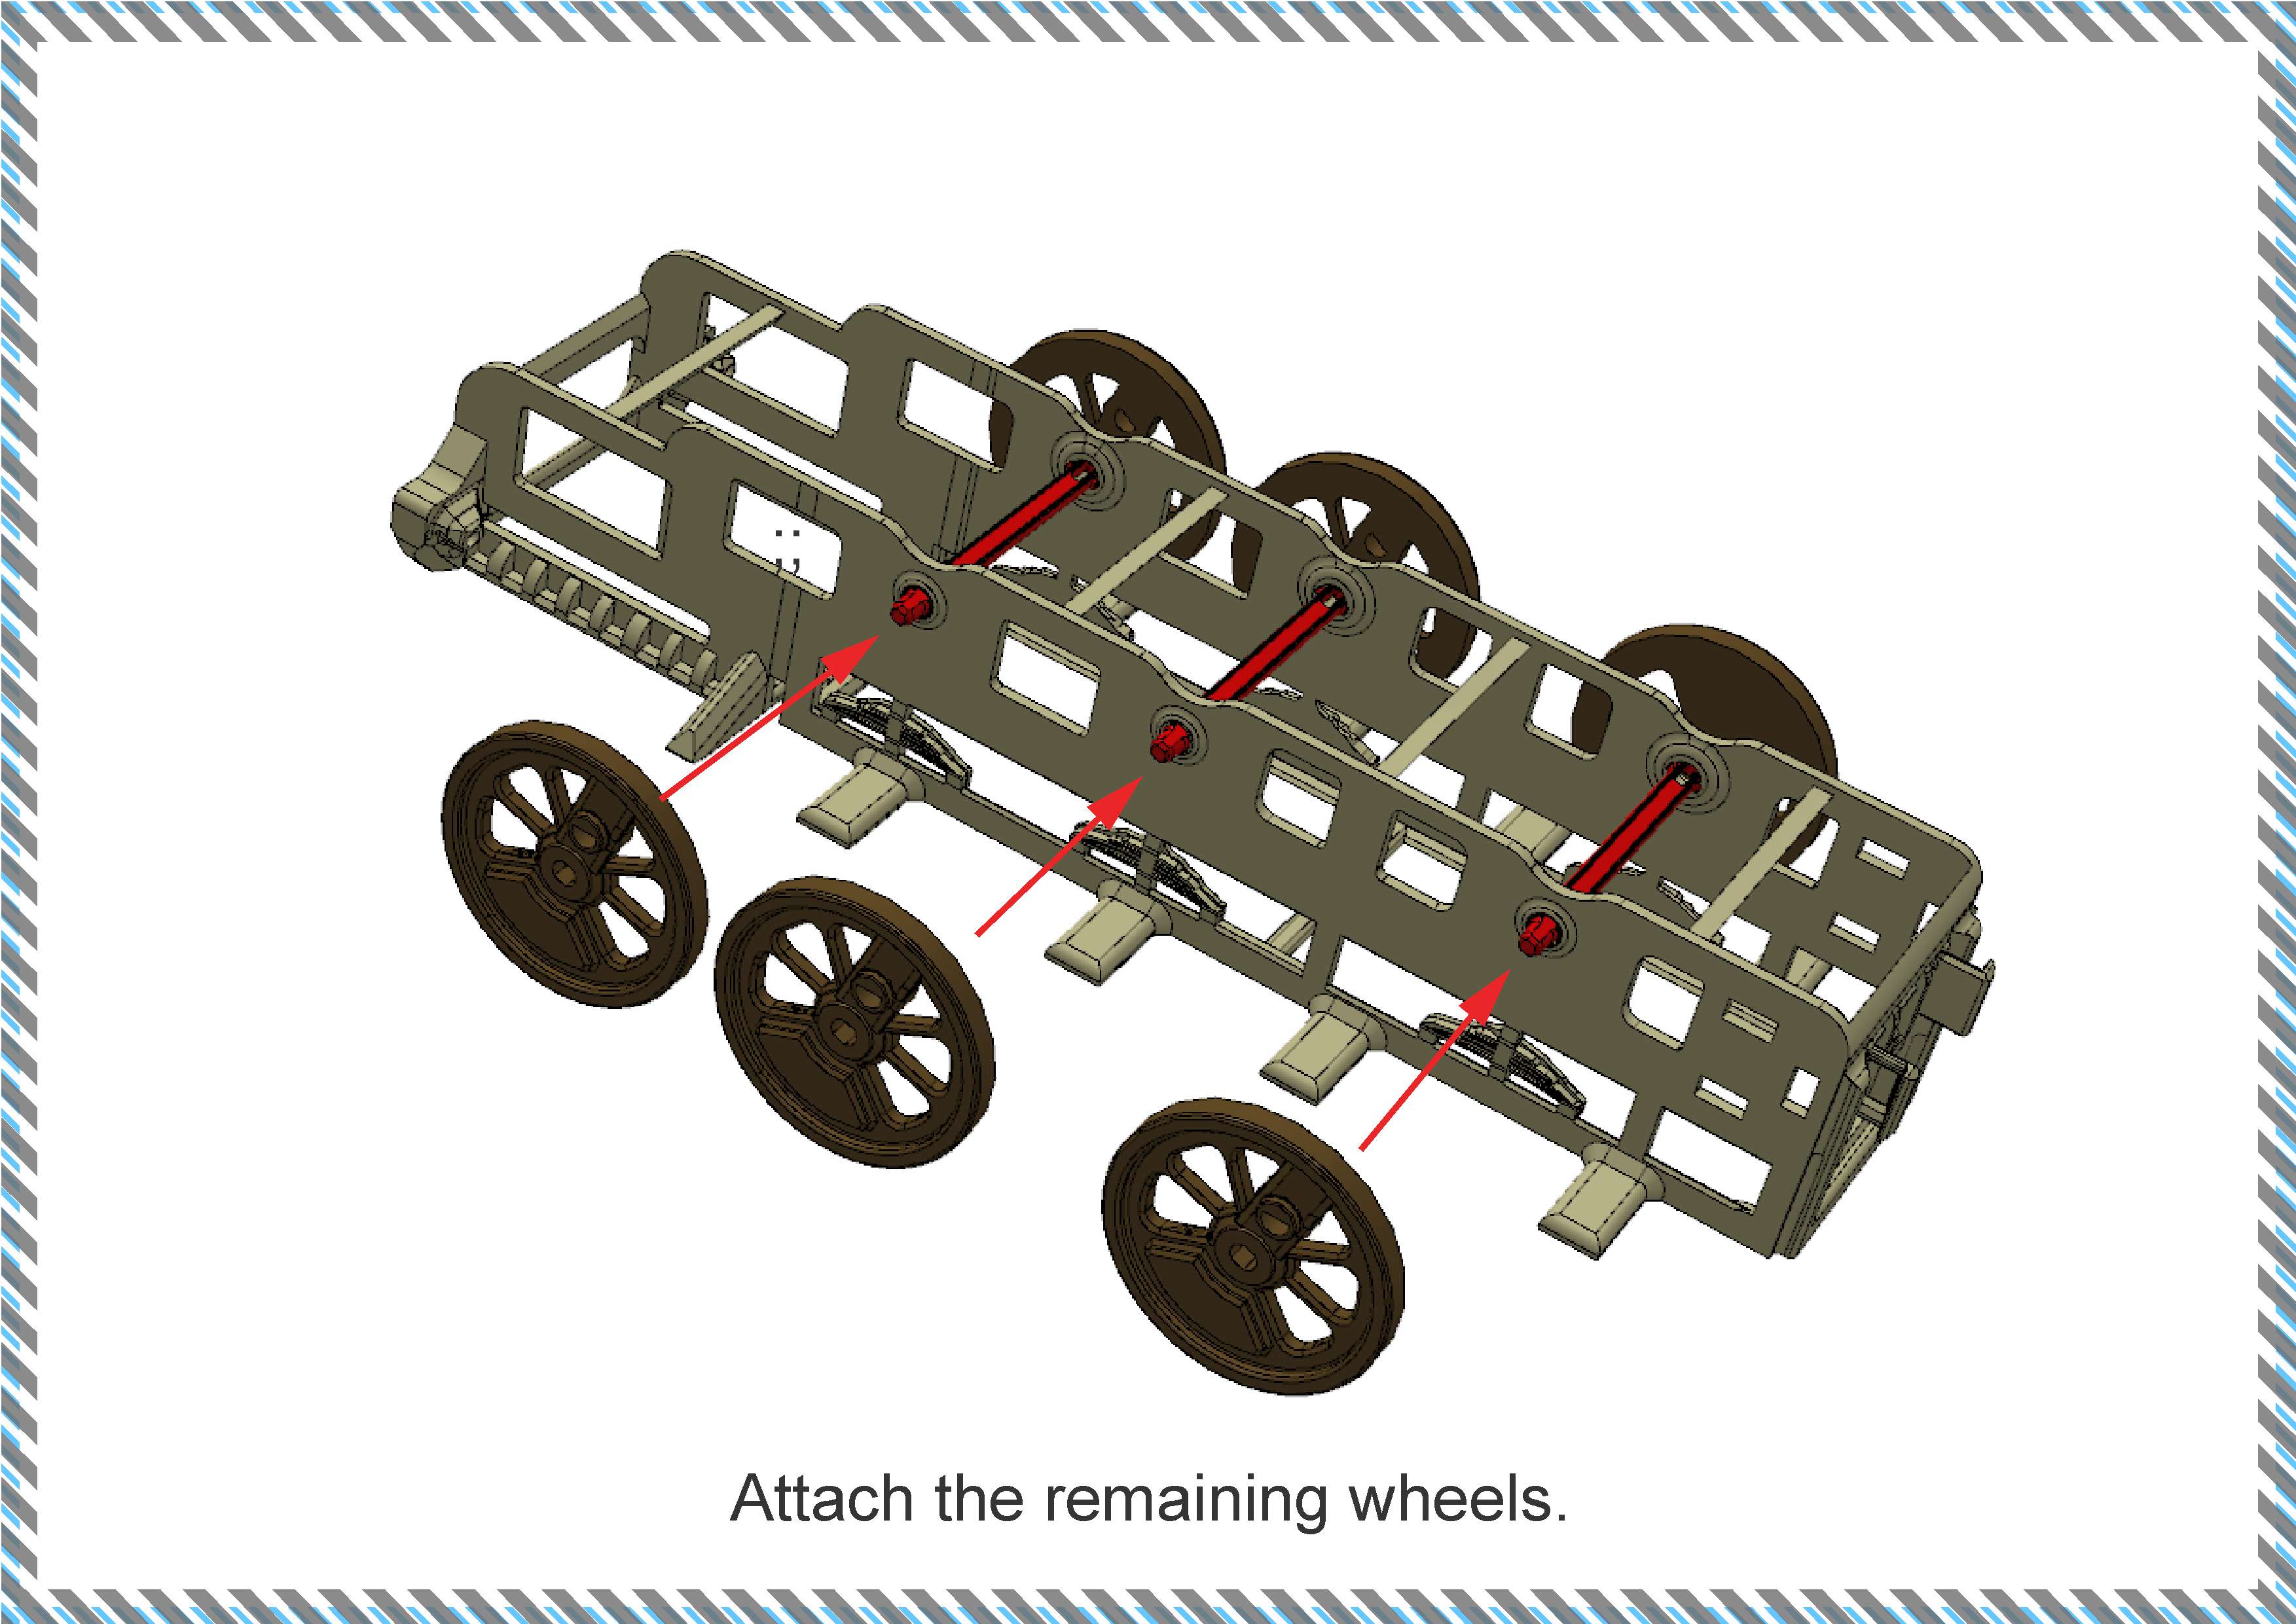
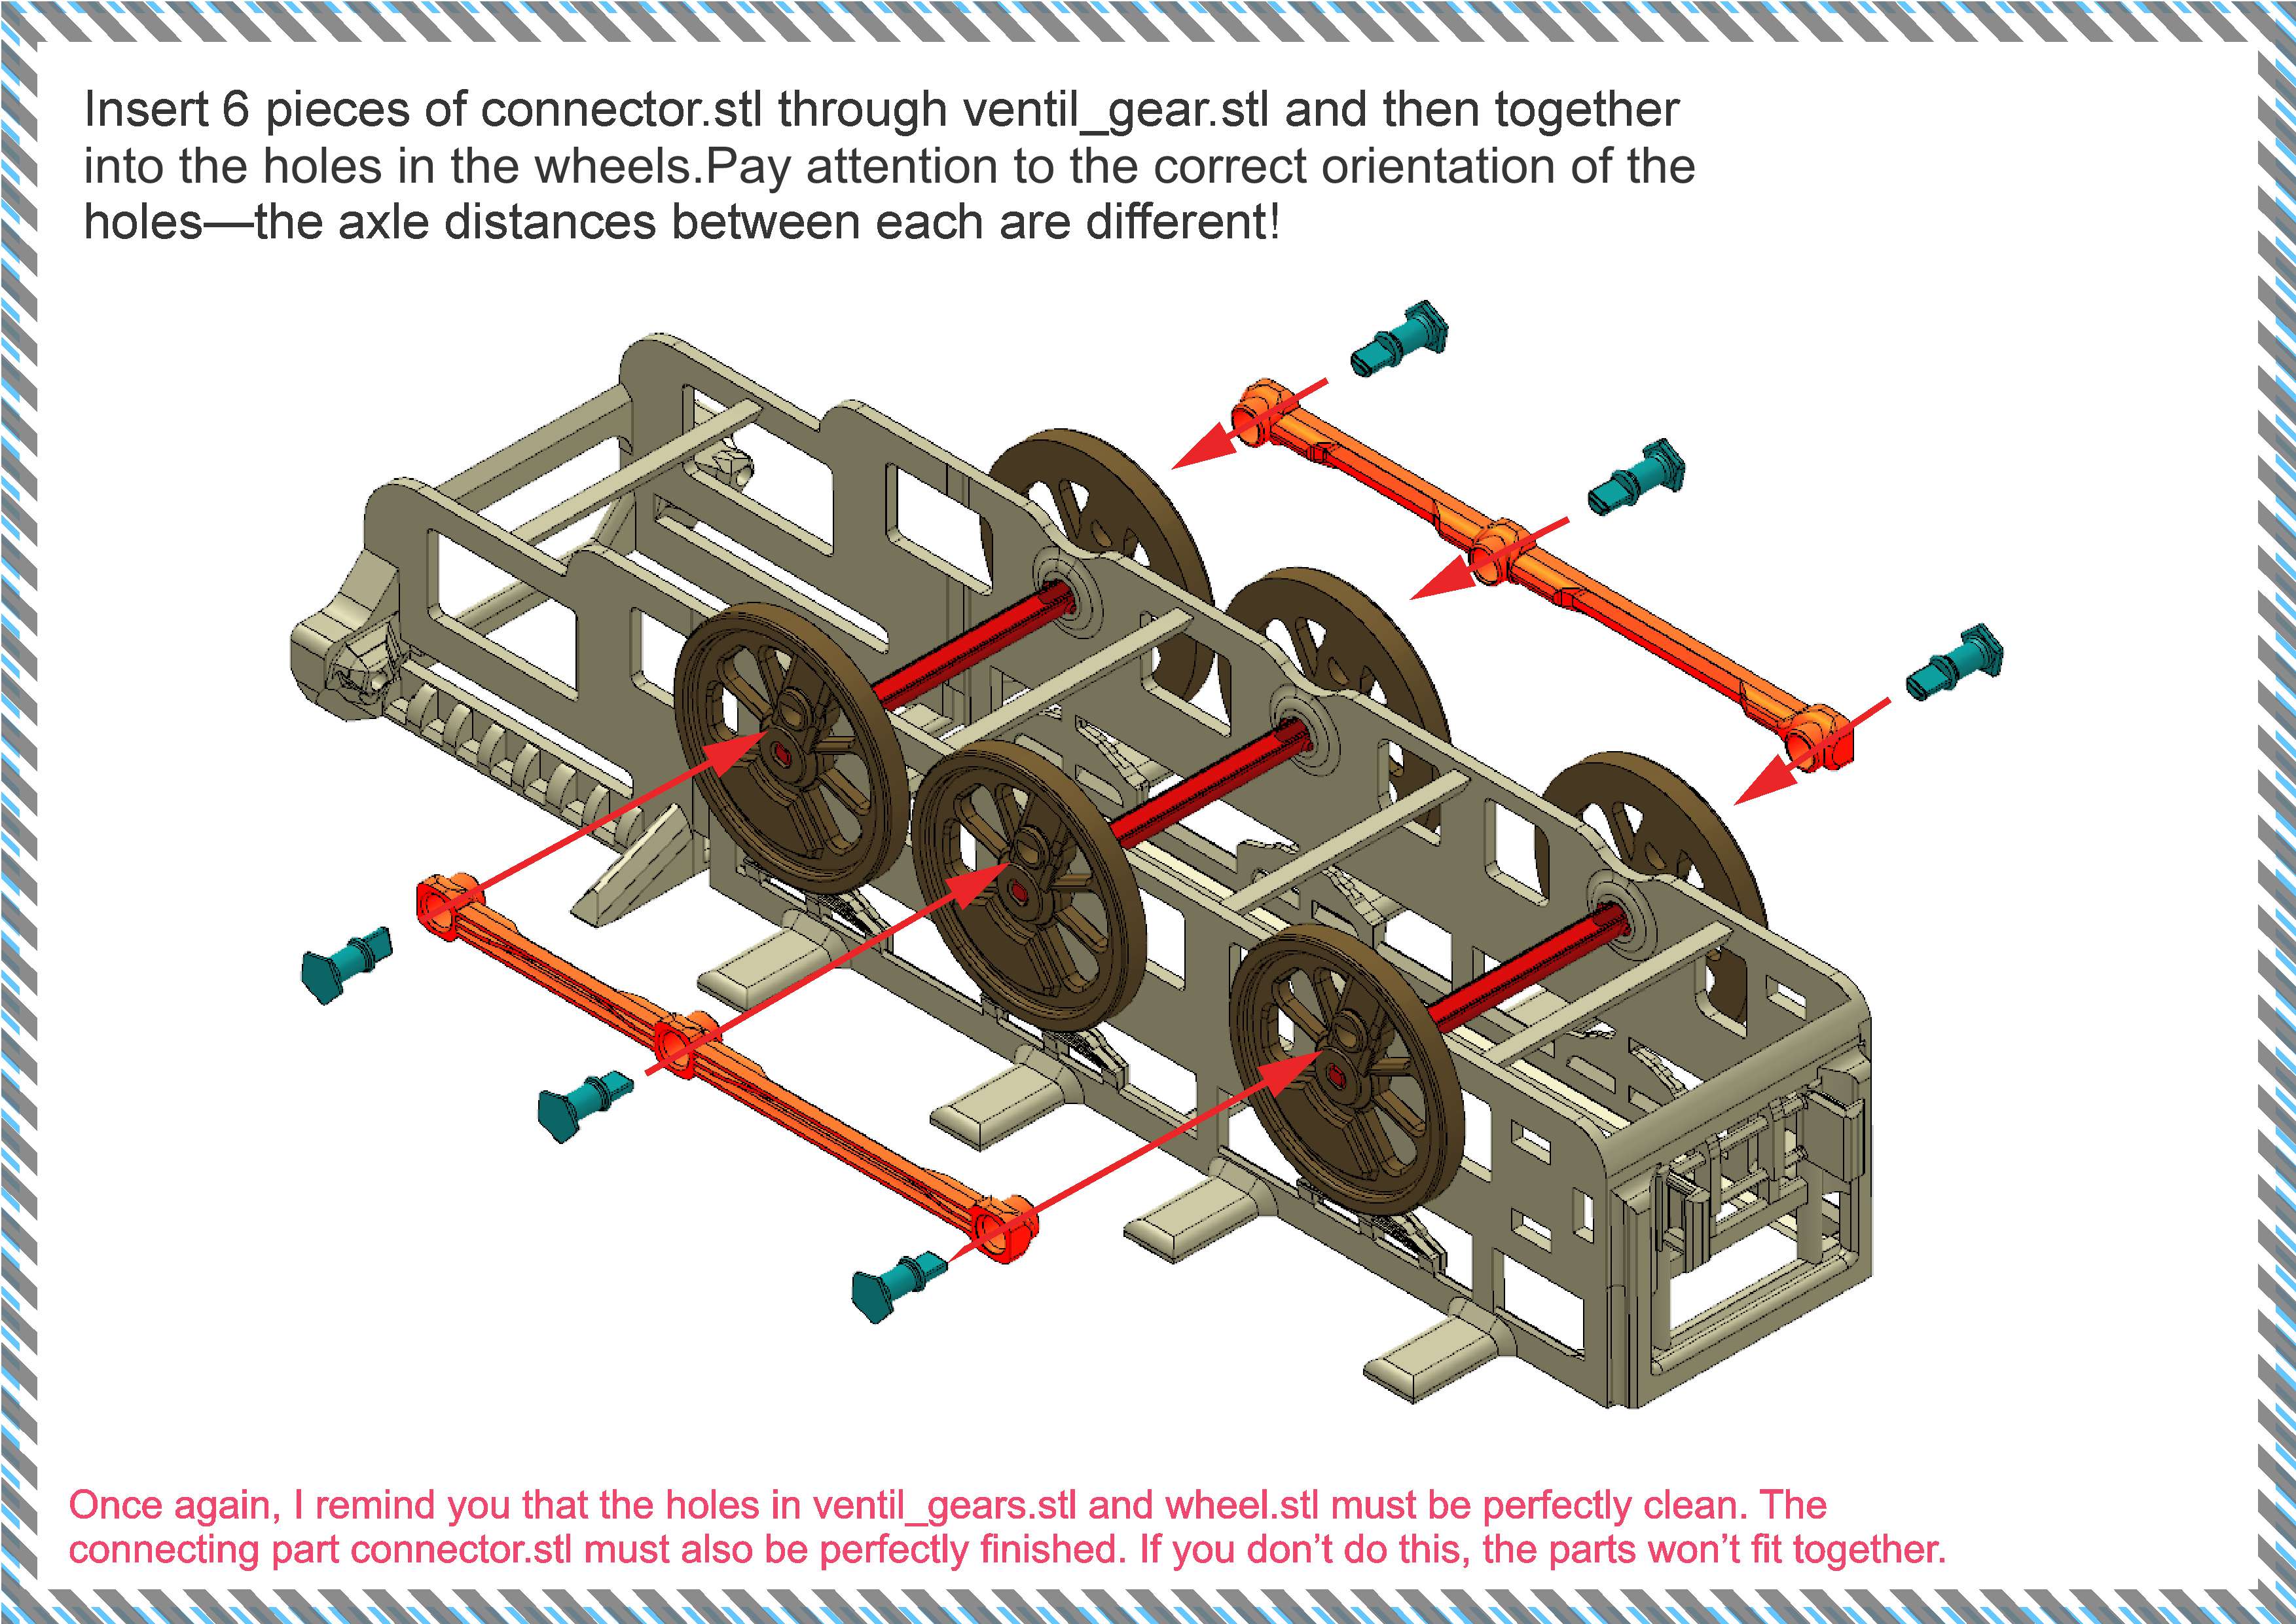
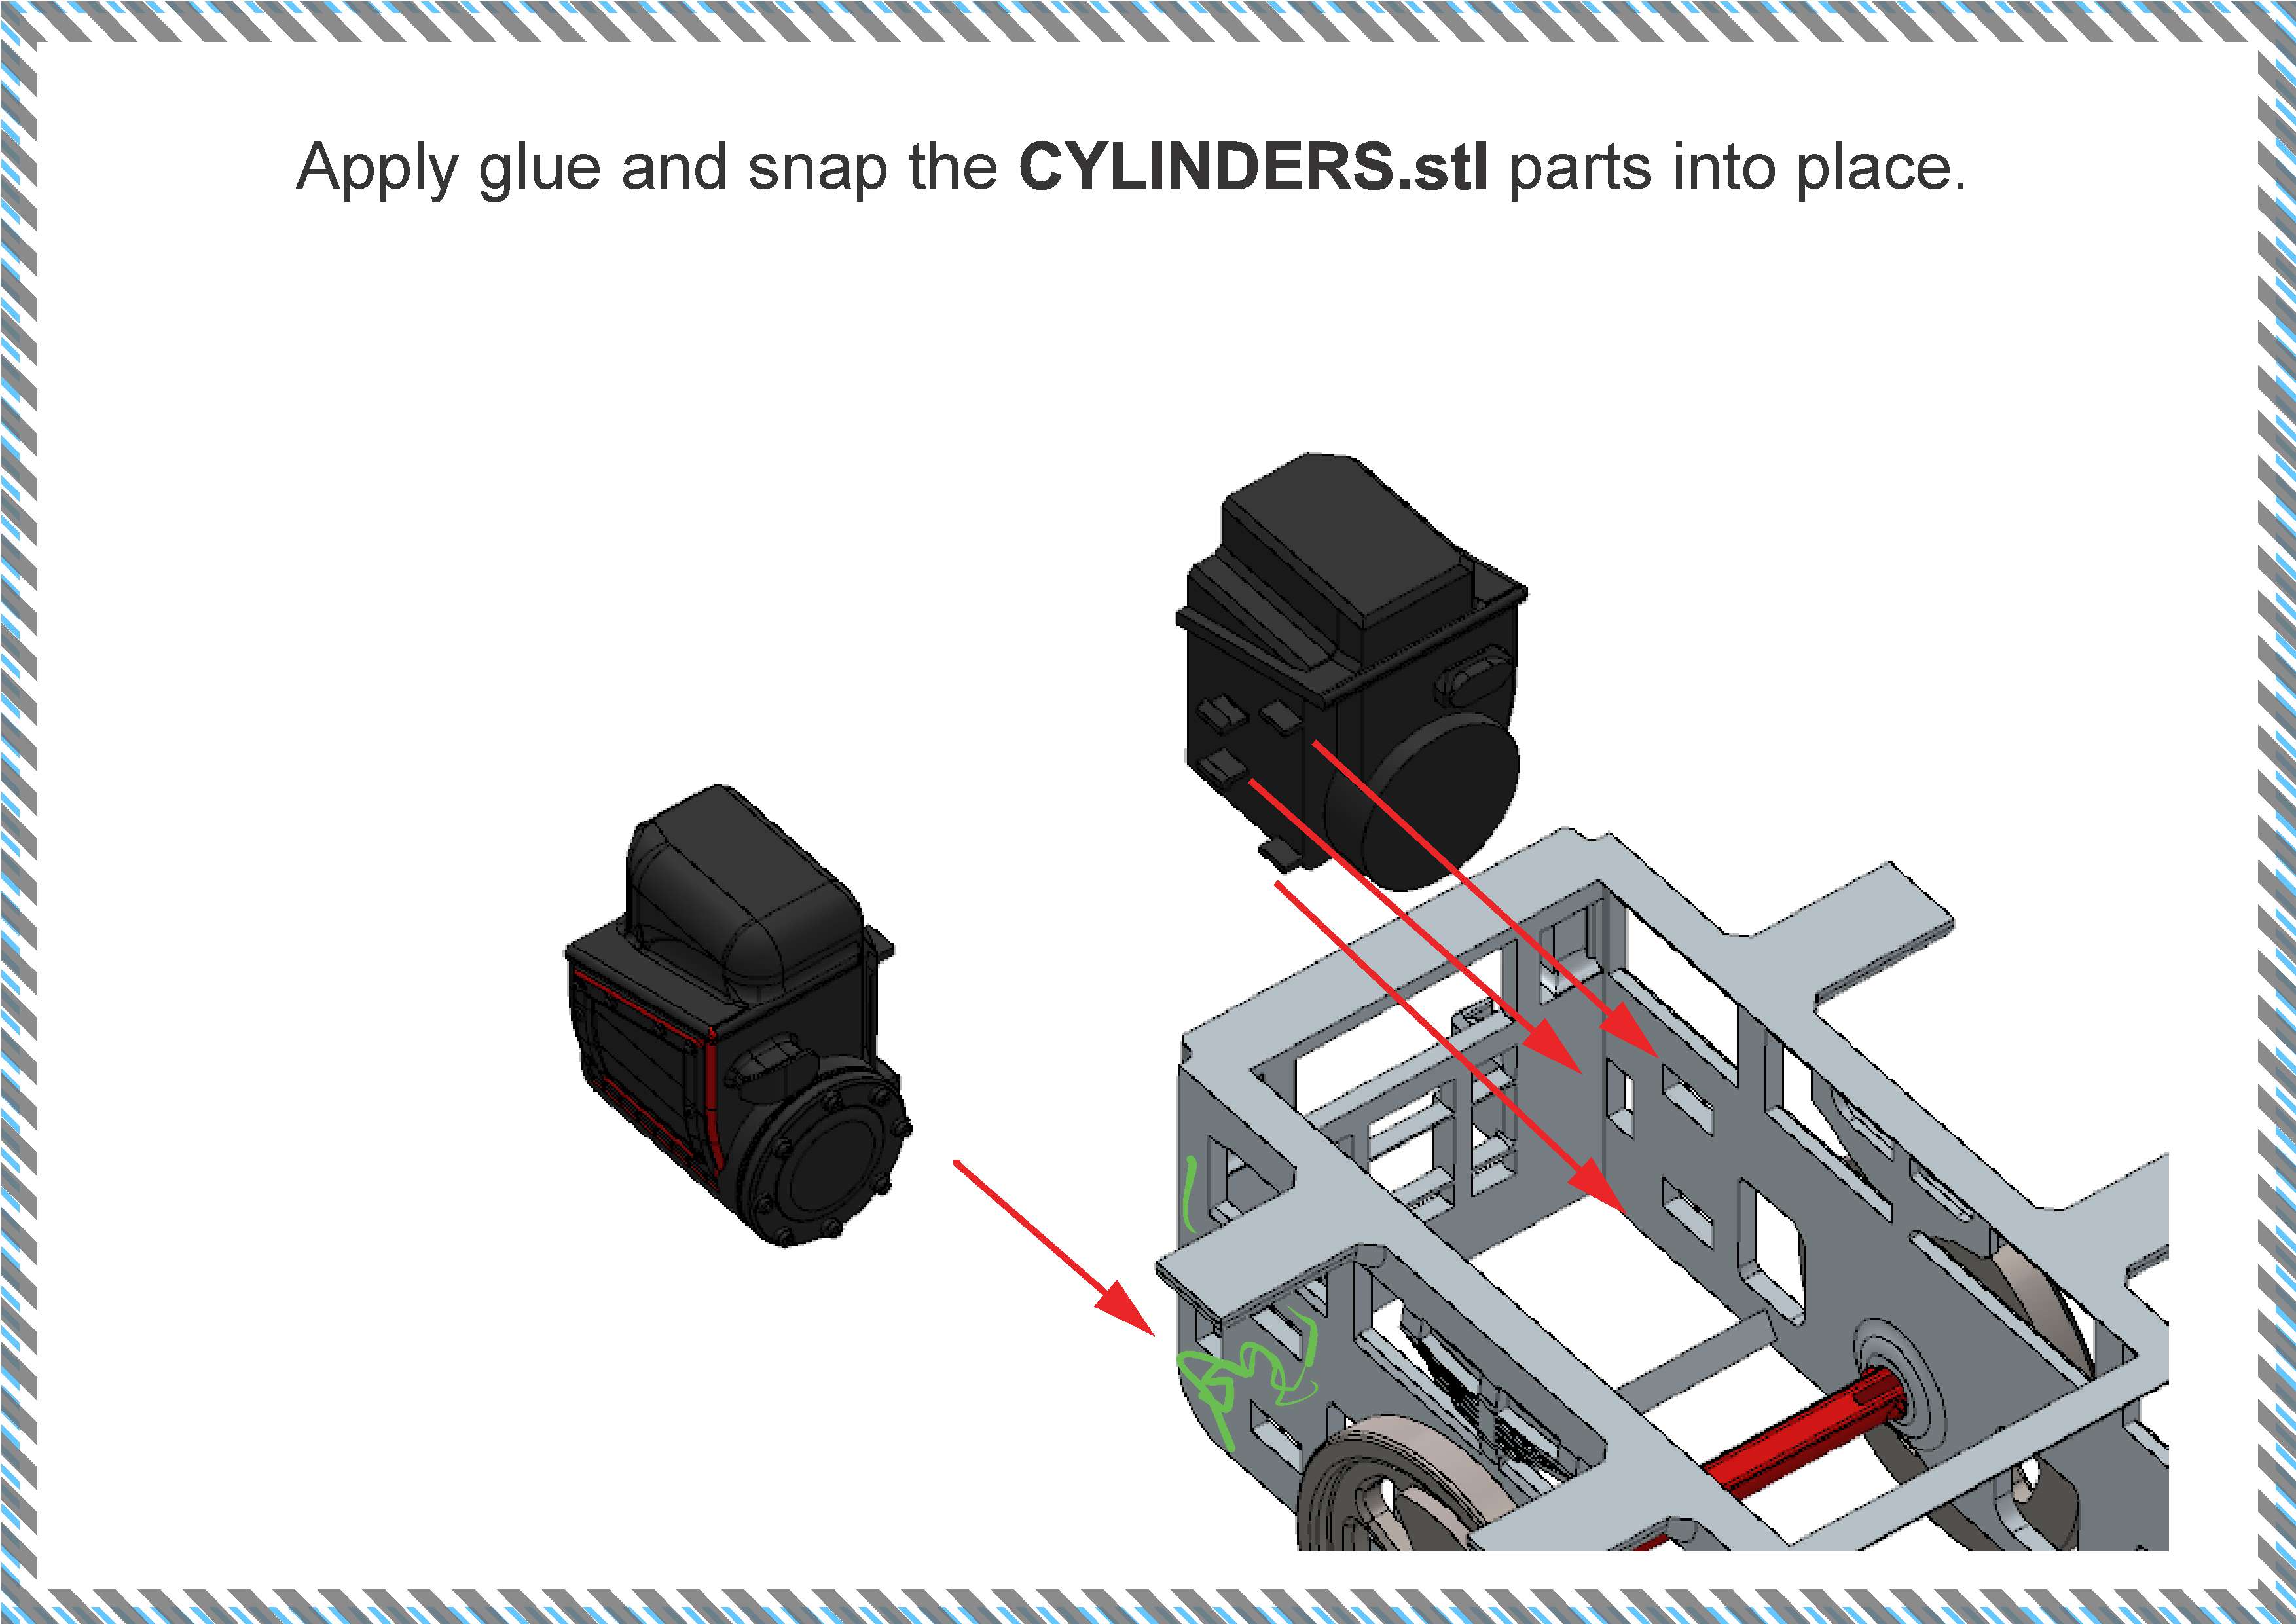
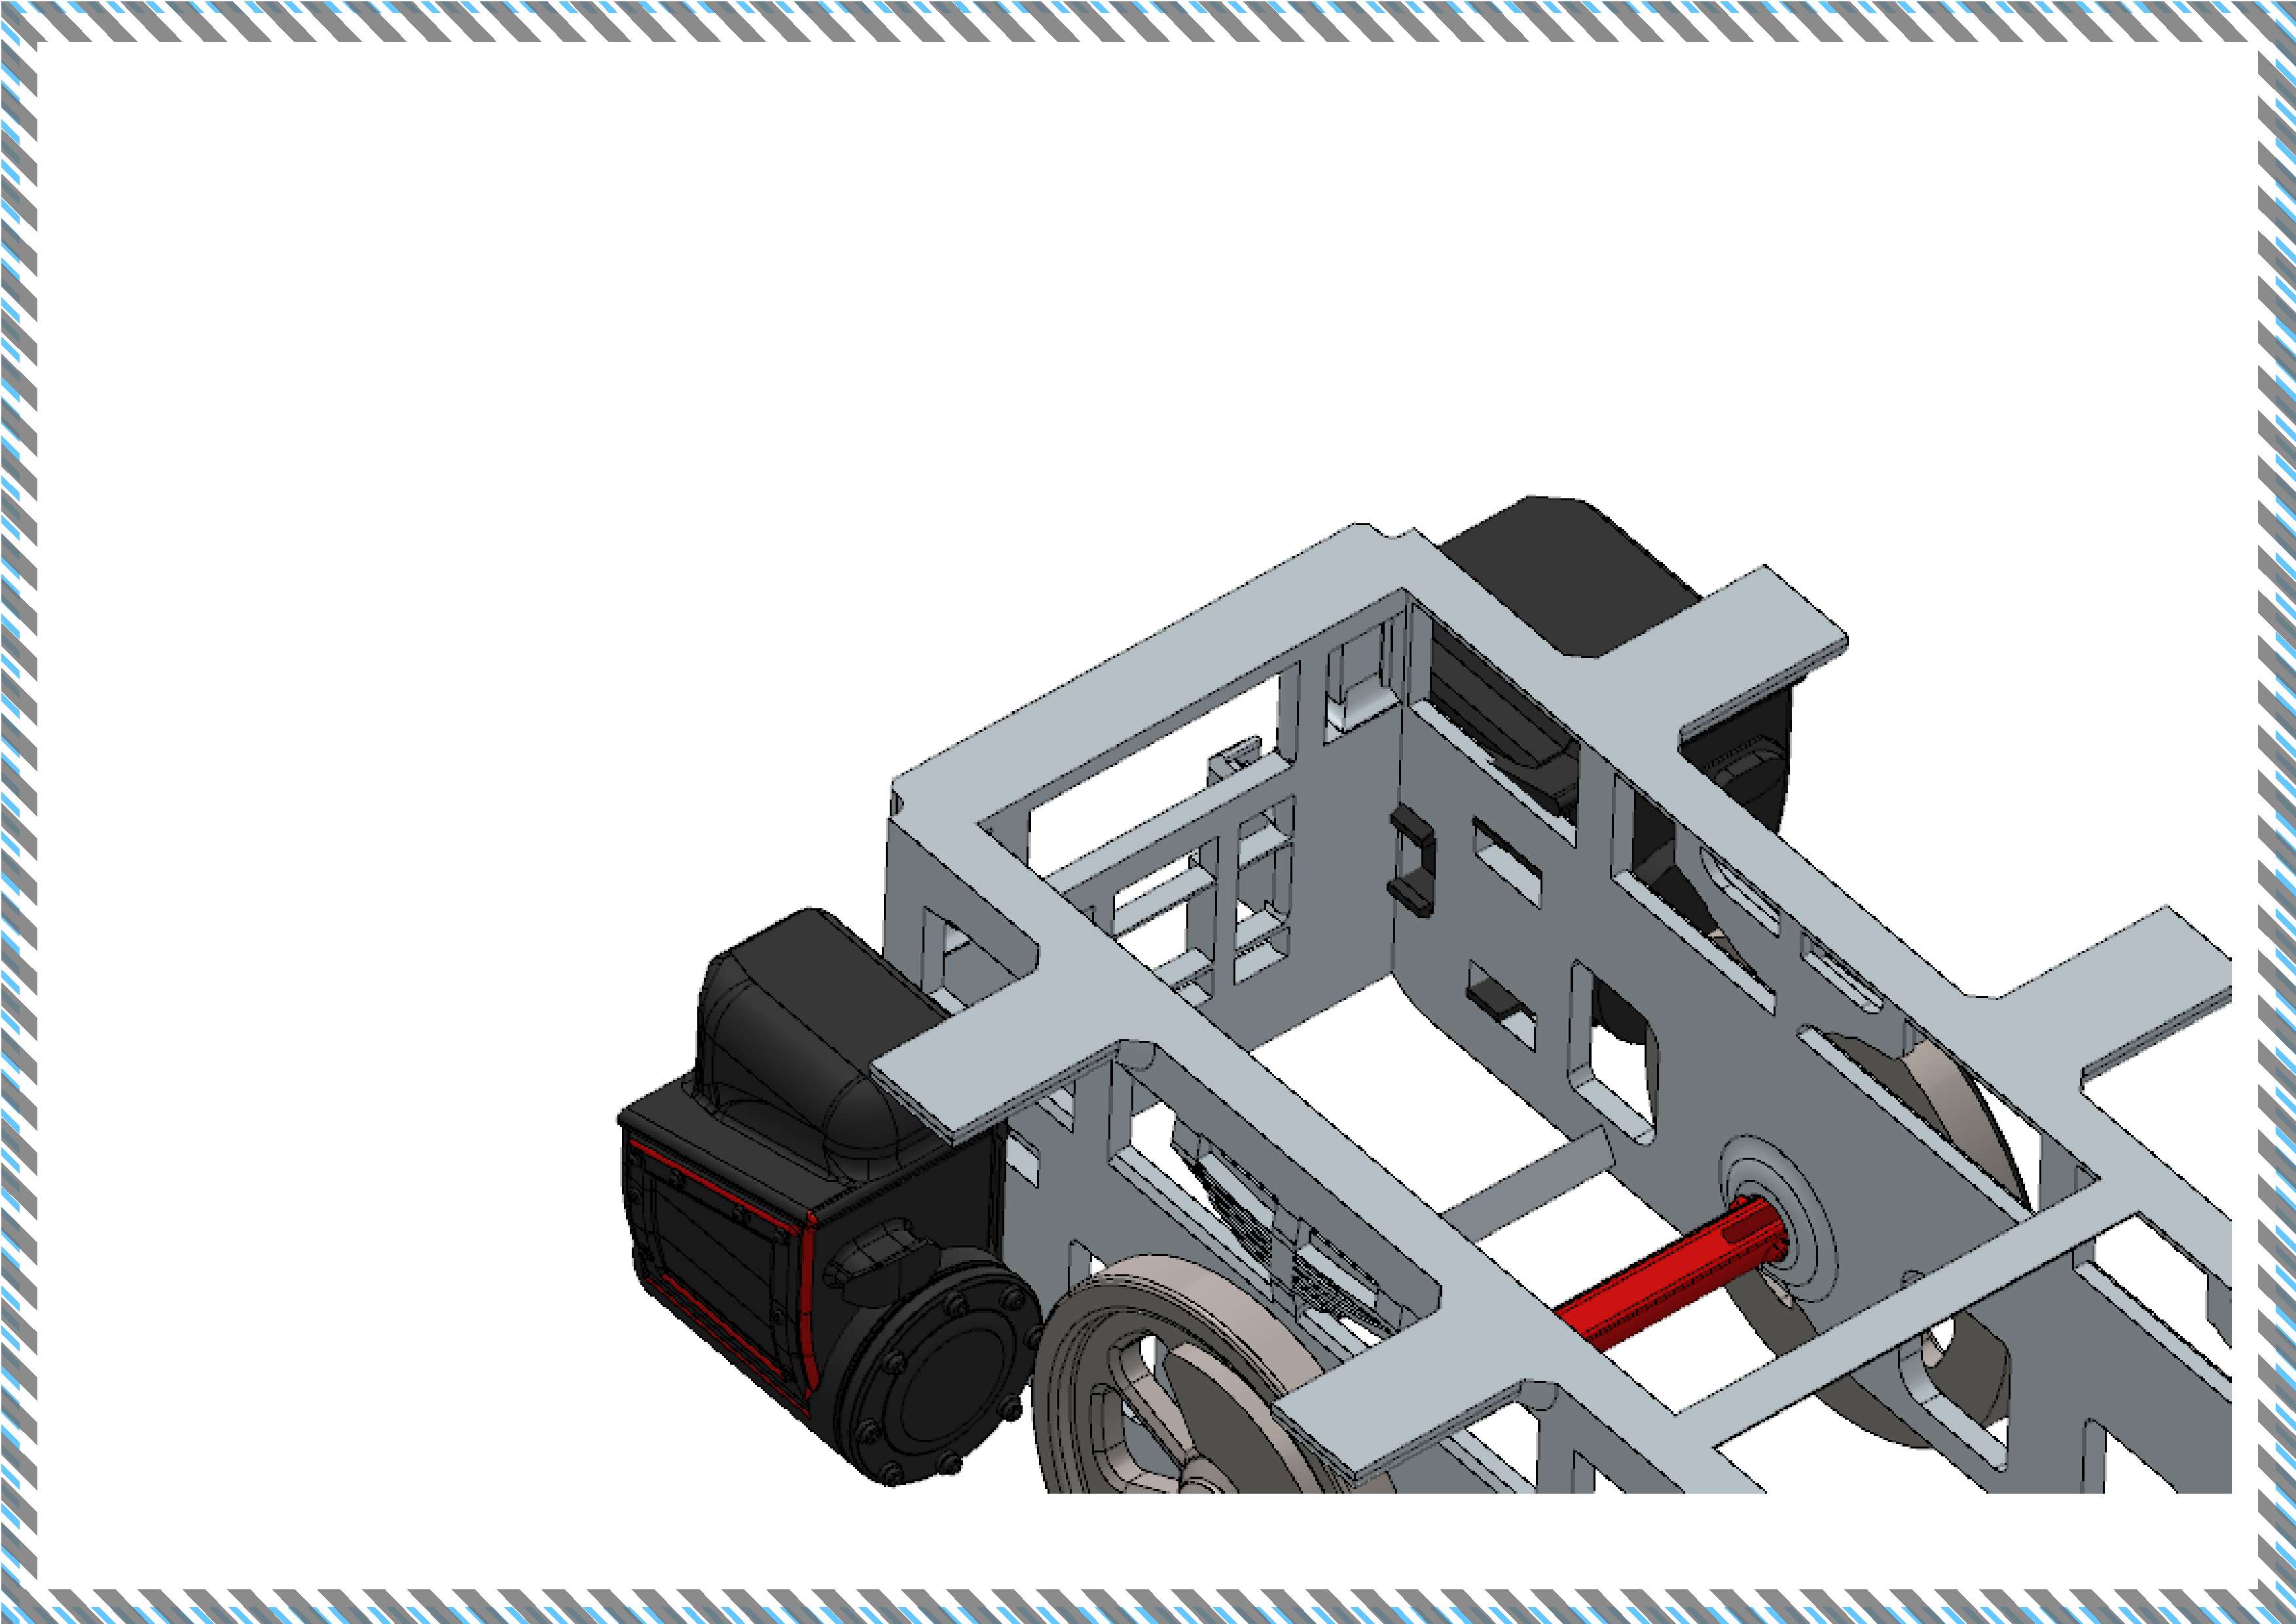
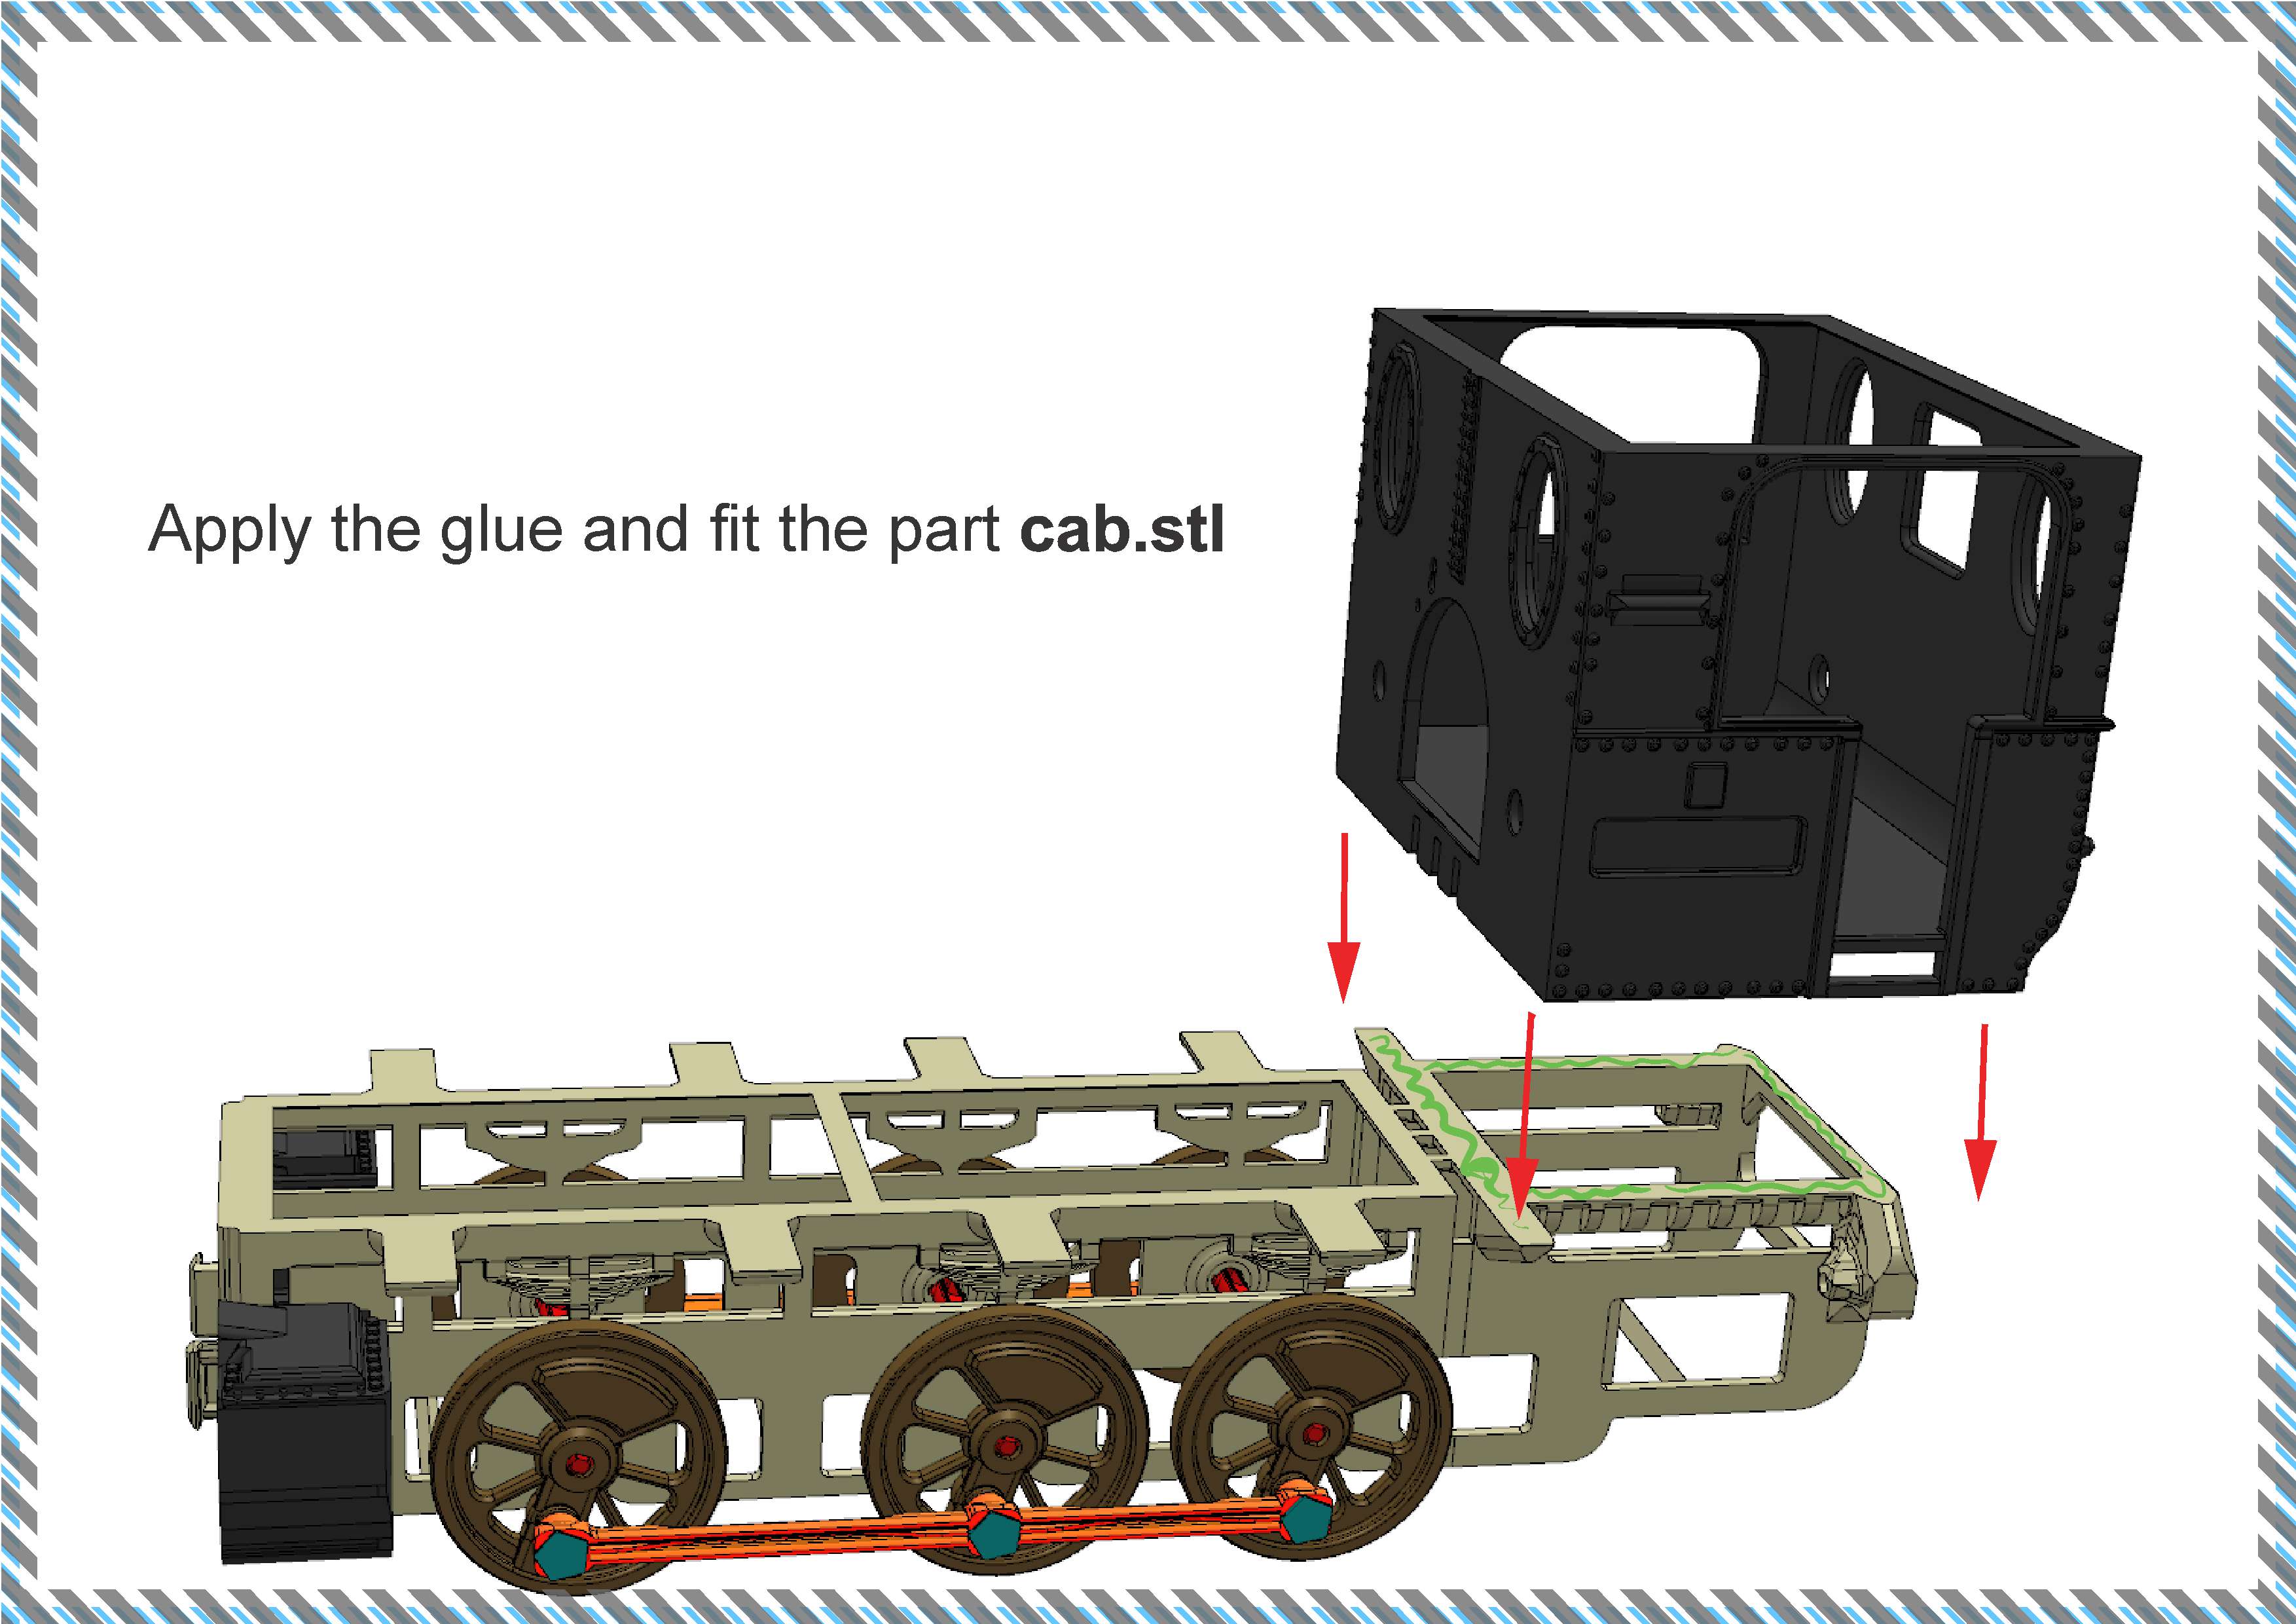
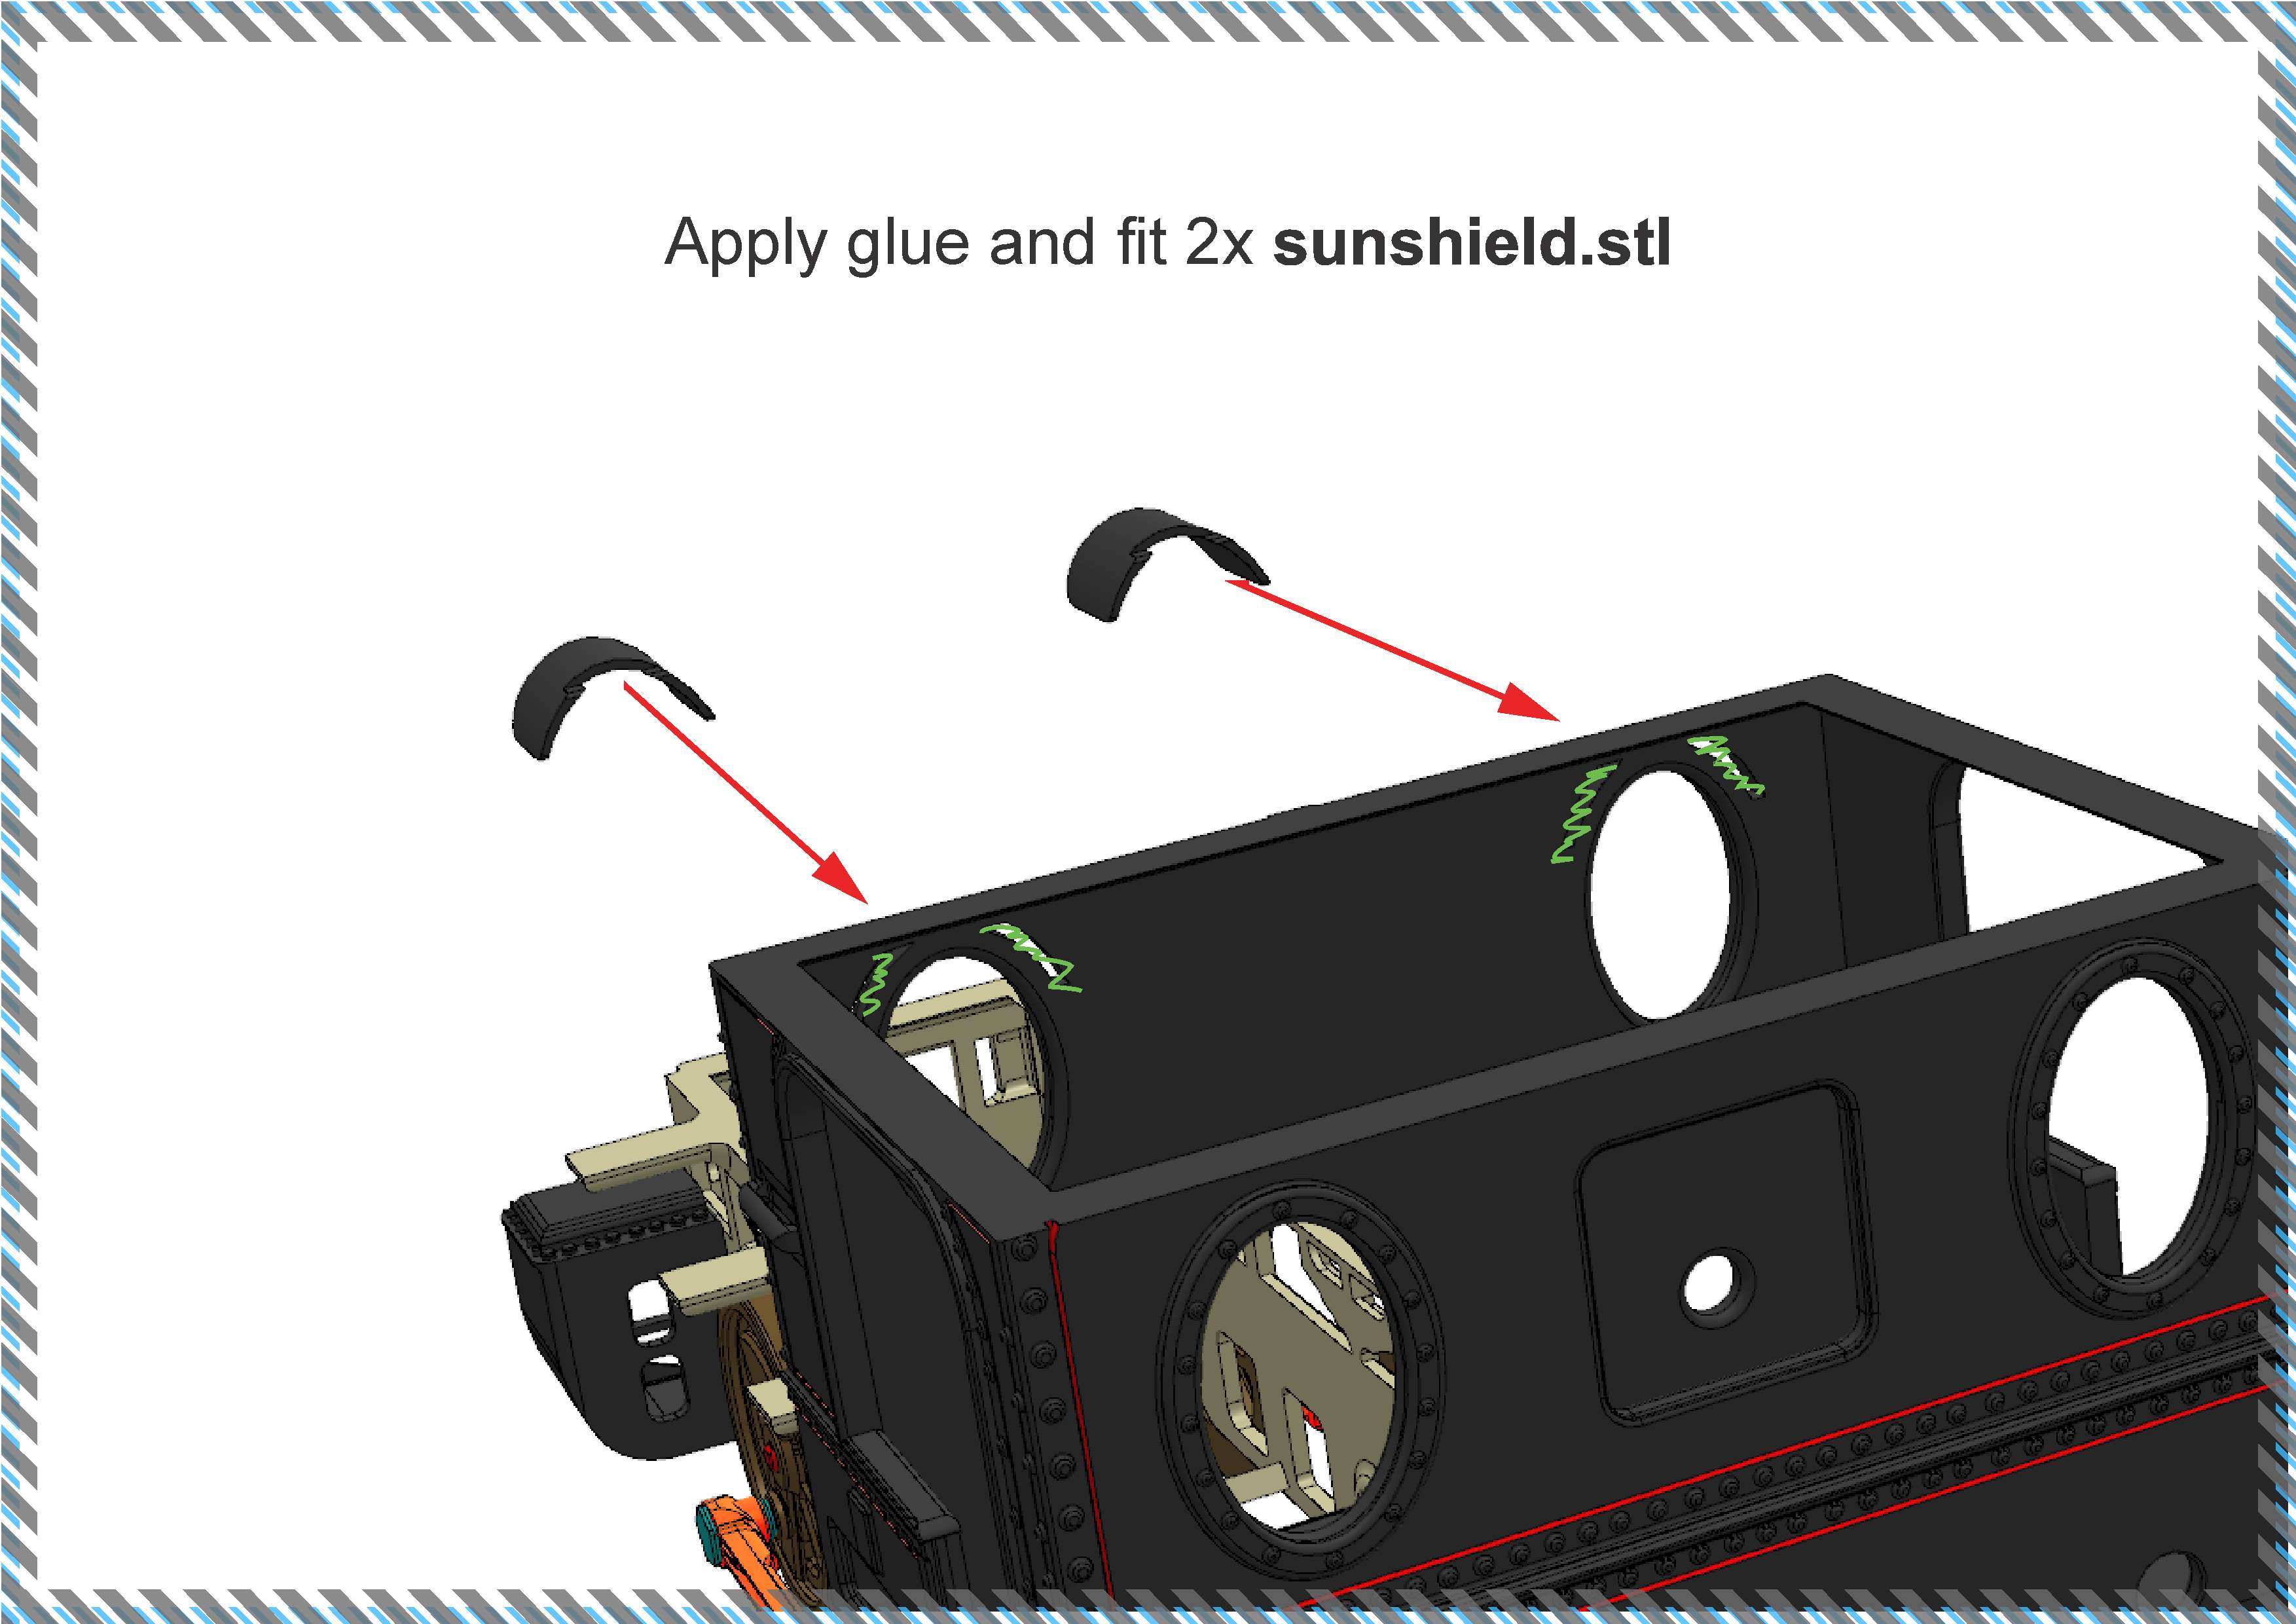
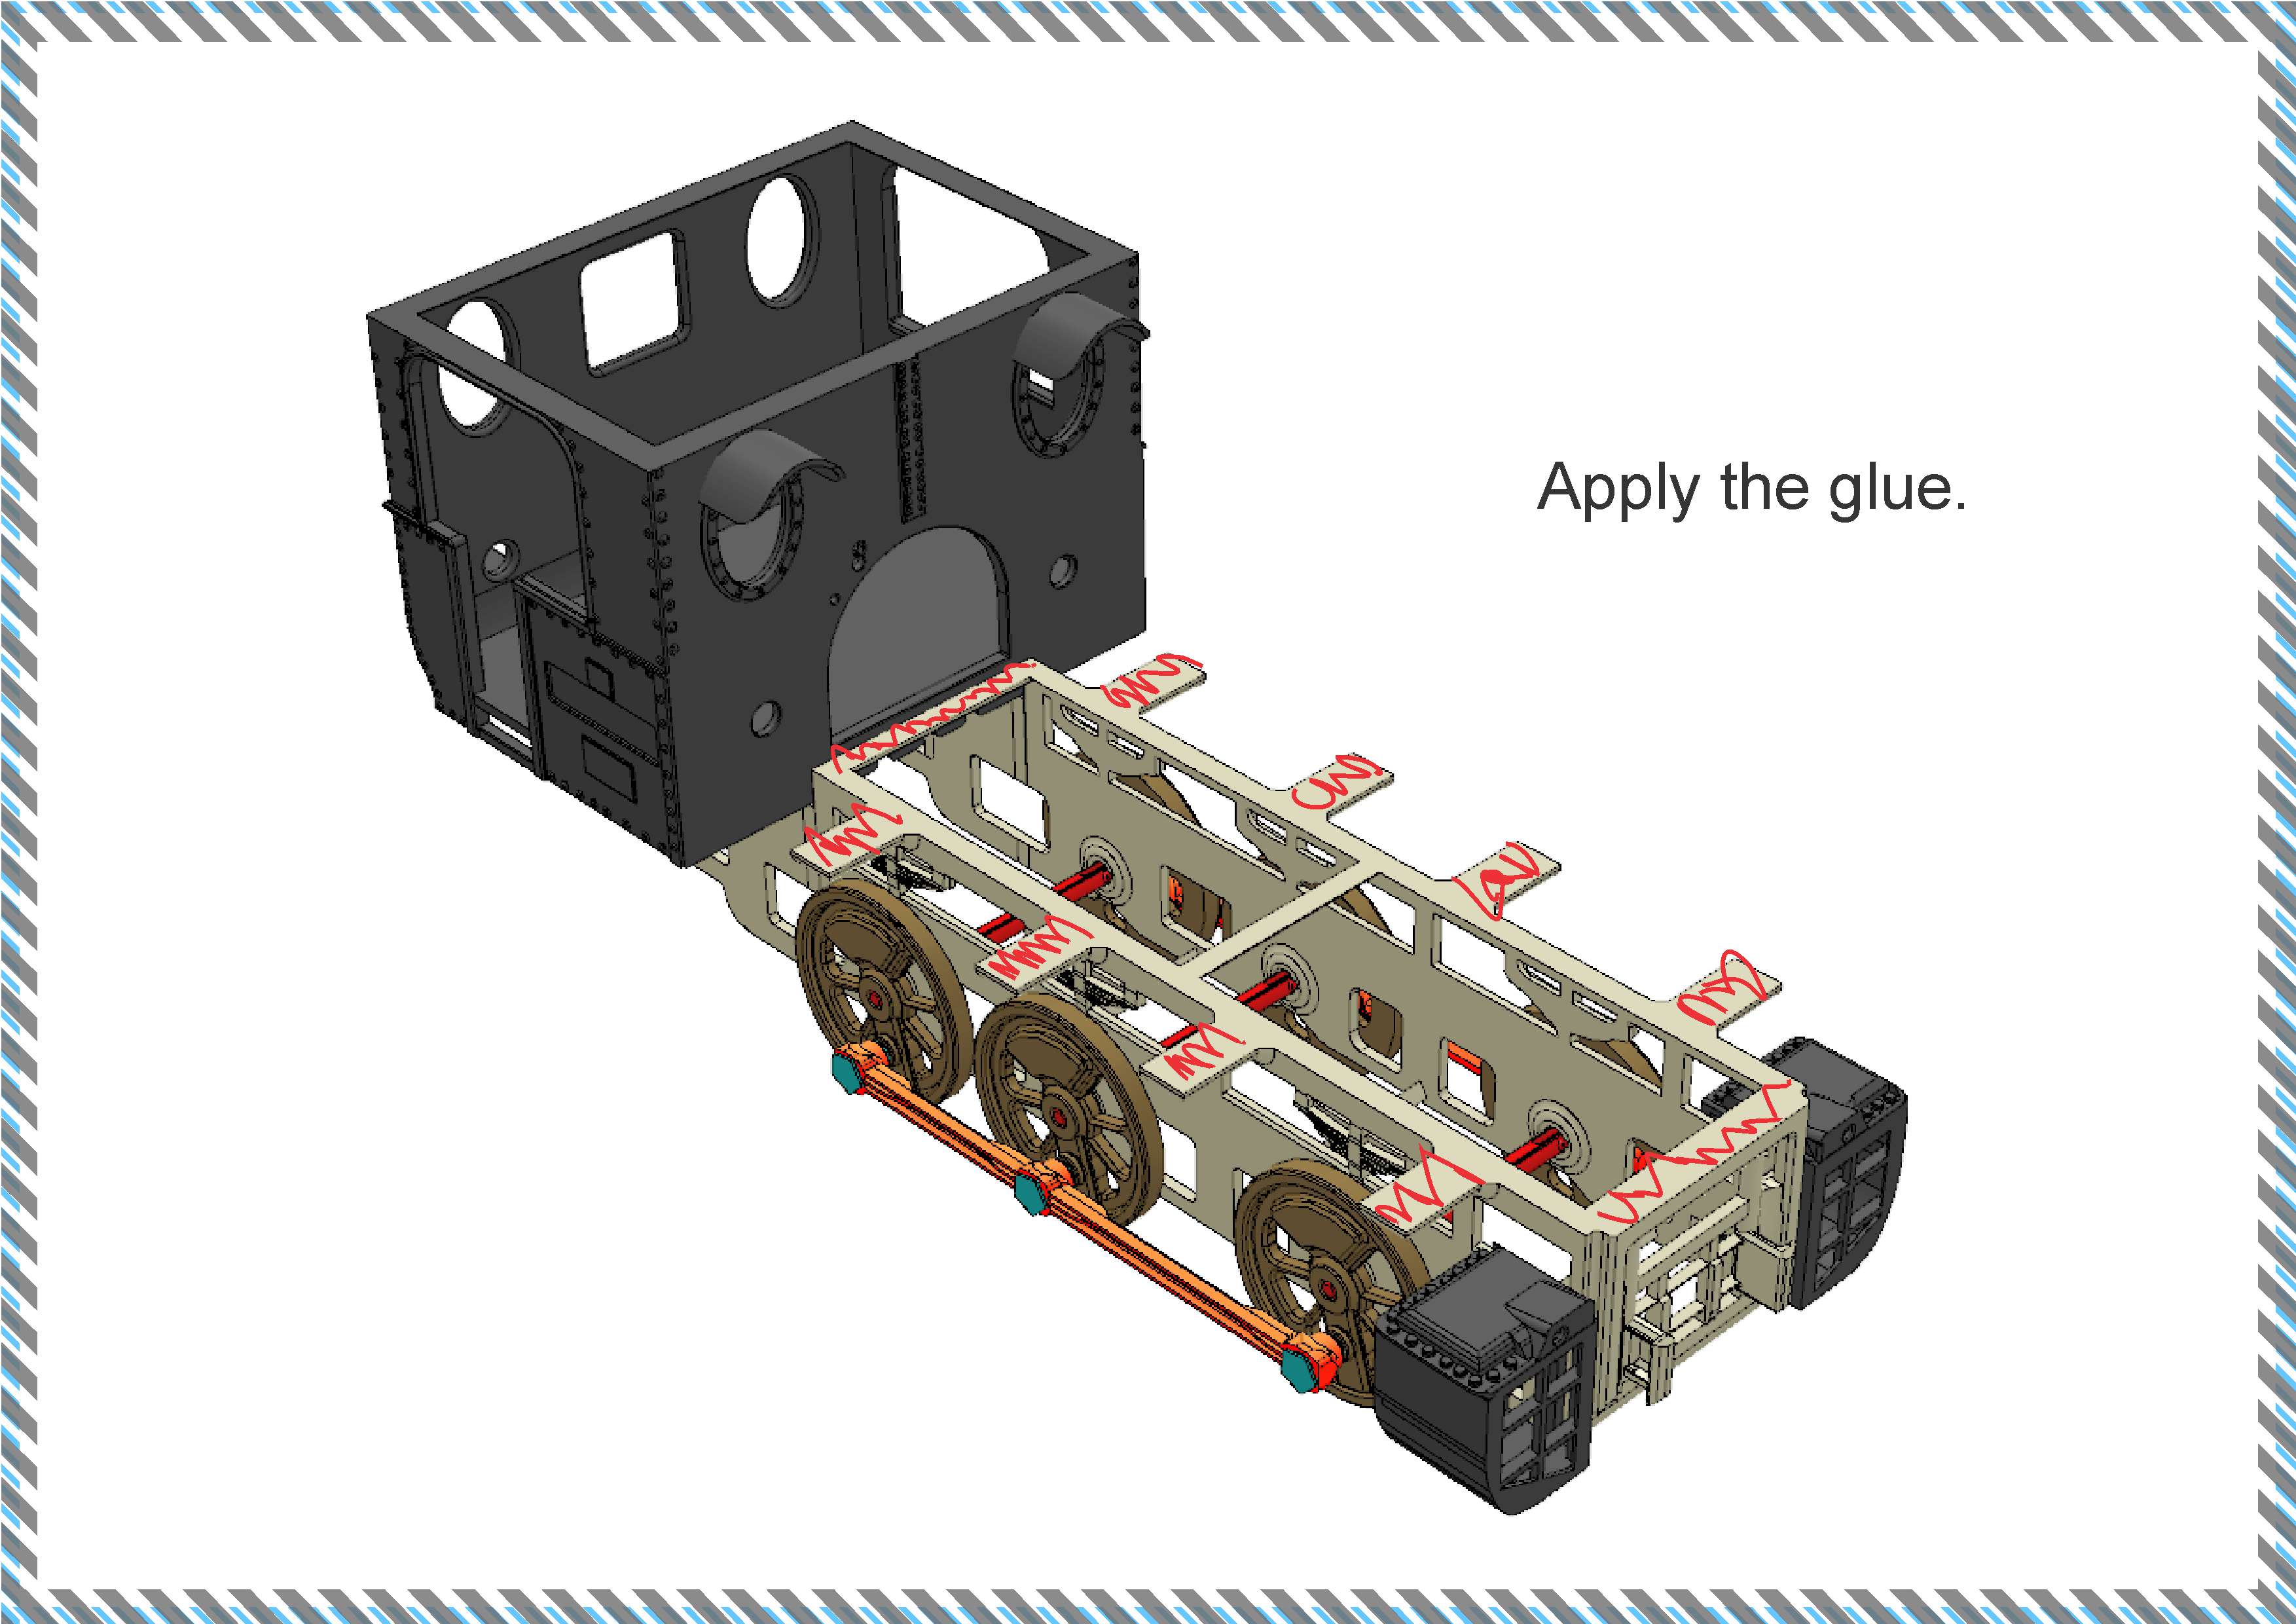
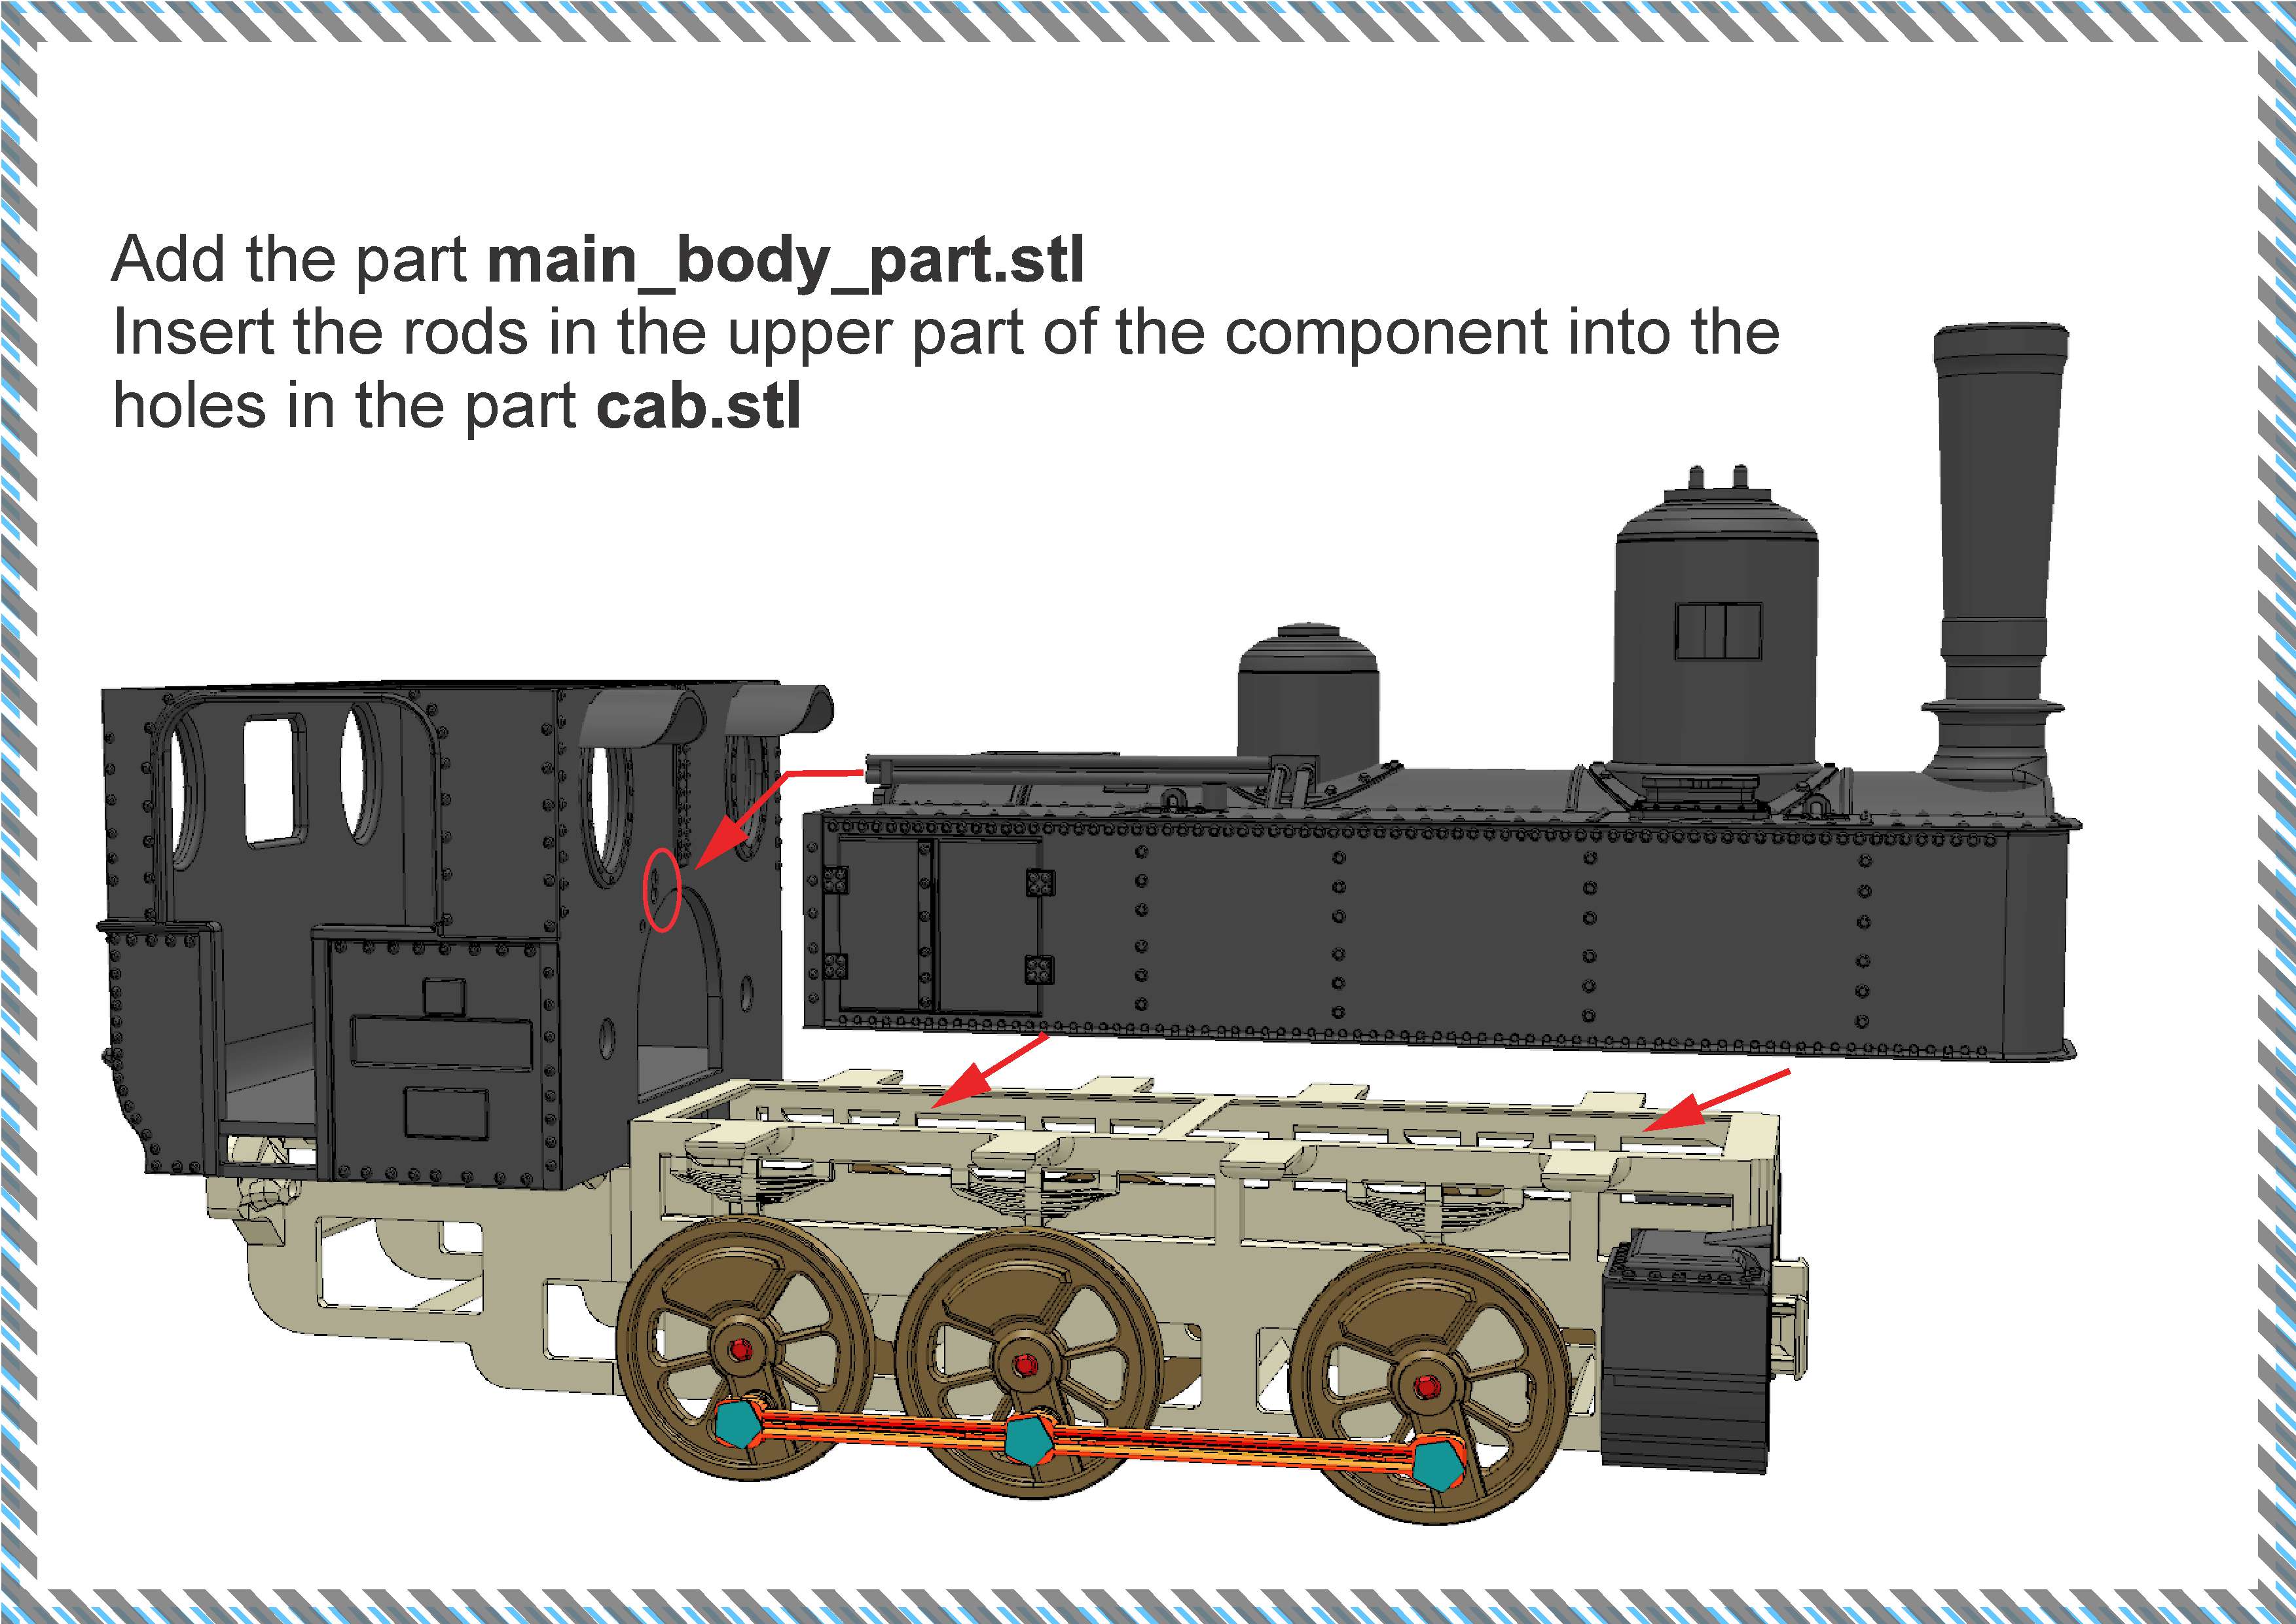
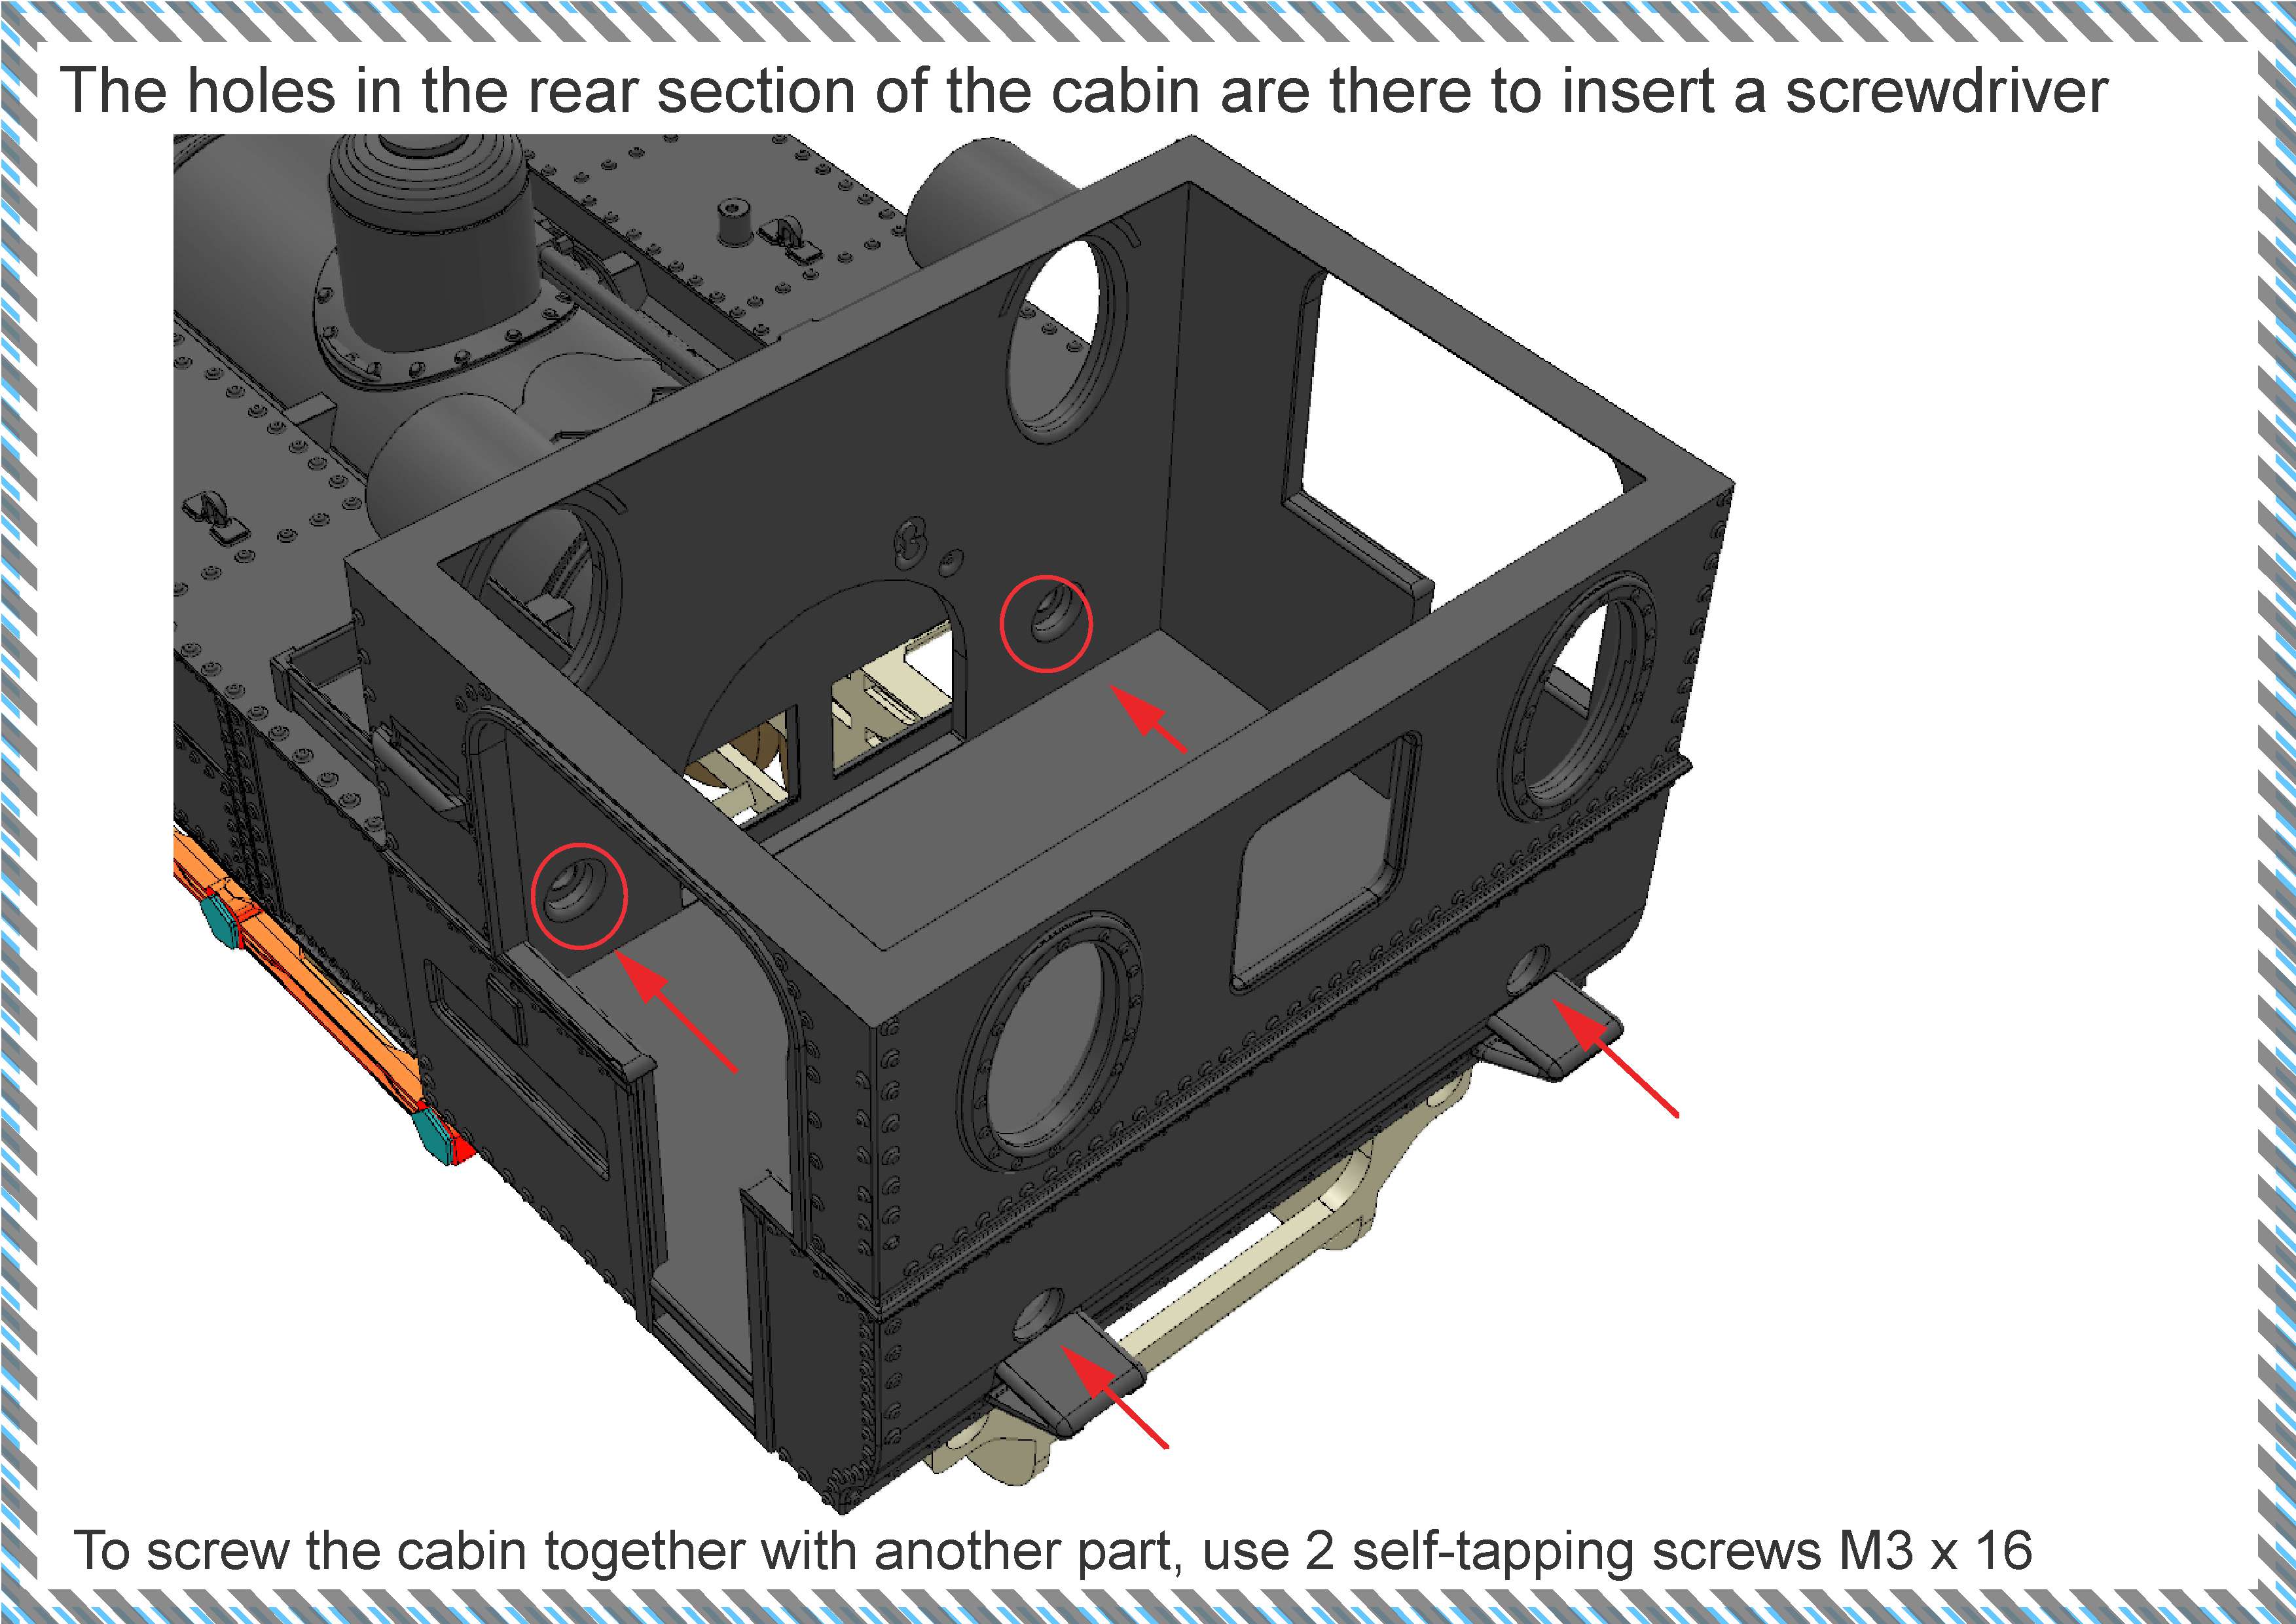
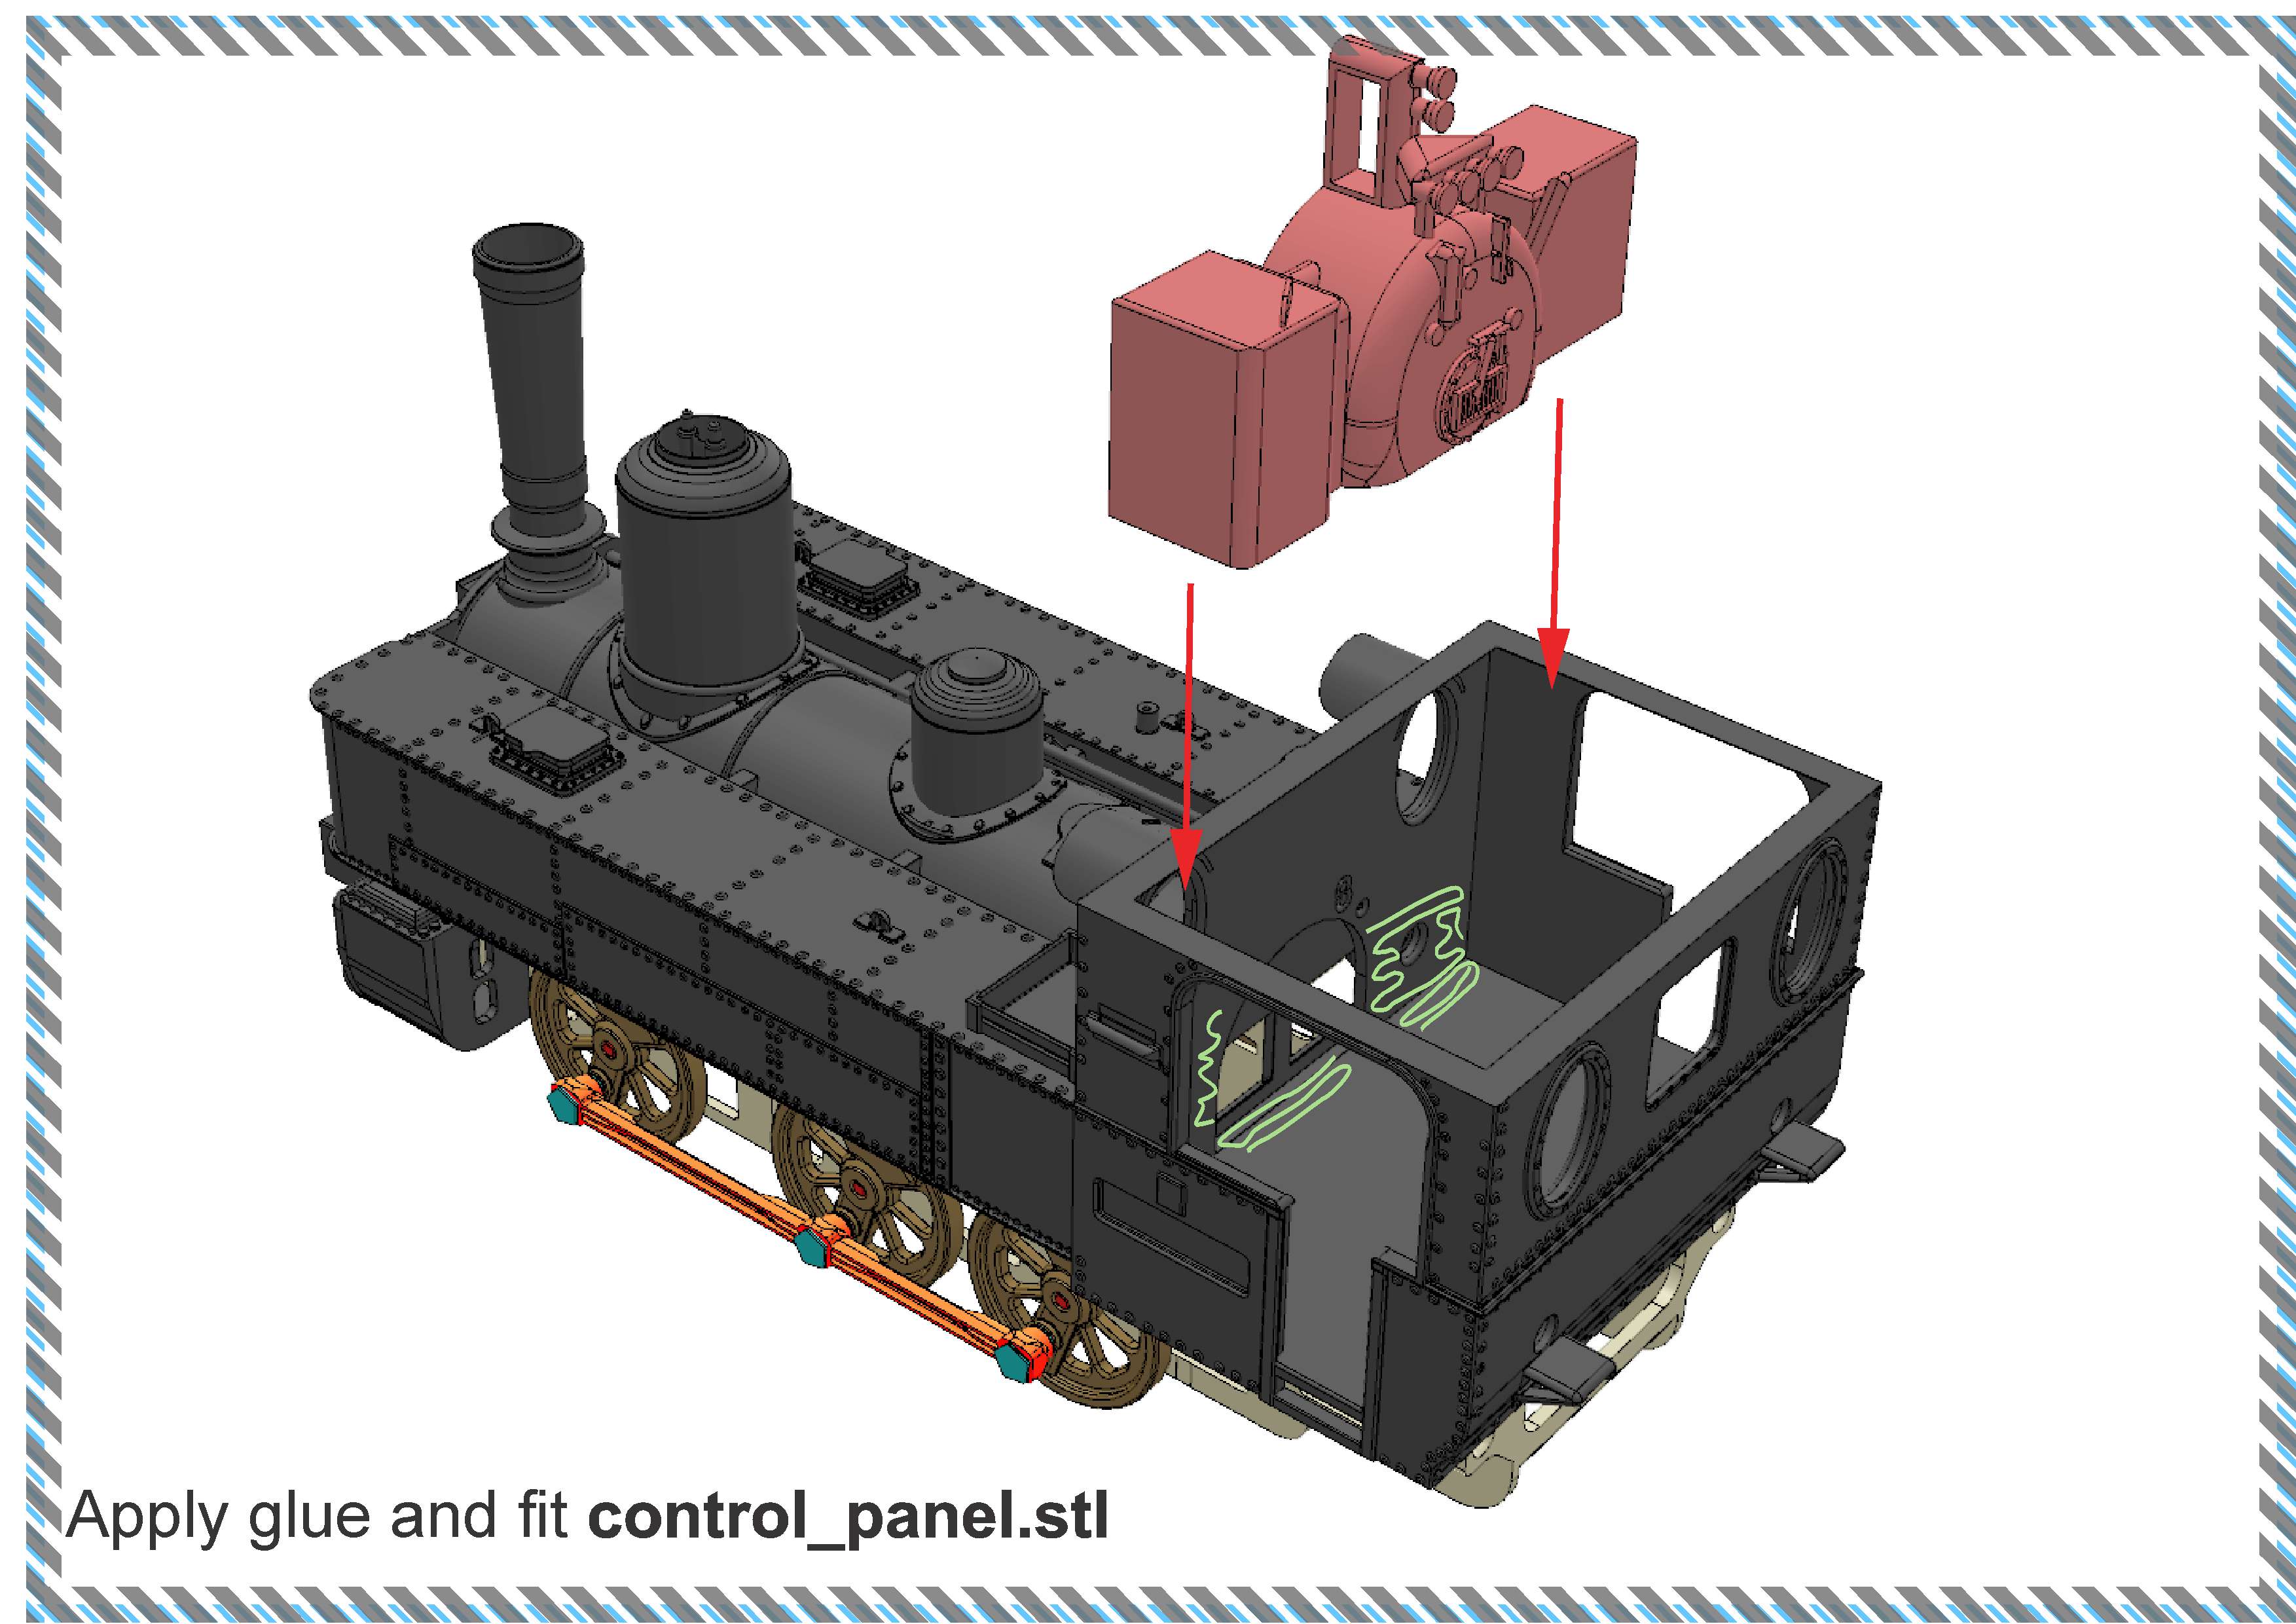
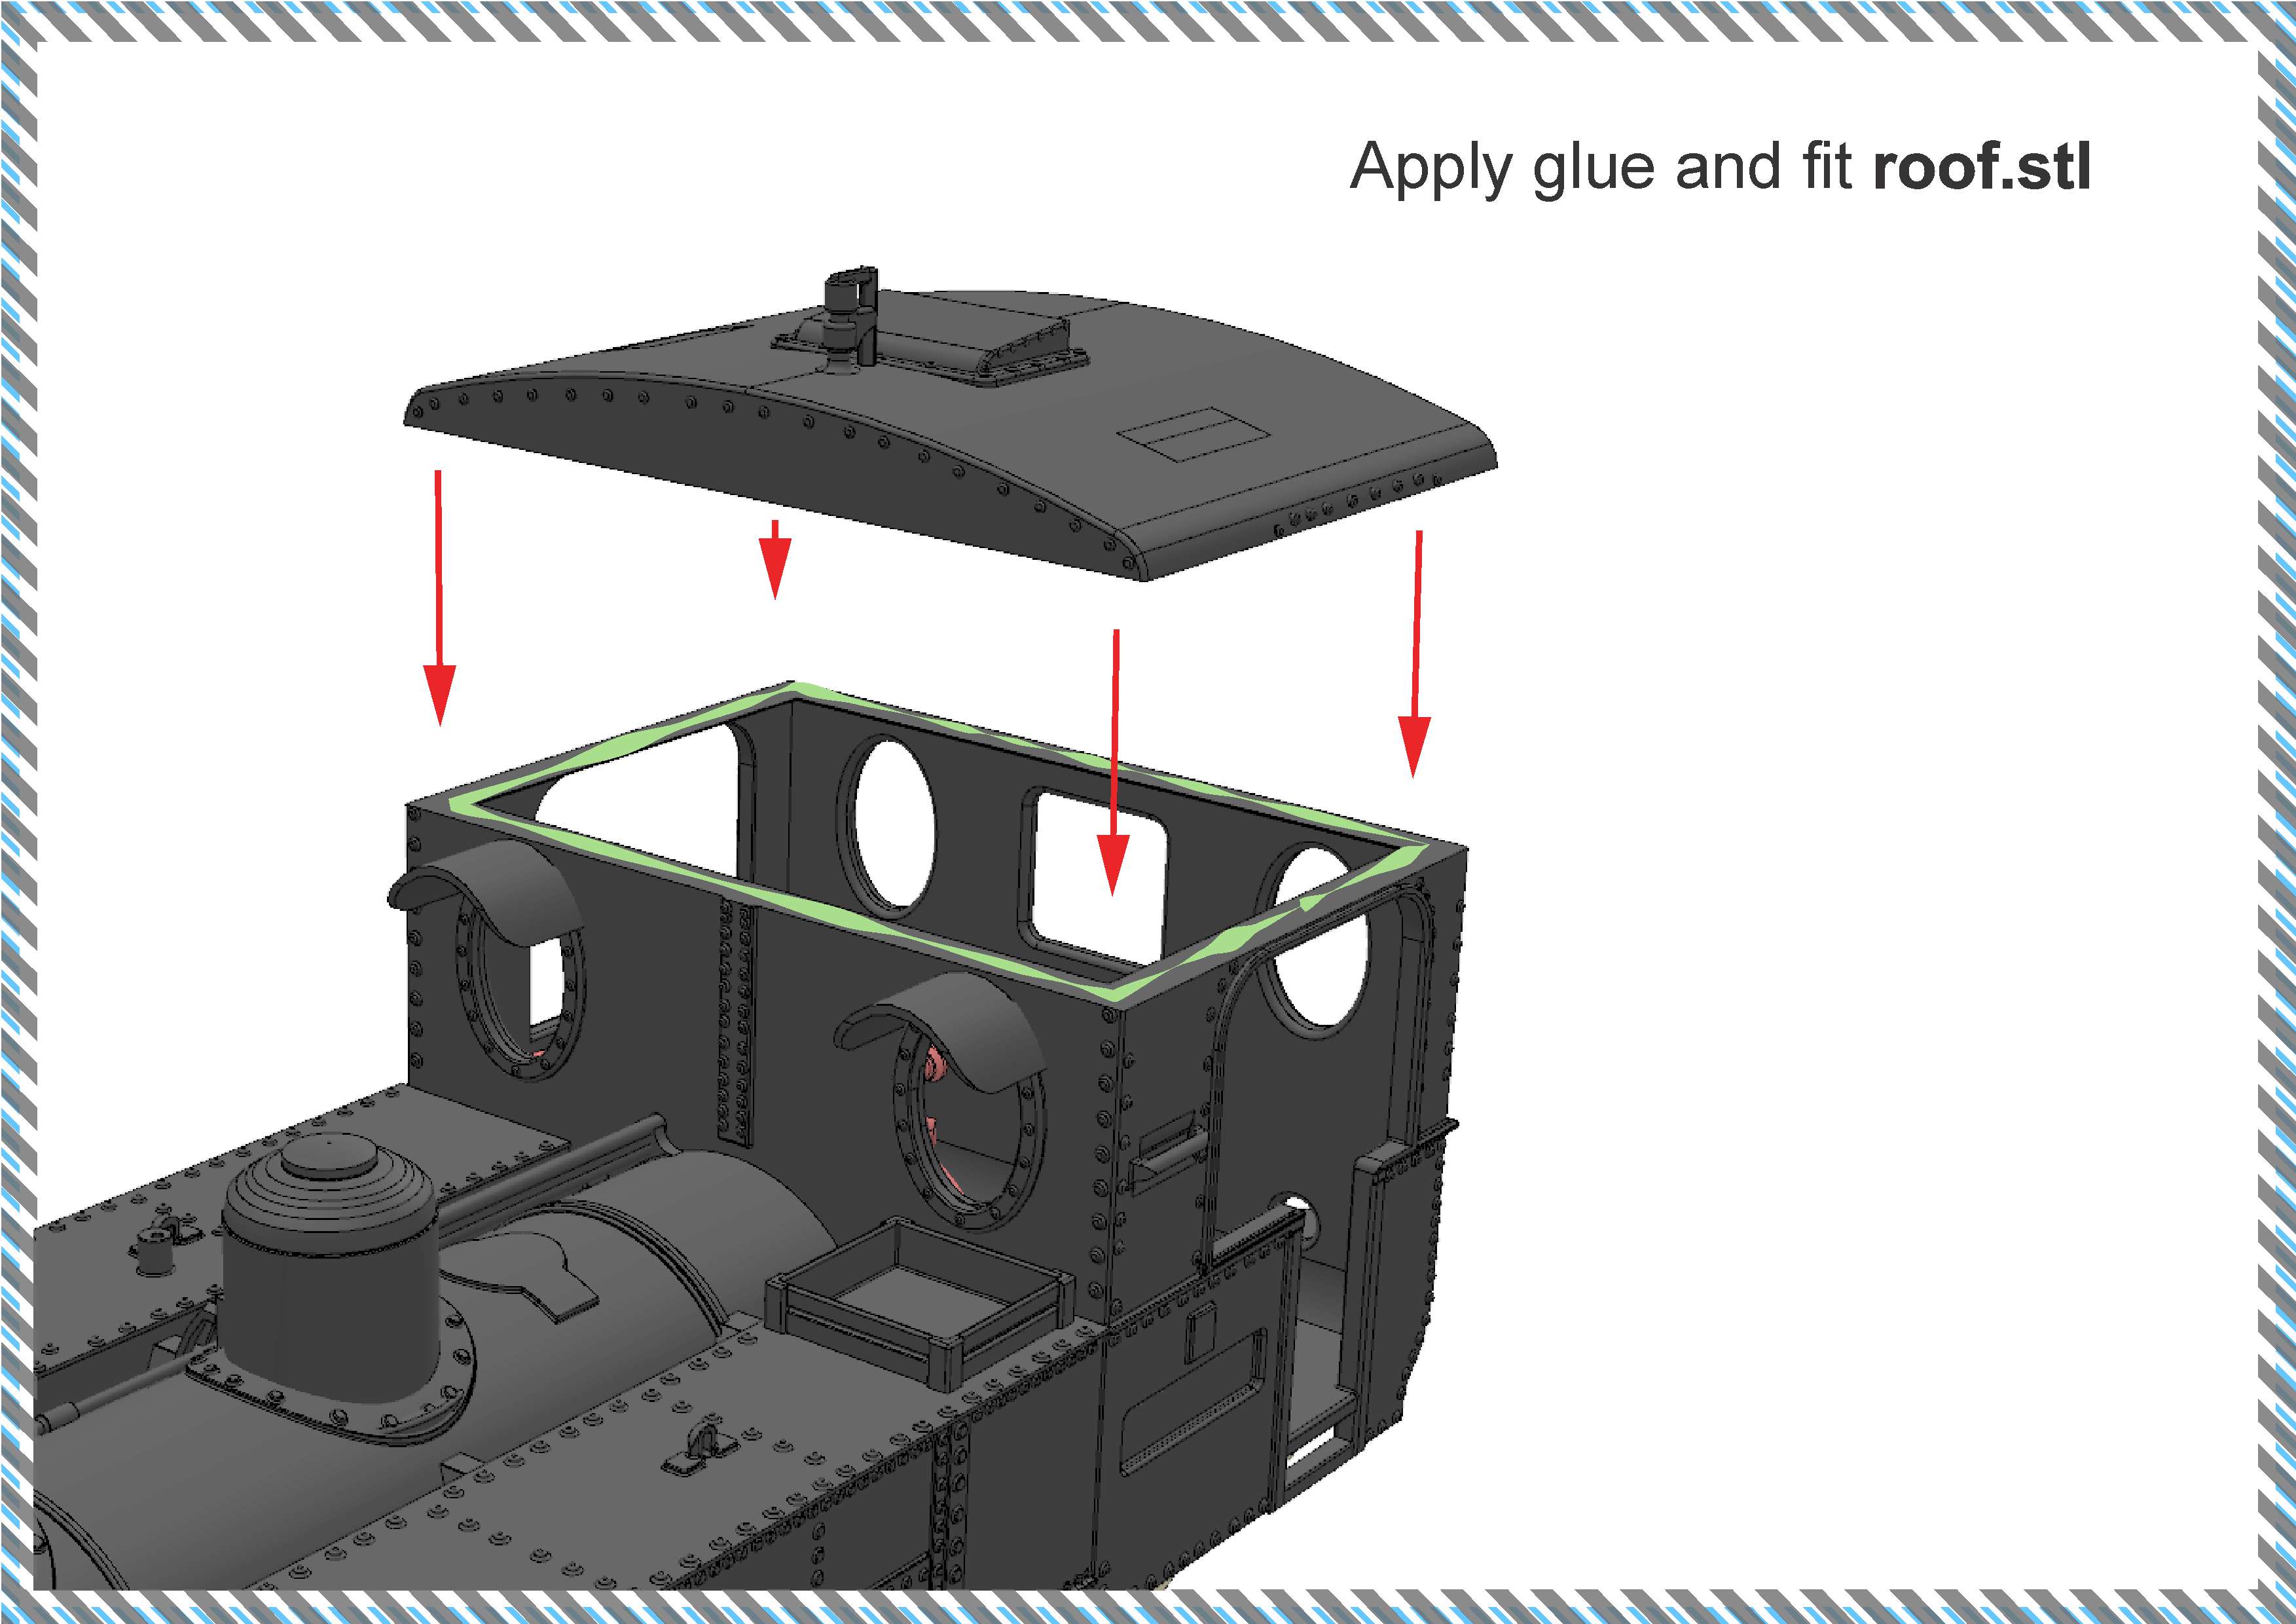
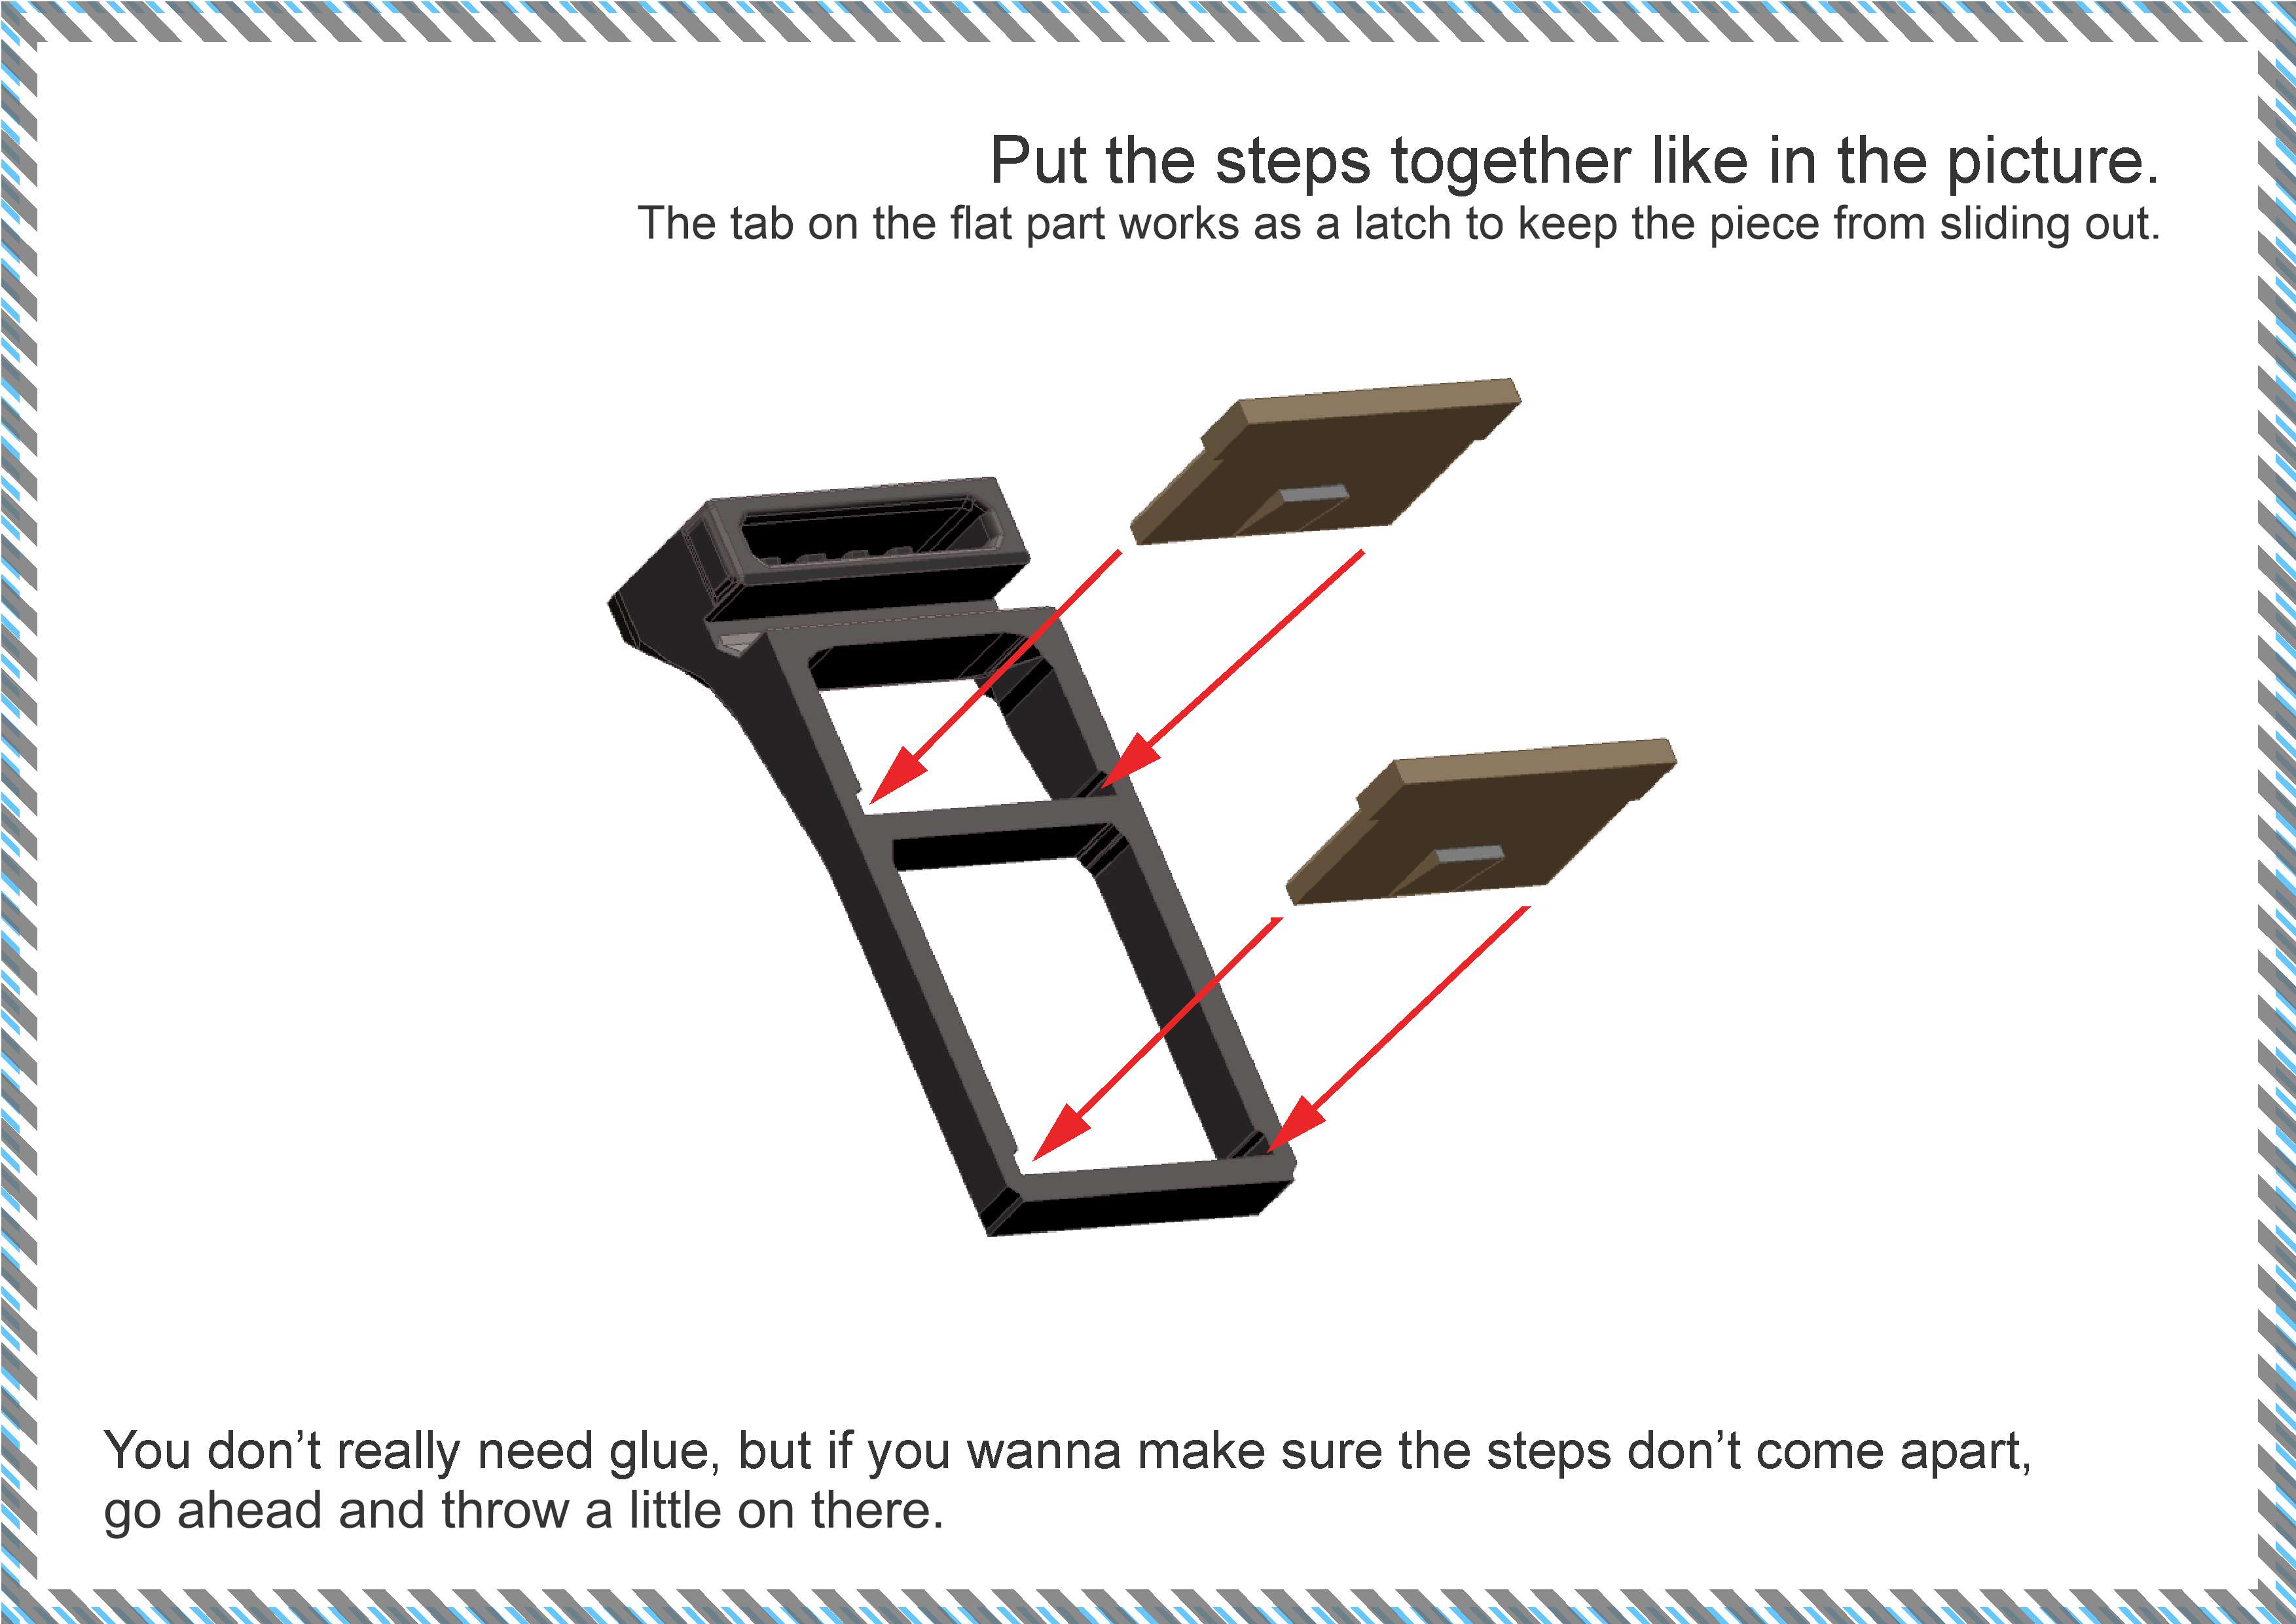
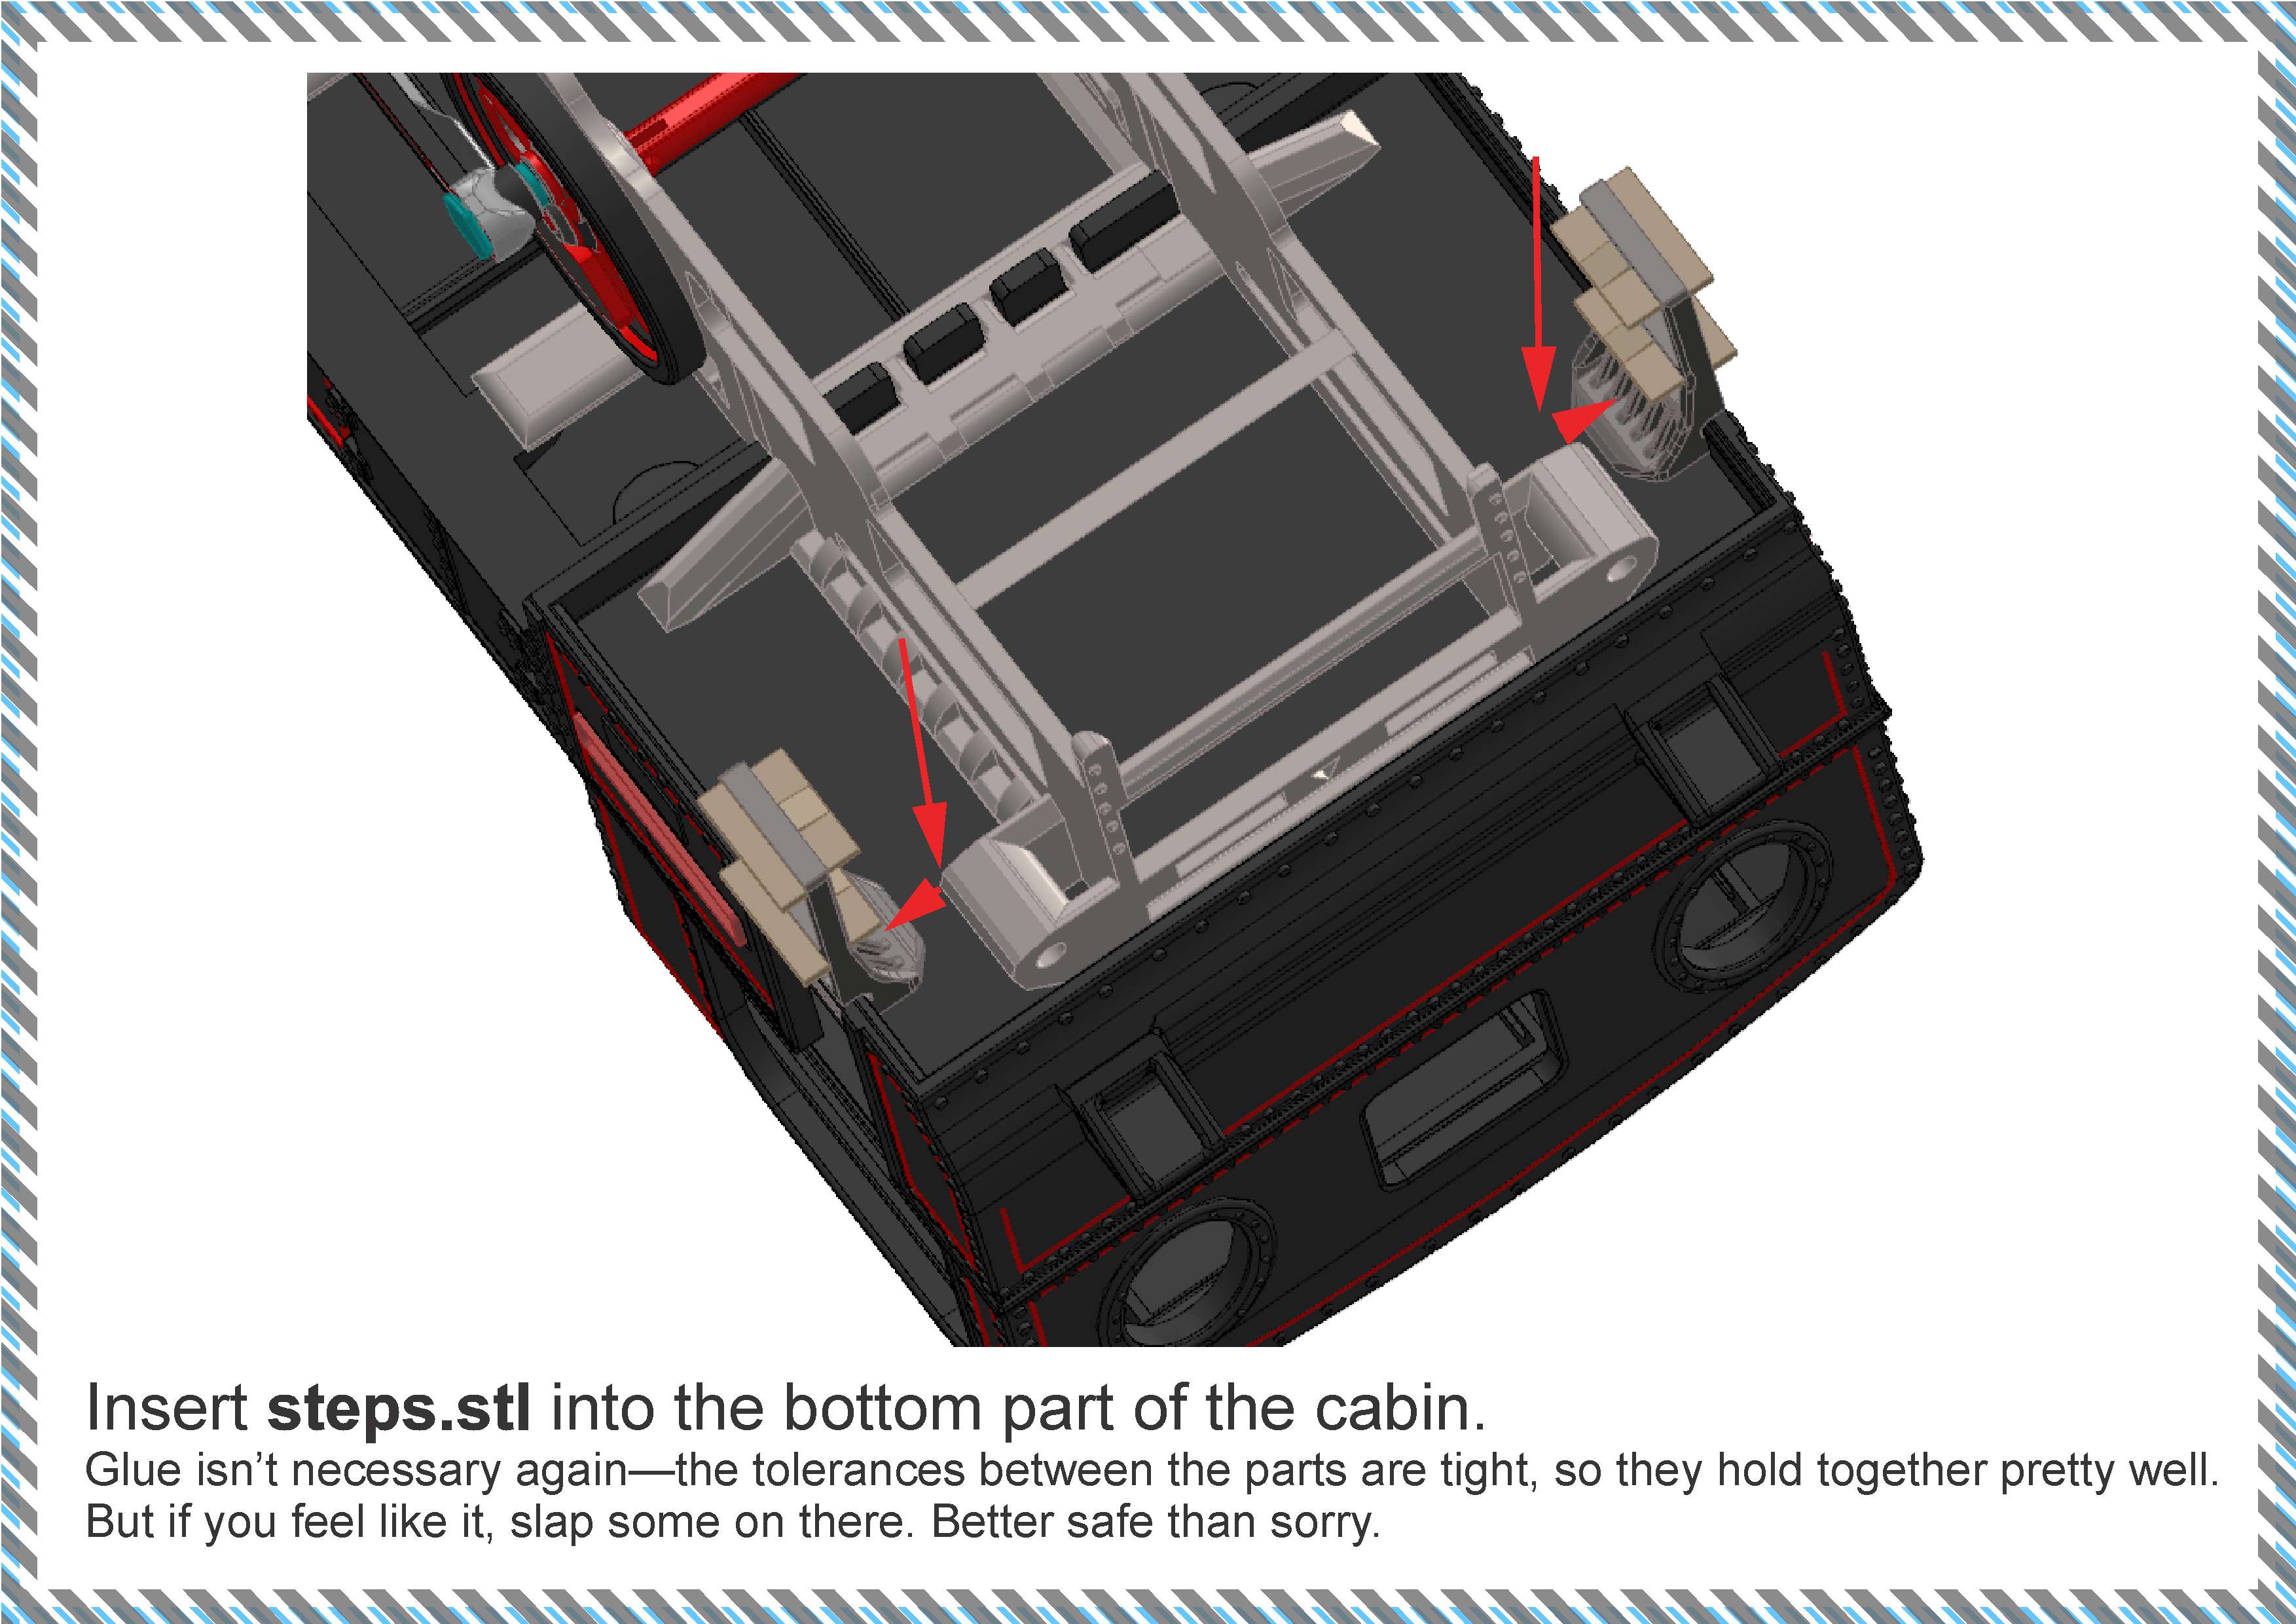
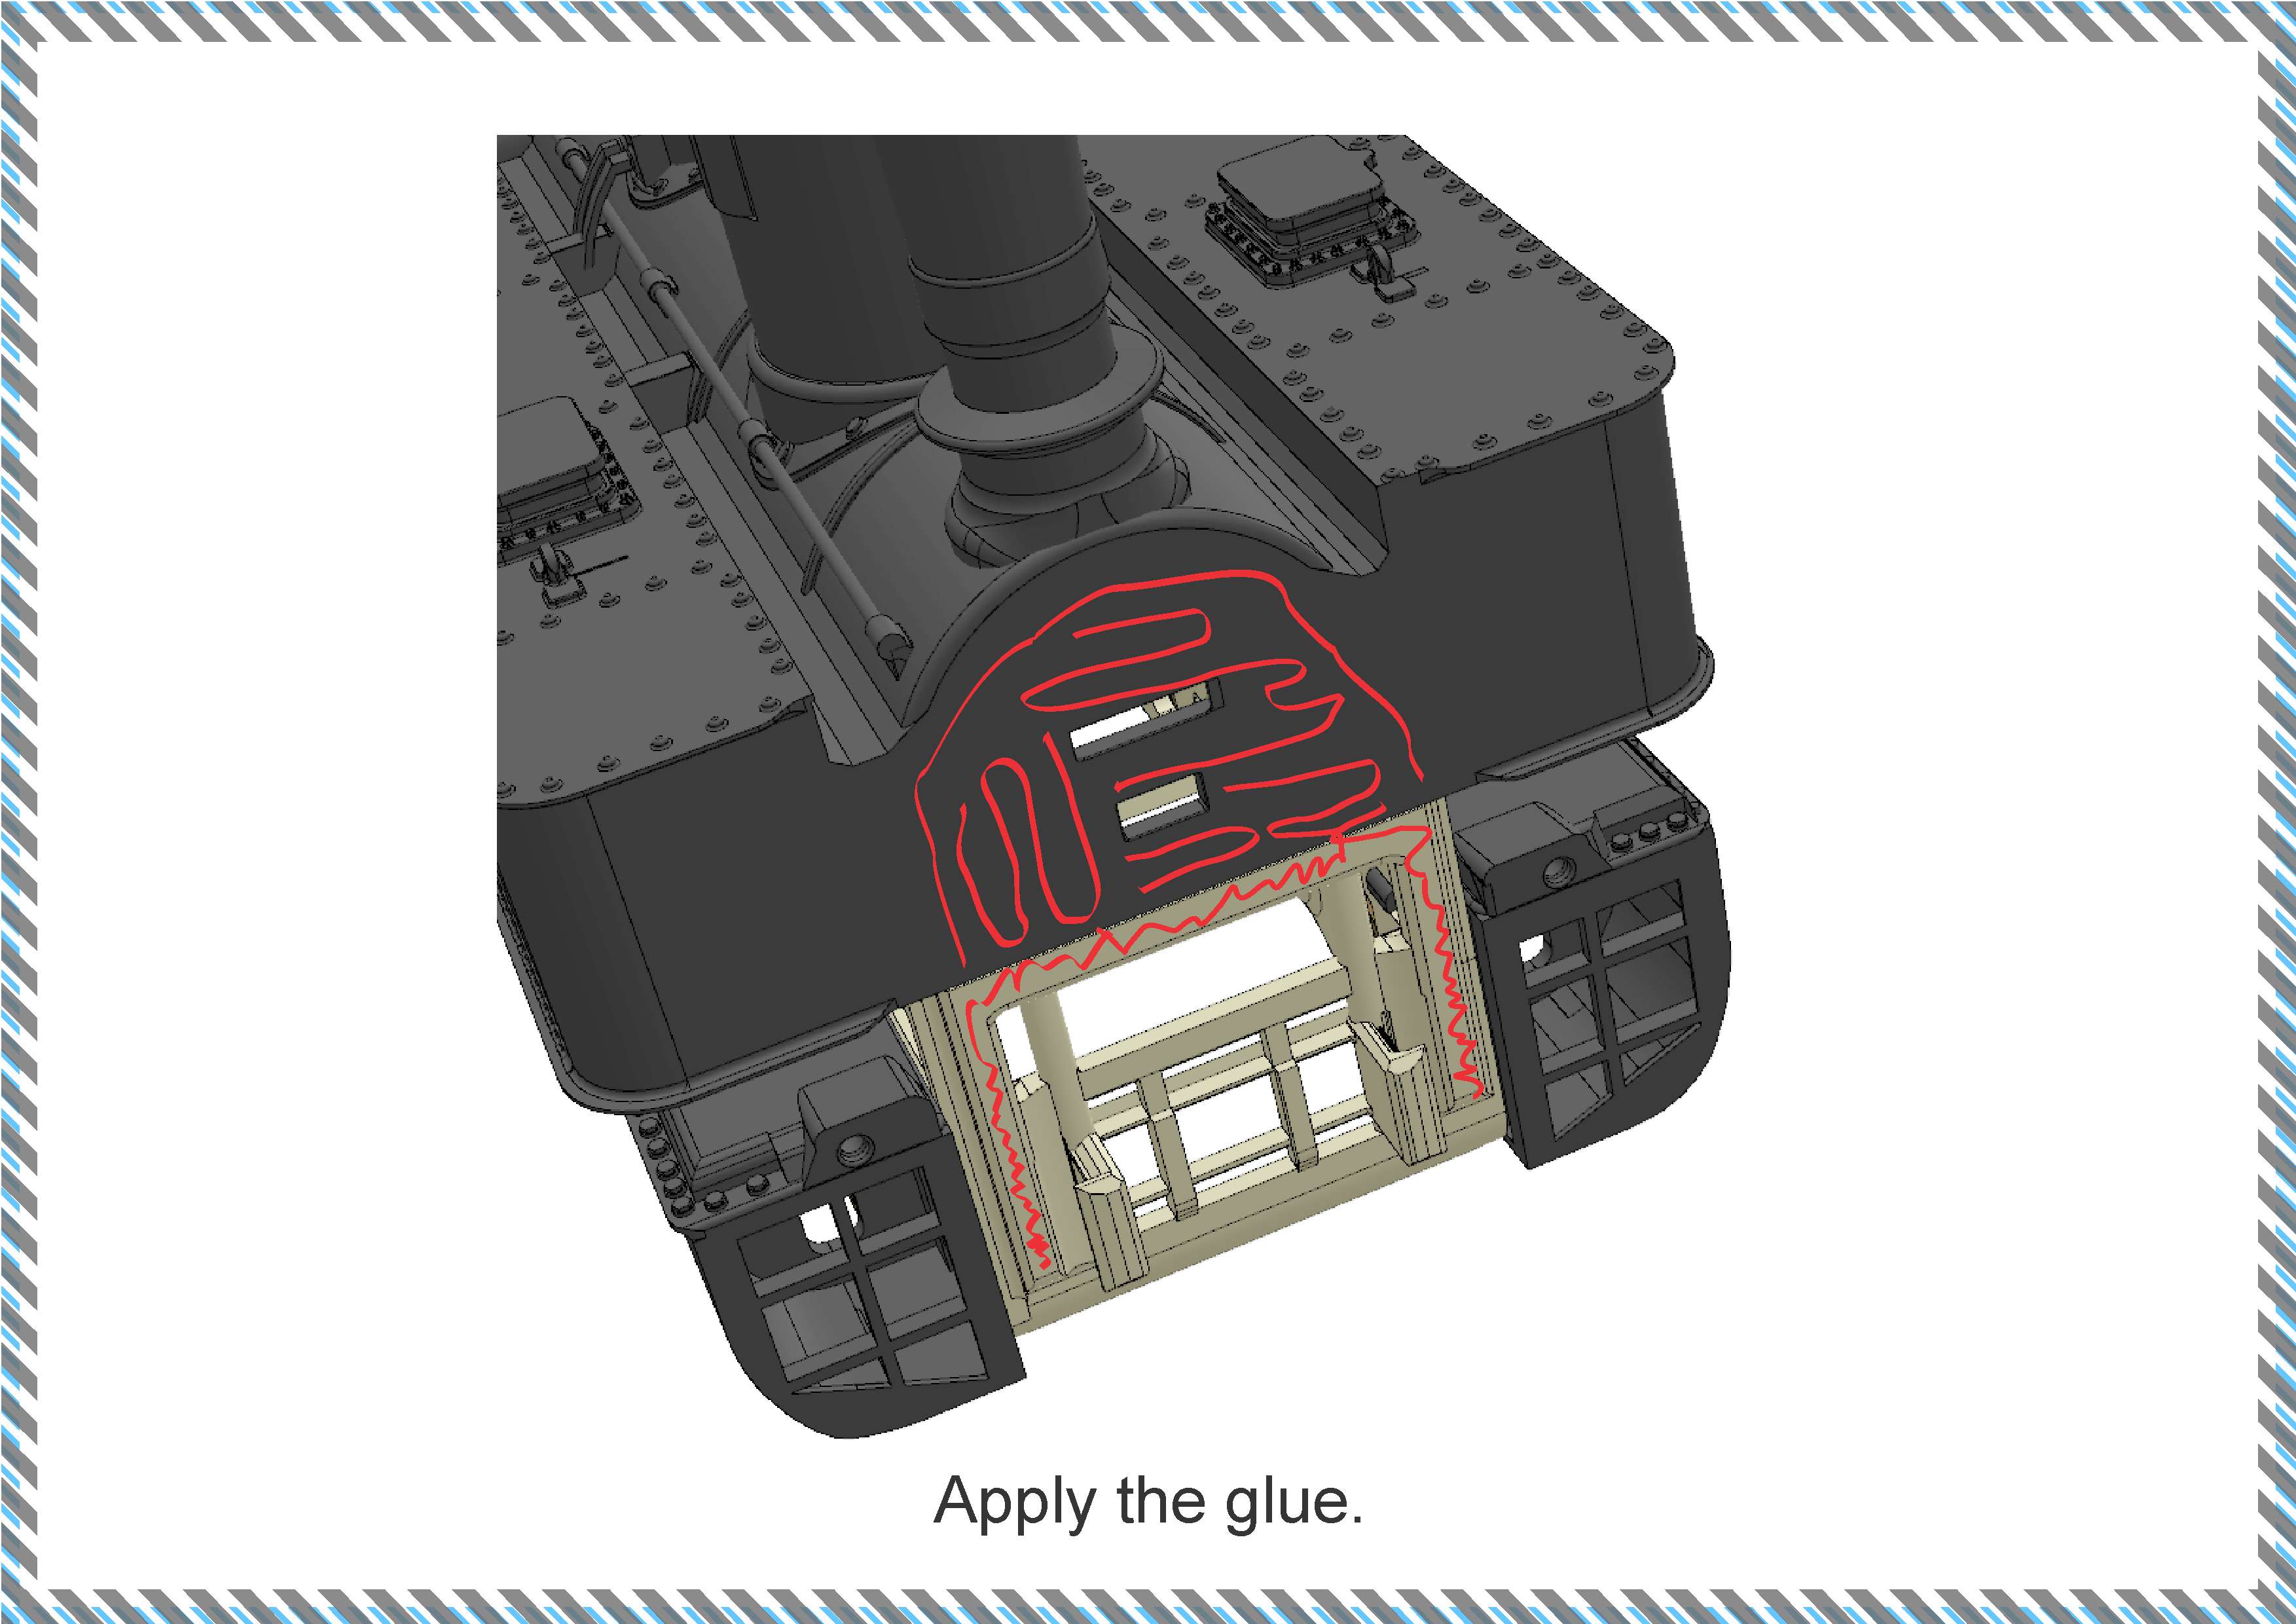
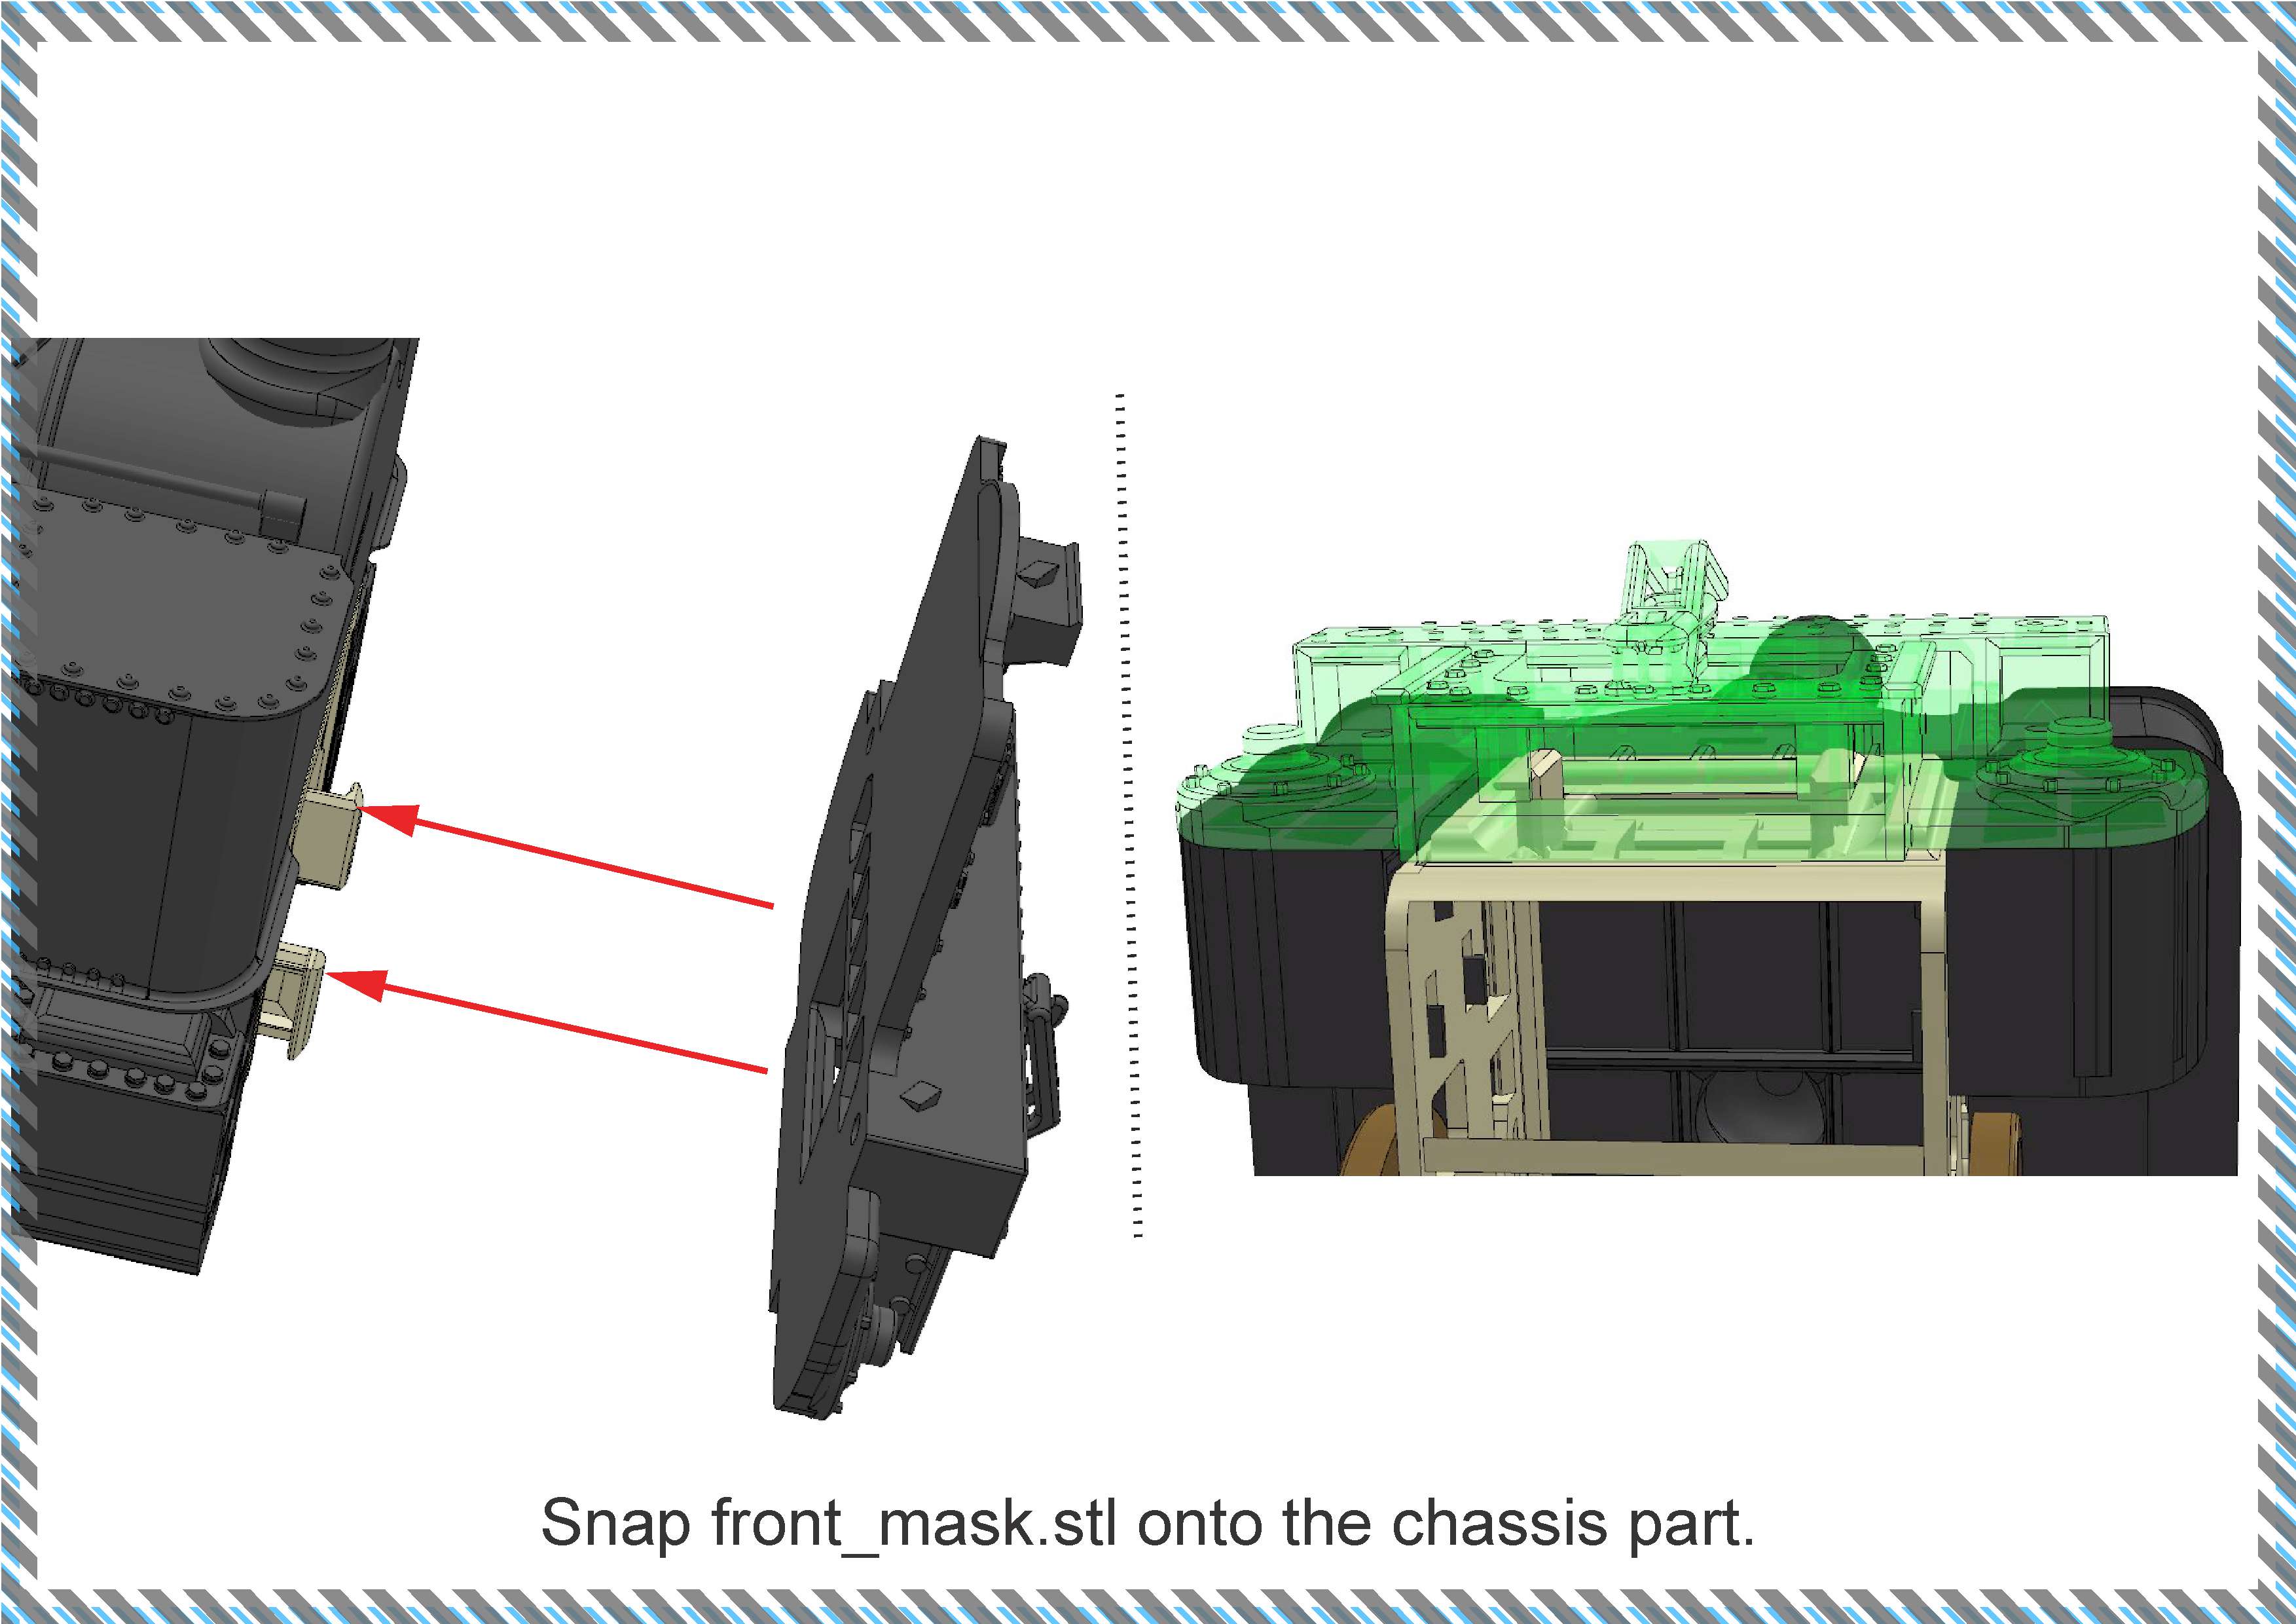

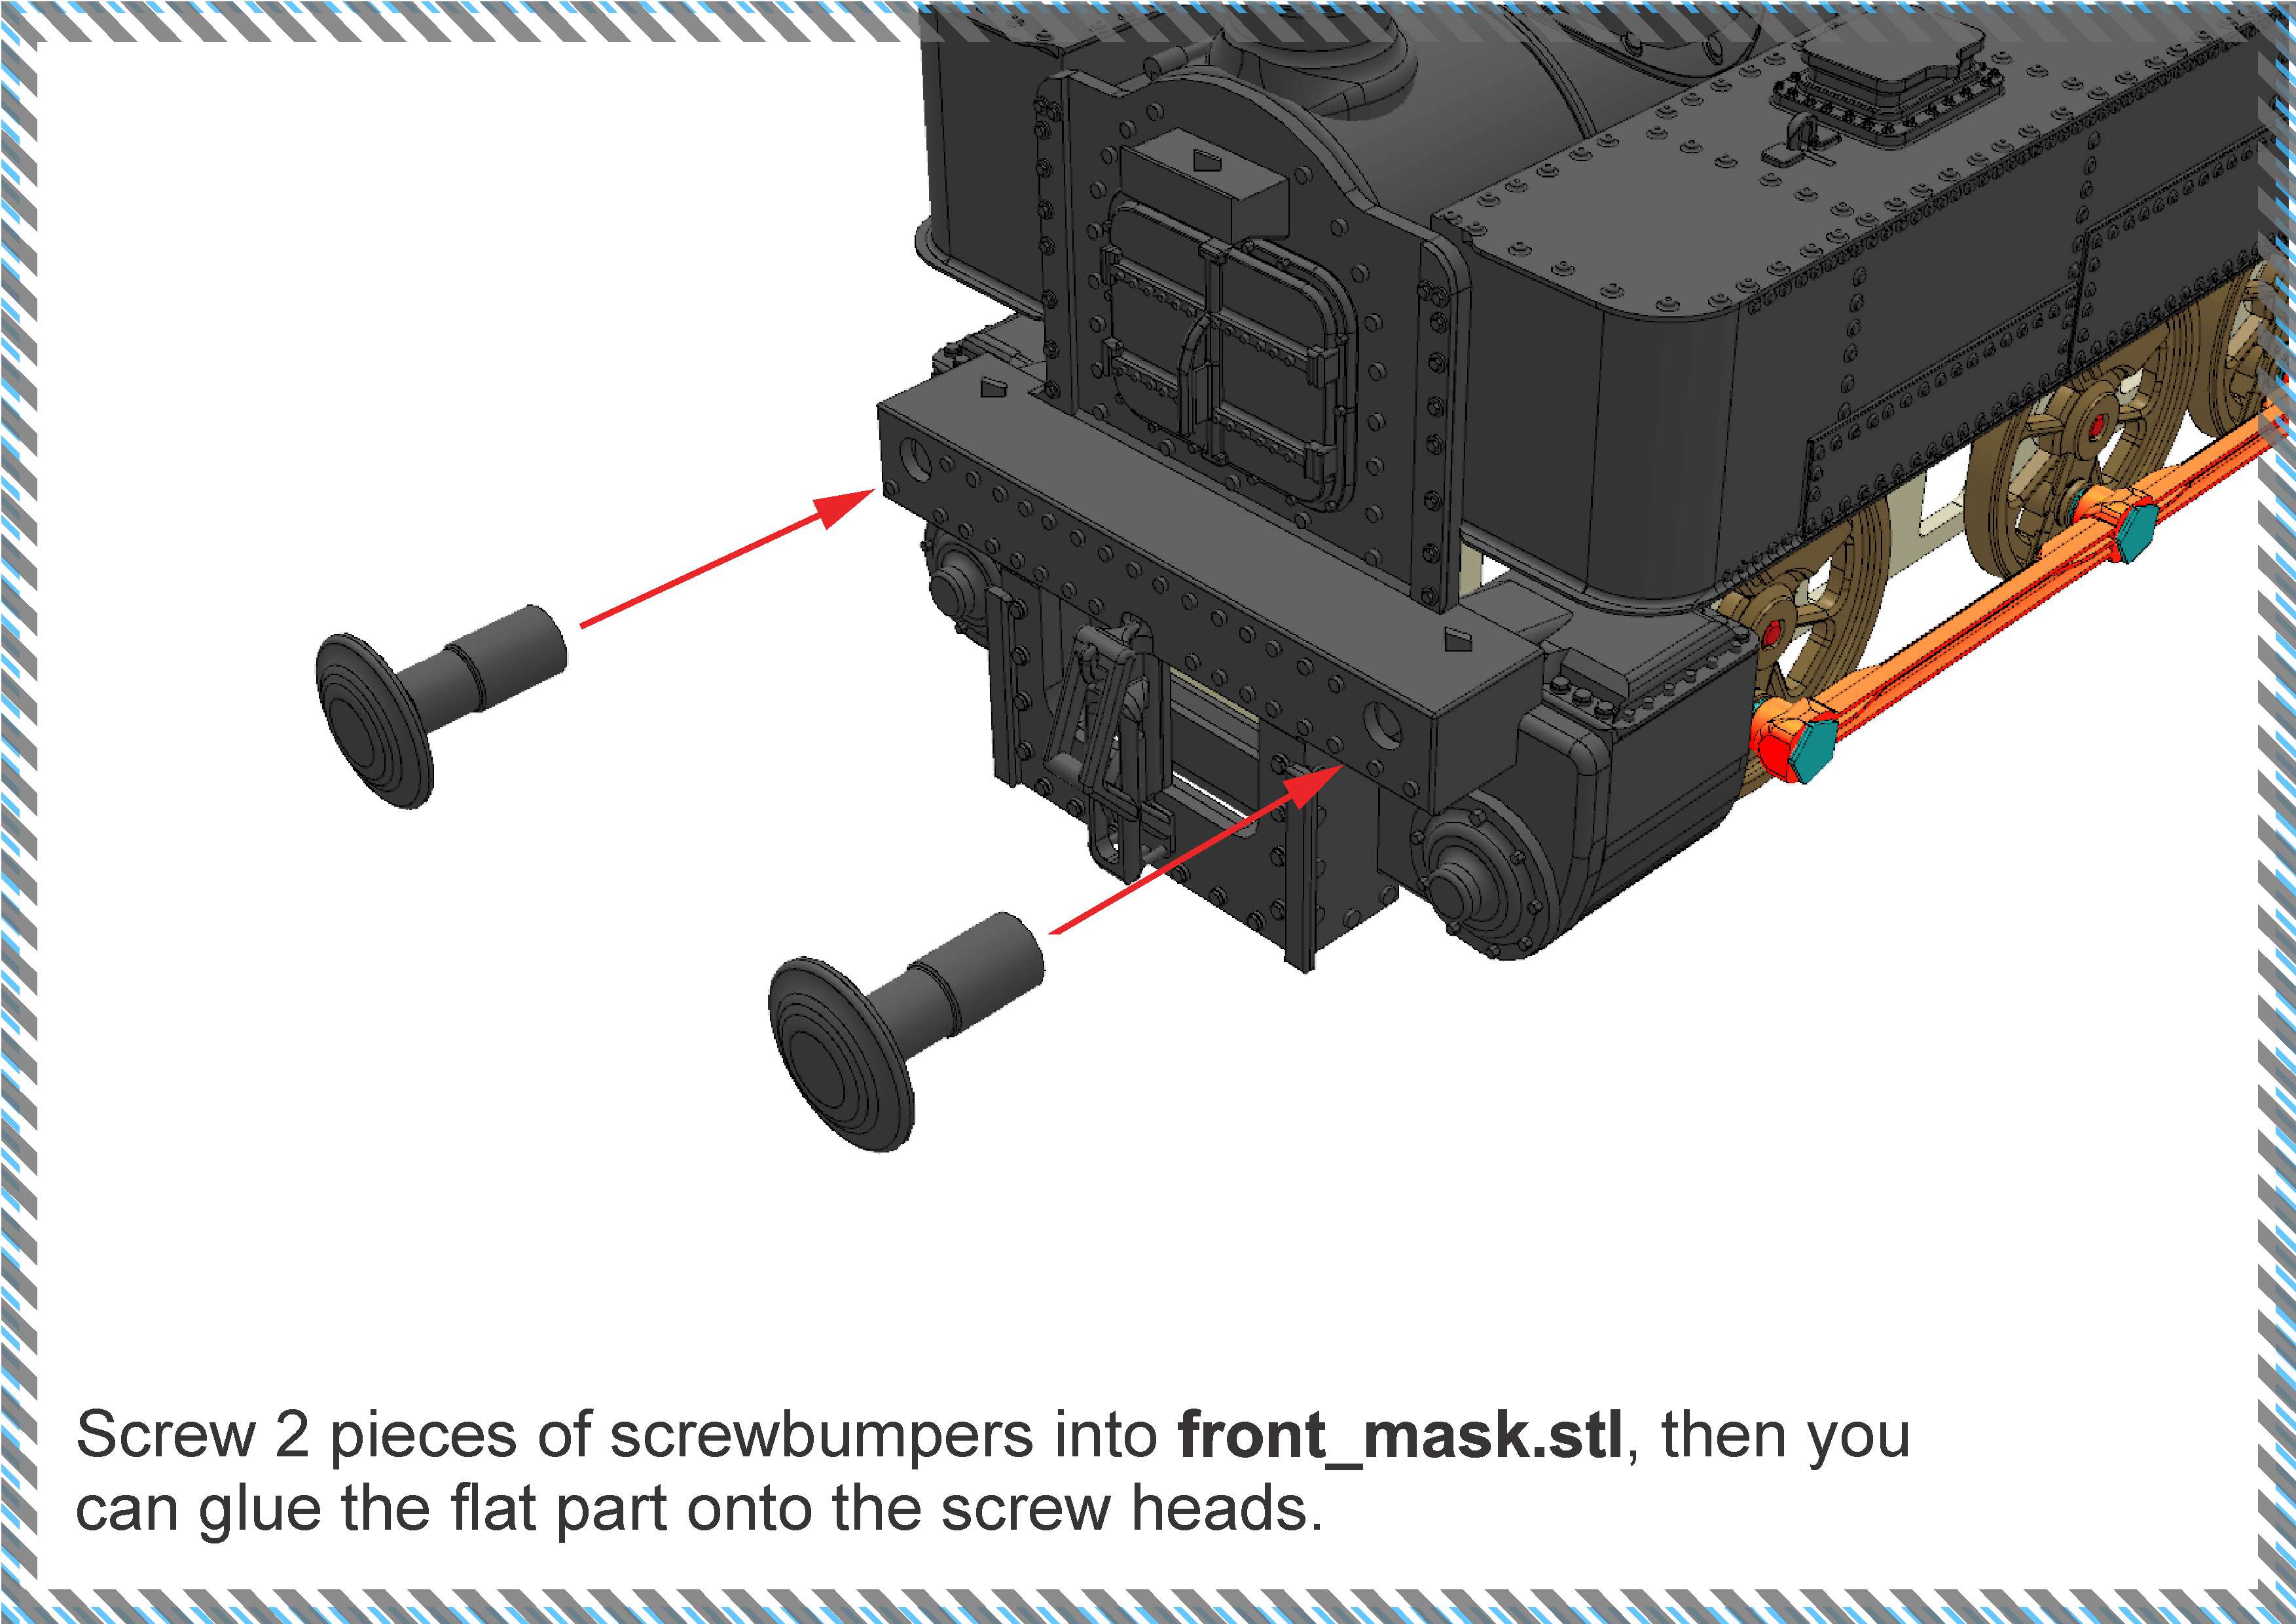
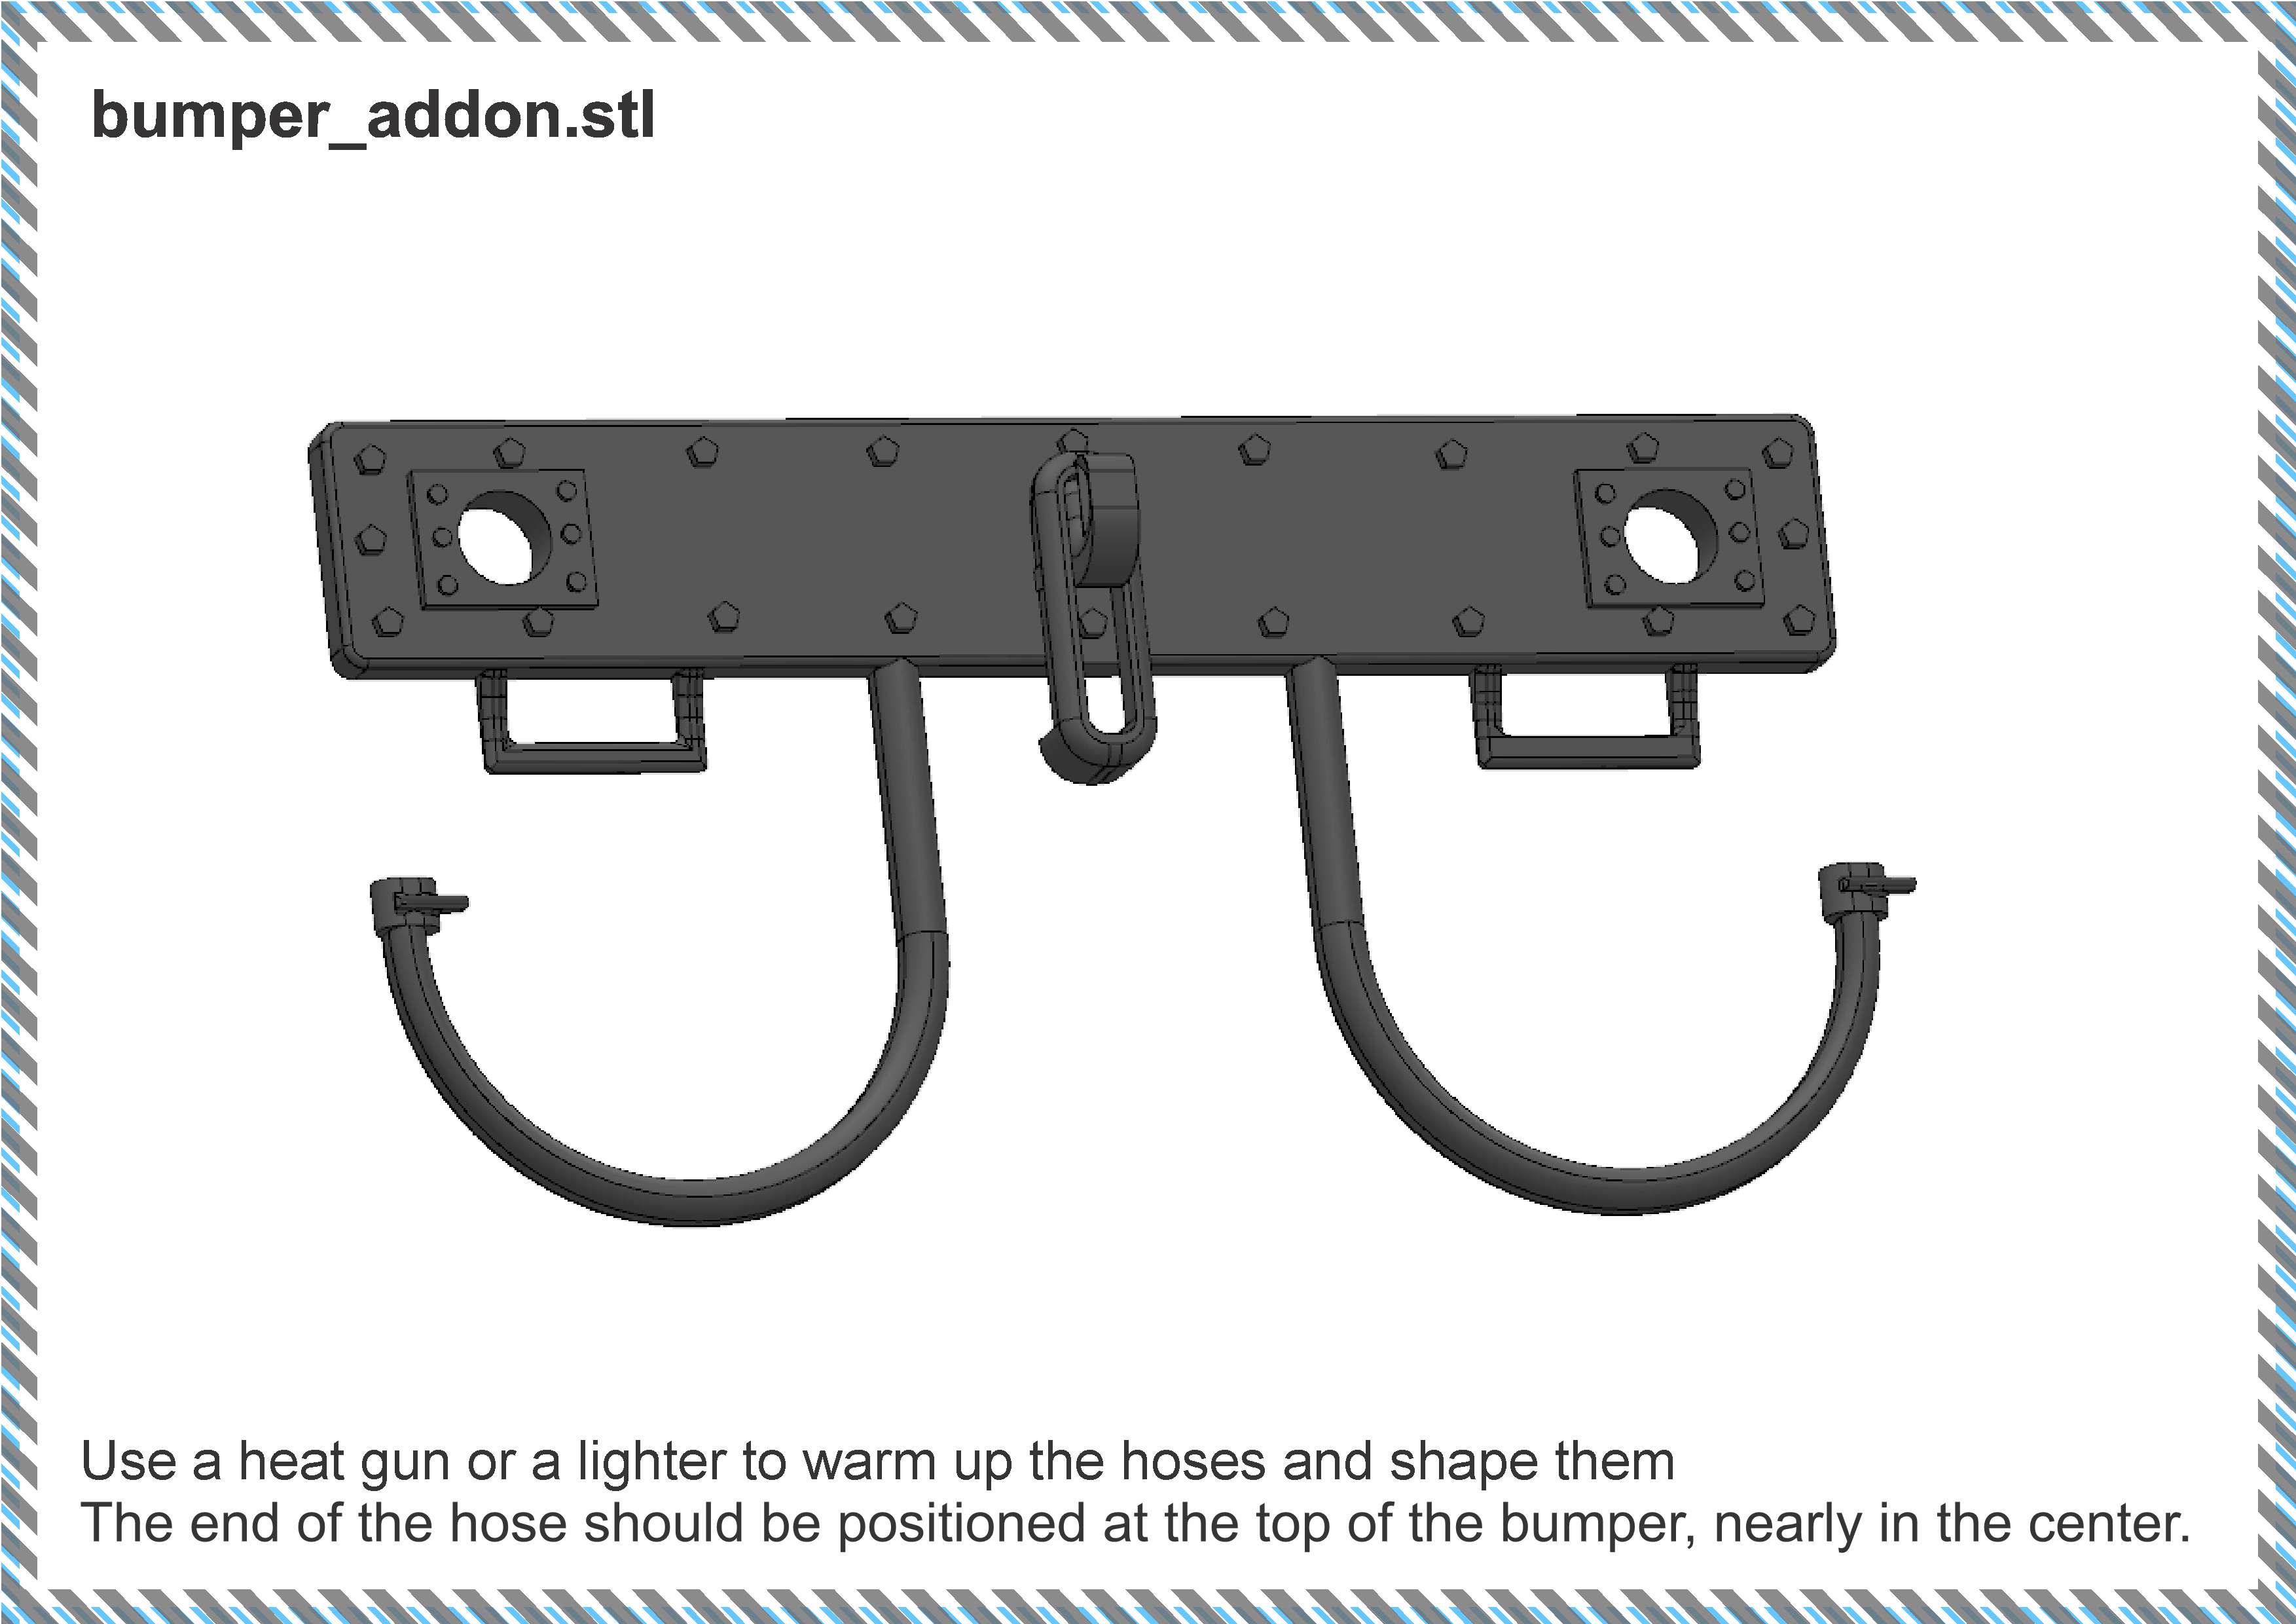
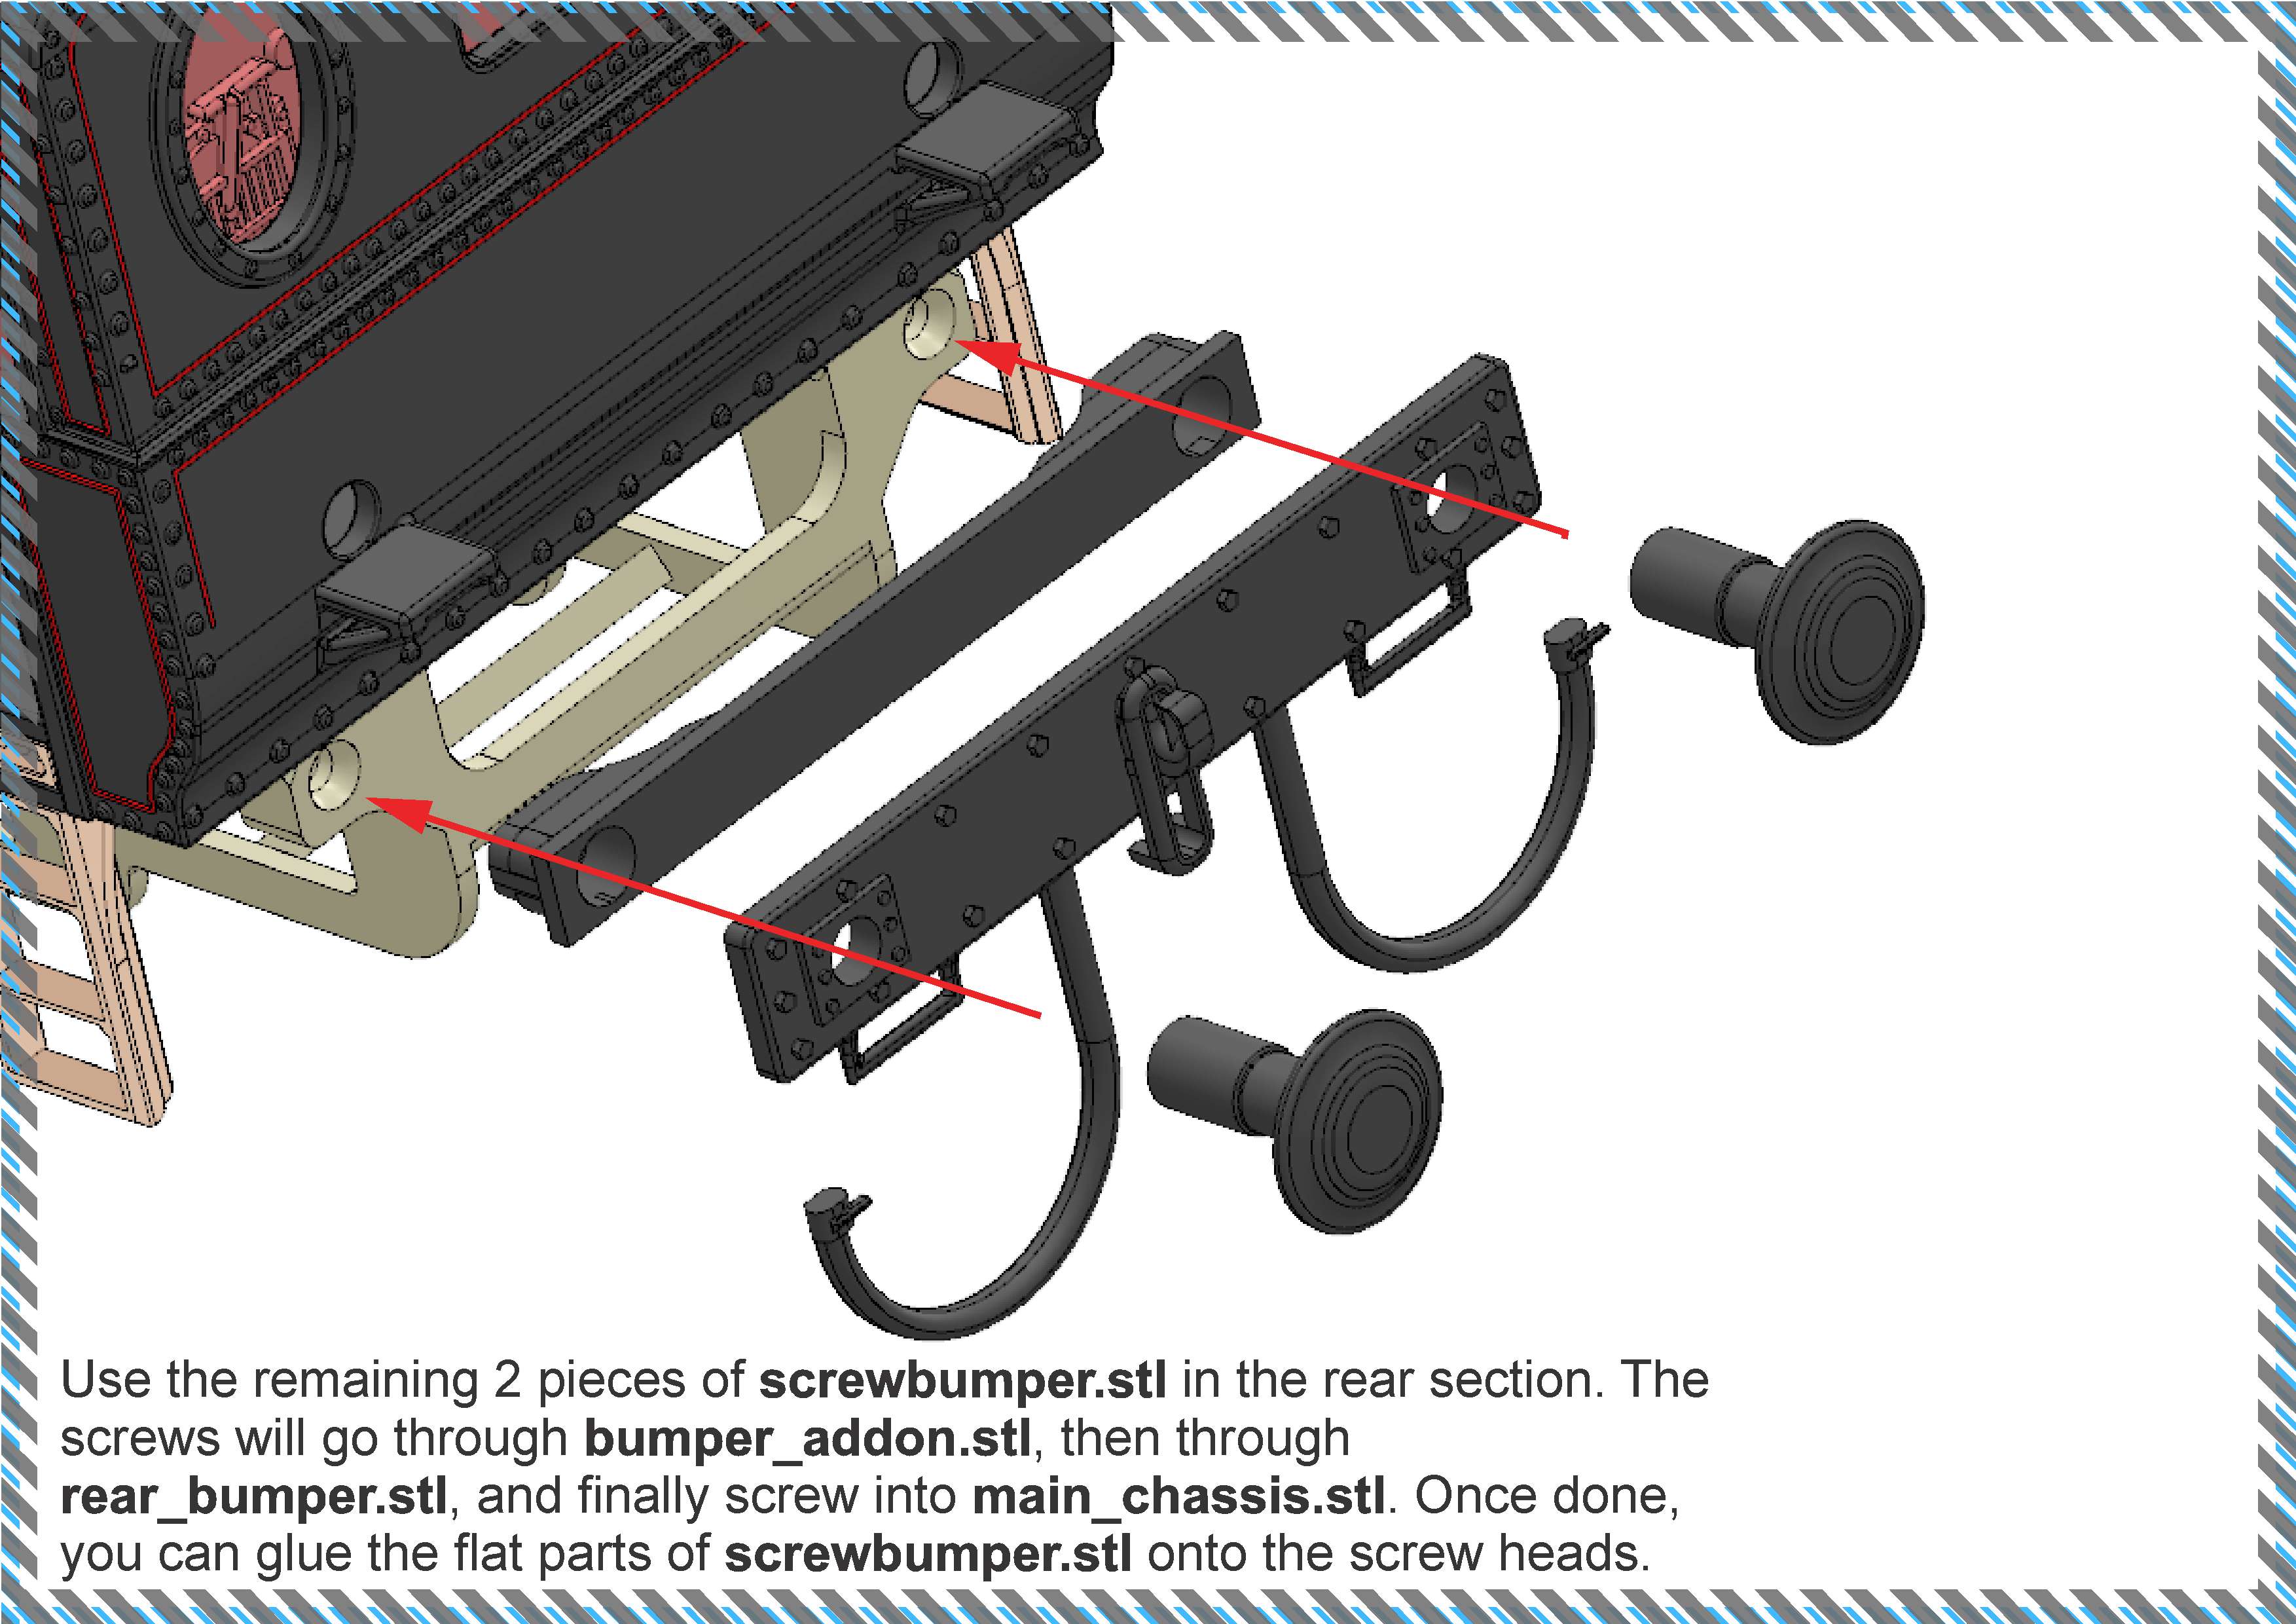
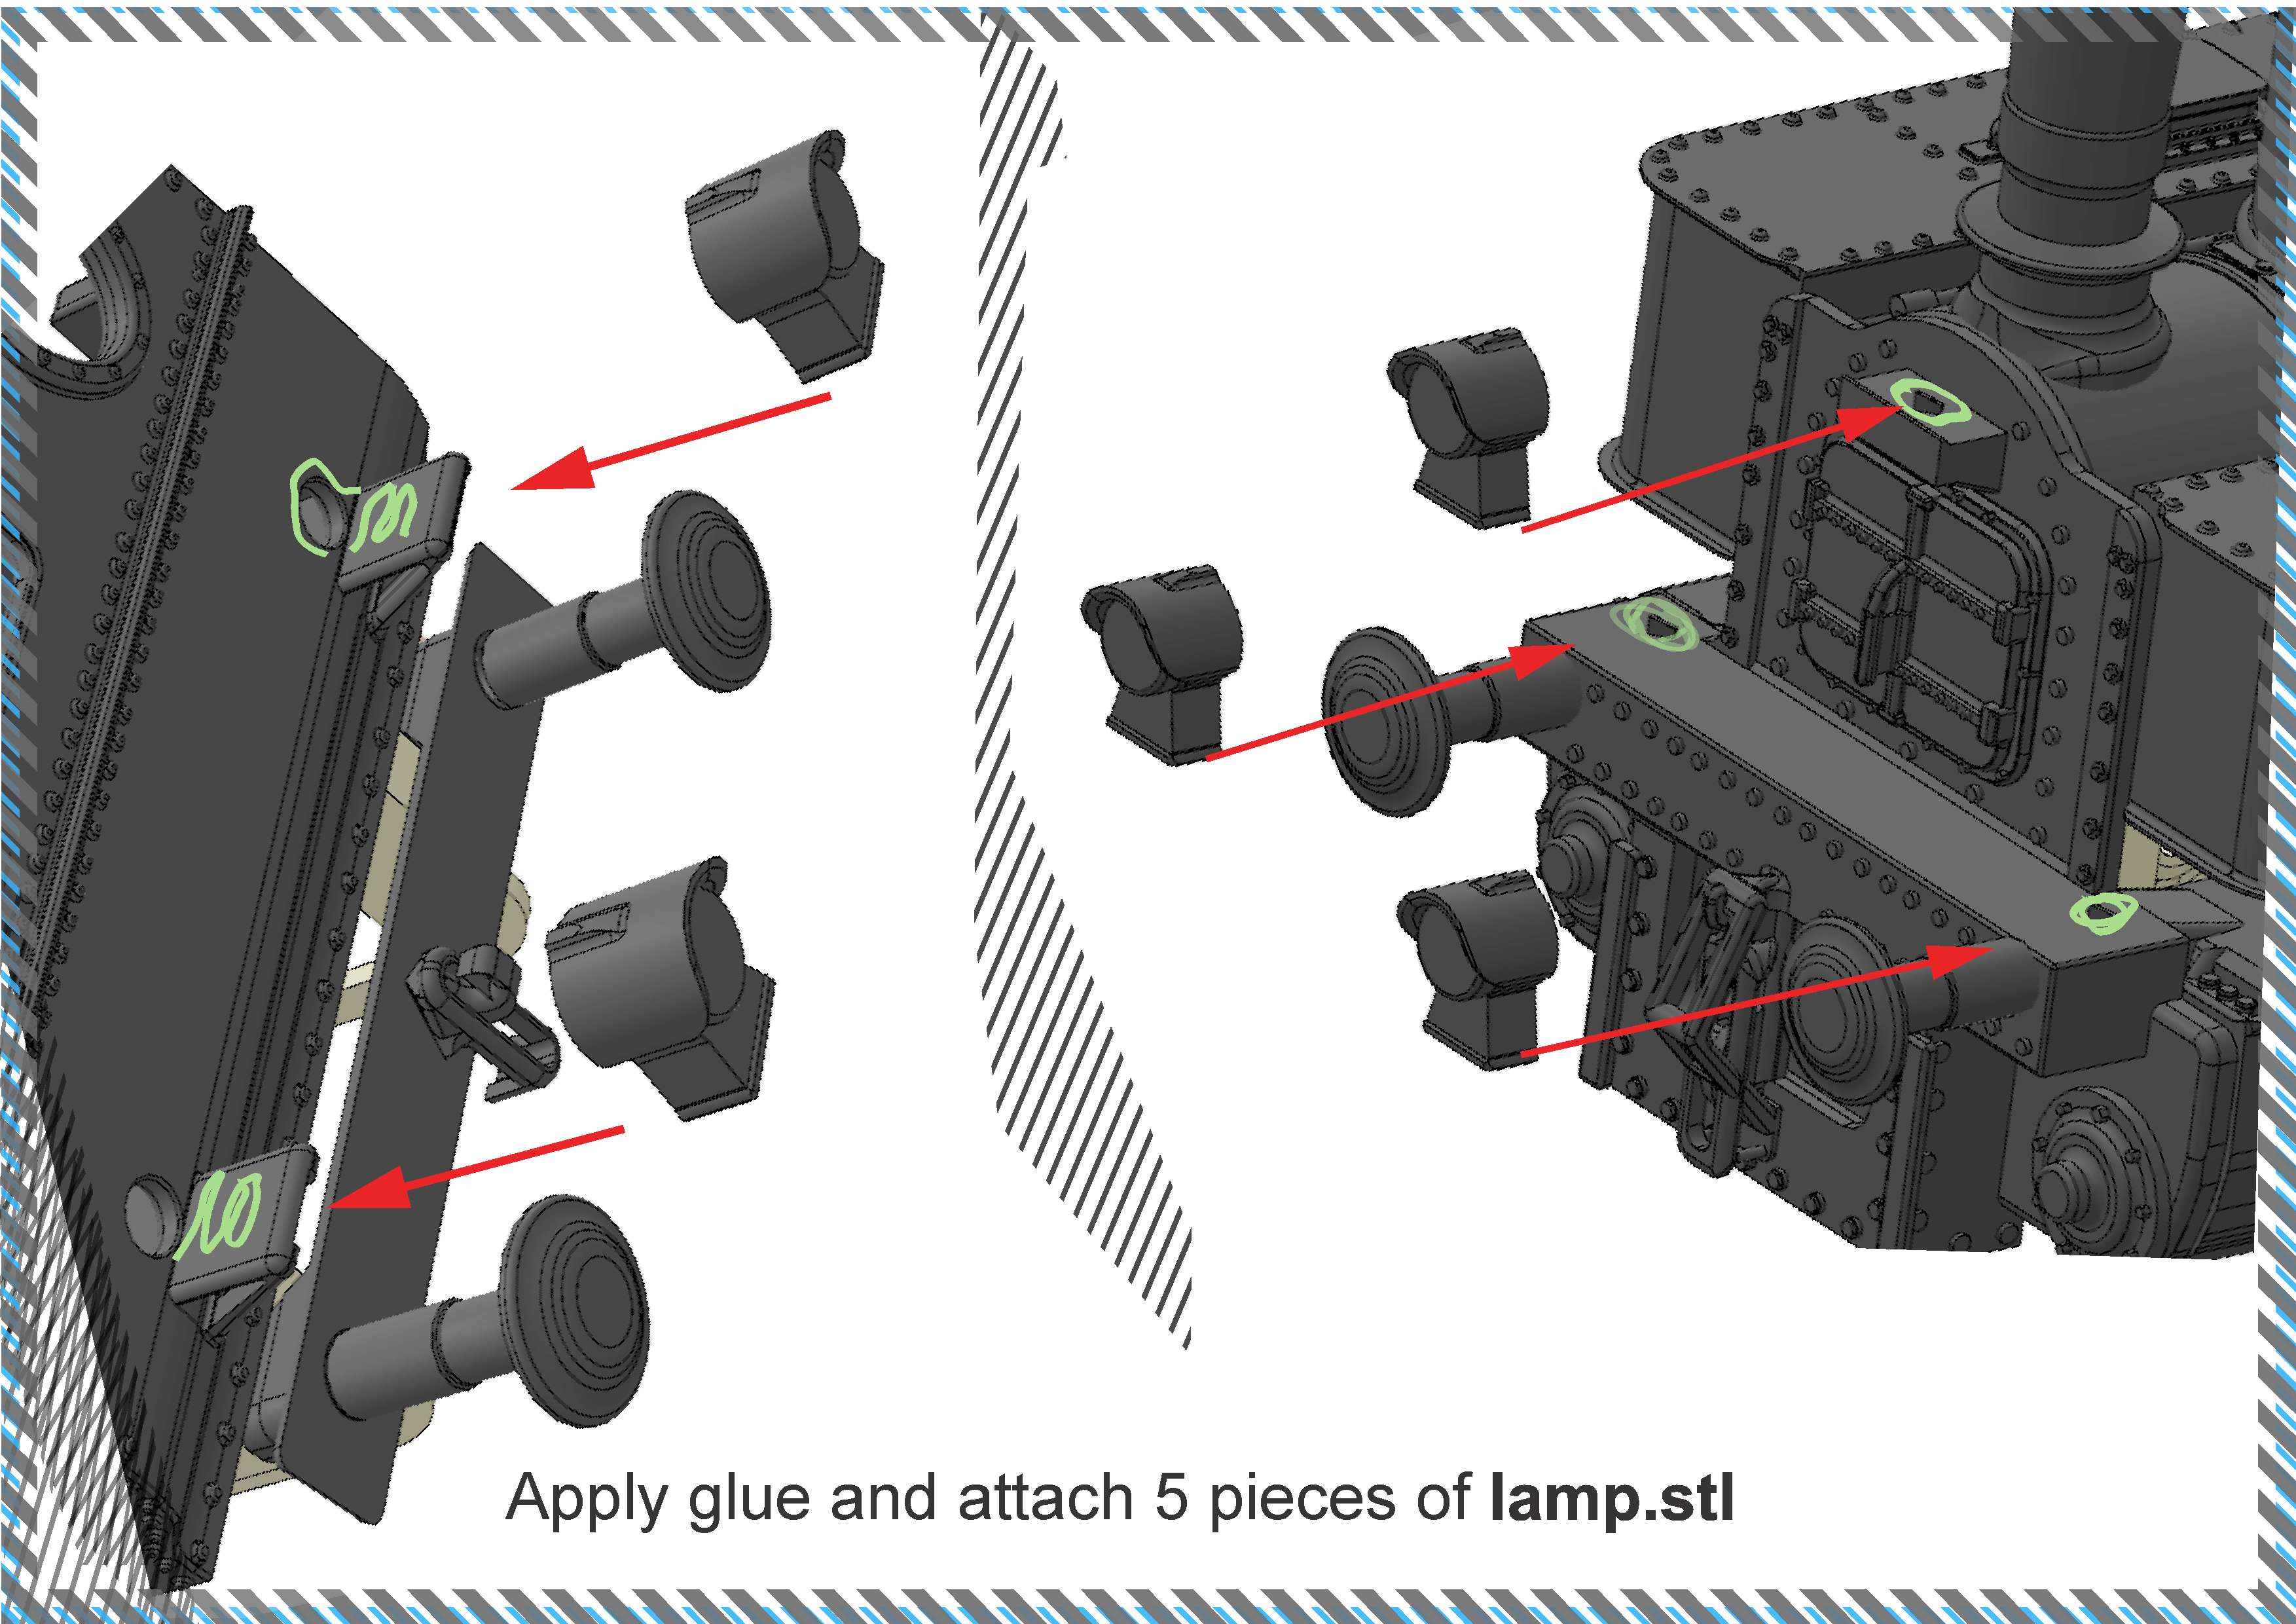
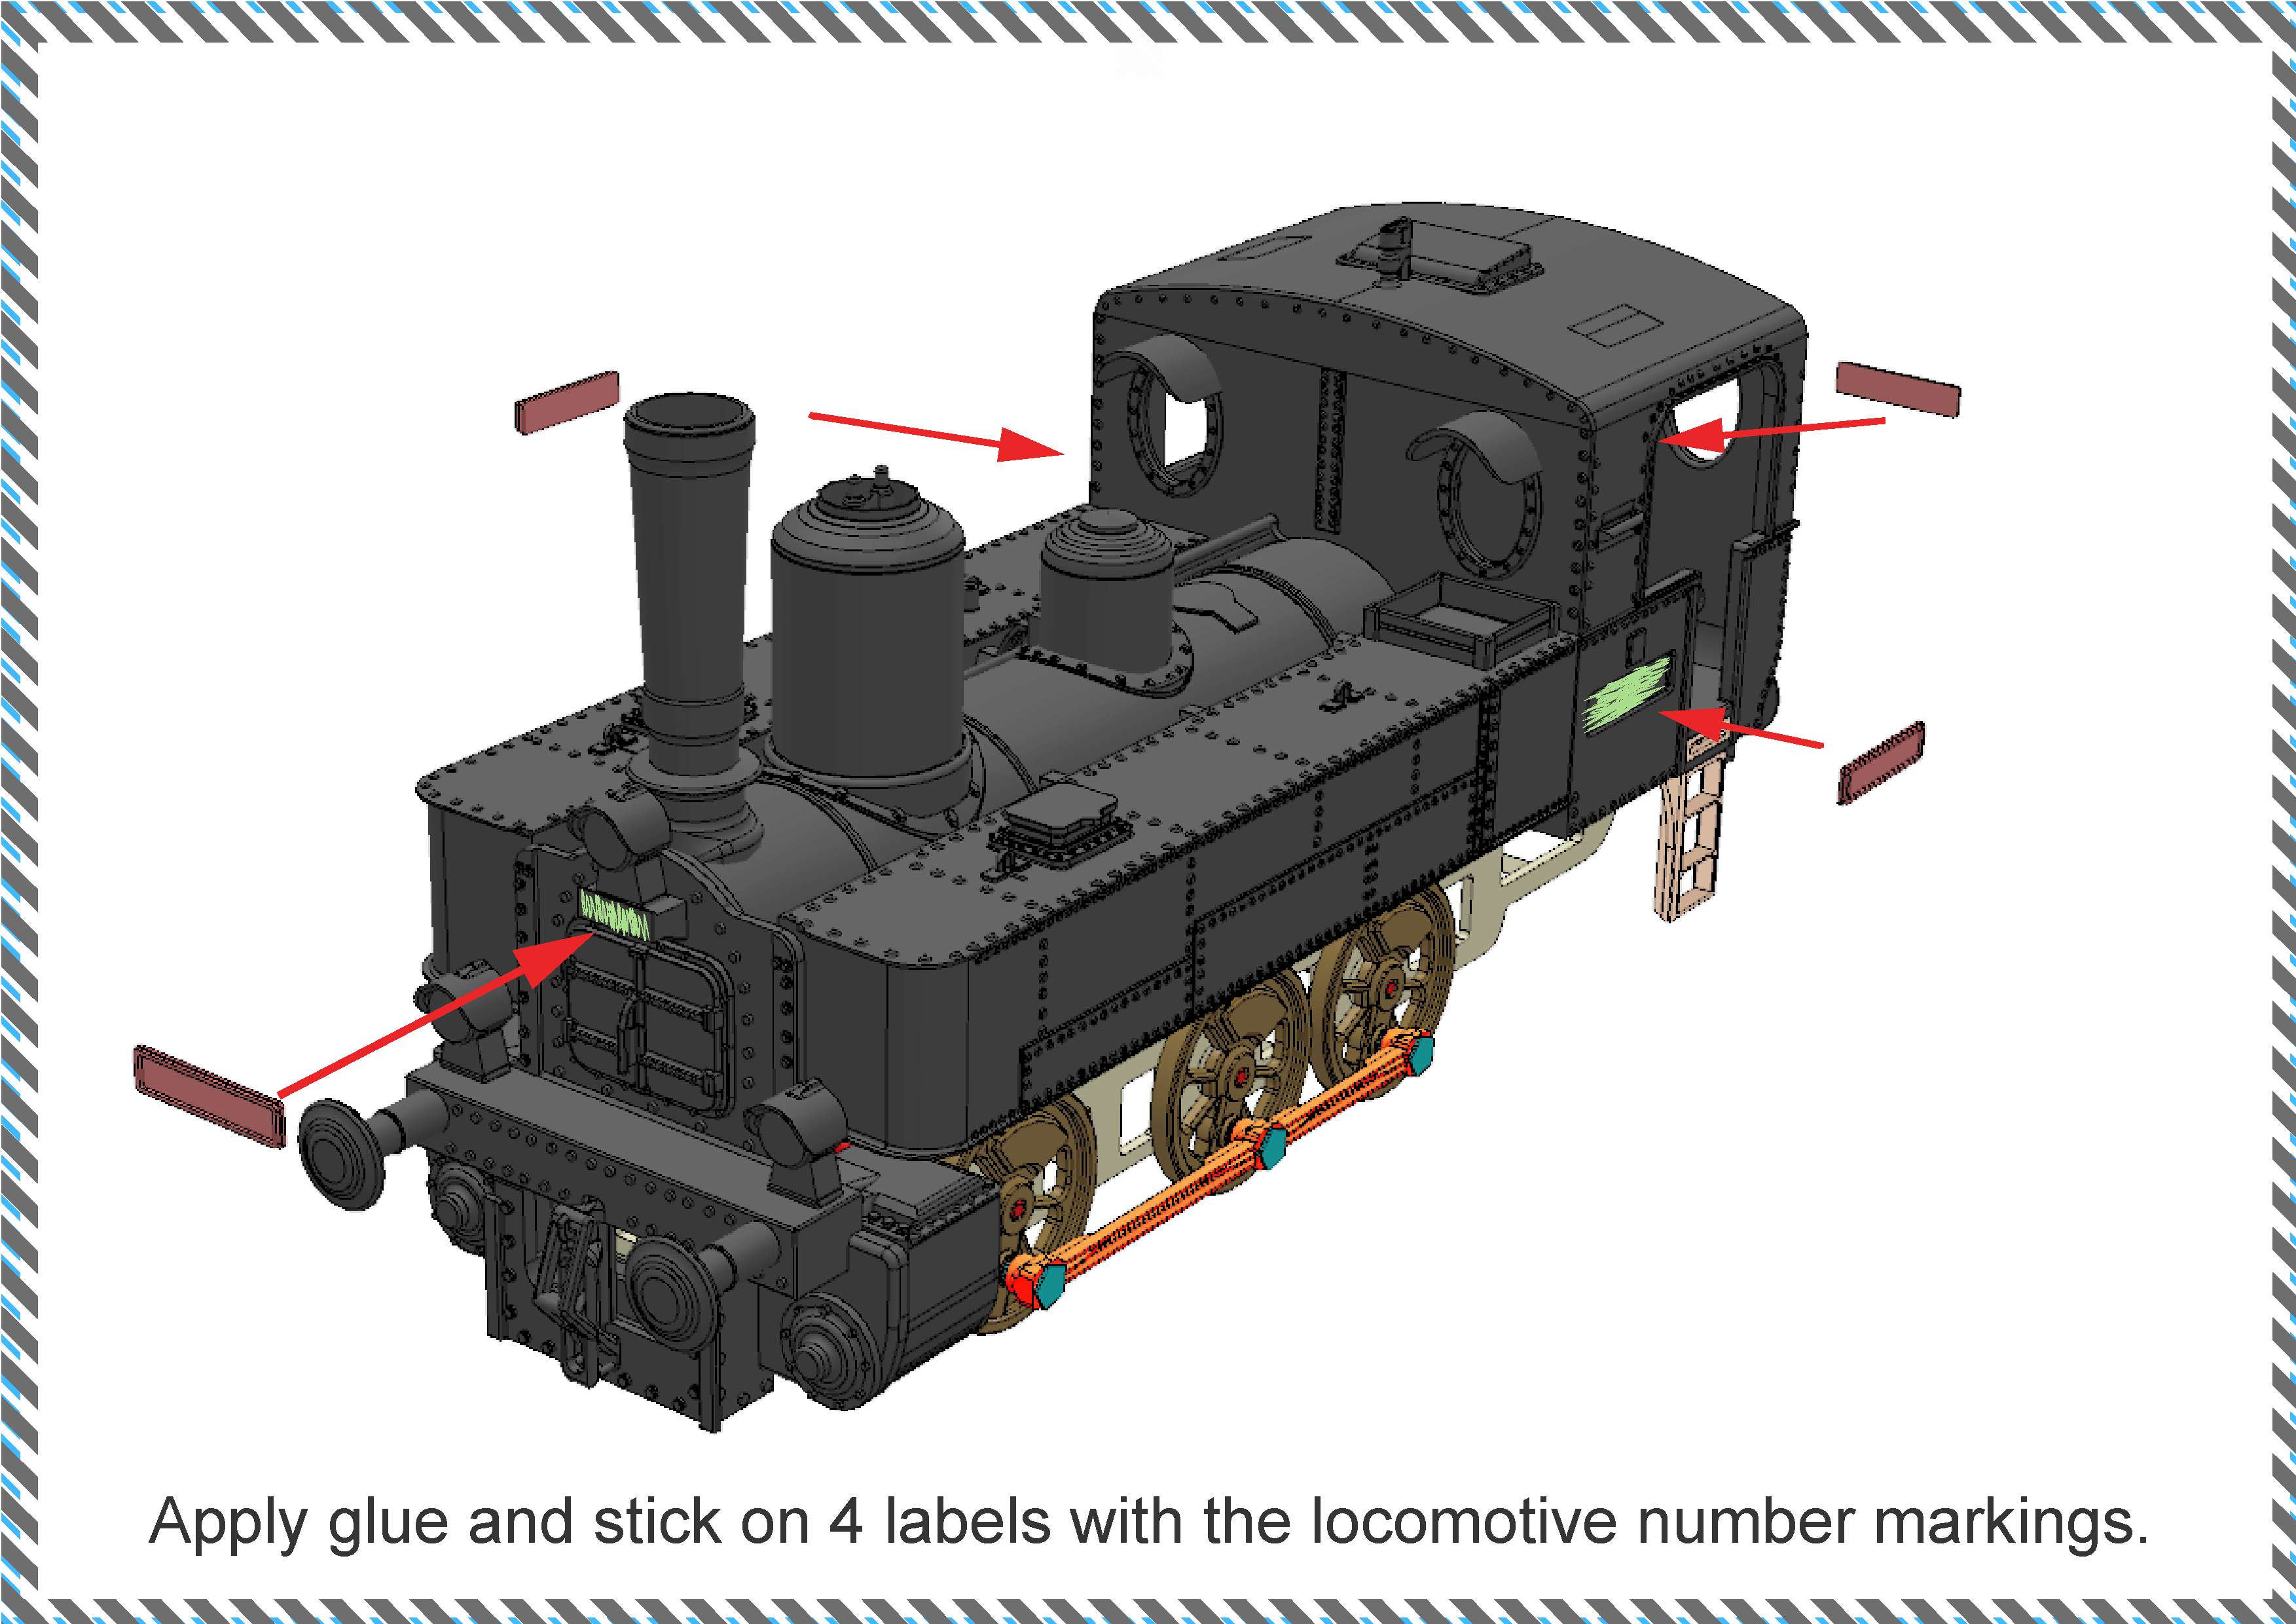
Handrail:

Assembling the handrails is one of the more challenging parts of the model and requires careful work and a little patience. The handrails are included in the rails.stl file, and printing them can be quite demanding due to the very thin parts. Handle the printed piece carefully to avoid damaging it.
Before assembly, I recommend running a small 0.6 mm drill bit through all the prepared holes in main_body.stl. This will remove any remaining material from the printing process and ensure that the eyelets fit properly.
Next, place the handrail from rails.stl against main_body.stl and use the prepared holes to position the individual eyelets beforehand. Insert the eyelets into the prepared holes and check their position relative to the handrail. I recommend assembling everything dry first and only gluing the parts once you are satisfied with the positioning.
For assembly, I recommend using eye pins with a diameter of approximately 0.6 mm:

AliExpress:
Eye pin 15 mm / 0.6 mm
buy here
For Czech Republic:
Eye pin 14 mm / 0.6 mm
https://www.bijoux-components.cz/ockova-jehla--cca-14mm-0-6mm/?variantId=25826
Working with parts this small requires some patience and preferably a pair of tweezers. The handrails are very delicate, so work carefully to avoid damaging them.
✰✮✰✮✰✮✰✮✰✮✰✮✰✮✰✮✰✮✰✮✰✮✰✮✰✮✰✮✰✮✰✮✰✮✰✮✰✮✰✮✰✮✰✮✰✮✰✮
You can download the improved driver’s cab with functional, print-in-place doors here:
👉 Download the cab with functional doors
The doors are printed directly in place, so no extra assembly is needed!
Please read the printing instructions and important notes provided on the model’s download page before printing and opening the doors for the first time.
✰✮✰✮✰✮✰✮✰✮✰✮✰✮✰✮✰✮✰✮✰✮✰✮✰✮✰✮✰✮✰✮✰✮✰✮✰✮✰✮✰✮✰✮✰✮✰✮
Model is inspired by the 310.0134 steam locomotive, which is currently housed at the depot in Turnov. Every summer, my son and I take nostalgic rides on it, and that's how my kid fell in love with this machine. For more info, you can check out www.parnimvlakemceskymrajem.cz
When I designed this, I really focused on making sure all the parts were easy to put together while still keeping it as close to the real locomotive as possible.
✰✮✰✮✰✮✰✮✰✮✰✮✰✮✰✮✰✮✰✮✰✮✰✮✰✮✰✮✰✮✰✮✰✮✰✮✰✮✰✮✰✮✰✮✰✮✰✮
If you like the model, I'd love to hear your feedback! You can rate it, leave a comment, share suggestions or questions, and best of all—post a pic of your print! 🤘😉😎