
HDMI5 Display Bracket
We calculate the final price from your selected file. You review and accept it before payment.
Saved on this device.

Bracket to attach a Bigtreetech HDMI5 V1.2 to a Ratrig V-Core 4
- Rating
- 0 / 5
- Likes
- 3
- Downloads
- 38
- Makes
- 0
- Views
- 343
- Reviews
- 0
Updated at source:
Model information
- Source
- Printables
- Category
- Other Printer Parts & Upgrades
- License
- Creative Commons — Attribution
A bracket to mount the BigTreeTech HDMI5 display to the left side of a Ratrig V-Core 4. The main bracket can be mirrored to mount the display on the right side instead.
BOM
In addition to the two printed parts, you will need:
- BigTreeTech HDMI5 V1.2
- 3-4x threaded inserts (M3 thread, 5mm diameter, 4mm height)
- 7x M3x16 BHCS
- 2x M6x16 SHCS (M6x12 if you are not using an enclosure panel)
- HDMI cable (may need an adapter to mini or micro HDMI depending on your Pi version)
- USB A to USB C data cable (6 feet is a good size)
- Optional: Print a few P-Clips to help route your cables!
Installation Steps:
- Mount the HDMI5_Mount piece to the side panel, replacing the M6x12 SHCS and washer on the upper corner.
- Install the display on the bracket, using 4 M3x16 BHCS.
- Install the threaded inserts into the holes in the [a]_HDMI5_Faceplate. You can install all 4 threaded inserts, or you can skip the one that doesn't have a matching screw hole in the HDMI5_mount.
- Install the [a]_HDMI5_Faceplate using 3 M3x16 BHCS.
- Connect your USB and HDMI wires to the Raspberry Pi.
- Install Klipperscreen according to their documentation.
Optional: USB + HDMI Pass-through
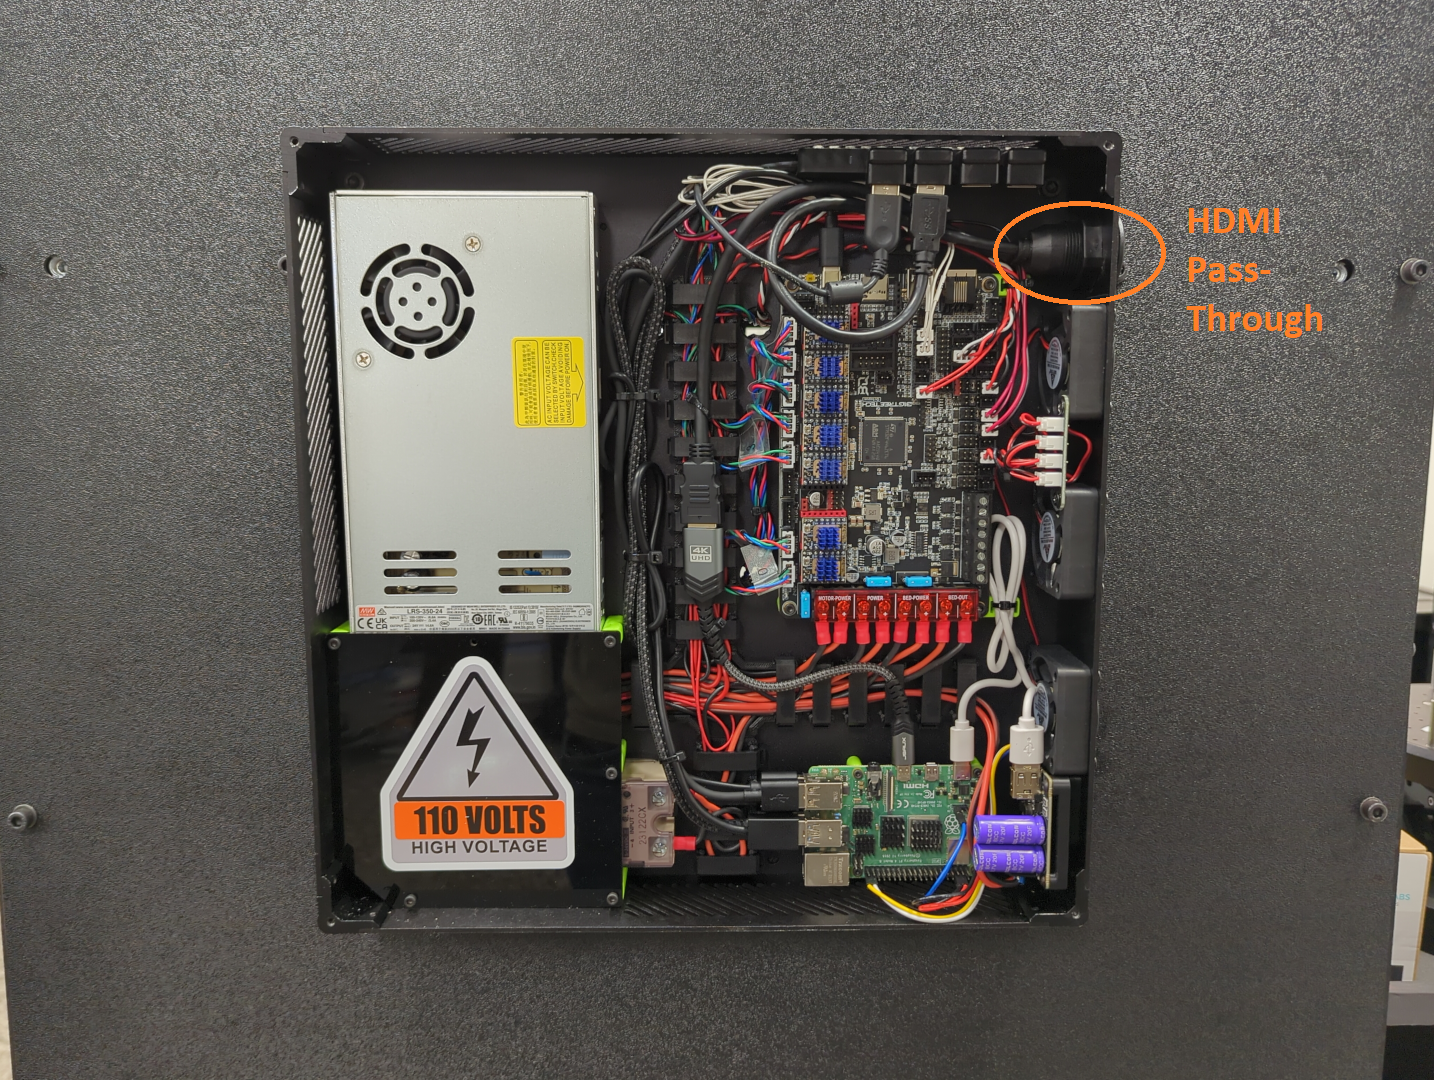
On my V-Core 4 400, I installed a USB + HDMI pass-through on the side of my electronics enclosure, just above the three cooling fans (drilled out a big hole with a step drill bit). With this pass-through, a 3 foot HDMI and USB cord were the perfect length to run from the display to the electronics enclosure. Internally, I connected the USB to a USB hub with some adapters, and the HDMI to a HDMI → MicroHDMI adapter, which then connected to the Pi. You could also use the 3 foot version of the pass-through if you have enough spare USB ports, but you still may need an HDMI Adapter.