
1 / 1
ELECTRONICS FOR STUDENTS V1
Order a print of this model
We calculate the final price from your selected file. You review and accept it before payment.
Saved on this device.
Model information
- Source
- Printables
- Category
- Engineering
- License
- Creative Commons — Attribution — Noncommercial — Share Alike
LEARNING GOALS:
To learn basic electronics, starting with fundamental components like resistors, capacitors, and diodes is a great approach. Here's a simple roadmap:
Resistors:
- Purpose: Resistors control the flow of current in a circuit by providing resistance.
- Learning Points:
- Understand Ohm’s Law: V=I×RV = I \times RV=I×R, where VVV is voltage, III is current, and RRR is resistance.
- Practice reading resistor color codes to determine resistance values.
- Experiment with resistors in series and parallel to see how they affect overall resistance in a circuit.
Capacitors:
- Purpose: Capacitors store and release electrical energy, acting as small batteries in circuits.
- Learning Points:
- Learn about capacitance, the unit of measurement (Farads), and different types of capacitors (ceramic, electrolytic).
- Practice connecting capacitors in circuits and observe their behavior when charging and discharging.
- Experiment with capacitors in parallel and series and study how capacitance adds up differently in each configuration.
Diodes:
- Purpose: Diodes allow current to flow in one direction only, making them essential for converting AC to DC or for protecting circuits from reverse currents.
- Learning Points:
- Understand forward and reverse bias in diodes.
- Experiment with simple circuits using a diode and observe how it blocks or allows current.
- Try using LEDs (Light Emitting Diodes) to get visual feedback on current direction.
BUILDING INSTRUCTIONS:
Required Materials for the Basics:
- 3D printed parts (PLA)
- 8 heated inserts (M3, "CNC Kitchen")
- 8 M3x10 screws
- 4 wood screws with a maximum diameter of 5mm, only needed for mounting on wood
- 1 meter of 1.5mm² rigid wire, fully stripped
Assembly Steps:
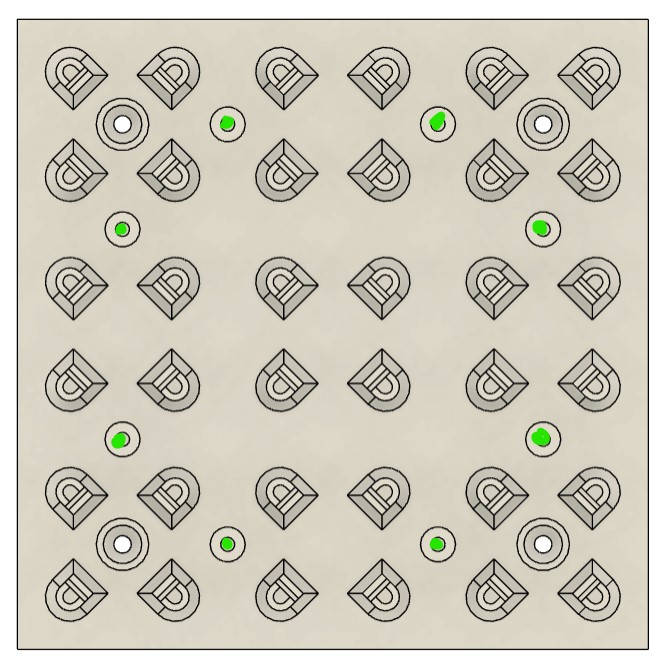
- Press the heated inserts into the bottom housing (marked by green points).
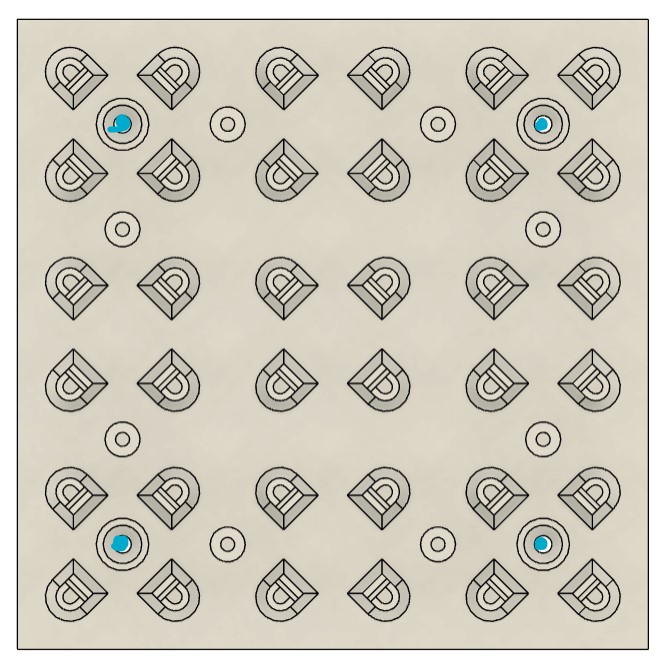
- This step is only necessary for mounting on wood: attach the bottom housing with wood screws through the points marked in blue.
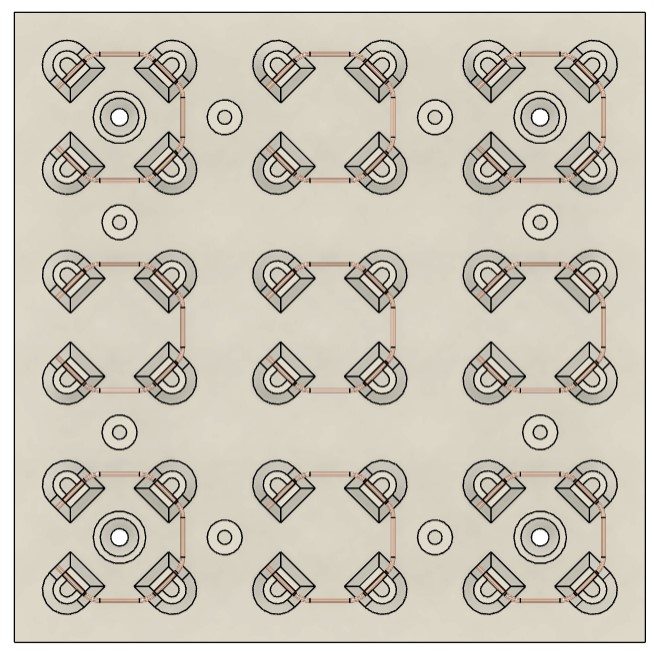
- Cut the copper wire into 10 cm pieces and press it into the printed part as shown in the picture.
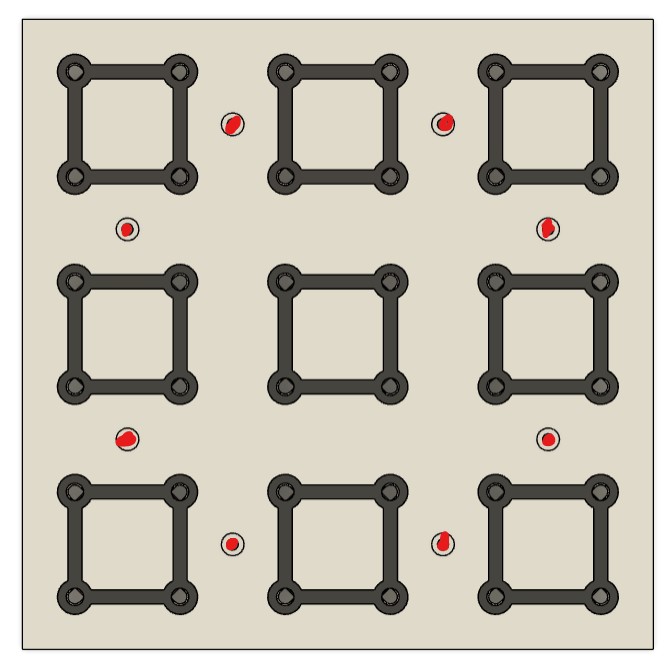
- Place the upper housing part on the lower one and secure it with the 8 M3x10 screws.
Required Materials for the Components:
- 3D printed parts (PLA)
- 2 banana plugs(LINK)
- Electronic components of your choice
Assembly Steps:
- Insert the banana plugs into the lower part and secure them with nuts.
- Fasten the electronic components with additional nuts or solder them in place.
- Place the housing cover on top.
What now?
Additional Items to Get Started:
- Lab power supply
- Oscilloscope
- Multimeter
I and I also hope that the community will create courses for that system to teach people electronics.