
makita-ls1219-ls1219l-ls1019-ls1019l-rear-vacuum-adapter
We calculate the final price from your selected file. You review and accept it before payment.
Saved on this device.

A Vacuum adapter for Makita Mitre Saw to connect a vacuum at the back and provide optimal air flow
- Rating
- 5 / 5
- Likes
- 10
- Downloads
- 172
- Makes
- 3
- Views
- 854
- Reviews
- 2
Updated at source:
Model information
- Source
- Printables
- Category
- Tools
- License
- Creative Commons — Attribution — Noncommercial — Share Alike
Overview
The default Makita LS1219 comes with a (stupid ?) vacuum hose adapter, which plugs into the top handle, which is a moving part. (This is not the case on the smaller LS1019). The vacuum adapter for your shopvac is also bulky. Many times I had it unplug during a cut or when changing the angle on the saw.
This Vacuum adapter fully replace the original model, re-using the flexible hose, and providing a 2.5 inch flexible hose socket, more common in woodworking shops, at the back of the saw.
It was heavily inspired by the model from Tobi Höher that you can find here.
It solves 2 issues I had:
- the output on the side is problematic when you tilt the saw on a 45 degree right angle. My previous experience with an ABS fittings proved to be too wide and problematic and I had to unplug it when cutting some angles.
Problem solved
- the top entree should have a direct flow to the output side, not to the inside of the saw. This “pipe” design solves that too.
I provide the Step file so you can import it into you CAD if you need to update it. It is really easy to replace the 2.5" output by any size you need.
Please ping me if you need other fittings.
Printing
I printed using SUNLU PETG, with 3 perimeters, 3 top/bottom solid layers. I set 25% infill. I used Organic Supports, which consumes less material.
I just installed it, but it seems strong enough as it's not a part that is beaten up… probably PLA would also do it.
Use the provided .3mf file to get the settings from my Prusa XL 5 heads config. This file includes a support blocker for the plug. I had no issue printing it without it.

While I prefer printing Orange parts… I only had fluo-green PETG :)
Installation
Simply remove the screws from the main adapter and remove the top fitting by unscrewing the one screw close to it, which also holds the electric cable.
Then unscrew the original fitting. Be careful as the hose is quite weak and will bend instead of unscrewing.
Then, replug the top hose

re-screw the new adapter
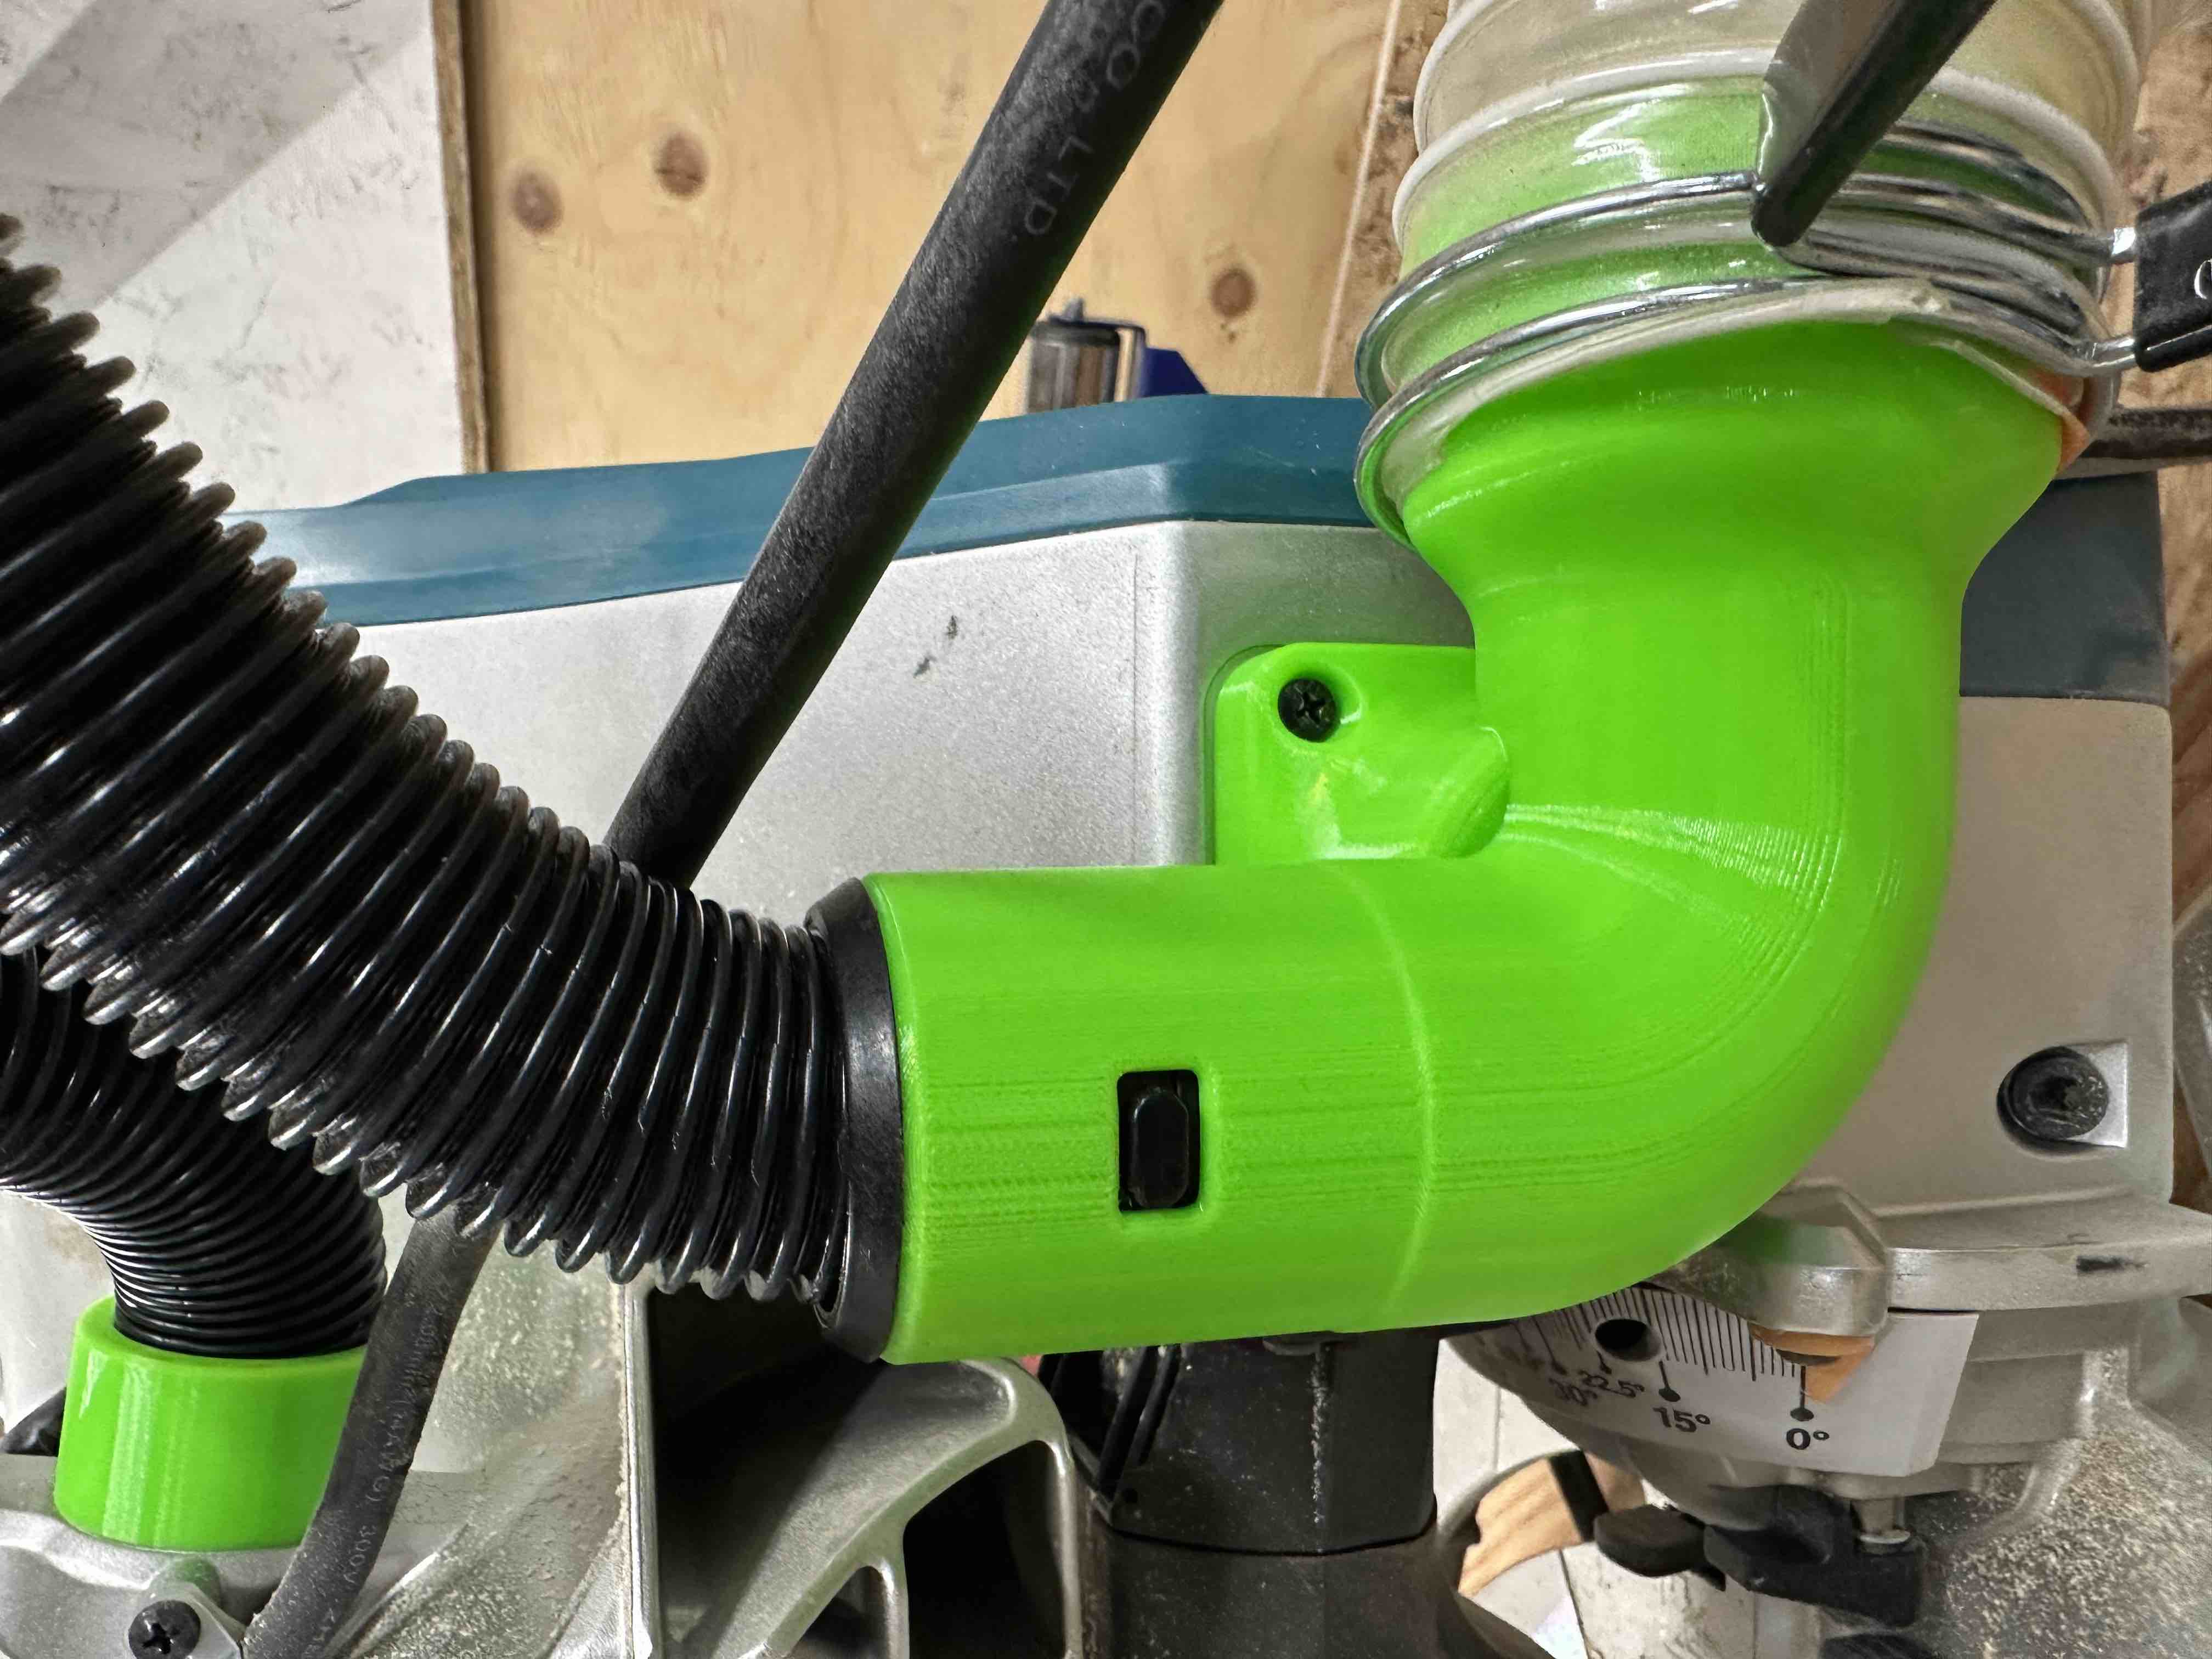
connect the hose (this is a tight fit)
