
Castanets | 18g
We calculate the final price from your selected file. You review and accept it before payment.
Saved on this device.

Castanets | 18g
- Rating
- 0 / 5
- Likes
- 9
- Downloads
- 74
- Makes
- 0
- Views
- 407
- Reviews
- 0
Updated at source:
Model information
- Source
- Printables
- Category
- Music
- License
- Creative Commons — Attribution — Share Alike
3D printed Castanets.
Introducing a castanet designed with ease of creation and affordability in mind! My entry for the MakerWorld musical instrument competition showcases a pair of 3D-printed castanets that are simple to assemble and good, rhythmic sounds. The design allows anyone, regardless of skill level, to create their own functional percussion instrument at home with minimal cost.
The castanets are printed in PLA. As an added bonus, the assembly process is straightforward, with easy-to-follow instructions on how to tie and secure the rope or string that connects the two halves.
This project is cheap and easy to print, especially with a Bambu Lab A1 3D printer. The design requires only a few basic adjustments to the settings for optimal results, and I’m always open to hearing new suggestions for improving the printing process or exploring different material options!
To make the assembly even easier, I’ve included a detailed tutorial on how to tie the rope (you can use shoelaces or a small rope) and create the perfect knot to hold the castanets together. This ensures that everyone can complete the castanets without worry and enjoy them right away.
STEP 1: Pass the rope through the holes, making sure one side is longer than the other.

STEP 2: Put the castanet on your hand with the shorter string resting on your index finger.
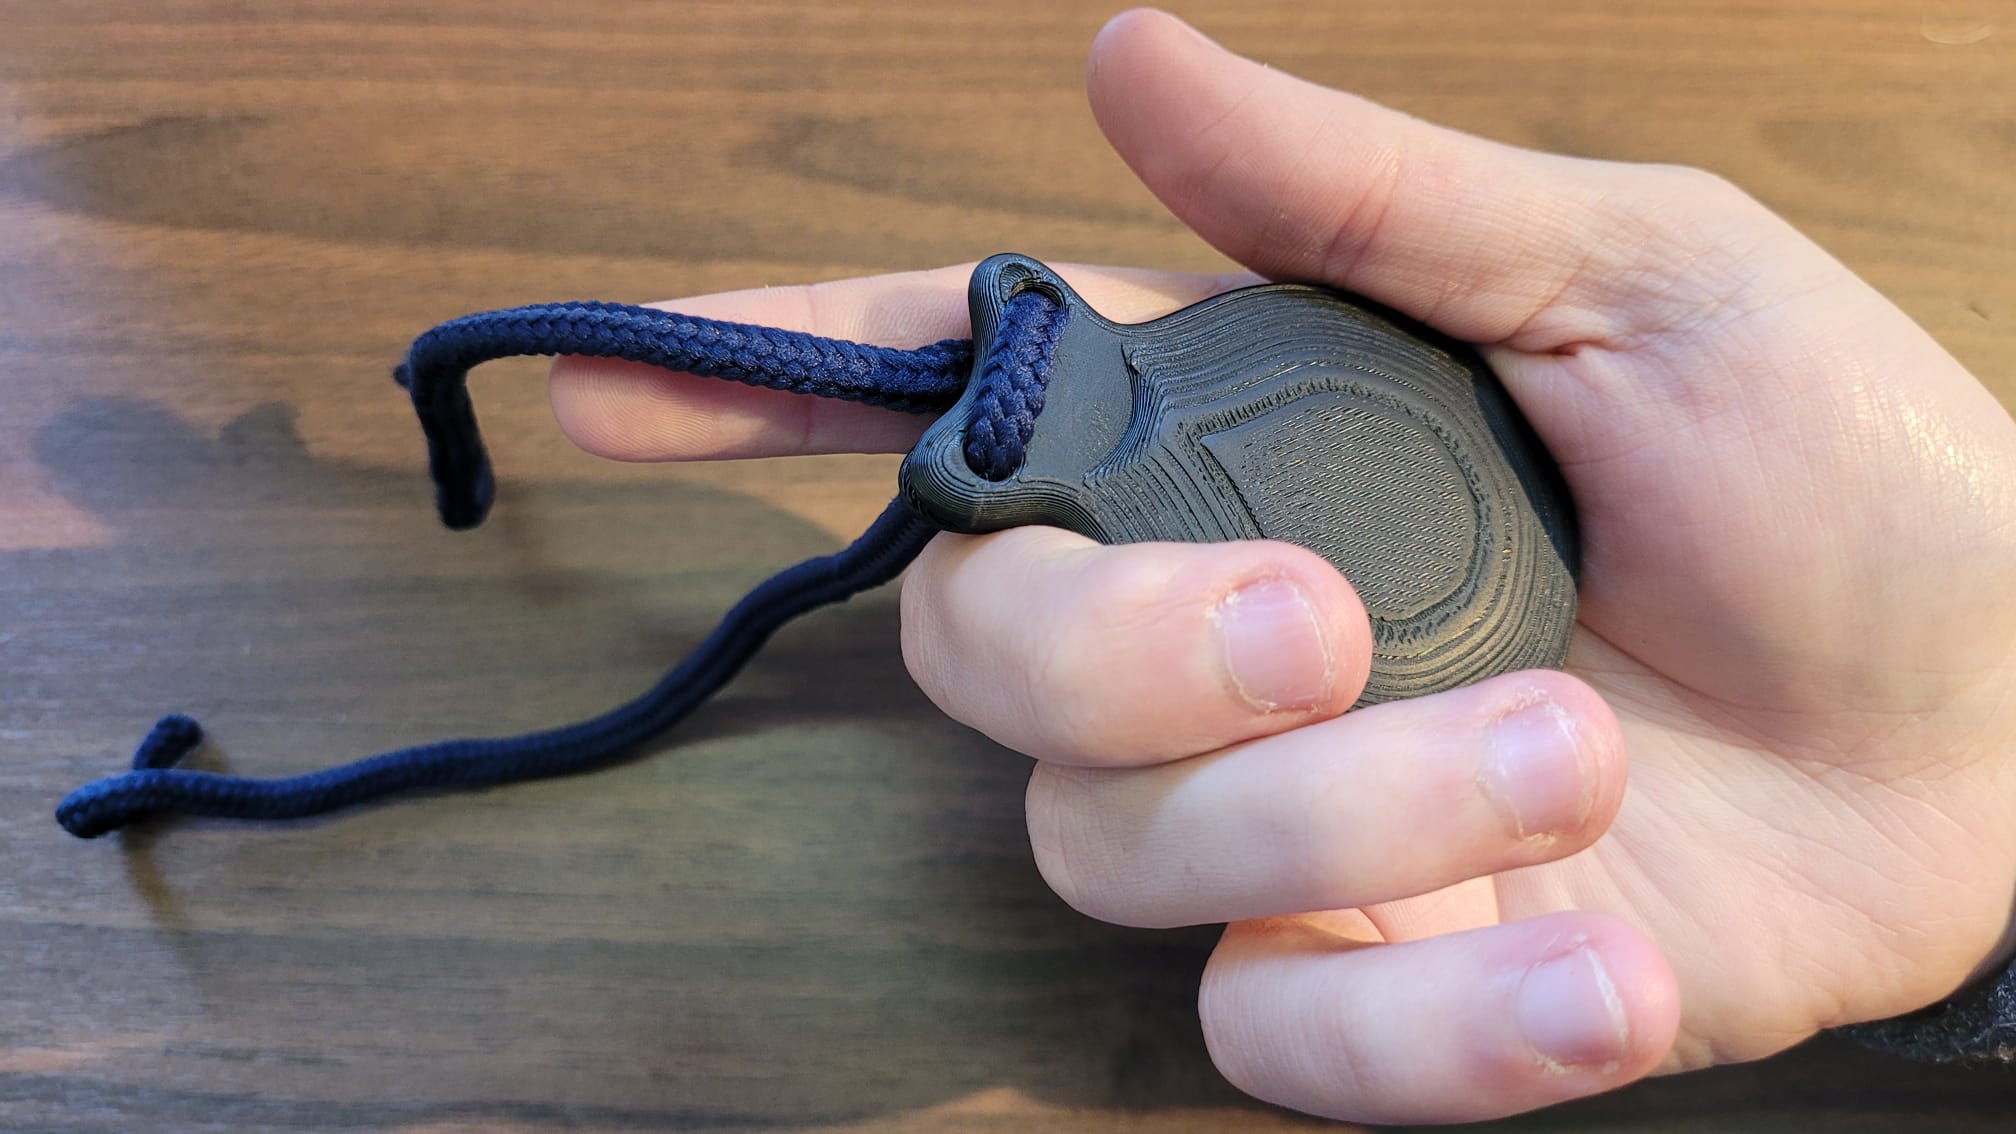
STEP 3: Wrap the rope twice around your finger.

STEP 4: Pass the rope under the 2 loops.

STEP 5: You should have a knot like this.

STEP 6: Position the rope like this around your thumb. You'll see that the knot is at the bottom, we don't want that. To fix see step 7.

STEP 7: Pull the string around so it's straight with the castanet.
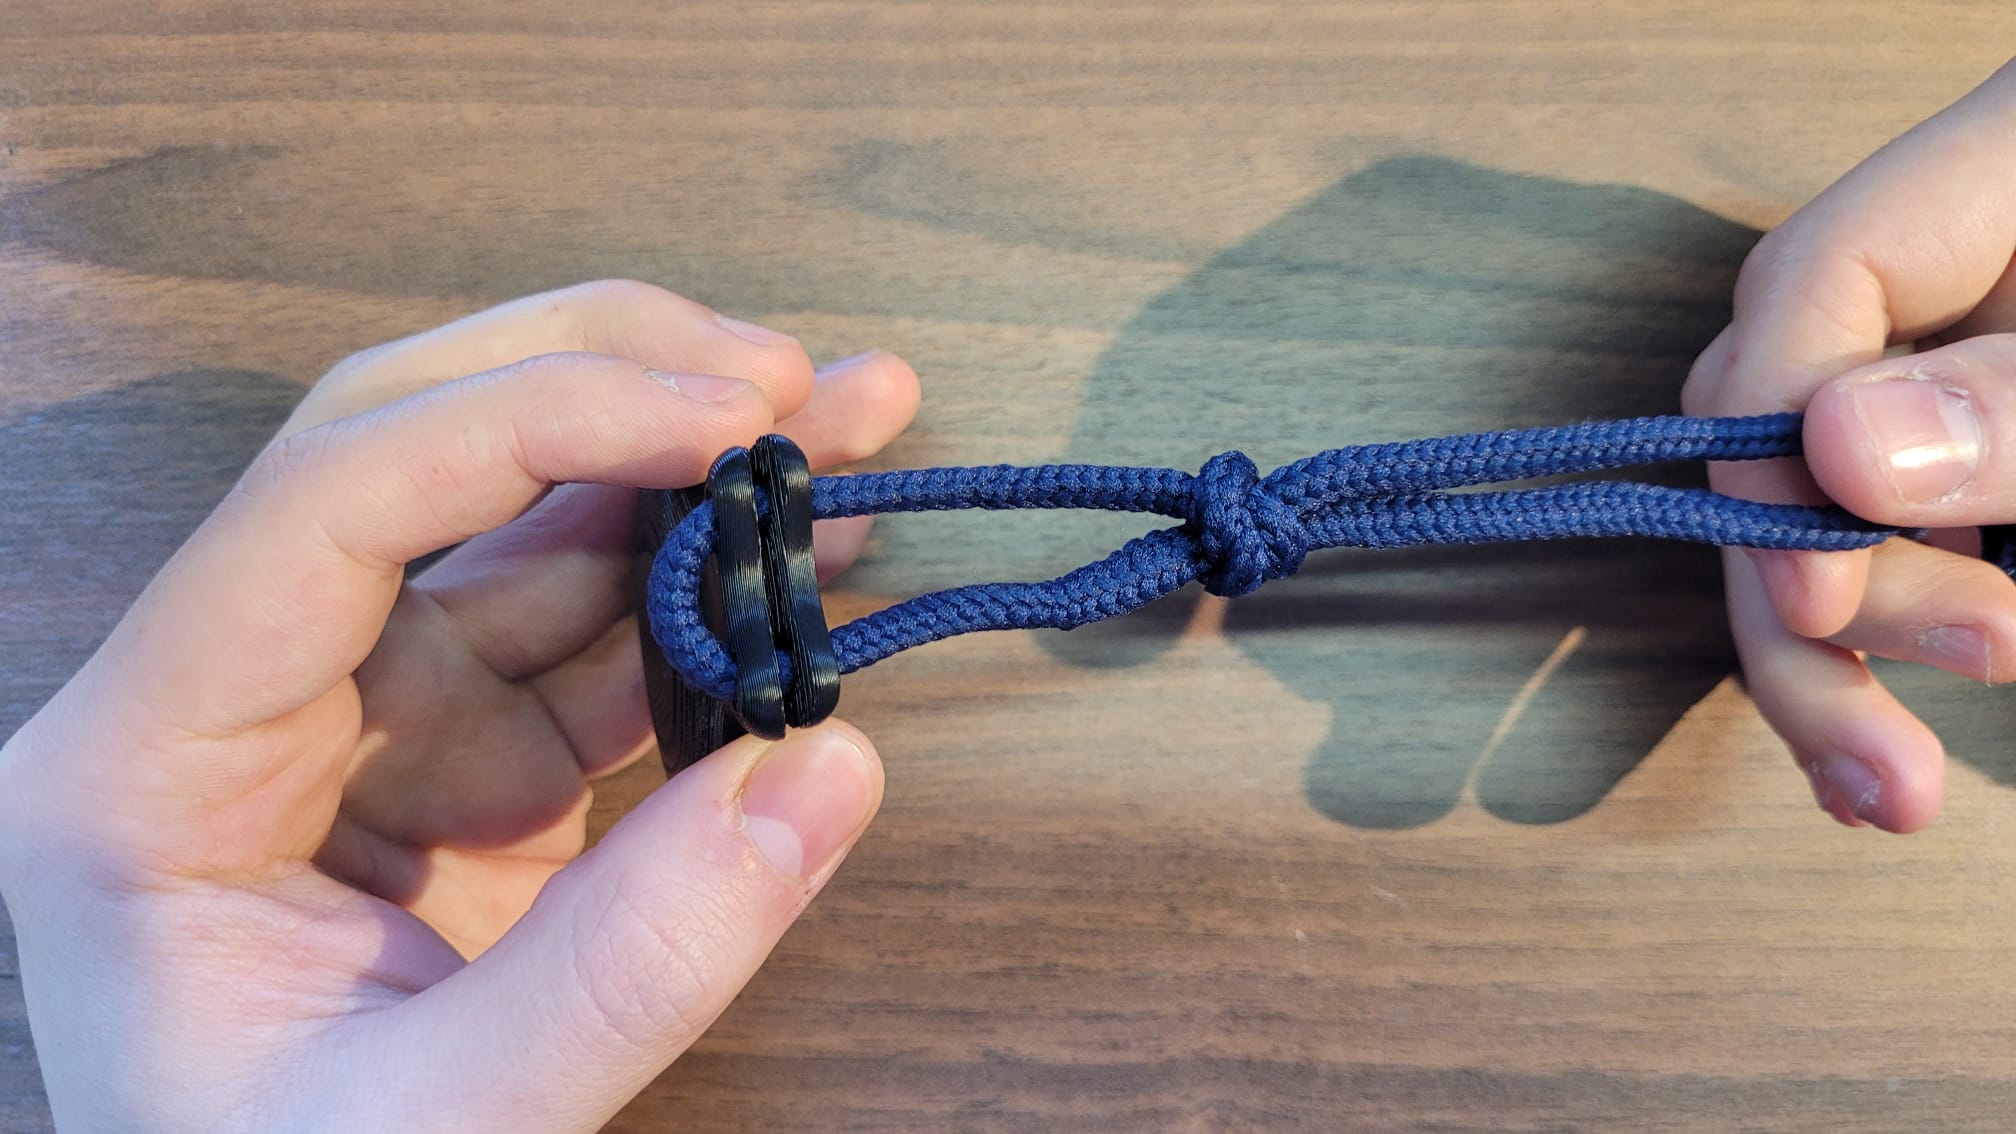
STEP 8: By the end it should look like this. Now you're ready to play your castanets! (you can play with 1 or 2 hands)

I'm eager to hear feedback and any tips on how to improve the design or the printing process, especially for those with experience using Bambu Lab settings!