
***NEW VERSION *** Qidi Plus 4 *BEACON* bed adjuster
We calculate the final price from your selected file. You review and accept it before payment.
Saved on this device.

replacement adjusters for the bed tramming
- Rating
- 0 / 5
- Likes
- 45
- Downloads
- 119
- Makes
- 0
- Views
- 2,423
- Reviews
- 0
Updated at source:
Model information
- Source
- Printables
- Category
- Other Printer Parts & Upgrades
- License
- Creative Commons — Attribution — Noncommercial — NoDerivatives
***ATTENTION !!! SOME NEWER MODEL DO NOT HAVE THE 4 HOLES FOR THE PLATE TO BE SCREWED ON …. YOU WILL NEED TO MANUALLY DRILL THEM ***
Design these spring adjuster to replace the ones mounted with the PIEZO's on the QP4 bed.
In order to use these, you need to remove the PIEZO brackets and small screw adjuster that are original with the machine.
These adjusters **** CAN NOT BE INSTALLED ON MACHINES THAT ARE NOT USING A BEACON OR CARTO MOD *****
**** NEW - FIX "SPRINGLESS" VERSION ****
RECOMMENDED FILAMENT : PA6-GF OR PPS-CF *follow recommendation for annealing parts*
BOP:
- 4X SPLINE-ADJUSTER : PA6-GF
- 4X TOP-PLATE : PA6-GF
- 4X SCREW-SHAFT : PA6-GF
- 2X SHIM : PA6-GF
- 4X KNOB-PRECISE : PA6 or harder
- 4X LOWER-ADJUSTER-PLATE PA6 or harder
- 4X STOPPER : PA6 or harder
BOM:
- 8 springs 6.35x10.3
- 4 spring 9.52x19.05
- 4 M4 brass inserts
- 16x M3 x 12 bolt
- 16x M3 nut
Install:
Reference of the system:
1: Remove bed plate completely
2: Remove piezo brackets (you can also take every other small PCB from the frame and secure wire to main harness **** OPTIONAL*** )
3: Install “ Screw-shaft : PA6-GF ” on four bolts of the plate
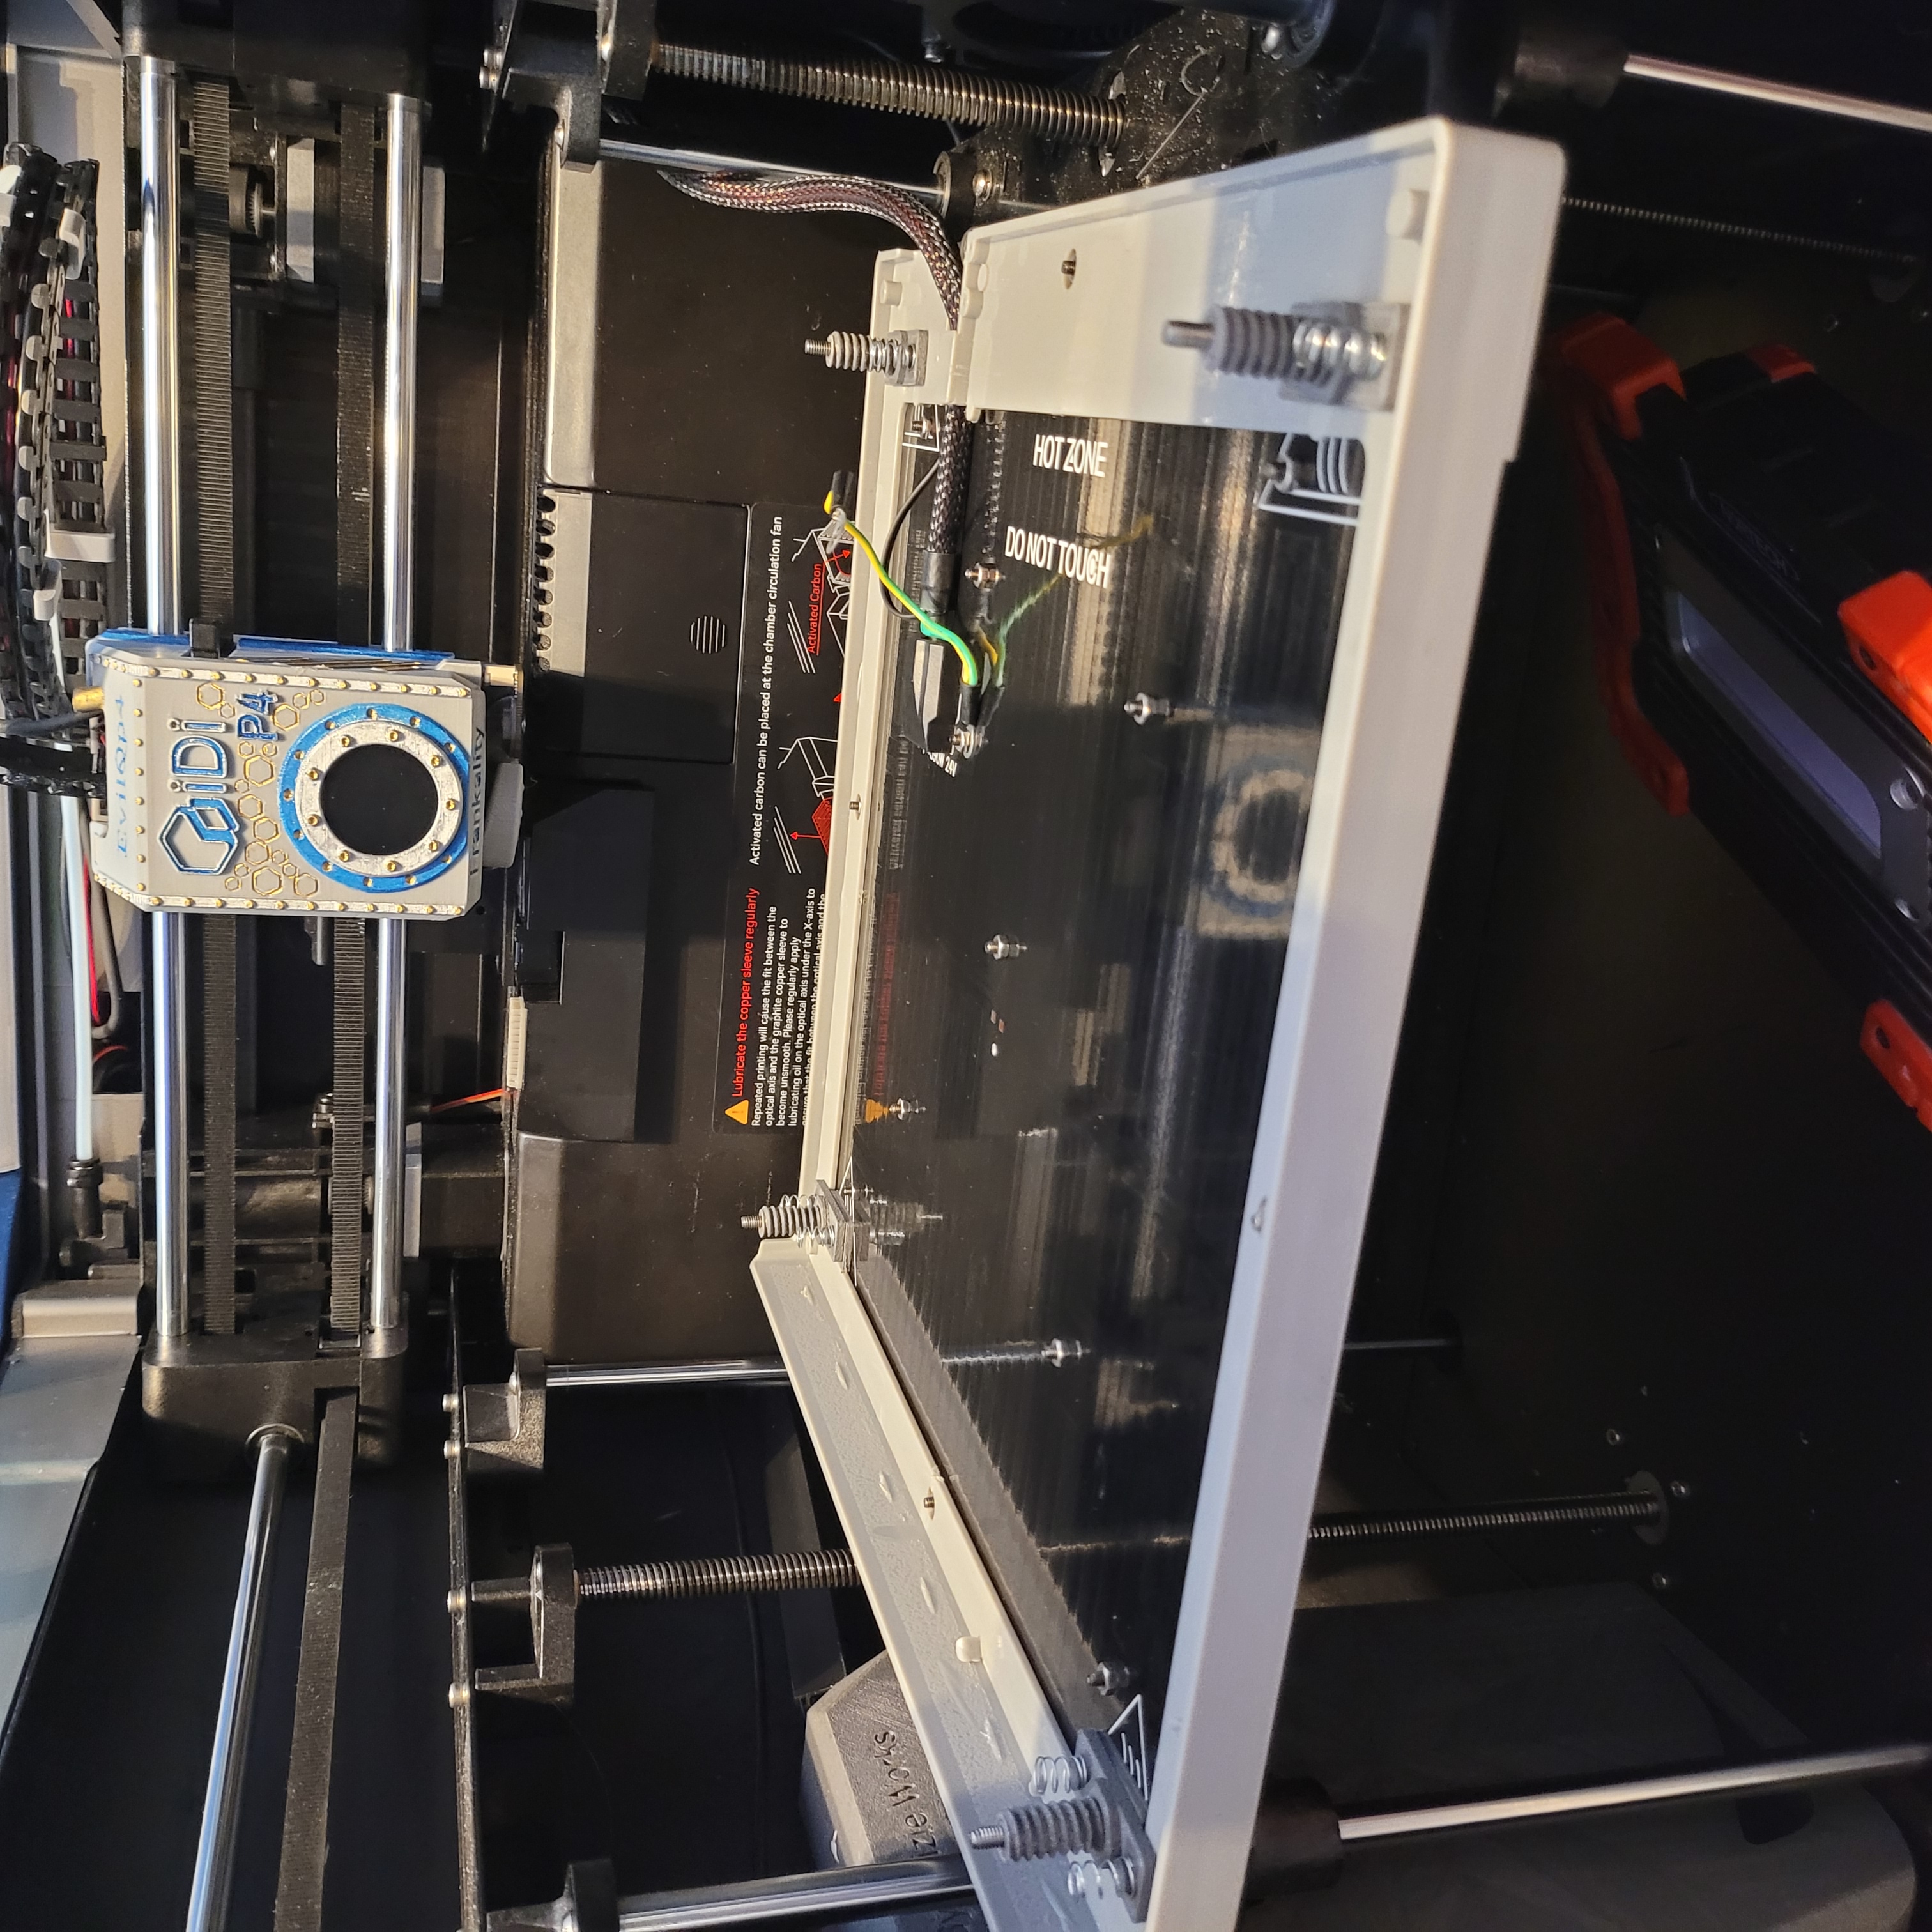
*** IMPORTANT *** make sure to use the two shims for the front screws

Highly recommend to pass a M4 tap in these to help clean the threads inside the part

5: Use step-bit and oversize the four holes on the bed frame so that the “ Spline-Adjuster ” passes freely ( no choice to make room for the adjuster to spin freely)

6: Install top plate and screw adjuster with the M3 x 12 bolts
*** IMPORTANT *** the screw-adjuster need to spin freely in the top plate once the plate is screwed down, you have a little bit of play to adjust the plate, if your prints are a bit rough, simply use a small file to elongate the slots.

7: install the 8X springs on the “ SCREW-SHAFT” … i made a small lip so the springs clips and stay on the part.
Flip the plate over and fit it over the spline-adjuster/ top-plate and screw it in place using the KNOB to screw from under the frame. Normally, the four bolts should align perfectly ! If not, you will need to loosen up the TOP-PLATES and play with those until alignment is good with the screws, but make sure the SPLINE-ADJUSTERS spins freely afterward.

8: Finish assembling the lower-plate with 4x nuts, install knob and stopper. The sandwich of parts look like this :

You need to screw down the plate on the frame and let the SCREWS from the bed stick out about 4~5mm from inside the KNOB as a quick guide reference for tramming the bed. This will make sure that you have enough threads to hold the stopper in place. If the screws are not showing threw the knob it's because the plate is to HIGH and need to come down more.
FINALLY :
Adjust the bed plate by loosing up the stoppers a bit, then pull down on the knob and tighten it to the right height.
Your bed should be set between 1.97~2.01 max when reading the values from the script that Stew675 made for the beacon with the four corners SFL-SFR-SBL-SBR.
Once your adjustments are good, simply tighten the stoppers on the knob to secure them.

*** SPRING VERSION ****
BOM:
4X: M4 nut (you can re-use the original ones and press it inside the SPLINE)
4X M4 Thread Inserts Brass
4X: Spring 9.52x15.8 (available on Amazon as kits)
16X: M3x6 bolts (we will re-use 12X from the piezo brackets, will need 4X extras)
How to replace the old ones :
- Prints “KNOB - SPLINE - STOPPER” in PA6 NYLON or STRONGER material
- Print “ PLATE” with PA6-GF or STRONGER material and anneal it for 6hrs at 100c**** NO ABS OR PLA-PETG****
- Insert nut inside SPLINE and use super glue to bond

- Install M4 brass thread insert in STOPPER ***NOTE*** make sure to take your time and not overheat the insert inside the part and end up deforming the part. Once inserted and still semi-soft, simply roll the part on a flat surface where the insert is in order to properly lock it in place. You will have to sand the outer circumference of the shaft to make sure it is even and fitting inside the knob FREELY.

- Remove cover, nut, adjuster and piezo brackets one corner at a time
- Install new parts, use the TOOL to hold the SPLINE assy and screw it on the bed screw before adding the PLATE bolts to the frame. ***DO NOT SCREW THE SPLINE WITH THE PLATE COMPLETELY ON THE FRAME*** as we will center the spring and make sure it passes freely in the frame hole. Screw the spline on all the way for the plate to almost touch the frame and then start adding the plate screws. there is a little bit of adjustments on the plate to make sure the spring will not be squish between the two parts ***IMPORTANT***
- ***NOTE*** i recommend that you use a M4 TAP in the spline starting from the screw side to help align the threads before screwing on the bed. The spline hole is smaller for the bolt threads to act as a self stopper so, it might get stuck when you get to the NUT therefor, taping from the nut first is essential :)

- Once spring is well centered in place with the plate and hole, add the 4X screws and secure it in place. The bed bolt should be sticking out about 5mm under the spline. Add the KNOB - SPRING - STOPPER and voila !!!! One done …. 3 more to go :P
- CUT-VIEW of the ASSY
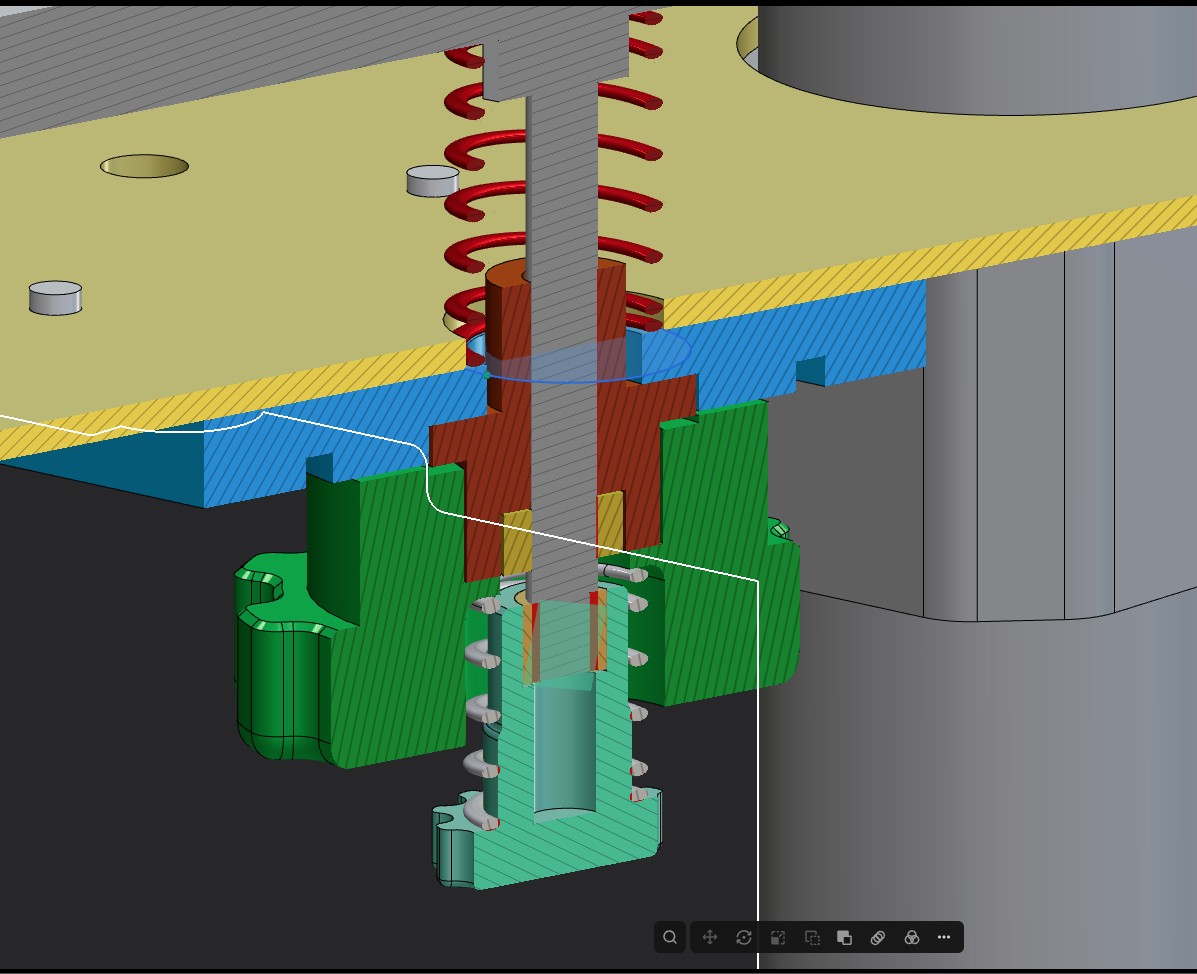
Once everything will be installed, simply run a G28 then Z_TILT_ADJUST to tram the bed level.
In order to level your bed, bring temp to 65c and let it sit for 3 days …. naaa joking lol just 10 min :P , then, use Stew's SFL-SBL-SBR-SFR macros and fine tune your plate.
MAKE SUR ONCE THE BED IS WELL ADJUSTED, TO TIGHTEN UP THE STOPPER BOLTS TO LOCK THE SPLINE FOR EXTRA LOCK
Enjoy and happy printing :)