
Titanfall 2 CAR
We calculate the final price from your selected file. You review and accept it before payment.
Saved on this device.

Full scale model of a CAR SMG from Titanfall 2 with some minor tweaks. Reloading, removable magazine and sight.
- Rating
- 5 / 5
- Likes
- 68
- Downloads
- 292
- Makes
- 0
- Views
- 1,263
- Reviews
- 1
Updated at source:
Model information
- Source
- Printables
- Category
- Props
- License
- Creative Commons — Public Domain
This model was designed in FreeCAD - FOSS (Free and Open-Source Software) 3D parametric modeler. Source file is available.
Read me
Full models length is ~850 mm. Featuring “reloading” and detachable magazine.
This model was designed for painting. You will need this materials:
- Sandpaper to smooth the surface of parts and ensure the movement of the mechanism;
- Putty to cover seams;
- Primer to further smooth the surface;
- Glue to assemble parts together;
- Acrylic paint (black, white, red, green, silver).
- Mate finish to protect the paint;
When I will mention that a part needs to be painted a assume you will also sandpaper it, cover all seams and cover the part with primer before the paint.
Try mixing black and silver for base color (black on the coloring reference). Try mixing black and green (black on the coloring reference).
I am not an expert, you should watch some tutorials. This is primarily a recommendation from my experience.
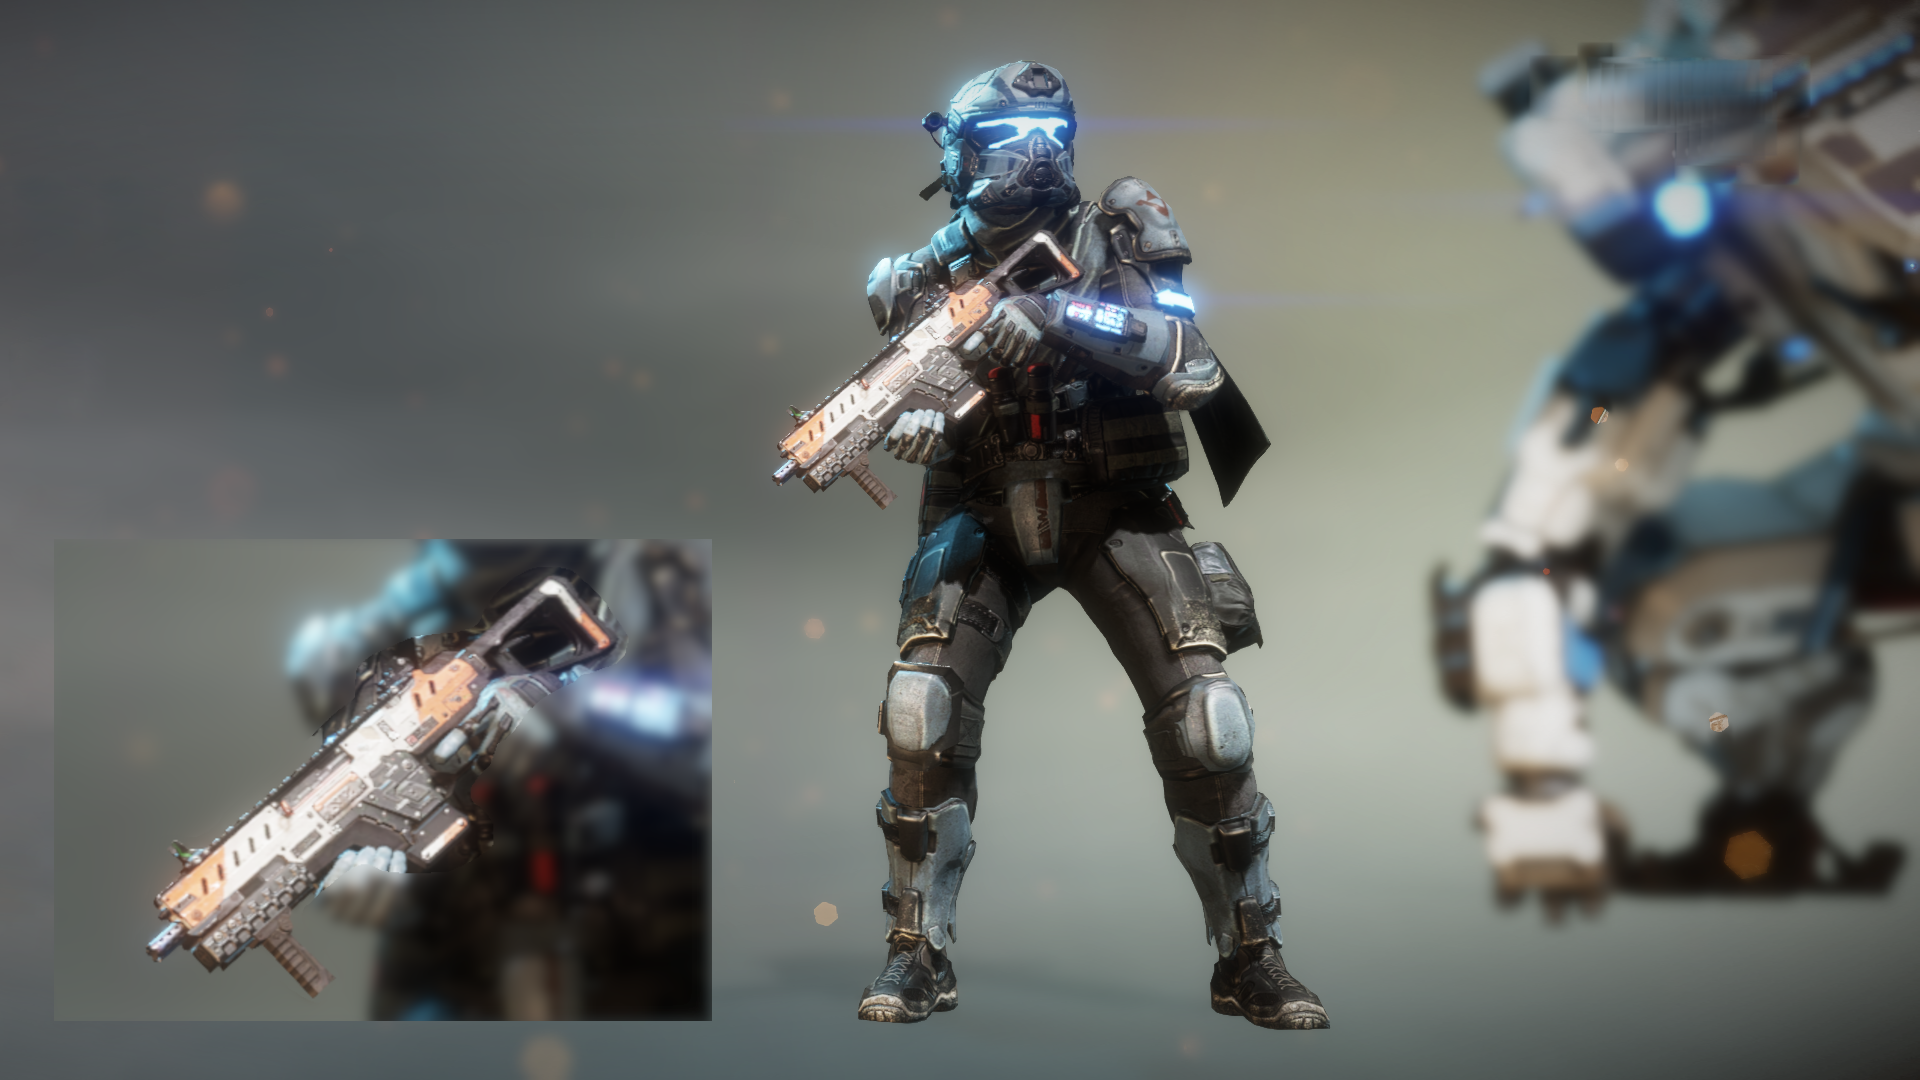
CAR from Titanfall 2.
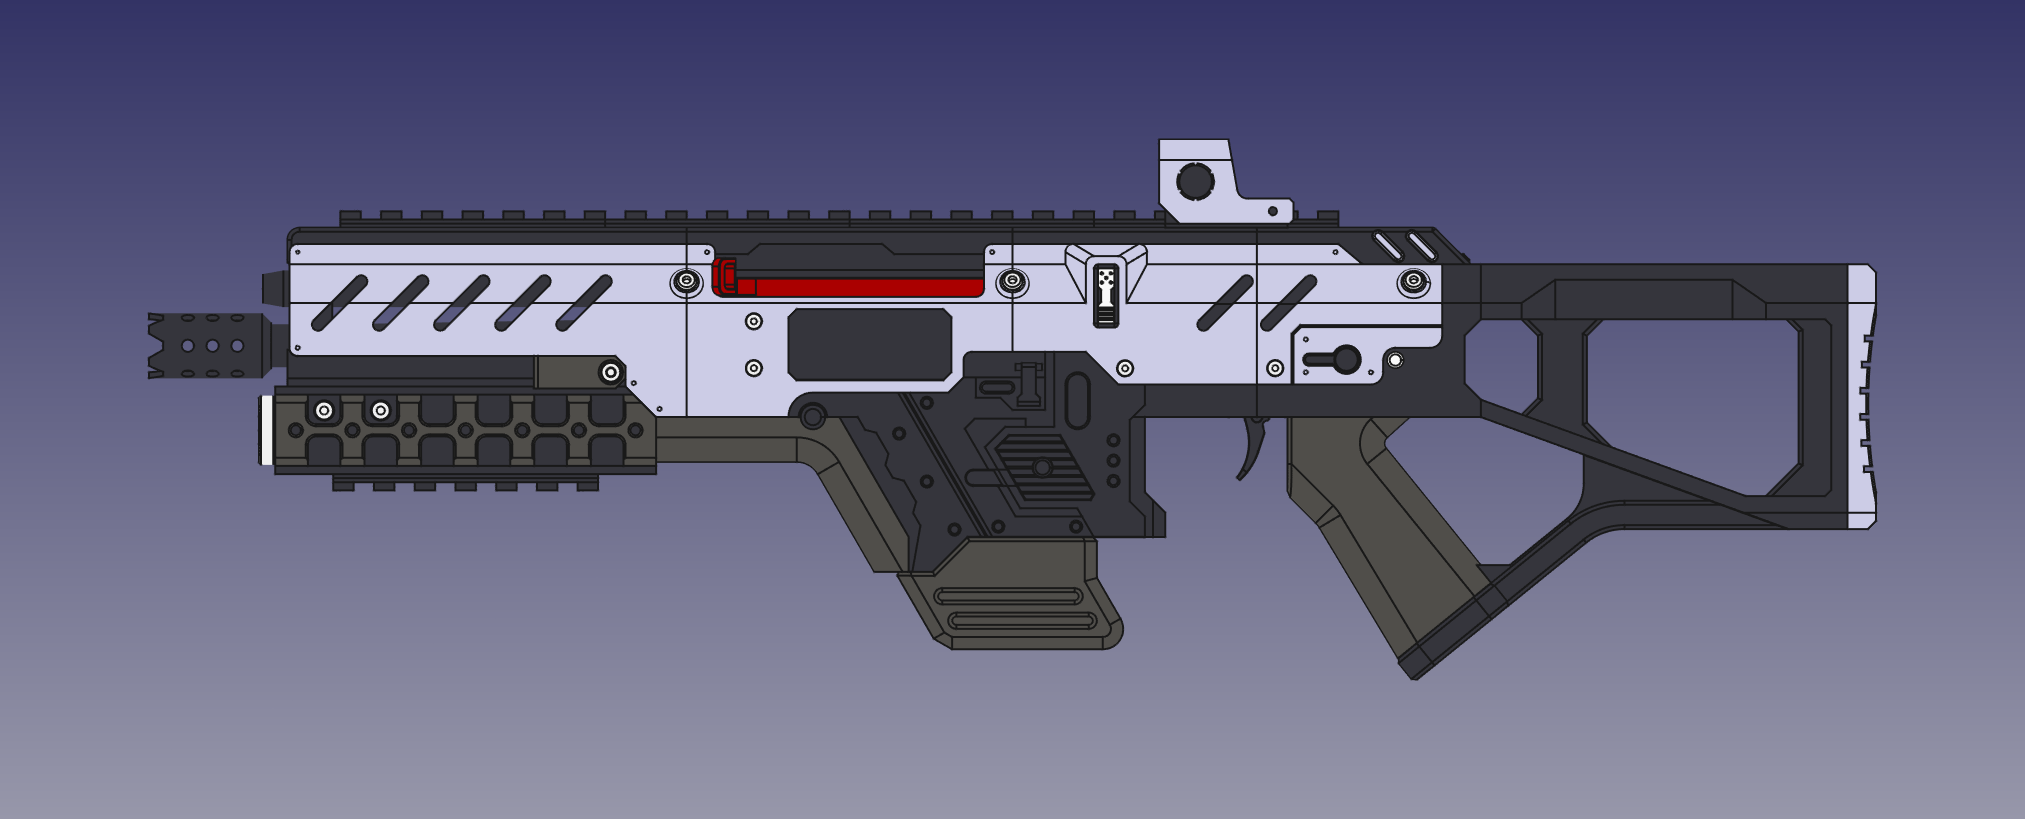
Coloring reference.
Assembly instructions
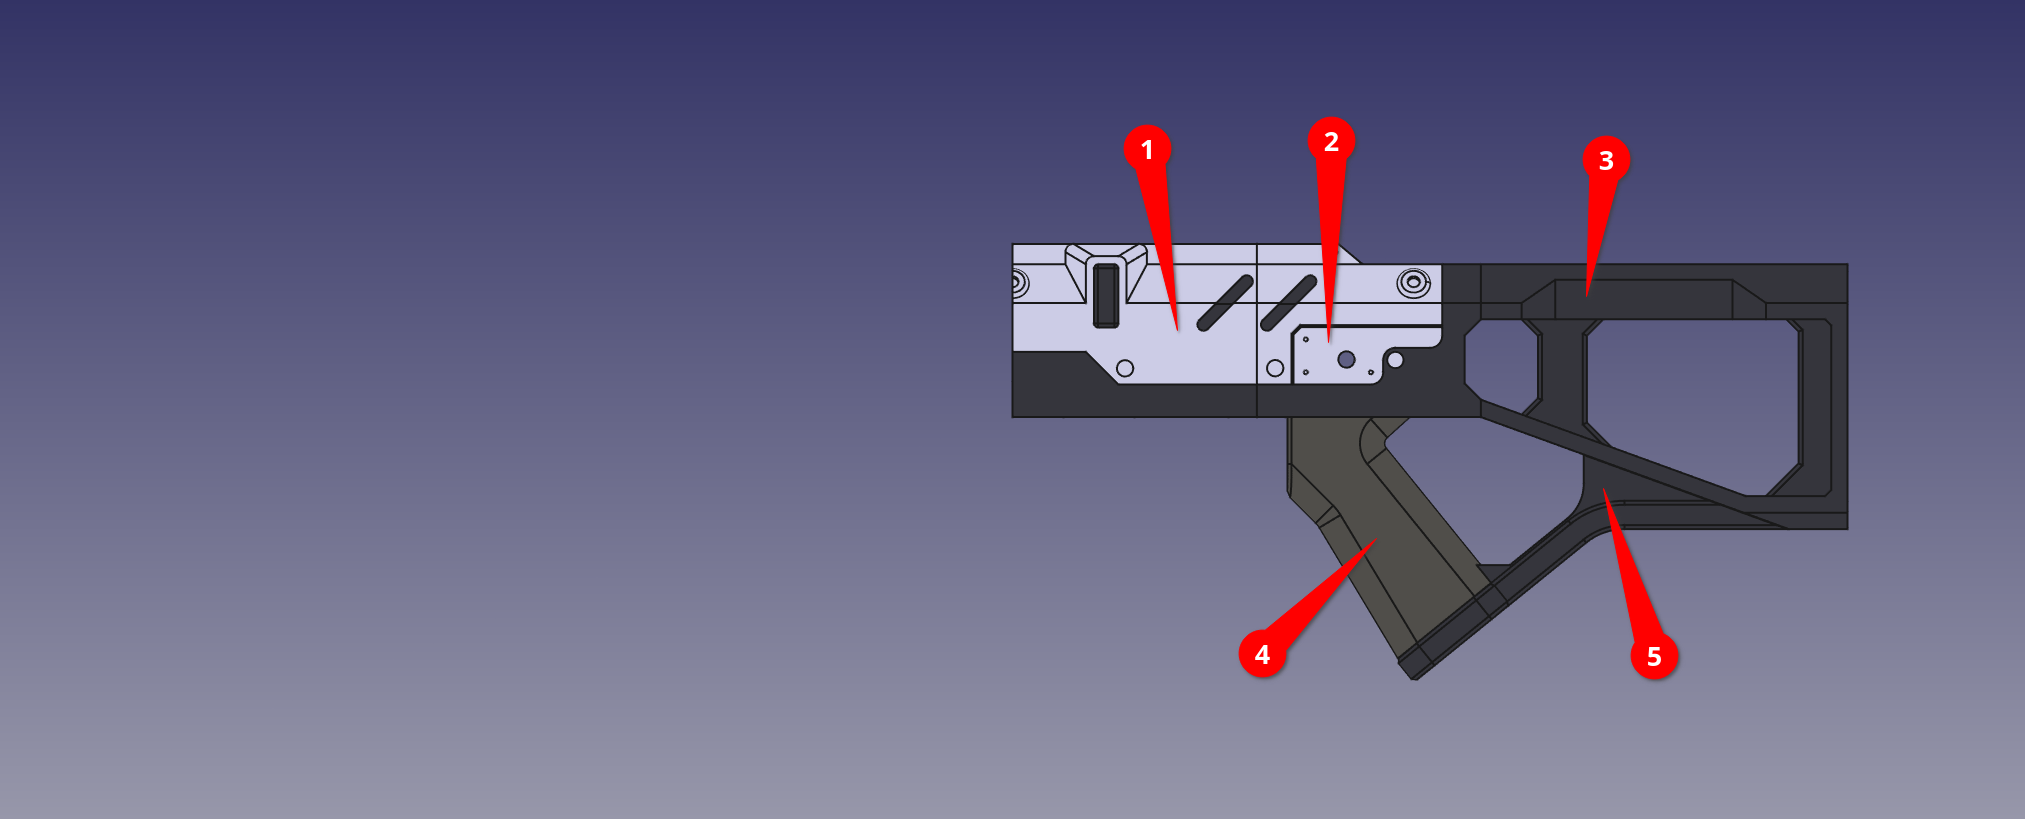
Parts 1 (body_c), 2 (body_d), 3 (body_e), 4 (body_i), 5 (body_k).
Glue parts 1, 2 and 3. Paint white areas of glued parts first, then paint black areas. Paint 4 and 5 separately. Glue 4 to 1+2+3. Glue 5 to 1+2+3+4.

Parts 1 (body_a), 2 (body_b), 3 (receiver_a).
Part 2 is split on the provided plate!
Paint 1 and 2 white from outside and black inside. Paint 3 black. Glue 1, 2 and 3.
Cover inner area of body_a with mate finish.

Halves 1 and 2 find above. Parts 3 (receiver_c), 4 (receiver_b), 5 (body_f). Here not visible: reload_chamber_a and reload_chamber_b.
Do NOT use glue before you are sure that things are moving smoothly.
Before painting, put parts together and try to move the handle (part 3) back and forth. It might move a bit rough initially. Use sandpaper to smooth things until you can open and close the cover (part 4) with the handle (part 3) without too much effort.
Paint 3 in red (with reload_handle_a and *_am, here not present) and cover with mate finish. Paint 4 in black and cover with mate finish. Do NOT glue in reload_handle_a and *_am, these parts are removable for a convenient transportation.
Glue reload_chamber_a and *_b. Be careful to position reload_chamber_b in the center.
Insert parts 3 and 4. Try moving them one last time and glue two halves together.

Do not forget parts 1 (reload_chamber_a) and 2 (reload_chamber_b)!

Parts 1 (top_a), 2 (top_b), 3 (top_c), 4 (top_d), 5 (rail_a), 6 (rail_a), 7 (rail_a), 8 (rail_b). Here not visible small_part_i x 5.
Paint only top side of parts small_part_i (5 here, 7 total).
Paint parts 5-8 (excluding bottom surface for the better adhesion).
Insert all small_part_i in parts 5-8.
Glue parts 1-8 together. Part 3 is not symmetrical! Do it on a flat surface. Paint the rest black (excluding bottom surface of parts 2-4.

Part top_c has a hole closer to its front side.

Parts 1 (body_h), 2 (body_g).
Paint parts 1 and 2. Exclude painting middle areas of part 1 for a better adhesion of body_m and *_mm later. Glue parts 1 and 2.

Part 1 (barrel_a). On the plate_2 there is an alternative version of the barrel with 2 separate parts with height < 200 mm.
Paint the part 1 black and cover with mate finish. Glue it in.

Parts 1 (under_barrel_a), 2 (under_barrel_side_a), 3 (under_barrel_side_am), 4 (under_barrel_b), 5 (rail_b). Here not visible small_part_i x 2.
Paint parts 1 and 5 (excluding bottom surface) in black. Paint parts 2 and 3 in green. Paint 4 silver. Cover upper area of the part 1 (under_barrel_a) with mate finish. Glue 1-5 together and to the model.

Parts 1 (body_m) with its mirror copy body_mm, 2 (magazine_catch_a and *_b), 3 (trigger_a, *_b, *_c).
Paint part 1 (body_m and *_mm) in black. Glue them to the model.

Parts 1 (trigger_c), 2 (trigger_a), 3 (trigger_b), 4 (magazine_catch_b), 5 (magazine_catch_a).
Print the part 5 in a dark grey, if possible, since its going to rub against the magazine or paint it black and cover with 2-3 layers of mate finish. Paint parts 2, 3 and 4 in black only on visible surfaces. Put together parts 1-3 and insert them into the model to check if the trigger bends normally. If everything is ok - glue parts into the model. Be careful then applying glue not to glue the spring (part 1).
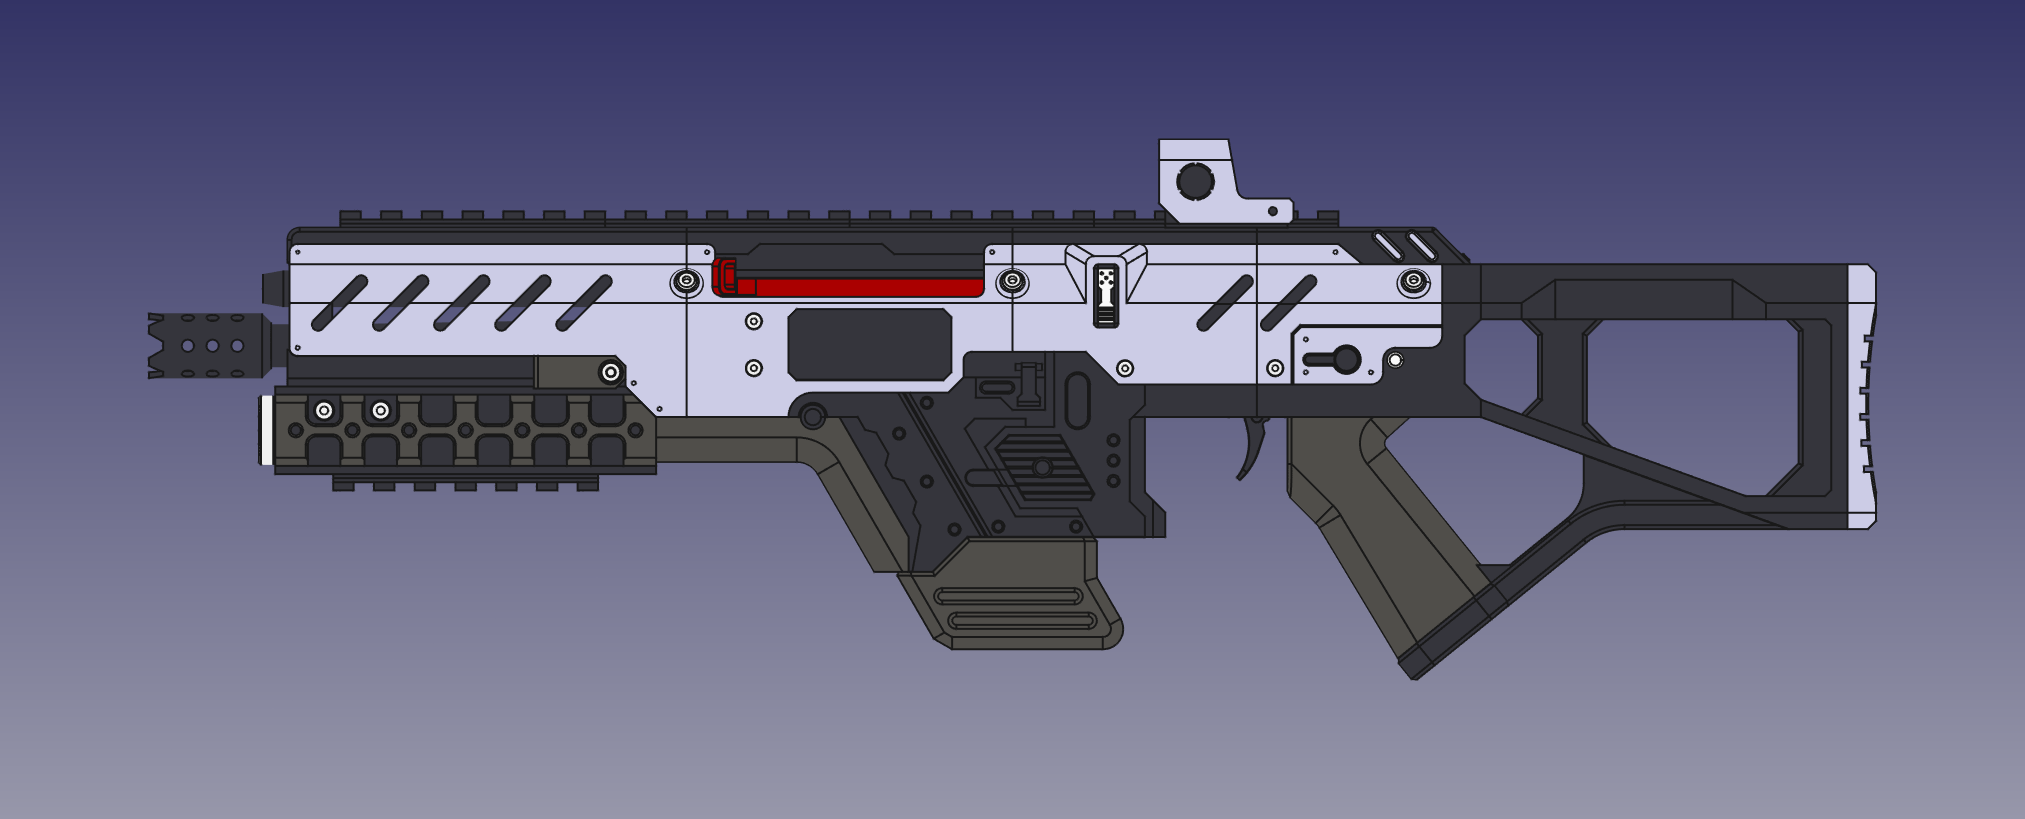
Paint all the remaining small parts: small_part_a and *_e should be green, small_part_b, *_c, *_d, *_f, *_h, *_i, *_j, *_k - silver. Glue them on the model. Cover the model with mate finish once ore twice.
Thank you for your interest in my models. If you have any troubles, leave a comment and I will answer you. I would love to see your makes!