
Modular Shelving for Gridfinity Case Light
We calculate the final price from your selected file. You review and accept it before payment.
Saved on this device.
Modular storage shelves for the 6U, 9U and 12U, 5x4, Gridfinity Case Light by Suit.
- Rating
- 0 / 5
- Likes
- 358
- Downloads
- 517
- Makes
- 0
- Views
- 6,544
- Reviews
- 0
Updated at source:
Model information
- Source
- Printables
- Category
- Organizers
- License
- Creative Commons — Attribution — Noncommercial — Share Alike
General.
Modular shelves for the 5x4 Gridfinity light cases by Suit, in 6U, 9U and 12U heights. I've designed these shelves for storing 5x4 cases in the van.
To stop the cases sliding out they are held in place using a lip along the front of the shelf and two sprung arms at the rear. The arms should push the case onto the front lip thereby securing the case in place, (it sort of works but does need a bit more refinement).
The modular shelves comprise of four main parts:
- Base
- Shelf
- Lid
- Side infill panels
If you are not going to be moving the shelves about the parts will clip firmly together and be just fine. However, if you want a more robust/permanent arrangement, at this moment in time, glue is the best answer.
Please note: the lugs and sockets are a reasonably tight tolerance. A test clip is provided. Print off two of these clips and see if they will fit together before printing a whole lot of shelves.
Updates:
17th June 25:
Oops…I've just noticed that version 1.6.03 of the 12U shelf is incorrect. The grooves for the side panels do not extend down to the bottom of the uprights like they should do. This is corrected in version 1.6.04 which is now available in the files section.
18th June 25:
Sorry, I missed off the filets to the uprights on version 1.6.04 of the 12U shelf. Please find V1.6.05 in the files section which corrects this omission.
Printing.
All of the supplied STL files should be in the correct orientation for printing.
What do I need to print?
- Base: - 1 per vertical stack of shelves.
- Shelf: 6U, 9U or 12U - quantity as required.
- Lid: Sorting tray, 5x4 grid or Combination - 1 per vertical stack of shelves.
- Front side infill panel: - 2 per shelf (optional)
- Rear side infill panel: - 2 per shelf (optional)
- Baying clips: - 4 clips are required to join two shelves together, side by side.
Firstly, you will need to decide how many shelves you need and what combination of heights the shelves need to be. Then decide if all of the shelves are to be in one vertical stack or spread over two or more stacks?
To complicate matters a 12U shelf is not twice the height of a 6U shelf. Unfortunately, this is down to the fact that a 12U storage box is not twice the height of a 6U box.
Shelf heights excluding the locating lugs are:
- 6U=58mm
- 9U=78mm
- 12U=98mm
Your best bet is to use pen and paper and draw out the arrangement you want. From this you should be able to get a rough idea of what is needed.
Hey, if it was simple, it wouldn't be any fun.
Print Settings.
0.4mm nozzle, 0.2mm layer height.
Print all parts in PETG or another material with some degree of flexibility. Two perimeters and 15% grid infill will be ok. I would suggest five top and four bottom layers. However, to speed up print times and use a bit less filament, the lids and base can be printed without bottom layers.
Bridging Extrusions.
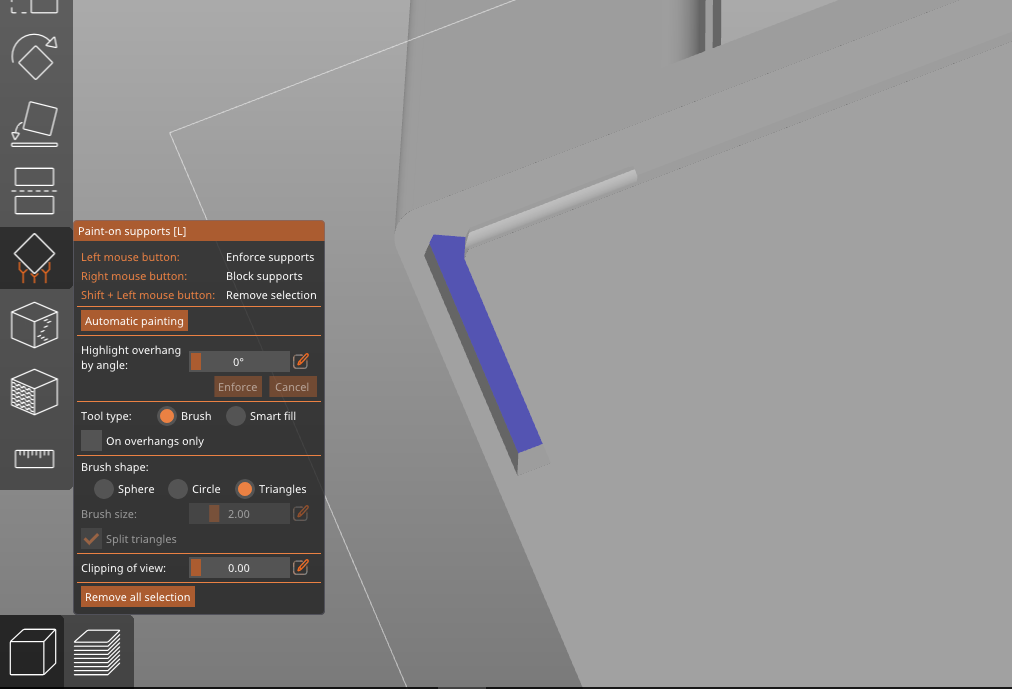
PrusaSlicer may warn about long bridging extrusions. If this is the case you may need to add paint on supports to the slots in the rear corners. These are dead easy to dig out.
Assembly.
This should be a straight forward affair.
Note: if you are going to use glue, loosely dry fit the parts together first to make sure everything fits as expected. Do not press the clips fully into place yet as you may find you cannot get them apart again.
- Take a base and a shelf unit and clip them together.

- If you are using the side panels slide them into the grooves in the shelf. When fitted the top of the side panels should protrude by about 1mm.

- Take another shelf or a lid and clip it on top of the assembly.

- Carry on building upwards or…
Expand sideways.
The shelf units may be connected together, side-by-side, using the baying clips as shown in red below. Butt the two shelves together and press the baying clips into the grooves. (Four clips are required to connect two shelves together).
Two lengths of clip are provided, 10mm and 20mm.

When baying shelves together the inner infill panels of the two shelves cannot be fitted due to the clips.
Known issues.
- The rear of the shelf distorts slightly when a case is inserted against the sprung arms.
- If the 5x4 case is heavy (say full of screws) the sprung arms will not push the case forwards onto the front lip, however the weight and the lip generally holds the case in place.
Conclusion.
Have fun and please let me know how you get on with your shelves and what could be improved.